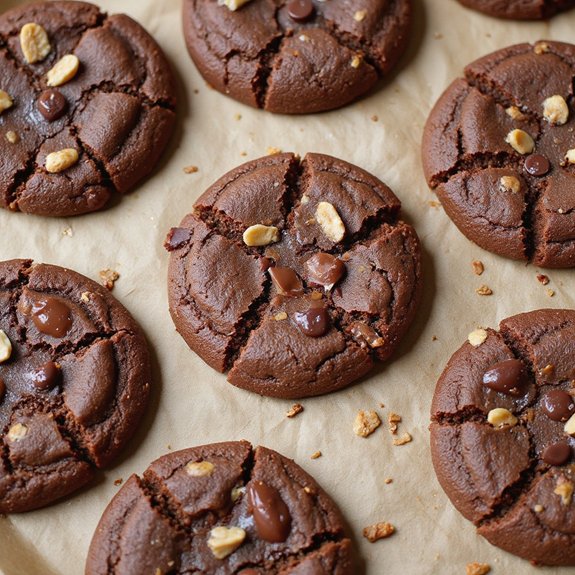
Imagine cracking open the oven to a wash of warm cocoa and roasted peanut aroma, the kind that wraps around you like a soft blanket.
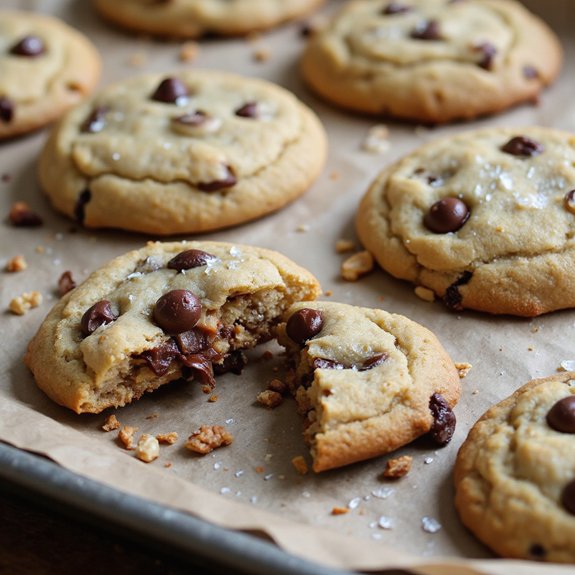
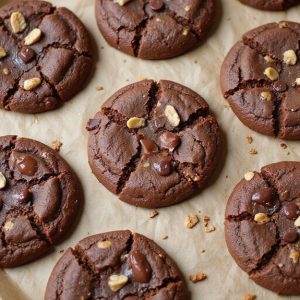
Picture cookies with crinkled, fudgy tops, edges just crisp enough to give way to a chewy center dotted with melting chocolate and salty peanut bits—comfort in every bite. They’re an instant mood-lifter: rich, familiar, and reliably crowd-pleasing.
They’re the kind of treat that fits any rhythm—quick to mix on busy weeknights, nostalgic for Sunday suppers, and sturdy enough for lunchbox surprises or last-minute potlucks.
Once, a rainy afternoon derailed our plans, and a single batch of these cookies turned a glum day into a warm, laughter-filled break, with everyone lingering around the cooling rack.
Whether you’re baking with kids or stocking the freezer for “just in case,” these are your reliable heroes.
Ready? Let’s cook!
Why You’ll Love It
- Delivers bold flavor from cocoa, peanut butter, and chocolate chips
- Bakes quickly; ready to enjoy in about 40 minutes
- Uses pantry staples you likely already have
- Stays soft and chewy; resists overbaking dryness
- Freezes beautifully as dough scoops or baked cookies
Ingredients
- 1 cup unsalted butter, softened — room temp for easy creaming
- 1 cup creamy peanut butter — smooth, not natural if possible
- 1 cup granulated sugar — fine white cane sugar
- 1 cup light brown sugar, packed — fresh, not dried out
- 2 large eggs, room temperature — helps emulsify batter
- 2 teaspoons vanilla extract — pure, not imitation
- 2 cups all-purpose flour — measure with spoon-and-level
- 1/2 cup unsweetened cocoa powder — natural or Dutch, your choice
- 1 teaspoon baking soda — fresh, not expired
- 1/2 teaspoon baking powder — check freshness date
- 1/2 teaspoon fine salt — fine grain disperses evenly
- 1 cup semisweet chocolate chips, optional — 50–60% cacao chips
- 1/2 cup chopped roasted peanuts, optional — lightly salted for contrast
Step-by-Step Method
Preheat the Oven and Prepare Pans
Preheat the oven to 350°F (175°C). Line two baking sheets with silicone baking mats or parchment paper. Position racks in the center of the oven. Gather measuring tools and mixers. This setup helps guarantee consistent heat and easy release. Keep a cooling rack nearby for later. Avoid greasing the pans, which can encourage spreading.
Whisk the Dry Ingredients
In a mixing bowl, whisk flour, cocoa powder, baking soda, baking powder, and salt until evenly combined. Break up any cocoa lumps with the whisk. Aerate the mixture for a lighter crumb. Set the bowl aside. Precise mixing here prevents uneven pockets of leavening and guarantees the cookies rise uniformly and bake evenly.
Cream the Fats and Sugars
In a large bowl, beat softened butter, creamy peanut butter, granulated sugar, and packed brown sugar until light and fluffy, about 2 minutes. Use medium speed on a hand or stand mixer. Scrape the bowl as needed.
Incorporate air for tender texture and balanced sweetness. Avoid overmixing, which can cause spreading.
Incorporate Eggs and Vanilla
Add the eggs one at a time, beating after each addition until fully incorporated. Mix in the vanilla extract. Scrape down the bowl and paddle to capture any unmixed streaks. Keep the mixer on medium-low to prevent over-aeration.
Stop when the mixture looks smooth and cohesive, with no visible egg ribbons remaining.
Combine Wet and Dry Mixtures
Add the dry ingredients to the wet in two additions. Mix on low just until combined after each addition. Stop when streaks of flour disappear. Don’t overmix, which can toughen cookies. Scrape the bowl bottom and sides to ensure even blending.
The dough should feel soft but hold its shape.
Fold in Chips and Peanuts
Using a rubber spatula, fold in semisweet chocolate chips and chopped roasted peanuts, if using. Distribute mix-ins evenly without overworking the dough. Keep folding gentle to maintain tenderness. Adjust amounts to taste or omit for a smoother texture.
The dough should remain cohesive and not crumbly.
Portion the Cookie Dough
Use a medium cookie scoop to portion 1.5-tablespoon mounds of dough. Place scoops on the prepared sheets about 2 inches apart. Keep sizes uniform for even baking. If dough is sticky, chill 20 to 30 minutes for easier handling. Work quickly to prevent warming, which increases spreading in the oven.
Flatten the Dough Mounds
Lightly flatten the tops with fingertips or the bottom of a glass to about 3/4 inch thick. Create even thickness for consistent doneness. Avoid pressing too thin, which can lead to crisp edges and dry centers. If desired, press a few extra chips on top for appearance. Rotate trays if necessary when shaping.
Bake Until Just Set
Bake one sheet at a time for 9 to 11 minutes. Watch for set edges and slightly soft centers. Pull the cookies when they look a touch underdone, as they continue to set while cooling. Avoid overbaking to preserve chewiness.
If your oven runs hot, start checking at 8 minutes to prevent dryness.
Cool and Rest the Cookies
Cool on the baking sheet for 5 minutes to stabilize structure. Transfer cookies to a cooling rack and rest for 10 minutes before serving. This carryover time sets centers and enhances texture. Store cooled cookies in an airtight container for up to 4 days.
Freeze baked cookies or dough scoops for up to 2 months.
Ingredient Swaps
- Gluten-free: swap all-purpose flour for a 1:1 gluten-free baking blend; add 1 tbsp milk if dough seems dry.
- Dairy-free: use plant-based butter sticks and dairy-free chocolate chips.
- Nut-free “PB” flavor: replace peanut butter with sunflower seed butter; add 1–2 tbsp extra flour if dough feels oily.
- Budget/availability: use vegetable oil spread instead of butter (cookies spread more; chill dough 30 minutes), and sub half the brown sugar with additional granulated sugar.
- Cocoa/Chocolate: use Dutch-process cocoa for deeper flavor, or replace chips with chopped chocolate or omitting entirely.
You Must Know
Doneness • If edges look set but centers still glossy and soft with a slight dome, pull at 9–10 minutes; they’ll firm up on-sheet in 5 minutes. Why: carryover heat finishes the middle without drying.
Visual: matte edges, shiny centers, no wet batter.
Troubleshoot • When dough feels greasy or spreads too much in the first 5 minutes, fold in 1–2 tablespoons flour and chill 20–30 minutes. Why: extra starch and cooler fat control spread.
Cue: cookies puddle beyond 2.5 inches in diameter.
Flavor Boost • For deeper peanut punch, swap 1/4 cup peanut butter for 1/4 cup toasted peanut powder or finely ground roasted peanuts. Why: concentrates roasted notes without extra oil.
Ratio: 1:1 by volume in that 1/4 cup portion.
Scale • To halve or double, keep leaveners proportional: 1/2 teaspoon baking soda + 1/4 teaspoon baking powder per 12-cookie half batch; 2 teaspoons soda + 1 teaspoon powder per 48-cookie double. Why: preserves rise and spread at any yield.
Make-Ahead • For best freezer results, portion 1.5-tablespoon scoops, flatten to 3/4 inch, freeze solid, then bag. Bake from frozen at 350°F adding 1–2 minutes. Why: pre-shaped pucks keep shape and bake evenly.
Cue: same matte edge/shiny center.
Serving Tips
- Serve warm with cold milk or vanilla ice cream for contrast.
- Drizzle melted chocolate and sprinkle chopped peanuts on top.
- Sandwich two cookies with peanut butter or chocolate frosting.
- Plate with sliced bananas and a dusting of cocoa powder.
- Pair with coffee, mocha, or a peanut butter stout.
Storage & Make-Ahead
Store cookies in an airtight container at room temperature up to 4 days or in the fridge up to 1 week.
Dough can be made ahead and chilled 24–72 hours for deeper flavor.
Freeze baked cookies or dough scoops well-wrapped up to 2 months.
Thaw or bake from frozen, adding 1–2 minutes.
Reheating
Reheat gently: microwave 5–10 seconds per cookie wrapped in a damp towel.
Oven at 300°F for 4–6 minutes on a sheet.
Stovetop skillet low heat, covered, 1–2 minutes per side.
Elvis’s Favorite Combo
Sometimes I lean into the King’s cravings and crown these cookies with Elvis’s favorite trio: warm peanut butter, melting chocolate, and sweet banana.
I slice a ripe banana into thin coins and let them soften in a skillet with a dab of butter until their edges caramelize and smell like toasted sugar.
While the cookies rest, I spread a satin smear of peanut butter across a warm top, nestle a glossy chocolate chip into the center, then press on a caramelized banana slice so it hugs the heat and slumps slightly.
Each bite feels plush and sultry: salt-kissed peanut, velvety chocolate, and banana’s buttery sweetness.
The cookie stays tender, the edges faintly crisp, and the topping turns every nibble into a small, swaying Graceland moment.
Final Thoughts
Ready to bake a batch? Give these Chocolate Peanut Butter Cookies a try as written, or tweak them with add-ins like extra chips or a pinch of sea salt on top to make them your own!
Frequently Asked Questions
Can I Make These Cookies Gluten-Free Without Changing Texture?
Yes—you can. I swap the flour for a 1:1 gluten-free blend with xanthan gum, sift it, and add 1 tablespoon cornstarch. The dough feels plush, scoops cleanly, bakes crinkly-edged, soft-centered, and wonderfully peanutty.
How Do Altitude Adjustments Affect Baking Time and Spread?
At high altitude, I bake a bit longer and expect more spread. I add 1–2 tablespoons flour, reduce sugar slightly, and raise oven temperature 15°F. The dough feels sturdier; cookies set quicker, edges whisper-crisp.
Which Mixer Speed Prevents Overcreaming the Butter-Sugar?
Use medium speed; I stop when it looks pale and fluffy, not glossy. I hear a soft thrum, feel airy grains melt under the spatula, and smell warm sweetness blooming—about 2 minutes keeps the butter tender, not greasy.
Are These Cookies Safe for Dogs or Pets?
No, they’re unsafe for pets. I picture warm crumbs and glossy chips, but chocolate, sugar, and fats can harm dogs. I’d keep the tin sealed, offer a vet-approved treat, and save these cozy bites for us.
How Can I Calculate Nutrition per Cookie Accurately?
I calculate per-cookie nutrition by dividing each ingredient’s macros by 24, then summing. I cross-check in a nutrition calculator. I weigh dough scoops for precision—warm butter scent, sugar grains, and cool metal scale keep me honest.
Chocolate Peanut Butter Cookies
Equipment
- 2 Mixing bowl
- 1 hand mixer or stand mixer
- 1 Rubber spatula
- 1 Whisk
- 2 Baking sheet
- 2 silicone baking mat or sheet of parchment paper
- 1 Cooling rack
- 1 medium cookie scoop
- 1 measuring cup set
- 1 measuring spoon set
Ingredients
- 1 cup unsalted butter softened
- 1 cup creamy peanut butter
- 1 cup granulated sugar
- 1 cup light brown sugar packed
- 2 large eggs room temperature
- 2 teaspoon vanilla extract
- 2 cup all-purpose flour
- 1/2 cup unsweetened cocoa powder
- 1 teaspoon baking soda
- 1/2 teaspoon baking powder
- 1/2 teaspoon fine salt
- 1 cup semisweet chocolate chips optional
- 1/2 cup chopped roasted peanuts optional
Instructions
- Preheat the oven to 350°F (175°C) and line baking sheets with silicone mats or parchment paper.
- In a mixing bowl whisk together flour, cocoa powder, baking soda, baking powder, and salt until evenly combined.
- In a separate large bowl beat the butter, peanut butter, granulated sugar, and brown sugar with a mixer until light and fluffy, about 2 minutes.
- Beat in the eggs one at a time until incorporated, then mix in the vanilla extract.
- Add the dry ingredients to the wet ingredients in two additions, mixing on low just until combined.
- Fold in the chocolate chips and chopped peanuts if using.
- Scoop 1.5-tablespoon mounds of dough onto prepared sheets, spacing about 2 inches apart.
- Lightly flatten the tops with your fingers or the bottom of a glass to about 3/4-inch thick.
- Bake one sheet at a time for 9 to 11 minutes until the edges are set and the centers look slightly soft.
- Cool on the baking sheet for 5 minutes, then transfer cookies to a cooling rack to rest for 10 minutes before serving.
Notes