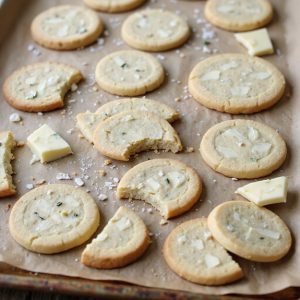
Picture a tray of buttery shortbread, marbled with ribbons of creamy white chocolate—ivory swirls catching the light, edges just set, and a vanilla-butter aroma that feels like a hug from the oven.
Each bite snaps delicately, then melts into rich sweetness and a whisper of salt, the kind of comfort that turns an ordinary afternoon into a little celebration.
I love these cookies because they prove that simple ingredients, handled with care, can deliver bakery-worthy beauty and warmth.
They’re perfect for last-minute coffee dates, teacher gifts, busy weeknights when you need a make-ahead treat, or slow Sunday suppers when dessert should be effortless but special.
Once, a rainy-day power outage ended right before guests arrived—this dough, chilled and ready, saved the evening with fresh, fragrant cookies in minutes. Ready? Let’s cook!
Why You’ll Love It
- Delivers buttery, melt-in-your-mouth shortbread with elegant white-chocolate swirls
- Uses simple pantry staples for an effortless, reliable dough
- Bakes with crisp edges and tender centers every time
- Freezes beautifully for make-ahead holiday or gifting ease
- Impresses visually without complicated techniques or special tools
Ingredients
- 1 cup unsalted butter softened — room-temp for easy creaming
- 3/4 cup powdered sugar sifted — prevents lumps
- 1 teaspoon vanilla extract — pure vanilla for best flavor
- 2 cups all-purpose flour sifted — for tender crumb
- 1/4 cup cornstarch sifted — classic shortbread texture
- 1/2 teaspoon fine sea salt — balances sweetness
- 4 ounces white chocolate chopped — choose real cocoa butter
- 1 teaspoon neutral oil optional — thins thick chocolate
Step-by-Step Method
Cream Butter & Sugar
Beat softened butter, powdered sugar, and vanilla until light and smooth. Start on low, then increase to medium. Scrape the bowl to incorporate any dry spots. Aim for a pale, fluffy mixture without air pockets. Proper creaming guarantees tender, crisp shortbread. Avoid overbeating to prevent too much air, which can cause spreading in the oven.
Combine Dry Ingredients
Whisk flour, cornstarch, and fine sea salt in a separate bowl. Sift if needed to remove lumps and ensure even distribution. Keep the mixture airy for a delicate crumb. Don’t add wet ingredients yet. Properly combining dry ingredients prevents uneven seasoning and helps produce a uniform, melt-in-your-mouth texture.
Form the Dough
Add dry ingredients to the butter mixture. Mix on low just until a soft dough forms. Stop as soon as no dry streaks remain. Overmixing develops gluten and toughens shortbread. Scrape the bowl bottom and sides with a spatula. The dough should be smooth and pliable but not sticky. Avoid warming it with excessive mixing.
Divide & Flatten
Split dough into two equal portions. Shape each into a disk about 1 inch thick. Flattening speeds chilling and creates even swirls later. Wrap loosely while you prepare chocolate. Keep dough cool for best texture. If the kitchen is warm, chill briefly to maintain firmness and prevent smearing during the swirl step.
Melt White Chocolate
Place chopped white chocolate in a microwave-safe bowl. Heat in 20-second bursts, stirring between each. Remove when mostly melted; residual heat will finish the job. Stir in a few drops of neutral oil if thick. Aim for smooth, fluid chocolate. Avoid overheating, which can seize or scorch the chocolate and ruin the swirl.
Cool the Chocolate
Let the melted chocolate stand until just warm, about 5 minutes. Test by touching the bowl; it should feel warm, not hot. Overly hot chocolate will melt the butter in the dough. Proper temperature helps create distinct ribbons. Stir briefly before using to maintain fluidity and even consistency for clean marbling.
Swirl the First Disk
Drizzle half the melted chocolate over one dough disk. Fold gently 3–4 times with a spatula. Stop while distinct streaks remain. Don’t fully mix; marbling should be visible. Less is more here. Overworking blends the chocolate into the dough, losing contrast and affecting texture. Smooth lightly to consolidate the disk.
Swirl the Second Disk
Repeat with the remaining dough disk and chocolate. Drizzle, fold minimally, and preserve visible streaks. Work quickly to keep dough cool. If the chocolate begins to thicken, give it a brief stir. Maintain similar swirl intensity in both disks for consistent cookies. Avoid kneading, which smears the pattern and toughens dough.
Chill the Swirled Dough
Wrap each swirled disk tightly in plastic. Press to seal and prevent drying. Chill until firm, about 1 hour. Proper chilling sets the butter and stabilizes the swirls. This step reduces spread and sharpens edges during baking. If time allows, chill longer for even cleaner cuts and easier handling on the bench.
Preheat & Prepare Pans
Heat the oven to 325°F (165°C). Line two baking sheets with parchment paper. Keep one dough disk refrigerated while you work with the other. Prepare a lightly floured surface and rolling pin. Gather cutters or a sharp knife. Organization minimizes time at room temperature and helps maintain neat, crisp cookie shapes.
Roll with Care
Roll one disk to 1/4-inch thickness. Use light pressure to avoid smearing the marbling. Rotate the dough occasionally and dust lightly with flour as needed. Avoid rerolling scraps more than once to keep swirls distinct. Work quickly and return the dough to the fridge if it softens. Clean the edges with a bench scraper.
Cut & Arrange
Cut shapes with a knife or cookie cutter. Transfer to prepared sheets, spacing about 1 inch apart. Use a thin spatula for clean lifts. Gather scraps, press gently, and reroll once if necessary. Keep swirls aligned by minimizing handling. Place full sheets in the refrigerator to firm up before baking for sharp outlines.
Chill the Cut Cookies
Refrigerate the trays of cut cookies for 10 minutes. This short chill prevents spreading and preserves definition. It also relaxes any gluten developed during rolling. If your kitchen is warm, extend chilling slightly. Meanwhile, roll and cut the second disk. Stagger trays to keep dough cold until it goes into the oven.
Bake to Pale Gold
Bake for 10–12 minutes until edges are set and just turning pale golden. Don’t brown. Rotate sheets halfway if needed for even baking. Shortbread continues to set as it cools. Remove when centers look matte, not glossy. Overbaking dries the cookies. Adjust time slightly for size and oven variance.
Cool & Finish
Cool on the sheet for 5 minutes to set, then transfer to a rack to cool completely. Optionally drizzle extra melted white chocolate or sprinkle flaky salt for contrast. Store airtight once fully cool. The flavor improves after a day. Freeze dough up to 2 months; bake from frozen, adding 1–2 minutes to the time.
Ingredient Swaps
- Butter: Use plant-based butter sticks for dairy-free; cultured butter for richer flavor. Avoid margarine (too much water).
- Powdered sugar: Swap with 2/3 cup granulated sugar pulsed to superfine; or use coconut sugar blitzed with 1 tsp cornstarch (darker flavor).
- All-purpose flour: Use a 1:1 gluten-free baking blend with xanthan; or mix 1 3/4 cups AP + 1/4 cup rice flour for extra snap.
- Cornstarch: Substitute potato starch or arrowroot in equal amounts; omit if using a shortbread-friendly GF blend that already includes starch.
- White chocolate: Use high-quality bars/chips with cocoa butter; for dairy-free, choose vegan white chocolate. Budget/availability: milk or dark chocolate swirls work too (flavor will be less sweet).
- Vanilla: Replace with 1/2 tsp almond extract, or 1 tsp vanilla paste; regional: add citrus zest (lemon/orange) instead.
- Neutral oil: Optional—use cocoa butter or a few drops of coconut oil if chocolate is thick.
- Salt: Fine sea salt can be swapped with kosher (slightly heaped 1/2 tsp) or use salted butter and reduce added salt to a pinch.
You Must Know
Doneness • If edges look matte but centers feel soft to a gentle poke, pull the tray once bottoms show a pale straw ring 1/8 inch wide; carryover heat firms them in 5 minutes, preventing overbrowned tips.
Troubleshoot • When the white chocolate stiffens dough into crumbly chunks, warm the dough with 2–3 palm presses or rest at room temp 5–7 minutes; this relaxes butter crystals so it rolls without cracking.
Avoid • To keep swirls crisp, reroll scraps only once and rotate the dough 90° between passes; more handling blurs marbling and raises dough temp above 68–70°F, causing spread.
Scale • For double batches, portion dough into 4 smaller disks (~250 g each); smaller masses chill to 40–45°F in 45–60 minutes and roll more evenly, keeping swirl distribution consistent.
Flavor Boost • For balance, add 1/4–1/2 teaspoon finely grated lemon zest or 1/8 teaspoon almond extract to the butter-sugar stage; the subtle acidity/aroma counters the 4 oz white chocolate’s sweetness without masking the shortbread.
Serving Tips
- Pair with hot Earl Grey or chamomile tea to balance the sweetness.
- Serve alongside fresh raspberries and a dollop of lightly sweetened whipped cream.
- Create a dessert board with dark chocolate, candied nuts, and dried apricots.
- Plate with a drizzle of raspberry coulis and a pinch of flaky sea salt.
- Offer as ice cream toppers over vanilla bean or lemon sorbet for contrast.
Storage & Make-Ahead
Store baked cookies airtight at room temperature 5–7 days.
Or refrigerate up to 10 days.
For make-ahead, the dough can be refrigerated, tightly wrapped, up to 3 days.
Chill cut shapes on sheets and bake from cold.
Dough and baked cookies both freeze well up to 2 months.
Thaw in fridge.
Reheating
Reheat gently.
Microwave 5–10 seconds wrapped in a paper towel.
Oven at 300°F for 3–5 minutes on a parchment-lined sheet.
Stovetop warm in a covered skillet on low briefly.
Hogmanay Biscuit Tins
When Hogmanay rolls in, I tuck these white chocolate–swirled shortbreads into a tin lined with crisp parchment, the kind that snaps softly when you lift the lid. I like a deep, lidded tin—cool metal keeps the edges snappy and the centers tender.
I layer the cookies in neat circles, parchment between each tier so the marbling stays pristine. A tiny sachet of rice or a food-safe desiccant keeps moisture in check when the room fills with kettle steam and clinking glasses.
I add a ribboned label—baked at 325°F, pale gold rims, cocoa‑buttery curls—so guests know they’re special. When the clock nears midnight, I pass the tin around. The scent of butter, sugar, and vanilla drifts out like a promise.
Final Thoughts
Ready to bake? Give these buttery white chocolate swirl shortbreads a try and make them your own—add a pinch of flaky salt, a citrus zest twist, or drizzle extra chocolate on top.
Can’t wait to hear how you customize them!
Frequently Asked Questions
Can I Make These Cookies Gluten-Free Without Gritty Texture?
Yes—you can. I swap in a 1:1 gluten‑free flour blend with added xanthan, sift well, and rest the dough 30 minutes. The dough relaxes, grit hydrates, and the baked cookies crumble tenderly like sand kissed by waves.
How Do Altitude Changes Affect Baking Time and Texture?
Altitude makes dough drier and quicker to set; I bake hotter, a touch shorter, add moisture, and reduce leavening. Expect crisper edges, fragile crumb. I watch aromas bloom, edges pale gold, and pull just before doneness.
What’s the Best Way to Ship These Without Breaking?
I nestle cookies in snug rows, separated by parchment, inside a tin with bubble wrap around. I pad empty spaces with crumpled tissue, double-box, label “Fragile,” ship fast. You’ll hear that soft, intact crumble on arrival.
Can I Color the White Chocolate Swirls Safely?
Yes—you can, if you use oil-based or powdered colors, not water. I melt gently, tint softly, then cool to barely warm. I fold once or twice; ribbons blush through the dough like sunrise marbling.
How Do I Scale This Recipe for Large Batches?
Multiply every ingredient by your desired yield factor, but keep oven temp. I batch in 3x or 4x, cream in portions, and chill disks separately. Bake sequentially; rotate sheets. Maintain short mixing to preserve tender crumb and marbled streaks.
White Chocolate Swirl Shortbread Cookies
Equipment
- 1 Mixing bowl
- 1 handheld mixer or stand mixer
- 1 Rubber spatula
- 1 Whisk
- 1 Measuring cups set
- 1 Measuring spoons set
- 1 Fine mesh sieve
- 1 Baking sheet 2
- 1 Parchment paper 2 sheets
- 1 Rolling Pin
- 1 sharp knife or cookie cutter
- 1 microwave-safe bowl
- 1 Cooling rack
- 1 plastic wrap roll
Ingredients
- 1 cup unsalted butter softened
- 3/4 cup powdered sugar sifted
- 1 teaspoon vanilla extract
- 2 cup all-purpose flour sifted
- 1/4 cup cornstarch sifted
- 1/2 teaspoon fine sea salt
- 4 ounce white chocolate chopped
- 1 teaspoon neutral oil optional
Instructions
- Cream the softened butter and powdered sugar together with the vanilla until light and smooth.
- Whisk the flour, cornstarch, and sea salt together in a separate bowl.
- Add the dry ingredients to the butter mixture and mix on low just until a soft dough forms.
- Divide dough in half and flatten each portion into a disk.
- Melt the white chocolate in a microwave-safe bowl in 20-second bursts, stirring between each, then stir in the neutral oil if using for smoother texture.
- Cool the melted white chocolate to just warm, not hot, about 5 minutes.
- Drizzle half the melted white chocolate over one dough disk and gently fold 3–4 times with a spatula to create visible streaks without fully mixing.
- Repeat with the second dough disk and remaining white chocolate.
- Wrap each swirled dough disk tightly in plastic and chill until firm, about 1 hour.
- Preheat the oven to 325°F (165°C) and line baking sheets with parchment paper.
- On a lightly floured surface, roll one disk to 1/4-inch thickness, keeping swirls intact by minimal rerolling.
- Cut cookies with a knife or cutter and transfer to prepared sheets, spacing 1 inch apart.
- Chill the cut cookies on the sheet for 10 minutes to prevent spreading.
- Bake for 10–12 minutes until edges are set and pale golden but not browned.
- Cool on the sheet for 5 minutes, then transfer to a rack to cool completely.
Notes