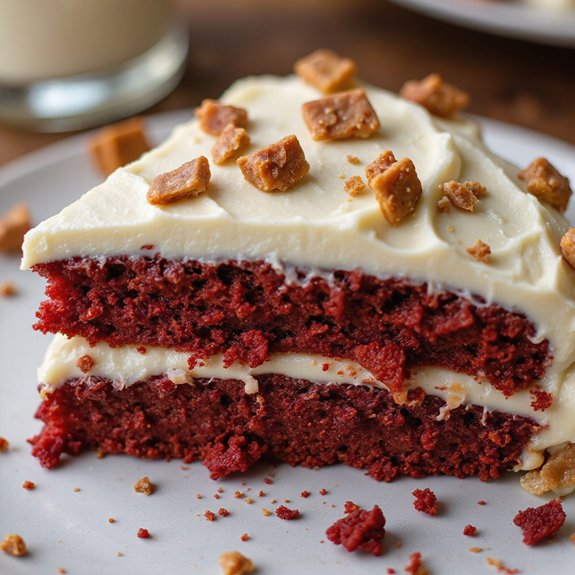
Picture a slice with ribbons of scarlet and ivory, the cocoa-kissed crumb tender against a cool, tangy cheesecake swirl, all wrapped in a billowy veil of cream cheese frosting.
Imagine the first forkful: buttery richness, a whisper of vanilla, and that signature red velvet aroma warming the air like a bakery on a snowy afternoon. This cake is my comfort tapestry—part celebration, part hug—because it turns simple pantry staples into something that feels special.
It’s the showstopper you can pull together for busy weeknights when you need make-ahead magic, for Sunday suppers that deserve a grand finale, or for birthdays when you want elegance without fuss.
Once, a midweek school concert ran late and we needed dessert that could chill quietly until curtain call; this layered beauty saved the day and still looked spectacular. I’ll guide you through every swirl and crumb with ease. Ready? Let’s cook!
Why You’ll Love It
- Delivers bold flavor: tangy cheesecake meets classic cocoa red velvet
- Impresses guests with striking swirl and bakery-style frosting finish
- Stays ultra-moist thanks to oil, buttermilk, and gentle baking
- Assembles easily with simple, pantry-friendly ingredients and tools
- Chills beautifully for clean slices and make-ahead convenience
Ingredients
- 2 1/2 cups all-purpose flour sifted — measure after sifting (keeps crumb tender)
- 2 cups granulated sugar — standard white cane sugar (dissolves cleanly)
- 1 teaspoon baking soda — check freshness (ensures proper rise)
- 1 teaspoon fine salt — fine grain blends evenly (balanced flavor)
- 2 tablespoons unsweetened cocoa powder natural — not Dutch-process (classic tang)
- 1 cup vegetable oil — neutral oil like canola (moist crumb)
- 1 cup buttermilk room temperature — real cultured buttermilk (tangy lift)
- 2 large eggs room temperature — grade A preferred (better emulsification)
- 2 teaspoons vanilla extract divided — pure extract (rounds flavors)
- 1 tablespoon distilled white vinegar — reacts with cocoa/soda (red hue)
- 2 tablespoons red liquid food coloring or as needed — add to desired shade (vivid color)
- 16 ounces cream cheese softened — full-fat blocks (smooth cheesecake)
- 1/2 cup granulated sugar for cheesecake — fine crystal (creamy mix)
- 1 large egg for cheesecake room temperature — binds the layer (silky set)
- 1/4 cup sour cream room temperature — full-fat (tender texture)
- 1 tablespoon all-purpose flour for cheesecake — helps prevent cracks (light structure)
- 1/4 teaspoon fine salt for cheesecake — balances sweetness (clean finish)
- 8 ounces cream cheese for frosting softened — full-fat block (stable frosting)
- 1/2 cup unsalted butter for frosting softened — room temp (whips fluffy)
- 3 cups powdered sugar sifted — 10x confectioners’ (smooth frosting)
- 1 teaspoon vanilla extract for frosting — pure extract (warm aroma)
- 1 to 2 tablespoons heavy cream for frosting as needed — add gradually (spreadable)
Step-by-Step Method
Prepare the Pans
Preheat the oven to 350°F. Line two 9-inch round cake pans with parchment circles and lightly grease the sides. Dust with a little flour if desired. Set a wire rack nearby for cooling. Gather bowls, mixer, whisk, spatula, and a skewer.
Make certain dairy and eggs are at room temperature for smoother batters and even baking.
Mix the Dry Ingredients
Whisk together the sifted flour, granulated sugar, baking soda, fine salt, and natural cocoa powder in a large bowl. Break up any lumps for a uniform mixture.
Keep the whisk moving to evenly distribute the leavening. Set the bowl aside. Avoid adding wet ingredients yet to prevent premature activation of baking soda.
Whisk the Wet Ingredients
In a separate bowl, whisk vegetable oil, buttermilk, eggs, vanilla extract, white vinegar, and red food coloring until smooth. Aim for a vibrant, evenly colored mixture. Adjust the food coloring if the hue looks dull.
Keep the mixture fluid and lump-free for easy incorporation. Don’t overbeat; just combine thoroughly.
Combine for Red Velvet Batter
Pour the wet mixture into the dry ingredients. Mix gently until a smooth batter forms. Stop as soon as streaks disappear to avoid overdeveloping gluten.
Scrape the bowl sides and bottom with a spatula for even mixing. Check color and add a few drops of red if needed to counter cocoa darkening.
Beat the Cheesecake Base
In a medium bowl, beat softened cream cheese with granulated sugar until creamy and fluffy. Use a mixer on medium speed to remove lumps. Scrape down the bowl.
Aim for a glossy, smooth texture. Keep the mixture at room temperature to prevent graininess. Consistent texture ensures clean dollops and swirls.
Finish the Cheesecake Mixture
Add the egg, sour cream, flour, fine salt, and vanilla to the cream cheese base. Beat until silky and completely smooth. Avoid overmixing to reduce air bubbles.
Reserve about 1/3 cup of this mixture for the top swirl. Keep the rest slightly thicker for defined pockets within the cake layers.
Layer the First Batter
Divide half of the red velvet batter evenly between the two prepared pans. Spread with an offset spatula to create level surfaces. Tap pans lightly to release air bubbles.
Make certain the batter reaches the edges without pooling in the center. Even layers bake uniformly and support the cheesecake swirls.
Dollop the Cheesecake
Spoon generous dollops of the cheesecake mixture over the batter in both pans. Space them evenly to create attractive pockets. Avoid pressing down too hard.
Reserve about 1/3 cup for the final swirl on top. Keep dollops visible so they maintain structure during baking and slicing.
Cover and Top with Swirl
Distribute the remaining red velvet batter over the dollops, carefully covering them. Smooth the tops without disturbing the cheesecake too much.
Dot the reserved cheesecake mixture across the surface. Use a skewer to gently swirl in shallow figure-eights. Avoid digging deep, which can cause sinking or uneven baking.
Bake Until Just Set
Place pans on the center rack and bake 28 to 33 minutes. Check doneness with a toothpick near the center; it should have a few moist crumbs, not wet batter. Rotate pans if needed for even browning.
Don’t overbake to keep the crumb tender and moist. The tops should spring back lightly.
Cool and Release
Cool cakes in their pans on a wire rack for 15 minutes. Run a knife around edges, then invert to release. Peel off parchment and let layers cool completely on the rack.
Avoid frosting warm cakes, which melts icing. If the kitchen is warm, chill layers briefly to reduce crumbs during assembly.
Whip the Cream Cheese Frosting
Beat softened cream cheese and unsalted butter until light and fluffy. Gradually add sifted powdered sugar and vanilla. Stream in heavy cream 1 tablespoon at a time until smooth and spreadable.
Aim for a silky, stable consistency. Avoid over-thinning. Chill briefly if the frosting feels too soft.
Assemble and Frost
Level cake layers if needed. Place the first layer on a stand and spread a thin coat of frosting. Set the second layer on top.
Apply frosting to the top and sides, smoothing or creating swirls. Chill the assembled cake for at least 1 hour. This sets the cheesecake swirls and yields clean slices.
Ingredient Swaps
- Buttermilk: replace with 1 cup milk + 1 tablespoon white vinegar or lemon juice (rest 5 minutes).
- Eggs: use 1/4 cup unsweetened applesauce or commercial egg replacer per egg for the cake; for the cheesecake layer, use a vegan cream cheese and 1–2 teaspoons cornstarch instead of the egg.
- Oil: swap vegetable oil with melted neutral oil (canola, sunflower) or 1 cup melted coconut oil (refined for no coconut flavor).
- Cream cheese: budget/availability swap with Neufchâtel; dairy-free with a thick, bake-stable vegan cream cheese.
- Sour cream: sub equal Greek yogurt; dairy-free with coconut yogurt.
- Cocoa: natural cocoa can be replaced 1:1 with Dutch-process, but add 1/4 teaspoon extra vinegar to keep color vibrant.
- Red food coloring: use gel color (more potent) or 1–2 tablespoons beet powder mixed with 1–2 teaspoons water (color will be deeper, slightly earthier).
- Gluten-free: use a 1:1 gluten-free all-purpose blend with xanthan gum.
- Frosting: dairy-free by using vegan butter and vegan cream cheese; thin with plant cream or milk.
You Must Know
- Doneness • If the centers look set but you’re unsure, do a wobble-and-crumb check: the cake should barely jiggle as one piece and a toothpick 1 inch from center should show a few moist crumbs, not wet streaks (28–33 minutes). This prevents overbaking and dry crumb.
- Troubleshoot • When the cheesecake pockets sink or run, chill the cheesecake batter 10–15 minutes until slightly thick and keep swirls shallow (no deeper than 1/4 inch). Thicker swirl holds shape and avoids tunneling.
- Scale • For a 3-layer 6-inch cake, use 2/3 of all components by weight (about 67%); reduce bake time to 22–27 minutes, looking for the same moist-crumb cue. Keeps height and texture proportional.
- Flavor Boost • For deeper cocoa notes without losing color, add 1 teaspoon espresso powder to the dry ingredients and increase red color by 1–2 teaspoons as needed; the espresso amplifies chocolate while maintaining the classic hue.
- Make-Ahead • To streamline, wrap cooled layers and refrigerate up to 48 hours or freeze up to 1 month; thaw wrapped in the fridge overnight, then frost while layers are still slightly chilled (about 40–50°F). Cold layers reduce crumbs and give cleaner finishes.
Serving Tips
- Serve chilled slices with fresh raspberries and a dusting of cocoa.
- Pair with hot coffee or cold milk; vanilla latte complements tanginess.
- Plate with a drizzle of warm chocolate or raspberry sauce and whipped cream.
- Add crunch: sprinkle toasted pecans or white chocolate shavings on top.
- For elegance, garnish with mint leaves and thin red velvet crumb border.
Storage & Make-Ahead
Refrigerate the frosted cake, covered, for up to 4 days.
Bring slices to room temperature before serving for best texture.
Layers can be baked a day ahead, wrapped, and chilled.
The assembled cake freezes well for up to 2 months.
Wrap tightly in plastic and foil.
Thaw overnight in the fridge.
Reheating
Reheat slices gently: microwave 50% power 15–25 seconds.
Oven: wrap in foil, 275°F for 8–12 minutes.
Stovetop steam: covered pan, low heat, 3–5 minutes.
Avoid overheating to preserve texture.
Juneteenth Potluck Favorite
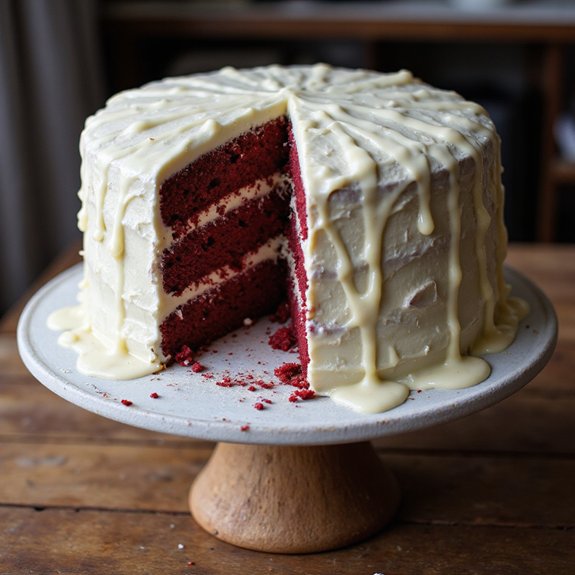
Sun-bright plates and laughter call for a dessert that pops, and this Red Velvet Cheesecake Swirl earns its invite to any Juneteenth potluck. I bring it chilled, glossy with swoops of cream cheese frosting, and cut clean slices so the crimson crumb and ivory ribbons gleam.
It’s sweet celebration on a plate—bright, generous, and easy to share.
Here’s how I make it potluck-strong: I bake the layers the day before, chill them thoroughly, and transport the cake in a snug carrier. I pack a long knife, extra napkins, and a serving spatula. For heat, I set it on ice packs beneath the carrier base.
Garnish with ruby crumbs or fresh berries, and watch guests’ eyes light up before the first bite.
Final Thoughts
Ready to bake? Give this Red Velvet Cheesecake Swirl a try, then make it your own—adjust the red hue, add a hint of citrus, or play with extra swirls to suit your style.
Enjoy every slice!
Frequently Asked Questions
Can I Bake This as Cupcakes Instead of Two Round Layers?
Yes—you can. I’d fill liners half with red batter, dollop cheesecake, cover lightly, then swirl. Bake at 350°F for 18–22 minutes. Cool completely, frost generously, chill to set swirls. You’ll get tender, marbled, bakery-pretty cupcakes.
How Do I Adapt for High-Altitude Baking Conditions?
Adjust for altitude like this: I reduce sugar 2 tablespoons, increase flour 2 tablespoons, add 1–2 tablespoons extra buttermilk, bump oven to 365°F, shorten bake slightly, and boost leavening 1/8 teaspoon. I watch doneness visually, not just time.
What’s the Best Way to Achieve a Deeper Red Color Naturally?
Use beet powder and a touch of pomegranate juice; they boost natural crimson without muddying flavor. I balance cocoa lightly, add lemon to brighten pigments, and mix gently. You’ll see a lush, velvety red bloom beautifully.
Can I Make It Gluten-Free Without Compromising Texture?
Yes—you can. I swap in a 1:1 gluten-free baking flour with xanthan gum, add 1 tablespoon cornstarch, and let the batter rest 15 minutes. I promise you’ll get tender crumb, velvety bite, and confident slices.
How Do I Prevent Cheesecake Cracks Within the Cake Layers?
Keep batter silky, don’t overbeat, and use room‑temperature dairy. I swirl gently, avoid digging deep, and bake just until set with a few moist crumbs. I cool slowly, chill an hour, and never shock with sudden temperature changes.
Cheesecake Layer Swirl Red Velvet Cake
Equipment
- 2 9-inch round cake pan
- 1 9-inch springform pan optional if using parchment sling
- 1 Stand mixer or hand mixer
- 3 Mixing bowl
- 1 Whisk
- 1 Rubber spatula
- 1 toothpick or skewer
- 1 Wire rack
- 1 parchment paper sheet
- 1 cooking spray bottle
Ingredients
- 2 1/2 cup all-purpose flour sifted
- 2 cup granulated sugar
- 1 teaspoon baking soda
- 1 teaspoon fine salt
- 2 tablespoon unsweetened cocoa powder natural
- 1 cup vegetable oil
- 1 cup buttermilk room temperature
- 2 large egg room temperature
- 2 teaspoon vanilla extract divided
- 1 tablespoon distilled white vinegar
- 2 tablespoon red liquid food coloring or as needed
- 16 ounce cream cheese softened
- 1/2 cup granulated sugar for cheesecake
- 1 large egg for cheesecake, room temperature
- 1/4 cup sour cream room temperature
- 1 tablespoon all-purpose flour for cheesecake
- 1/4 teaspoon fine salt for cheesecake
- 8 ounce cream cheese for frosting, softened
- 1/2 cup unsalted butter for frosting, softened
- 3 cup powdered sugar sifted
- 1 teaspoon vanilla extract for frosting
- 1 to 2 tablespoon heavy cream for frosting, as needed
Instructions
- Preheat the oven to 350°F and line two 9-inch round cake pans with parchment circles then grease the sides.
- In a large bowl whisk flour, 2 cups sugar, baking soda, salt, and cocoa powder until combined.
- In another bowl whisk oil, buttermilk, 2 eggs, 1 teaspoon vanilla, vinegar, and red food coloring until smooth.
- Pour wet ingredients into dry and mix just until a smooth red velvet batter forms without overmixing.
- In a medium bowl beat 16 ounces cream cheese with 1/2 cup sugar until creamy.
- Beat in 1 egg, sour cream, 1 tablespoon flour, 1/4 teaspoon salt, and 1 teaspoon vanilla until silky and lump-free.
- Divide half of the red velvet batter between the two pans and spread evenly.
- Dollop spoonfuls of the cheesecake mixture over the batter in both pans, reserving about 1/3 cup for swirling on top.
- Cover the cheesecake dollops with the remaining red velvet batter, smoothing the tops.
- Dot the reserved cheesecake mixture over the tops and use a skewer to gently swirl without digging deep.
- Bake the cakes for 28 to 33 minutes until a toothpick inserted near the center comes out with a few moist crumbs.
- Cool pans on a wire rack for 15 minutes, then turn out cakes, peel parchment, and let cool completely.
- For the frosting beat 8 ounces cream cheese and 1/2 cup butter until fluffy.
- Gradually add powdered sugar, 1 teaspoon vanilla, and enough heavy cream to reach a smooth spreadable consistency.
- Level cake layers if needed, place the first layer on a stand, and spread a thin coat of frosting.
- Set the second layer on top and frost the top and sides, smoothing or creating swirls as desired.
- Chill the assembled cake for at least 1 hour to set the cheesecake swirls before slicing.
Notes