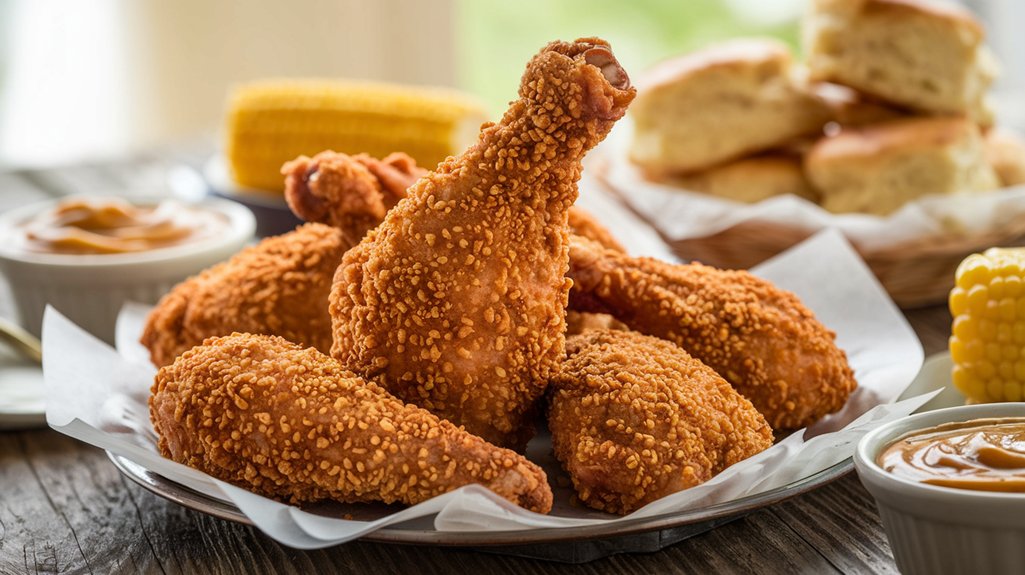
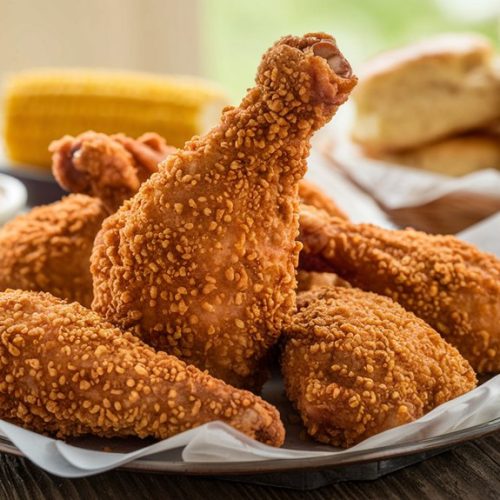
Creating KFC Copycat Fried Chicken at home allows you to explore the balance of flavors and textures that make this dish a beloved classic.
You’ll find that the key lies in mastering the blend of spices and achieving that perfect crispy coating.
As you experiment with ingredients like buttermilk and a variety of seasonings, you gain insights into the nuances of replicating a fast-food favorite.
Curious about how to achieve that golden-brown perfection?
Kitchen Tools Required
To successfully recreate this KFC copycat fried chicken, having the right kitchen tools is vital for efficiency and precision.
The right tools not only streamline your process but also guarantee consistent quality.
Here’s what you’ll need:
- Deep Fryer or Large Pot: A deep fryer provides even heat distribution, essential for achieving that iconic crispy crust. If you don’t have one, a large pot will work, but keep an eye on the oil’s temperature.
- Thermometer: Accuracy in temperature is important. A thermometer guarantees the oil is at the perfect frying temperature, and the chicken reaches a safe internal temperature.
- Wire Rack and Baking Sheet: After frying, place your chicken on a wire rack over a baking sheet. This setup drains excess oil, preserving crispiness without becoming greasy.
Recipe
If you’re a fan of crispy, juicy fried chicken, this KFC copycat recipe is sure to satisfy your cravings.
With its perfect blend of spices, this homemade version captures the essence of the famous fast-food classic.
The secret lies in the well-balanced seasoning mix that coats each piece of chicken, providing an irresistible flavor in every bite.
Whether you’re cooking for a family dinner or a gathering with friends, this recipe is designed to impress.
Before you start, gather all necessary equipment: a large mixing bowl, a whisk, a deep fryer or large pot, a thermometer, a wire rack, a baking sheet, and a pair of tongs.
Having everything ready will make the cooking process smoother. The ingredient list is straightforward, and most items can be found in your pantry.
Ingredients:
- 1 cup all-purpose flour
- 1 tablespoon salt
- 1 tablespoon ground black pepper
- 2 teaspoons garlic powder
- 2 teaspoons onion powder
- 1 teaspoon paprika
- 1 teaspoon cayenne pepper
- 1 teaspoon dried thyme
- 1 teaspoon dried oregano
- 1 cup buttermilk
- 8 pieces chicken drumsticks and thighs
- 4 cups vegetable oil
To create this delicious fried chicken, first mix together the flour, salt, black pepper, garlic powder, onion powder, paprika, cayenne pepper, thyme, and oregano in a large mixing bowl.
In another bowl, pour the buttermilk.
Dip each chicken piece in the buttermilk before coating it thoroughly with the flour mixture.
Let the coated chicken rest on a wire rack for 10 minutes to allow the coating to set.
Meanwhile, heat the vegetable oil in a deep fryer or pot to 350°F (175°C).
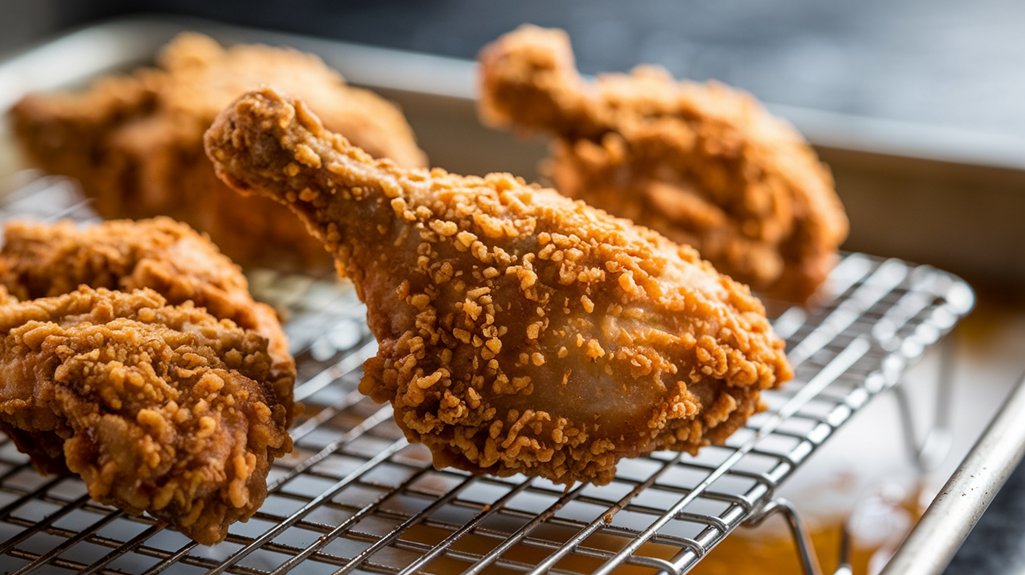
Carefully add the chicken to the hot oil and fry for 10-12 minutes until golden brown, checking that the internal temperature reaches 165°F (74°C).
Once cooked, transfer the chicken to a wire rack over a baking sheet to drain excess oil, allowing it to rest for at least 5 minutes before serving.
For best results, avoid overcrowding the frying pot, which can lower the oil temperature and result in uneven cooking.
Maintaining a consistent oil temperature is essential for achieving a crispy exterior, so adjust the heat as necessary.
Using a thermometer is a great way to guarantee the chicken is perfectly cooked without being overdone.
With these tips in mind, you’re on your way to making fried chicken that’s both flavorful and satisfying.
Cook & Prep Time
When you’re planning to make this KFC copycat fried chicken, knowing the cook and prep time is vital for organizing your kitchen activities efficiently.
The total preparation time is approximately 20 minutes, during which you’ll mix your flavorful coating and prepare the chicken for frying.
It’s a straightforward process, but attention to detail guarantees each step is executed perfectly.
Cooking the chicken takes another 20 minutes, which requires careful monitoring to achieve that iconic golden-brown crust.
Additionally, allowing the chicken to rest for 10 minutes afterward is important for flavor absorption and moisture retention.
This time management not only enhances your cooking rhythm but guarantees the outcome is a delicious, crispy delight reminiscent of KFC’s famous fried chicken.
Cooking Steps
To achieve that perfect KFC copycat crust, start by thoroughly combining your dry ingredients to guarantee an even flavor profile in every bite.
Next, dip each chicken piece into the buttermilk, which not only tenderizes the meat but also acts as a sticky base for the flour coating.
Once coated and rested on a wire rack, it’s essential to heat your oil to precisely 350°F to create a crispy outer layer without sacrificing the juicy interior.
Step 1. Combine Dry Ingredients Thoroughly
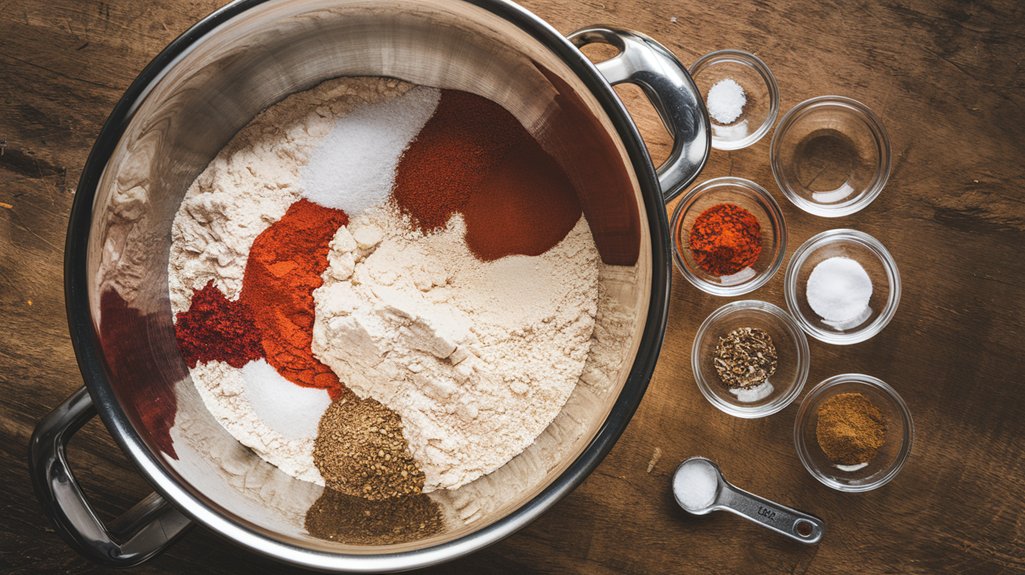
Before you start coating the chicken, it’s important to combine your dry ingredients thoroughly to guarantee that each piece of chicken gets an even distribution of flavors.
This step is critical in achieving that signature taste and texture.
Here’s how you can guarantee success:
- Use a large mixing bowl: A spacious bowl allows you to whisk the ingredients without spilling, guaranteeing a uniform blend.
- Whisk with purpose: Don’t just stir; whisk vigorously. This method breaks up clumps of flour and evenly distributes spices like paprika, cayenne, and thyme.
- Check for consistency: Look for a consistent color and texture, indicating that your seasonings are well-integrated.
This meticulous preparation guarantees every bite bursts with the intended flavor profile, reminiscent of KFC’s iconic fried chicken.
Step 2. Dip Chicken in Buttermilk
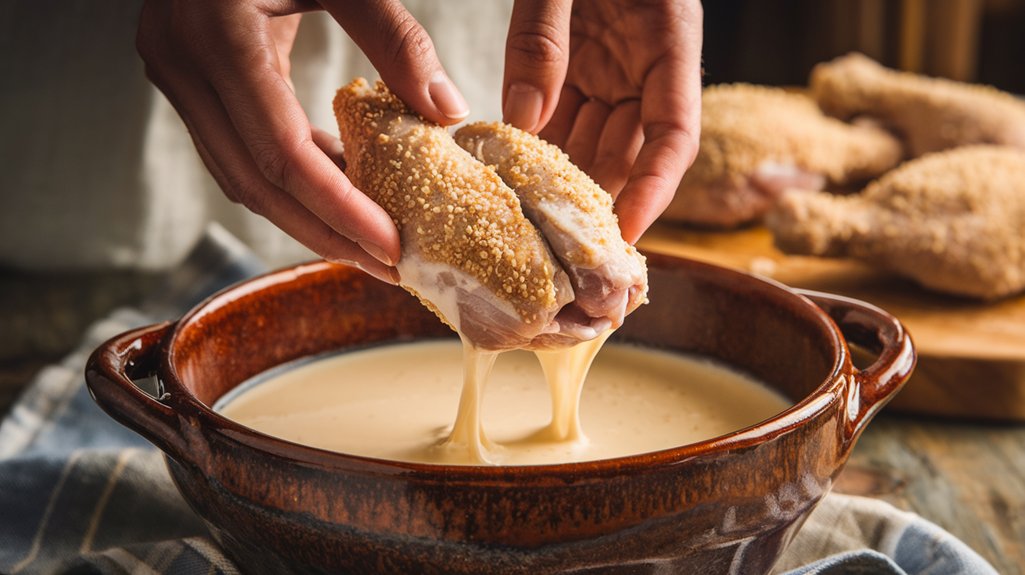
Immerse each piece of chicken into the buttermilk, guaranteeing it’s fully coated in this essential step.
This immersion isn’t just about flavor—it’s a tenderizing marvel.
The acidity in buttermilk breaks down the protein fibers, making your chicken succulent.
As you dip, focus on achieving a uniform coat, allowing the buttermilk to cling and seep into the meat.
| Step | Action | Insight |
|---|---|---|
| 1 | Pour buttermilk into a bowl | Prepares liquid base |
| 2 | Submerge chicken fully | Guarantees even coating |
| 3 | Let chicken sit briefly | Tenderizes and moistens |
| 4 | Check for complete coverage | No dry spots, thorough soak |
| 5 | Prepare for next coating step | Ready for flour application |
This step sets the stage for a flawless crust, promising a delightful bite.
Step 3. Coat Chicken Thoroughly in Flour
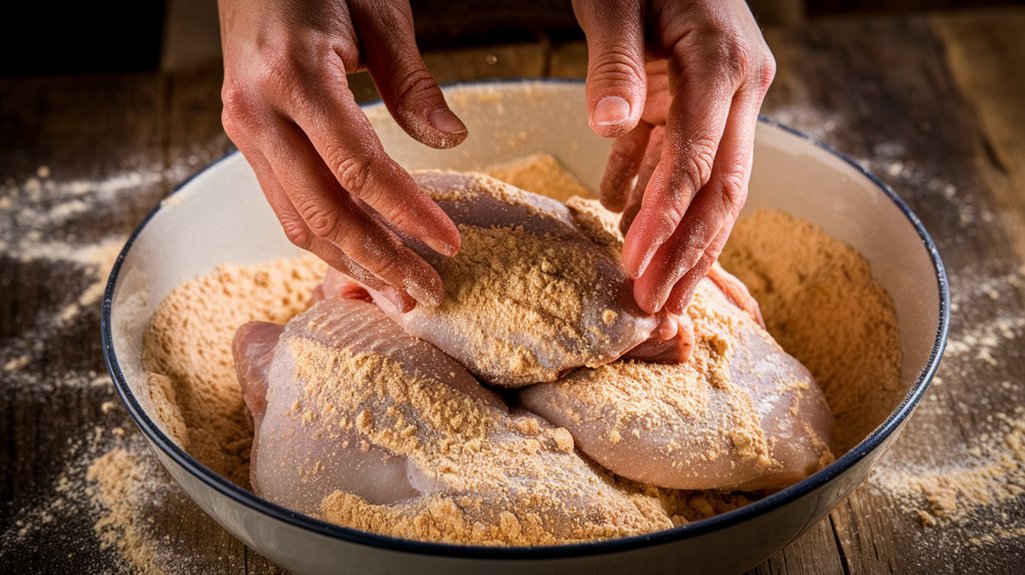
Grab the flour mixture and prepare to coat the chicken with precision.
This step is essential for achieving that signature crispy exterior.
Immerse each buttermilk-soaked piece in the flour, guaranteeing a thorough and even coating.
Pay attention to these key points:
- Even Coverage: Gently press the flour onto the chicken to fill all crevices. This guarantees an even, crispy texture.
- Double Dip: For extra crunch, consider re-dipping the chicken in buttermilk and flour. This creates a thicker crust.
- Shake Off Excess: Lightly shake off any surplus flour to prevent clumping and guarantee even frying.
Step 4. Rest Chicken on Wire Rack
Once you’ve meticulously coated the chicken, allow each piece to rest on a wire rack.
This step is more essential than it appears.
Resting the chicken lets the coating adhere better, reducing the chance of it falling off during frying.
It also gives the flour time to absorb the buttermilk, forming a glue-like bond that enhances the crispy texture.
Placing the chicken on a wire rack guarantees air circulates around each piece, preventing sogginess that might occur if they were placed directly on a flat surface.
This brief pause also allows you to verify even coating, providing a moment to reapply flour if necessary.
Ultimately, this resting period builds the foundation for achieving that perfect, golden-brown crunch.
Step 5. Heat Oil to 350°F
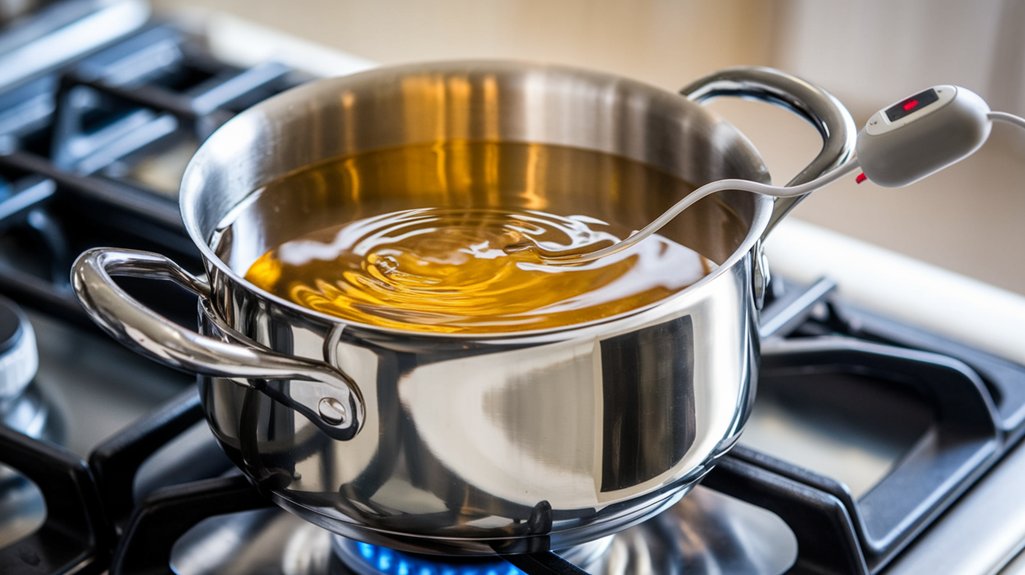
With the chicken resting and the coating perfectly adhered, your focus now shifts to heating the oil, a pivotal step for that signature crunch.
Begin by selecting a deep fryer or large pot, guaranteeing it’s deep enough to submerge the chicken without overcrowding.
Pour in about 4 cups of vegetable oil, offering a neutral flavor that complements the seasoned coating.
Here’s how to guarantee perfect frying conditions:
- Temperature Monitoring: Use a reliable thermometer to maintain the oil at 350°F (175°C). This guarantees the chicken cooks evenly and crisply.
- Heat Adjustment: Keep an eye on the heat, adjusting as needed to maintain consistent temperature.
- Safety Precautions: Carefully add chicken with tongs to avoid splattering, which can cause burns or mess.
These steps guarantee your chicken fries to perfection.
Final Thoughts
Crafting your own KFC copycat fried chicken at home not only satisfies cravings but also allows you to tweak the seasoning to suit your taste.
By making it yourself, you gain control over every ingredient, ensuring each piece is perfectly seasoned and cooked to your preference.
You can experiment by adjusting the spice levels or even adding your favorite herbs to personalize the recipe further.
The process is straightforward yet rewarding, offering a deeper understanding of how simple ingredients can transform into a delicious dish.
Remember, the key to success lies in maintaining the right oil temperature and ensuring the chicken reaches the correct internal temperature.
Embrace the process, and you’ll create a crispy, flavorful fried chicken that rivals the original.
Frequently Asked Questions
Can I Use Boneless Chicken for This Recipe?
You can use boneless chicken, but adjust the fry time as it cooks faster. Guarantee even coating and monitor internal temperature closely. Boneless pieces might lack some juiciness, so don’t skip resting time for best results.
What Can I Substitute for Buttermilk?
You can replace buttermilk with a mix of regular milk and lemon juice or vinegar. Combine one cup of milk with one tablespoon of either acid, let it sit for five minutes, then use it.
How Do I Make the Chicken Extra Spicy?
To make the chicken extra spicy, increase cayenne pepper to two teaspoons and add one teaspoon of crushed red pepper flakes. Infuse the buttermilk with hot sauce for an extra kick. Taste and adjust spices accordingly.
Can I Bake the Chicken Instead of Frying?
You can bake the chicken by preheating the oven to 400°F, placing the coated chicken on a wire rack over a baking sheet. Bake for 35-40 minutes until cooked through, ensuring it reaches 165°F internally.
How Do I Store Leftover Fried Chicken?
You’ll want to store leftover fried chicken in an airtight container in the refrigerator. For longer storage, freeze it. When reheating, use an oven to restore crispiness without overcooking. Avoid microwaving, as it turns soggy.
KFC Copycat Fried Chicken
Equipment
- 1 large mixing bowl
- 1 Whisk
- 1 Deep fryer or large pot
- 1 Thermometer
- 1 Wire rack
- 1 Baking sheet
- 1 pair of tongs
Ingredients
- 1 cup all-purpose flour
- 1 tablespoon salt
- 1 tablespoon ground black pepper
- 2 teaspoons garlic powder
- 2 teaspoons onion powder
- 1 teaspoon paprika
- 1 teaspoon cayenne pepper
- 1 teaspoon dried thyme
- 1 teaspoon dried oregano
- 1 cup buttermilk
- 8 pieces chicken drumsticks and thighs
- 4 cups vegetable oil
Instructions
- – Mix the flour, salt, black pepper, garlic powder, onion powder, paprika, cayenne pepper, thyme, and oregano in a large mixing bowl.
- – Pour the buttermilk into a separate bowl.
- – Dip each piece of chicken into the buttermilk, then coat it thoroughly with the flour mixture.
- – Place the coated chicken pieces on a wire rack and let them rest for 10 minutes.
- – Heat the vegetable oil in a deep fryer or large pot to 350°F (175°C).
- – Carefully add the chicken pieces to the hot oil using tongs and fry for 10-12 minutes until golden brown and cooked through.
- – Use a thermometer to ensure the internal temperature of the chicken reaches 165°F (74°C).
- – Remove the chicken from the oil and place it on a wire rack over a baking sheet to drain excess oil.
- – Allow the chicken to rest for at least 5 minutes before serving.
Notes