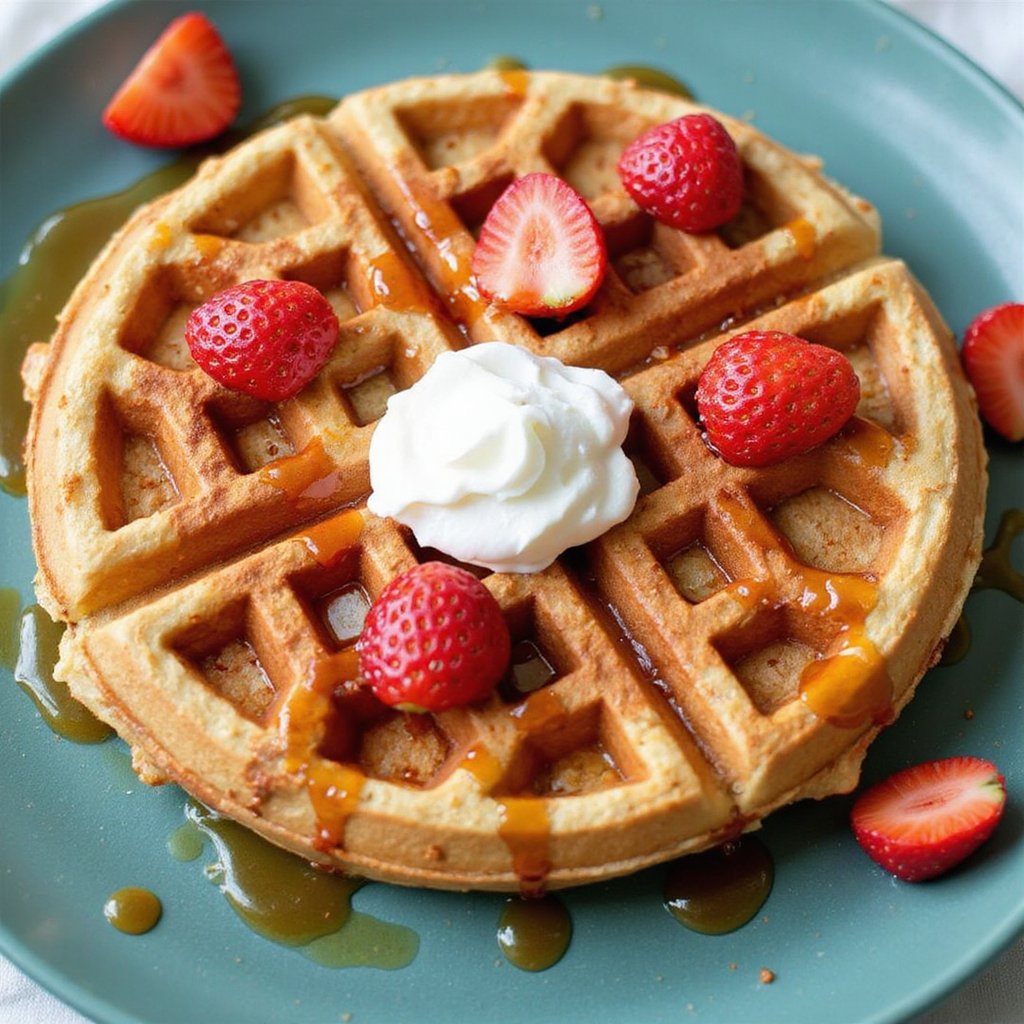
Imagine the comforting aroma of warm nutmeg and sweet vanilla wafting through your kitchen, as golden, crispy waffles emerge from the iron, their edges perfectly browned and inviting.
The soft, airy texture of these eggnog waffles offers a delightful contrast to the crisp exterior, creating a breakfast experience that feels like a warm hug on a chilly morning.
This recipe holds a special place in my heart because it brings back memories of cozy family breakfasts during the holidays, where the smell of freshly cooked waffles signaled the start of a festive day.
Whether you’re looking for a quick breakfast solution on a busy weekday morning or a leisurely Sunday brunch option, these eggnog waffles fit the bill perfectly.
I recall one hectic morning when this recipe saved the day, providing a delicious, stress-free meal that everyone loved.
Ready? Let’s cook up some comfort!
Why You’ll Love It
- Delivers bold flavor with the rich taste of eggnog and nutmeg.
- Uses pantry staples like flour, sugar, and baking powder for convenience.
- Makes breakfast special with a festive twist perfect for holiday mornings.
- Requires minimal prep time, ready in just 30 minutes including resting.
- Offers customization with various toppings like syrup, berries, or whipped cream.
Ingredients
- 2 cups all-purpose flour — provides structure; sift for best results.
- 2 tablespoons granulated sugar — adds sweetness; adjust to taste.
- 1 tablespoon baking powder — for leavening; guarantees waffles rise.
- 1/2 teaspoon ground nutmeg — offers warm spice; use freshly grated if possible.
- 1/4 teaspoon salt — enhances flavors; use fine sea salt.
- 2 large eggs — adds richness; use room temperature for better mixing.
- 1 3/4 cups eggnog — creamy base; opt for full-fat eggnog for richer flavor.
- 1/3 cup vegetable oil — guarantees moist texture; choose a neutral-flavored oil.
- 1 teaspoon vanilla extract — adds aroma; use pure extract for best taste.
Step-by-Step Method
Preheat the Waffle Iron
Turn on your waffle iron and set it to the desired temperature according to the manufacturer’s instructions.
This step guarantees that your waffle iron is hot and ready to cook the batter evenly, giving you crisp and golden waffles. Preheating also helps prevent the batter from sticking to the iron.
Mix the Dry Ingredients
In a mixing bowl, whisk together the flour, sugar, baking powder, nutmeg, and salt.
Verify the ingredients are evenly distributed to avoid clumps in the batter. This step forms the base of your waffle mix, providing structure and flavor.
Combine Wet Ingredients
In a separate bowl, beat the eggs until smooth.
Add the eggnog, vegetable oil, and vanilla extract. Mix well until the wet ingredients are fully combined. This mixture adds moisture and richness to the waffles, enhancing their flavor and texture.
Blend Wet and Dry Mixtures
Pour the wet ingredients into the dry ingredients.
Stir until just combined, making sure not to overmix. Overmixing can result in dense waffles. The batter should be slightly lumpy but evenly mixed to guarantee the baking powder activates properly.
Rest the Batter
Allow the batter to rest for 5 minutes.
This resting period lets the baking powder activate, leading to fluffier waffles. It also allows the flour to fully absorb the liquid ingredients, improving the batter’s consistency.
Grease the Waffle Iron
Lightly grease the waffle iron if necessary, using a pastry brush or non-stick spray.
This step prevents the batter from sticking, making it easier to remove the waffles once cooked. Proper greasing also contributes to even browning.
Cook the Waffles
Pour the appropriate amount of batter onto the preheated waffle iron using a ladle.
Close the lid and cook until the waffles are golden brown and crisp, following the waffle iron’s instructions. Cooking times may vary, so check for doneness.
Serve with Toppings
Serve the waffles warm with your choice of toppings such as maple syrup, whipped cream, or fresh berries.
These additions complement the rich, spiced flavor of the eggnog waffles, creating a delicious and satisfying breakfast treat.
Ingredient Swaps
- For a dairy-free version, substitute the eggnog with almond milk or coconut milk and add a teaspoon of nutmeg for flavor.
- Replace vegetable oil with melted coconut oil or applesauce for a healthier option.
- Use gluten-free all-purpose flour for a gluten-free alternative.
You Must Know
- Preheat your waffle iron according to the manufacturer’s instructions before starting the batter to guarantee it’s ready for cooking.
- Use room temperature eggnog and eggs to achieve a smoother batter and more even cooking.
- Let the batter rest for 5 minutes after mixing to allow the baking powder to activate, resulting in fluffier waffles.
- Avoid overmixing the batter; stir until just combined to prevent dense waffles.
- Cook a test waffle first to adjust the batter consistency or cooking time as needed for perfectly golden and crisp waffles.
Serving Tips
- Pair waffles with a dusting of powdered sugar and a dollop of whipped cream.
- Serve alongside crispy bacon or sausage for a savory contrast.
- Top with fresh berries and a drizzle of maple syrup for added sweetness.
- Add a sprinkle of cinnamon for a warm, spicy aroma.
- Serve with a side of fruit salad for a revitalizing balance.
Storage & Make-Ahead
Eggnog waffles can be stored in the refrigerator for up to 3 days.
For make-ahead options, prepare and freeze the waffles in a single layer.
Then store them in a freezer-safe bag for up to 2 months.
Reheat in a toaster or oven for best results.
Reheating
To gently reheat eggnog waffles, use a microwave for 20-30 seconds.
Alternatively, warm them in an oven at 350°F for 5-10 minutes.
Another option is to reheat them on a stovetop skillet.
Cultural Significance of Eggnog
Though often associated with holiday cheer and festive gatherings, eggnog boasts a rich cultural history that spans centuries.
Originating in medieval Britain, it was initially enjoyed by the upper class during winter’s chill, a creamy concoction of milk, eggs, and sherry.
As it crossed the Atlantic, eggnog found its place in American traditions, becoming a beloved holiday staple.
I delight in its versatility, whether sipped by the fire or infused into recipes like waffles, each bite a nod to its storied past.
The aromatic blend of nutmeg and creaminess evokes a sense of nostalgia, connecting us to generations before. It’s more than just a drink; it’s a delicious reminder of warmth, comfort, and shared moments across time.
Final Thoughts
Give these delightful eggnog waffles a try for a cozy breakfast treat, and feel free to tweak the nutmeg or toppings to suit your taste! Enjoy experimenting with flavors and making this recipe your own.
Frequently Asked Questions
Can I Freeze Leftover Eggnog Waffles for Later?
Absolutely, you can freeze leftover eggnog waffles! I wrap each one in parchment paper, then place them in a freezer bag. When I’m craving one, I just pop it in the toaster for a quick, delightful breakfast.
How Do I Prevent Waffles From Sticking to the Waffle Iron?
I always guarantee my waffle iron’s well-greased before pouring the batter. A light coat of cooking spray or brushing it with oil works wonders. Plus, preheating thoroughly can help prevent those delicious waffles from sticking.
What Can I Use if I Don’T Have a Waffle Iron?
If you don’t have a waffle iron, use a grill pan or skillet. Pour batter to form circles and cook until bubbles form. Flip and cook until golden. It’s not quite the same, but still delicious!
Can I Use a Different Type of Flour for This Recipe?
Absolutely, you can! I often substitute all-purpose flour with whole wheat or gluten-free flour. Just remember, each type alters texture and flavor slightly. Experiment to find your favorite version and enjoy the delicious results!
How Can I Make Vegan Eggnog Waffles?
I love turning traditional recipes vegan! Simply swap the eggs with flaxseed meal and water, use almond milk eggnog, and replace the oil with coconut oil. These changes make delicious, cruelty-free waffles that everyone will enjoy.

Eggnog Waffles
Equipment
- 1 waffle iron
- 1 Mixing bowl
- 1 Whisk
- 1 measuring cup
- 1 measuring spoon set
- 1 Ladle
Ingredients
- 2 cup all-purpose flour
- 2 tablespoon granulated sugar
- 1 tablespoon baking powder
- 1/2 teaspoon ground nutmeg
- 1/4 teaspoon salt
- 2 large eggs
- 1 3/4 cup eggnog
- 1/3 cup vegetable oil
- 1 teaspoon vanilla extract
Instructions
- Preheat the waffle iron according to the manufacturer’s instructions.
- In a mixing bowl, whisk together the flour, sugar, baking powder, nutmeg, and salt.
- In a separate bowl, beat the eggs and then add the eggnog, vegetable oil, and vanilla extract, mixing well.
- Pour the wet ingredients into the dry ingredients and stir until just combined; do not overmix.
- Let the batter rest for 5 minutes to allow the baking powder to activate.
- Lightly grease the waffle iron if necessary.
- Pour the appropriate amount of batter onto the waffle iron using a ladle.
- Cook the waffles until golden brown and crisp, following the waffle iron instructions.
- Serve the waffles warm with your choice of toppings such as maple syrup, whipped cream, or fresh berries.

