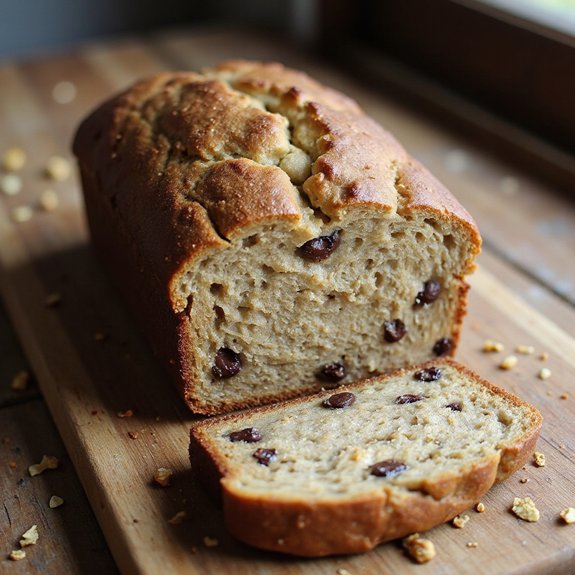
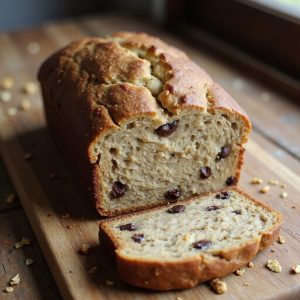
There’s something about the smell of warm banana bread drifting from the oven—sweet, toasty, and rich—that makes a kitchen feel like home.
This banana bread without sugar is a cozy, feel-good dessert (or snack) that comes together quickly, perfect for days when you need comfort but don’t want a sugar crash.
It’s ideal for busy families, beginners who are just learning to bake, and anyone cutting back on refined sugar without giving up treats.
I first leaned on this recipe during a hectic week of late-night work sessions; a simple loaf baked on Sunday carried me through, slice by slice, with tea in the evenings and yogurt in the mornings.
It shines for Sunday suppers, last-minute cravings, casual gatherings, and those chilly afternoons when you just want something warm in your hands and nourishing in your belly.
Ready to bring this dish to life?
Why You’ll Love It
- Delivers natural sweetness from ripe bananas, no refined sugar needed
- Stays moist and tender thanks to yogurt and bananas
- Mixes up in one bowl with simple pantry ingredients
- Customizes easily with nuts, chocolate chips, or warm spices
- Feels wholesome enough for breakfast, satisfying enough for dessert
Ingredients
- 3 large bananas, very ripe, mashed — skins heavily spotted or black for maximum sweetness
- 80 ml honey or maple syrup — choose a mild, good-quality variety
- 80 ml plain yogurt or Greek yogurt — full-fat keeps the crumb tender
- 60 ml neutral oil, melted butter, or coconut oil — pick one for flavor you enjoy
- 2 large eggs, room temperature — helps batter mix smoothly
- 5 ml vanilla extract — real vanilla gives better aroma
- 190 g all-purpose flour — spoon and level for accurate measuring
- 5 g baking soda — check it’s fresh so the loaf rises well
- 2 g fine salt — balances sweetness and enhances flavor
- 2 g ground cinnamon (optional) — adds gentle warmth and spice
- 60 g chopped walnuts (optional) — toast lightly for extra nuttiness
- 60 g dark chocolate chips, sugar-free (optional) — choose at least 70% cocoa
Step-by-Step Method
Preheat and Prepare Pan
Preheat the oven to 175°C (350°F).
Grease a 9×5-inch loaf pan lightly with oil or butter, then line it with parchment paper, letting some overhang for easy lifting.
Lightly grease the parchment as well.
Set the pan aside.
This step guarantees the banana bread releases cleanly and bakes evenly without sticking.
Mash the Ripe Bananas
Place the very ripe bananas in a large mixing bowl.
Use a fork or potato masher to mash them thoroughly until mostly smooth, with only small lumps remaining.
Aim for a thick, pourable consistency.
Well-mashed bananas help distribute sweetness and moisture evenly throughout the batter, giving the bread a tender texture.
Whisk in Wet Ingredients
Add honey or maple syrup, yogurt, oil (or melted butter/coconut oil), eggs, and vanilla extract to the mashed bananas.
Whisk everything together until the mixture looks smooth and uniform.
Ensure the eggs are fully incorporated and the oil is well blended.
This creates a cohesive wet base that will hydrate the dry ingredients properly.
Combine Dry Ingredients Separately
In another bowl, whisk together the flour, baking soda, salt, and cinnamon if using.
Break up any lumps, especially in the flour and baking soda.
Mixing dry ingredients separately helps distribute the leavening and seasoning evenly.
This prevents pockets of baking soda and ensures the bread rises uniformly with a consistent crumb.
Fold Wet and Dry Mixtures
Pour the dry ingredients into the bowl with the wet mixture.
Use a wooden spoon or spatula to gently fold them together.
Stop mixing as soon as you no longer see dry streaks of flour. Avoid vigorous stirring.
Overmixing develops gluten and can make the banana bread dense or tough instead of soft and tender.
Add Mix-Ins Gently
Sprinkle in the chopped walnuts and sugar-free dark chocolate chips, if using.
Fold them into the batter with just a few gentle strokes, distributing them evenly without overworking the mixture.
Mix-ins should be suspended throughout the batter.
Keeping this step brief preserves the light texture and prevents the loaf from becoming heavy.
Fill the Pan and Smooth
Pour the batter into the prepared loaf pan, scraping the bowl to use it all.
Spread the batter evenly with a spatula, smoothing the top so it bakes level.
Tap the pan lightly on the counter to release any large air bubbles.
This helps the loaf bake evenly and promotes a uniform, attractive top crust.
Bake Until Just Done
Place the pan in the preheated oven on the center rack.
Bake for 50–55 minutes.
Start checking around 50 minutes by inserting a toothpick into the center.
It should come out mostly clean with a few moist crumbs, not wet batter.
Avoid overbaking, which dries the loaf.
Adjust time slightly if your oven runs hot or cool.
Cool Briefly in the Pan
Remove the banana bread from the oven and set the pan on a wire rack.
Let it cool in the pan for about 10 minutes.
This short rest allows the structure to set, making it easier to handle.
The loaf will shrink slightly from the sides, helping it release cleanly without tearing or crumbling.
Transfer, Cool, and Slice
Use the parchment overhang to lift the loaf from the pan onto the wire rack.
Let it cool for at least 5 more minutes, preferably longer, before slicing.
Cooler bread cuts more neatly and holds together better.
Slice with a serrated knife into about 10 pieces.
Serve warm or at room temperature, plain or with a light spread.
Ingredient Swaps
- For dairy-free: use coconut yogurt or another plant-based yogurt, and swap butter for neutral oil or melted coconut oil.
- For gluten-free: replace the all-purpose flour with a 1:1 gluten-free baking blend.
- For nut-free: omit walnuts or replace with seeds (pumpkin, sunflower) or extra chocolate chips.
- For a richer, heartier loaf: swap up to half the all-purpose flour with whole wheat flour.
You Must Know
– Make-Ahead – *For* best next-day texture, cool the loaf until just slightly warm (about 45–60 minutes total after baking), then wrap tightly in plastic or store in an airtight container;
by the 12–24 hour mark the crumb sets and moisture redistributes, giving neater slices and a moister interior.
Serving Tips
- Serve warm slices with a dollop of Greek yogurt and a drizzle of honey.
- Pair with fresh berries or sliced strawberries for color and natural sweetness.
- Toast leftover slices lightly and spread with nut butter or cream cheese.
- Plate with a dusting of cinnamon and a few dark chocolate shavings on top.
- Offer alongside coffee or tea on a small wooden board with nuts for garnish.
Storage & Make-Ahead
Store banana bread tightly wrapped or in an airtight container in the fridge for up to 5 days.
It’s great for making ahead—flavor improves overnight.
For longer storage, wrap slices individually and freeze up to 3 months.
Thaw at room temperature or gently warm in the microwave or oven.
Reheating
Reheat banana bread gently.
Microwave slices 10–15 seconds wrapped in a damp paper towel.
Warm in a 160°C (325°F) oven for 8–10 minutes.
Toast lightly in a covered skillet.
Banana Bread in Pop Culture
To me, banana bread feels like a quiet character in the background of the story—never dramatic, always steady.
When it’s sugar-free and still deeply sweet from speckled bananas, it almost reads like a tiny rebellion: you and I choosing warmth, nourishment, and nostalgia, without needing it to be cloying.
Final Thoughts
Give this banana bread without sugar a try and see how naturally sweet and moist it can be, thanks to those extra-ripe bananas.
Feel free to tweak the mix-ins and spices to make it your own favorite version.
Frequently Asked Questions
Can I Make This Banana Bread Gluten-Free Without Sacrificing Texture?
Yes, you can. I’d use a good 1:1 gluten-free flour blend, add an extra spoonful of yogurt, and let the batter rest briefly so the loaf bakes tender, moist, and softly fragrant.
Is This Banana Bread Suitable for People With Diabetes?
It might be, but I’d ask your doctor first. I taste gentle sweetness from bananas and honey, not sharp sugar spikes, yet your meter’s glow after a warm slice will tell your story best.
How Can I Adjust the Recipe for High-Altitude Baking?
You’ll tweak it gently: I’d bake at 365°F, reduce baking soda slightly, add 1–2 tablespoons extra yogurt, and maybe a splash more honey so your loaf still rises tall, moist, and richly fragrant.
Can I Turn This Batter Into Banana Bread Pancakes or Waffles?
Yes, you can. I’d thin the batter with milk, let it rest, then pour it onto a sizzling griddle or waffle iron. Watch the edges crisp, smell caramelized banana, and serve with butter and warm maple syrup.
What’s the Best Way to Pack Slices for Freezing and Individual Snacks?
I’d cool slices fully, then wrap each in plastic like a snug little blanket, tuck into a freezer bag, freeze. For grab‑and‑go snacks, I’d thaw one on the counter; it softens, smells warm and sweet.
Banana Bread Without Sugar
Equipment
- 2 Mixing bowls
- 1 Fork or potato masher
- 1 Whisk
- 1 Wooden spoon or spatula
- 1 9×5-inch loaf pan
- 1 parchment paper sheet (optional but recommended)
- 1 Measuring cups set
- 1 Measuring spoons set
- 1 Wire rack
Ingredients
- 3 large bananas very ripe mashed
- 80 milliliter honey or maple syrup
- 80 milliliter plain yogurt or Greek yogurt
- 60 milliliter neutral oil melted butter or coconut oil
- 2 large eggs room temperature
- 5 milliliter vanilla extract
- 190 gram all-purpose flour
- 5 gram baking soda
- 2 gram fine salt
- 2 gram ground cinnamon optional
- 60 gram chopped walnuts optional
- 60 gram dark chocolate chips sugar-free optional
Instructions
- Preheat the oven to 175°C (350°F) and lightly grease and line the loaf pan with parchment paper.
- In a large bowl mash the ripe bananas with a fork until mostly smooth.
- Whisk in the honey or maple syrup, yogurt, oil, eggs, and vanilla until well combined.
- In a separate bowl whisk together the flour, baking soda, salt, and cinnamon.
- Gently fold the dry ingredients into the wet mixture just until no dry flour remains.
- Fold in the chopped walnuts and chocolate chips if using, being careful not to overmix.
- Pour the batter into the prepared loaf pan and smooth the top with a spatula.
- Bake for 50–55 minutes or until a toothpick inserted in the center comes out mostly clean with a few moist crumbs.
- Allow the banana bread to cool in the pan for 10 minutes.
- Transfer the loaf to a wire rack and let it cool for at least 5 more minutes before slicing and serving.
Notes

Cynthia Weatherford is a seasoned chef and culinary enthusiast who serves as the Recipe creator of Somonday. With decades of experience in the kitchen and a passion for exploring diverse cuisines, Cynthia brings a blend of creativity and technique to every dish. Known for transforming simple ingredients into show-stopping meals, Cynthia believes that cooking is an art form anyone can master. Dedicated to inspiring home cooks, Cynthia shares approachable recipes, pro tips, and culinary wisdom to make every meal memorable.


