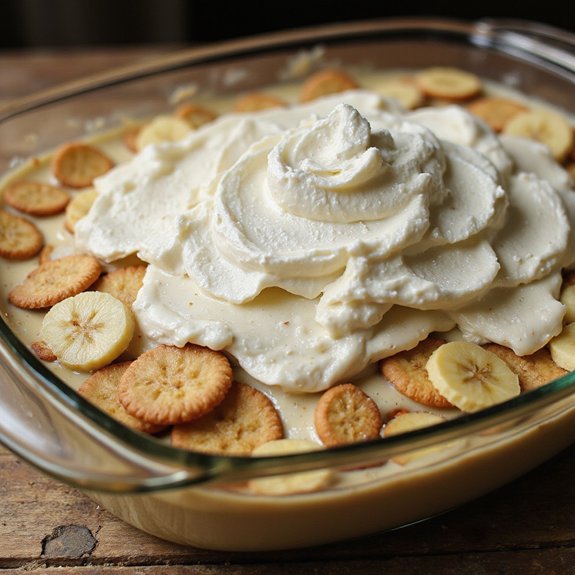
Envision this: a creamy, dreamy dessert that envelops you in warmth with every bite.
There’s something about banana pudding that feels like a comforting hug, with its layers of ripe bananas, vanilla wafers, and luscious custard.
It’s simple to make, yet the result is an indulgent treat that’s a favorite at gatherings.
As the ingredients meld and chill, they transform into a delightful harmony of flavors.
Let’s bring this classic dessert to life!
Kitchen Tools Required
- 1 large mixing bowl
- 1 medium saucepan
- 1 whisk
- 1 rubber spatula
- 1 9×13-inch baking dish
- 1 plastic wrap
- 1 refrigerator
Ingredients
- 1 cup granulated sugar
- 1/2 cup all-purpose flour
- 1/2 teaspoon salt
- 4 cups whole milk
- 4 large egg yolks
- 2 teaspoons vanilla extract
- 1 package vanilla wafer cookies
- 4 ripe bananas, sliced
- 1 cup heavy cream
- 2 tablespoons powdered sugar
Cook & Prep Time
To efficiently manage your time when making Banana Pudding, follow this timeline:
- Reading the Recipe (5 minutes):
- Spend a few minutes reading through the entire recipe to familiarize yourself with the steps and ingredients.
- Preparation (20 minutes):
- Gather all the equipment and ingredients.
- Pre-measure the sugar, flour, and salt into a large mixing bowl.
- Measure and set aside the milk, egg yolks, and vanilla extract.
- Slice the bananas and have the vanilla wafers ready.
- Get the baking dish and plastic wrap ready.
- Whisk together the sugar, flour, and salt in the bowl.
- Cooking (15 minutes):
- Gradually whisk the milk into the sugar mixture until smooth.
- Transfer the mixture to a saucepan and cook over medium heat.
- Stir constantly until it thickens and comes to a boil.
- Remove from heat and whisk in the egg yolks and vanilla extract.
- Let the pudding mixture cool slightly.
- Assembling (10 minutes):
- Layer half of the wafers and bananas in the baking dish.
- Pour half of the pudding over the layers.
- Repeat the layers with the remaining wafers, bananas, and pudding.
- Resting (4 hours):
- Cover the dish with plastic wrap.
- Refrigerate for at least 4 hours to set properly.
- Whipping Cream & Serving (10 minutes):
- Just before serving, whip the heavy cream with powdered sugar until soft peaks form.
- Spread the whipped cream over the pudding.
- Optionally, garnish with saved wafers and banana slices.
Feel free to adjust the timeline as needed to suit your pace and kitchen setup.
Recipe Instructions
Whisk together the sugar, flour, and salt in a large mixing bowl.
Gradually whisk in the milk until smooth.
Transfer the mixture to a medium saucepan and cook over medium heat, stirring constantly, until it thickens and comes to a boil.
Remove from heat and whisk in the egg yolks and vanilla extract until well combined.
Let the pudding mixture cool slightly.
In the baking dish, layer half of the vanilla wafers, followed by half of the banana slices.
Pour half of the pudding mixture over the bananas and wafers.
Repeat the layers with the remaining wafers, bananas, and pudding.
Cover the dish with plastic wrap and refrigerate for at least 4 hours.
Before serving, whip the heavy cream with powdered sugar until soft peaks form and spread over the pudding.
Serving Tips
- Fresh Mint Leaves: Add a pop of color and a rejuvenating aroma to contrast the sweet, creamy pudding.
- Crushed Vanilla Wafers: Sprinkle on top for added crunch and a delightful texture contrast.
- Chopped Nuts: Walnuts or pecans add a nutty flavor and a satisfying crunch.
- Caramel Sauce Drizzle: Introduce a rich, sweet layer that complements the banana flavor perfectly.
- Chocolate Shavings: Sprinkle on top for an elegant touch and a hint of chocolatey goodness.
Storage
To store banana pudding, cover with plastic wrap and refrigerate for up to 3 days.
Ensure it’s airtight to prevent bananas from browning and maintain freshness.
Avoid freezing.
Freezing
Banana pudding can be frozen for longer storage.
Wrap tightly to prevent ice crystals.
Thaw in the refrigerator before serving.
Note that texture may change slightly, especially the bananas.
Reheating
To reheat banana pudding, gently warm individual portions in the microwave for 20-30 seconds.
Avoid overheating to prevent the pudding from becoming runny.
Serve immediately for the best texture.
Final Thoughts
Banana pudding is a classic American dessert that combines layers of vanilla wafers, ripe bananas, and creamy pudding.
It’s a comforting treat that’s perfect for any occasion.
The key to a great banana pudding lies in the balance of flavors and textures.
The creamy pudding should be smooth and rich, complementing the sweetness of the bananas and the crunch of the wafers.
For best results, make certain your bananas are ripe but firm to maintain their texture in the dessert.
If you desire a stronger banana flavor, a touch of banana extract can enhance the taste.
Additionally, consider garnishing with whole wafers and banana slices for a decorative touch.
Once prepared, the banana pudding benefits from resting in the refrigerator, allowing the flavors to meld together beautifully.
With a bit of patience and care, you’ll have a delightful dessert that’s sure to impress.
Frequently Asked Questions
Can I Use a Different Type of Milk for This Recipe?
You can certainly experiment with different types of milk. Opt for almond or oat milk for a nutty undertone, but remember, it may alter the texture slightly. Explore your culinary creativity and enhance your dessert’s unique flavor profile!
Is It Possible to Make This Banana Pudding Gluten-Free?
You can easily transform this dessert into a gluten-free delight by swapping the all-purpose flour with a gluten-free flour blend. Make certain your vanilla wafers are gluten-free too. The flavors will still enchant your taste buds!
How Can I Prevent the Bananas From Browning?
To keep your bananas from browning, immerse them in lemon juice for a few minutes. This citrusy barrier preserves their vibrant hue. Pat them dry before layering, ensuring they don’t overpower the dessert’s flavors.
Can I Substitute the Vanilla Wafers With a Different Cookie?
You can swap vanilla wafers with shortbread cookies or graham crackers. They’ll add a unique texture and flavor. Just make sure they’re fresh and crisp to maintain that delightful crunch amidst the creamy layers.
What’s the Best Way to Transport Banana Pudding for a Party?
Carefully cover your dessert with foil or a lid, ensuring it’s secure. Place it in an insulated bag or cooler with ice packs. This keeps it chilled and intact, so it arrives fresh and ready to impress.

Banana Pudding
Equipment
- 1 large mixing bowl
- 1 Medium saucepan
- 1 Whisk
- 1 Rubber spatula
- 1 9×13 inch baking dish
- 1 plastic wrap
- 1 refrigerator
Ingredients
- 1 cup granulated sugar
- 1/2 cup all-purpose flour
- 1/2 teaspoon salt
- 4 cups whole milk
- 4 large egg yolks
- 2 teaspoons vanilla extract
- 1 package vanilla wafer cookies
- 4 ripe bananas sliced
- 1 cup heavy cream
- 2 tablespoons powdered sugar
Instructions
- In a large mixing bowl, whisk together the sugar, flour, and salt.
- Gradually whisk in the milk until smooth.
- Transfer the mixture to a medium saucepan and cook over medium heat, stirring constantly, until it thickens and comes to a boil.
- Remove from heat and whisk in the egg yolks and vanilla extract until well combined.
- Let the pudding mixture cool slightly.
- In the baking dish, layer half of the vanilla wafers, followed by half of the banana slices.
- Pour half of the pudding mixture over the bananas and wafers.
- Repeat the layers with the remaining wafers, bananas, and pudding.
- Cover the dish with plastic wrap and refrigerate for at least 4 hours.
- Before serving, whip the heavy cream with powdered sugar until soft peaks form and spread over the pudding.
Notes

Cynthia Weatherford is a seasoned chef and culinary enthusiast who serves as the Recipe creator of Somonday. With decades of experience in the kitchen and a passion for exploring diverse cuisines, Cynthia brings a blend of creativity and technique to every dish. Known for transforming simple ingredients into show-stopping meals, Cynthia believes that cooking is an art form anyone can master. Dedicated to inspiring home cooks, Cynthia shares approachable recipes, pro tips, and culinary wisdom to make every meal memorable.


