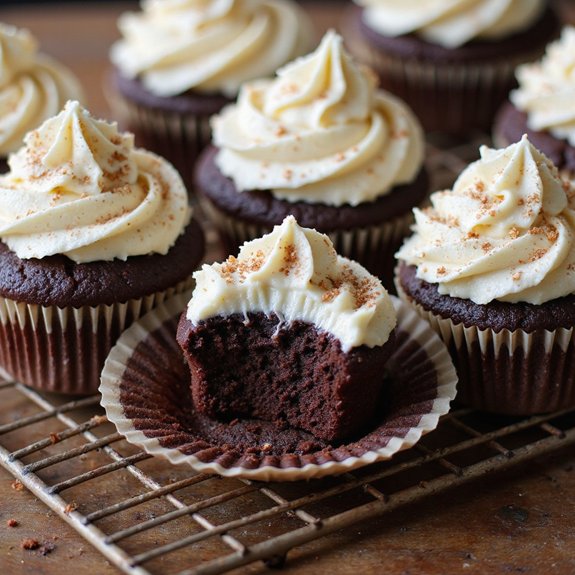
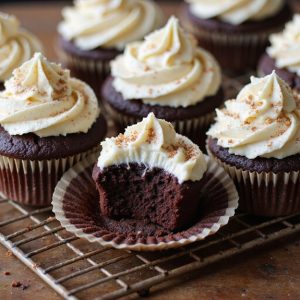
There’s something about peeling back a cupcake wrapper to reveal a midnight-black crumb that instantly feels luxurious. These Black Velvet Cupcakes are a cozy dessert with a dramatic twist—tender, moist, and topped with a cloud of creamy frosting.
You’ll smell warm cocoa and vanilla as they bake, and in about 30 minutes, you’ve got bakery-worthy treats cooling on your counter. They’re perfect for sweet-tooth fans, beginner bakers, and anyone who loves a show-stopping dessert without extra fuss.
I still remember a stormy Friday when friends dropped by unexpectedly; this recipe saved the evening. I whipped up a batch, and by the time we’d finished catching up, the kitchen was filled with the scent of chocolate and the promise of something special.
These cupcakes shine at birthday parties, holiday gatherings, or whenever a last-minute craving hits.
Ready to bring this dish to life?
Why You’ll Love It
- Delivers bold chocolate flavor with striking, dramatic black velvet color
- Produces ultra-soft, tender crumb that stays moist for days
- Pairs tangy cream cheese frosting with rich, cocoa-forward cupcake base
- Uses simple techniques and basic tools—great for confident beginners
- Impresses at parties, holidays, and Halloween with bakery-style presentation
Ingredients
- 1 cup all-purpose flour, sifted — measure lightly for tender crumbs
- 2 tbsp cornstarch, sifted — helps mimic cake flour softness
- 1/3 cup unsweetened cocoa powder, dark or Dutch-processed — gives rich chocolate base
- 1 tsp baking powder — check it’s fresh for proper rise
- 1/2 tsp baking soda — balances the acidity of buttermilk and vinegar
- 1/4 tsp fine sea salt — sharpens the chocolate flavor
- 3/4 cup granulated sugar — provides structure and sweetness
- 1/4 cup light brown sugar, packed — adds moisture and caramel notes
- 1/2 cup unsalted butter, softened — should dent easily when pressed
- 2 large eggs, at room temperature — blend more evenly into batter
- 1 tsp vanilla extract — choose pure vanilla for best flavor
- 1/2 cup buttermilk, at room temperature — creates a tender, velvety crumb
- 1 tsp white vinegar — enhances color and leavening
- 1 tbsp black cocoa powder, optional — deepens color and Oreo-like flavor
- 1/4 tsp black gel food coloring, optional — for intense inky black hue
- 8 oz cream cheese, softened — block-style, not whipped or spreadable
- 1/2 cup unsalted butter, softened (for frosting) — brings richness to frosting
- 2 1/2 cups powdered sugar, sifted — prevents lumpy frosting
- 1 tsp vanilla extract (for frosting) — rounds out tangy cream cheese
- 1 pinch fine sea salt (for frosting) — balances sweetness
- 1–2 tbsp heavy cream or milk — adjust for smooth, pipeable consistency
Step-by-Step Method
Preheat & Prepare Pan
Preheat the oven to 350°F (175°C). Line a standard 12-cup muffin tin with paper liners so the cupcakes release easily.
Clear your workspace and gather all ingredients and tools. This keeps the process efficient and avoids missed steps. Set butter, eggs, cream cheese, and buttermilk out to reach room temperature.
Combine Dry Ingredients
Whisk together sifted flour, cornstarch, cocoa powder, optional black cocoa, baking powder, baking soda, and salt in a medium bowl. Break up any lumps completely.
Proper sifting and whisking guarantee an even, light crumb and consistent color. Set this bowl aside so it’s ready to alternate with the liquid mixture later.
Cream Butter & Sugars
Beat softened butter with granulated and light brown sugar in a large bowl using an electric mixer on medium speed. Continue for 2–3 minutes, until the mixture looks pale and fluffy.
Incorporate air thoroughly here to help the cupcakes rise well. Scrape down the bowl to ensure no sugar or butter sticks to the sides.
Add Eggs & Vanilla
Add the eggs one at a time to the creamed butter mixture. Beat well after each addition so the mixture doesn’t separate.
Mix in the vanilla extract until fully combined. Avoid overbeating once the eggs are in; you want a smooth, cohesive batter without making it too dense or tough.
Mix Buttermilk & Color
Stir together the buttermilk, white vinegar, and optional black gel food coloring in a small bowl. Mix until the color looks completely even.
The vinegar gently reacts with the leaveners to create a tender texture. Adjust the food coloring based on how deep and dramatic you want the final cupcake shade to be.
Alternate Dry & Wet Additions
Add one-third of the dry ingredients to the butter mixture and mix on low just until incorporated. Pour in half the buttermilk mixture and blend on low, scraping the bowl.
Repeat with another third of the dry ingredients, the remaining buttermilk, then the final dry third. Stop mixing as soon as a smooth batter forms.
Fill Liners & Bake
Divide the batter evenly among the 12 liners, filling each about two-thirds full for even domes. Place the pan in the preheated oven and bake for 16–18 minutes.
Check doneness with a toothpick inserted in the center; it should come out clean or with a few moist crumbs, not wet batter.
Cool Cupcakes Thoroughly
Remove the muffin tin from the oven and let the cupcakes cool in the pan for 5 minutes. Carefully transfer them to a wire rack to prevent overbaking from residual heat.
Allow them to cool completely for at least 25 minutes. Frosting warm cupcakes will cause the cream cheese frosting to melt and slide off.
Beat Cream Cheese & Butter
While cupcakes cool, place softened cream cheese and butter for the frosting in a large bowl. Beat on medium speed until perfectly smooth and creamy, about 2 minutes.
Scrape down the sides often so no lumps remain. This step is vital for a silky frosting texture that spreads or pipes cleanly.
Flavor & Sweeten Frosting
Add vanilla extract and a pinch of fine sea salt to the cream cheese mixture. Mix briefly to combine.
Gradually add sifted powdered sugar, about 1/2 cup at a time. Beat on low at first to avoid a sugar cloud, then increase to medium until thick, fluffy, and fully combined before adding more sugar.
Adjust Consistency & Frost
Add 1–2 tablespoons of heavy cream or milk to loosen the frosting to a smooth, spreadable consistency. Beat until it holds soft peaks and feels easy to pipe.
Transfer to a piping bag or use an offset spatula to generously frost each fully cooled cupcake. Create swirls or smooth tops, depending on your preferred look.
Chill Briefly & Serve
Place the frosted cupcakes in the refrigerator for 10–15 minutes to gently firm the frosting. This helps the swirls hold their shape and makes transport easier.
Serve the cupcakes slightly cool or at room temperature for the best flavor and texture. Store any leftovers covered in the fridge, then soften before enjoying.
Ingredient Swaps
- No buttermilk? Use 1/2 cup milk + 1/2 tablespoon vinegar or lemon juice, rest 5 minutes.
- No black cocoa? Use regular unsweetened cocoa; color will be lighter but flavor still rich.
- Make it egg-free: swap each egg for 1/4 cup unsweetened applesauce or a commercial egg replacer.
- Dairy-free: use vegan butter in both batter and frosting, and dairy-free milk + vinegar instead of buttermilk and cream.
- Budget sugar swap: use all granulated sugar if you don’t have light brown sugar (same total amount).
You Must Know
- Avoid • If the batter looks curdled after adding eggs or buttermilk: Keep going and add a spoonful of the dry ingredients to the bowl, stirring gently just until it smooths out. The flour helps re-emulsify the mixture, preventing dense patches once baked.
- Troubleshoot • If your cupcakes sink in the middle: Check that your baking powder and soda are under 6–9 months old, and fill liners only about 2/3 full.
Overfilling or weak leaveners cause a big dome that collapses as it cools.
- Flavor Boost • For deeper “black velvet” character: Use the full 1 tablespoon black cocoa and taste the batter; if it’s intensely cocoa-y but slightly bitter, increase sugar by 1–2 tablespoons next time to balance while keeping the dramatic color.
- Scale • For a double batch: Multiply every ingredient by 2 but still portion into no more than 24 cupcakes per oven load, rotating the pan at 10 minutes if your oven has hot spots.
Overcrowding or uneven heat leads to lopsided domes and inconsistent texture.
Serving Tips
- Serve on a white platter to highlight the deep black and creamy frosting contrast.
- Garnish with dark chocolate curls, black sprinkles, or a single fresh raspberry on top.
- Pair with cold milk, hot coffee, or a small glass of dessert wine.
- Add a dramatic touch using black cupcake liners and metallic cupcake toppers.
- For parties, arrange in tiers on a cake stand with scattered cocoa nibs.
Storage & Make-Ahead
Store frosted cupcakes in an airtight container in the fridge for up to 4 days.
Bring to room temperature before serving.
Unfrosted cupcakes keep slightly better, about 5 days refrigerated.
Both unfrosted cupcakes and cream cheese frosting freeze well separately for up to 2 months.
Thaw overnight in the fridge.
Reheating
Reheat cupcakes gently: in the microwave at 50% power for 8–12 seconds.
Or in a 300°F (150°C) oven for 5–7 minutes.
Avoid stovetop reheating to preserve texture.
Cupcakes in Pop Culture
Every time cupcakes pop up in movies, TV shows, or on social media, they’re treated less like simple desserts and more like tiny symbols of celebration, comfort, and a little bit of mischief.
I always notice how a single frosted swirl can soften a tense scene or turn a breakup into a moment of quiet defiance—someone biting into cake instead of crying.
When I picture my black velvet cupcakes on screen, I imagine that inky crumb against white cream cheese peaks, like moonlight on wet asphalt.
They’d sit in a moody bakery window, waiting for the character who needs a small, edible act of rebellion.
One bite, and suddenly the world feels darker, sweeter, and a little more dangerous.
Final Thoughts
Give these Black Velvet Cupcakes a try and see how beautifully they fit everything from casual treats to special occasions.
Don’t be afraid to tweak the cocoa level, coloring, or frosting style to make them completely your own.
Frequently Asked Questions
Can I Make These Cupcakes Gluten-Free Without Sacrificing Texture and Rise?
Yes, you can. I’d grab a high‑quality 1:1 gluten‑free blend with xanthan, sift it well, and keep the buttermilk and eggs room‑warm; you’ll still bite into a tender, domed, velvety crumb.
How Do High-Altitude Baking Adjustments Affect Black Velvet Cupcake Results?
High altitude makes them rise fast, dry out, and dome wildly. I’d tell you: cut leavening slightly, add a splash more buttermilk, bake cooler and shorter, watching for that tender, velvety crumb to just set.
Are There Natural Coloring Options to Replace Black Gel Food Coloring Entirely?
You can, and I’d love to show you how: I’d lean on ultra‑dark cocoa, a whisper of espresso, maybe finely ground black sesame or charcoal, letting their inky swirls tint your batter naturally, luxuriously.
What Wine or Cocktail Pairs Best With Black Velvet Cupcakes for Entertaining?
I’d pour you a ruby port or mix a blackberry bourbon smash; their dark fruit, caramel warmth, and gentle spice echo the cupcake’s cocoa richness, turning each bite into a slow, velvety nightfall on your tongue.
How Can I Scale This Recipe for a Large Event or Wedding?
I’d triple the recipe per 36 guests, then bake a small test batch. I’d weigh ingredients for precision, stagger baking in rotations, cool on racks, then chill frosted cupcakes in deep trays before transporting.
Black Velvet Cupcakes
Equipment
- 1 standard 12-cup muffin tin
- 12 paper cupcake liners
- 2 medium mixing bowls
- 1 large mixing bowl
- 1 Electric mixer or whisk
- 1 Rubber spatula
- 1 Measuring cups set
- 1 Measuring spoons set
- 1 Fine mesh sieve
- 1 wire cooling rack
- 1 toothpick
- 1 piping bag and tip (optional, for frosting)
Ingredients
- 1 cup all-purpose flour sifted
- 2 tablespoon cornstarch sifted
- 1/3 cup unsweetened cocoa powder dark or Dutch-processed
- 1 teaspoon baking powder
- 1/2 teaspoon baking soda
- 1/4 teaspoon fine sea salt
- 3/4 cup granulated sugar
- 1/4 cup light brown sugar packed
- 1/2 cup unsalted butter softened to room temperature
- 2 large eggs at room temperature
- 1 teaspoon vanilla extract
- 1/2 cup buttermilk at room temperature
- 1 teaspoon white vinegar
- 1 tablespoon black cocoa powder optional for deeper color
- 1/4 teaspoon black gel food coloring optional for intense color
- 8 ounce cream cheese softened to room temperature
- 1/2 cup unsalted butter for frosting; softened to room temperature
- 2 1/2 cup powdered sugar sifted
- 1 teaspoon vanilla extract for frosting
- 1 pinch fine sea salt for frosting
- 1 1–2 tablespoons heavy cream or milk as needed for frosting
Instructions
- Preheat the oven to 350°F (175°C) and line a 12-cup muffin tin with paper cupcake liners.
- In a medium bowl whisk together the flour, cornstarch, cocoa powder, black cocoa powder if using, baking powder, baking soda, and salt until well combined.
- In a large mixing bowl beat the softened butter, granulated sugar, and brown sugar with an electric mixer on medium speed until light and fluffy, about 2–3 minutes.
- Add the eggs to the butter mixture one at a time, beating well after each addition, then mix in the vanilla extract.
- In a small bowl stir together the buttermilk, vinegar, and black gel food coloring if using until evenly tinted.
- Add one-third of the dry ingredients to the butter mixture and mix on low just until incorporated.
- Pour in half of the buttermilk mixture and mix on low until combined, scraping the bowl as needed.
- Repeat with another third of the dry ingredients, then the remaining buttermilk mixture, and finish with the last third of the dry ingredients, mixing just until a smooth batter forms.
- Divide the batter evenly among the 12 liners, filling each about two-thirds full.
- Bake the cupcakes for 16–18 minutes, or until a toothpick inserted in the center comes out clean or with a few moist crumbs.
- Remove the pan from the oven and let the cupcakes cool in the tin for 5 minutes.
- Transfer the cupcakes to a wire rack and let them cool completely for at least 25 minutes before frosting.
- While the cupcakes cool, beat the cream cheese and softened butter together in a large bowl on medium speed until smooth and creamy, about 2 minutes.
- Add the vanilla extract and salt to the cream cheese mixture and mix until incorporated.
- Gradually add the powdered sugar, 1/2 cup at a time, beating on low at first then increasing to medium until thick and fluffy.
- Add 1–2 tablespoons of heavy cream or milk, beating until the frosting is smooth and spreadable, adjusting consistency as needed.
- Once the cupcakes are fully cool, transfer the frosting to a piping bag or use an offset spatula to generously frost each cupcake.
- Chill the frosted cupcakes for 10–15 minutes if you want the frosting to firm slightly before serving.
Notes

Cynthia Weatherford is a seasoned chef and culinary enthusiast who serves as the Recipe creator of Somonday. With decades of experience in the kitchen and a passion for exploring diverse cuisines, Cynthia brings a blend of creativity and technique to every dish. Known for transforming simple ingredients into show-stopping meals, Cynthia believes that cooking is an art form anyone can master. Dedicated to inspiring home cooks, Cynthia shares approachable recipes, pro tips, and culinary wisdom to make every meal memorable.


