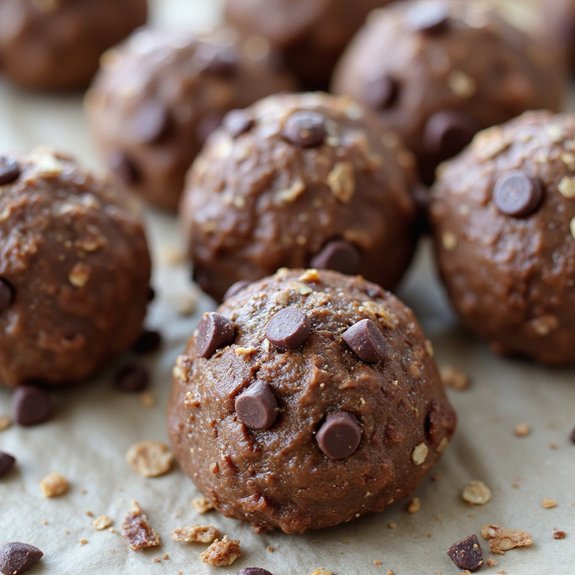
There’s something about rolling rich, cocoa-scented batter between your palms and feeling it transform into perfect bite-sized treats.
These brownie protein balls are a cozy, no-bake dessert snack—soft, fudgy, and studded with chocolate—ready in about 15 minutes from start to finish.
They’re ideal for busy professionals, gym-goers, meal-preppers, and anyone who craves something sweet but still wants a boost of protein.
I first made a batch late one Sunday night after realizing I’d a packed week ahead and nothing grab-and-go for those hectic afternoons.
By Wednesday, those brownie bites had saved me from at least three vending-machine runs and one skipped lunch.
They’re just right for last-minute cravings, after-school snacks, casual gatherings, or keeping in the fridge for those evenings when you need “just a little something” with your tea.
Ready to bring this chocolatey, nourishing treat to life?
Why You’ll Love It
- Delivers rich, brownie-like chocolate flavor in a bite-sized snack
- Packs in protein to keep you fuller between meals
- Requires zero baking and mixes up in one bowl
- Uses simple pantry staples you likely already have on hand
- Stores and freezes well for convenient grab-and-go snacks
Ingredients
- 1 cup rolled oats — old-fashioned, not instant, for best texture
- 1 cup chocolate protein powder — choose a brand you enjoy on its own
- 1⁄4 cup unsweetened cocoa powder — use Dutch-process for deeper chocolate flavor
- 1⁄2 cup natural peanut butter, smooth — well-stirred so it’s evenly creamy
- 1⁄3 cup honey — adjust slightly to taste based on protein powder sweetness
- 1⁄4 cup mini dark chocolate chips — 60–70% cacao for a richer brownie vibe
- 1⁄3 cup milk of choice — dairy or unsweetened plant milk both work
- 1 teaspoon vanilla extract — real vanilla adds better flavor than imitation
- 1⁄4 teaspoon fine sea salt — helps balance sweetness and deepen chocolate taste
Step-by-Step Method
Line the Tray
Line a baking sheet with parchment paper. Smooth out any wrinkles so the balls sit flat. This prevents sticking and makes cleanup easier.
Set the tray aside within easy reach of your work area. Make sure the sheet fits in your refrigerator so you can chill the balls later without rearranging everything.
Combine the Dry Ingredients
Add rolled oats, chocolate protein powder, cocoa powder, and fine sea salt to a mixing bowl.
Stir thoroughly with a wooden spoon or spatula until everything looks evenly combined.
Break up any lumps of protein powder or cocoa as you mix. Even distribution now helps make certain each bite has consistent flavor and texture.
Add the Wet Ingredients
Pour in the peanut butter, honey, milk, and vanilla extract. Aim to drizzle the milk and honey around the bowl to help them disperse better.
Place the peanut butter in small dollops instead of one big scoop.
This makes it easier to incorporate and reduces the risk of dry pockets remaining in the mixture.
Mix into a Thick Dough
Stir the mixture steadily until a thick, slightly sticky dough forms.
Scrape down the sides and bottom of the bowl to capture any unmixed dry ingredients.
Continue mixing until you see no streaks of powder. The dough should hold together when pressed but still feel soft.
Take your time to achieve an even consistency.
Fold in the Chocolate Chips
Sprinkle the mini dark chocolate chips over the dough. Gently fold them in using your spatula, turning the dough from the bottom up.
Rotate the bowl as you go to ensure even distribution.
Avoid overmixing so the dough doesn’t become too compact. Stop when every scoop appears speckled with chocolate.
Adjust the Dough Consistency
Test the dough by pressing some between your fingers. If it crumbles, add milk one teaspoon at a time, mixing after each addition.
If it feels too sticky, sprinkle in oats a tablespoon at a time. Stir gently and test again.
Aim for a dough that forms smooth balls without sticking heavily to your hands.
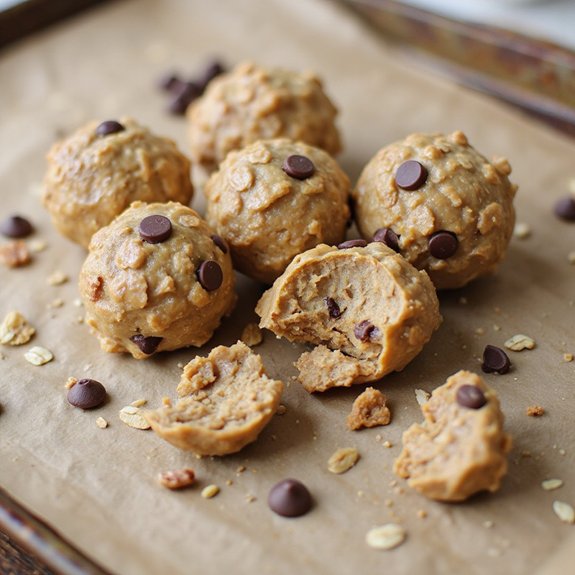
Roll into Balls
Scoop out tablespoon-sized portions of dough using a measuring spoon or small scoop. Roll each portion between your palms into a smooth ball.
Slightly dampen your hands if the dough sticks. Work quickly to keep the mixture from warming too much.
Place each finished ball onto the prepared parchment-lined baking sheet.
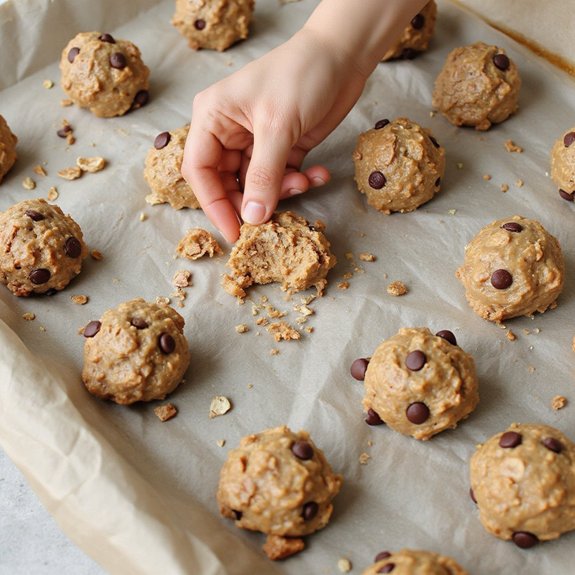
Chill and Store
Arrange the balls with a little space between them on the tray. Refrigerate for at least 30 minutes so they firm up and hold their shape.
Once chilled, transfer the balls to an airtight container. Keep them stored in the refrigerator for up to one week, or freeze them for longer storage if desired.
Ingredient Swaps
- Make it nut-free by swapping peanut butter for sunflower seed butter or tahini; use allergy-friendly chocolate chips.
- For vegan, use plant-based protein powder, maple syrup or agave instead of honey, dairy-free milk, and vegan chocolate chips.
- Use whatever you have on hand: oat flour instead of rolled oats (start with slightly less), any milk (dairy or non-dairy), and almond or cashew butter in place of peanut butter for a milder flavor.
You Must Know
– Troubleshoot • If the dough crumbles instead of holding a ball
Add 1 teaspoon milk at a time and squeeze a small piece in your fist until it keeps the shape with only a few tiny cracks. This guarantees enough moisture so the balls don’t fall apart after chilling.
– Troubleshoot • If the mixture glues to your hands
Lightly dampen your palms or chill the bowl for 10–15 minutes before shaping; the dough should feel cool and just tacky, not leave thick streaks on your skin. This keeps the balls smooth and easier to roll.
– Flavor Boost • For deeper “brownie” flavor
Add a pinch of instant espresso powder (⅛–¼ teaspoon) or an extra 1 teaspoon cocoa; taste a small pinch of dough—if it reminds you of brownie batter before chilling, you’re there. Coffee notes enhance chocolate without making it taste like coffee.
– Scale • When doubling or halving the recipe
Keep the oats and milk adjustable, not fixed: start with ¾ of the called-for milk, then adjust by teaspoons until the dough packs into a firm ball that doesn’t slump on the tray. Protein powders absorb liquid differently, so texture is more reliable than strict ratios.
– Make-Ahead • To freeze for grab-and-go snacks
Chill shaped balls until firm (about 30–45 minutes), then freeze in a single layer 1–2 hours before moving to a container. They’ll keep 2–3 months and soften in 10–15 minutes at room temp for best texture.
Serving Tips
- Serve chilled with fresh berries for a post-workout snack plate.
- Pair 2–3 balls with Greek yogurt for a higher-protein mini-meal.
- Arrange in mini cupcake liners on a platter for party-friendly finger food.
- Pack in small containers with sliced apples or bananas for on-the-go fuel.
- Crumble over smoothie bowls or oatmeal as a chewy, chocolatey topping.
Storage & Make-Ahead
Brownie protein balls keep well in an airtight container in the fridge for up to 1 week, making them perfect for meal prep.
You can also freeze them in a single layer, then store in a bag or container for up to 3 months.
Thaw briefly before eating.
Reheating
Gently warm brownie protein balls if desired.
Microwave 5–10 seconds, or place in a low oven briefly.
For stovetop, set in a covered pan over lowest heat just until softened.
Post-Workout Snack Culture
Once they’re chilled and ready, I like to think of these brownie protein balls as tiny rewards waiting at the end of a tough workout—soft, fudgy, and already portioned so I can just grab, eat, and move on.
Post‑workout snack culture can feel intense: color‑coded shakers, exact macros, timers buzzing the second you re‑rack your weights.
I’ve tried that rigid routine, but what actually keeps me consistent is knowing there’s something satisfying and real waiting in my fridge.
I’ll finish a lifting session, muscles humming, and picture that cold, chocolatey bite—oats for staying power, protein to rebuild, just enough sweetness to feel indulgent.
It turns recovery into a small ritual instead of another fitness chore.
Final Thoughts
Give these brownie protein balls a try and see how they fit into your snack routine—you might find yourself making them every week.
Don’t hesitate to tweak the nut butter, sweetness, or mix-ins to create your perfect grab-and-go treat.
Frequently Asked Questions
Can I Make These Brownie Protein Balls Completely Sugar-Free or Keto-Friendly?
Yes, you can; I’d swap honey for liquid monk fruit or allulose, use unsweetened chocolate chips, and choose low‑carb peanut butter. I’ve done this for late‑night cravings, and the texture still felt decadently truffle‑like.
What’s the Approximate Cost per Ball Using Common Grocery-Store Ingredients?
I’d ballpark each at about $0.25–$0.40 using store brands. When I batch-make them on Sunday, a single crumpled receipt feels like it magically stretches into a week of grab-and-go chocolate energy.
Can I Safely Ship These Brownie Protein Balls in the Mail?
Yes, you can, but only if they stay cool and firm; I’d pack them in a snug tin with parchment, add an ice pack, choose fast shipping, and avoid blazing summer heat like it’s lava.
How Do Altitude or Very Humid Climates Affect the Dough Texture?
Altitude makes the dough drier and crumbly; humidity makes it sticky and soft. When I bake in Denver, I add extra milk; visiting my aunt in Florida, I stir in more oats until it holds.

Brownie Protein Balls
Equipment
- 1 Mixing bowl
- 1 Wooden spoon or spatula
- 1 Measuring cups set
- 1 Measuring spoons set
- 1 Baking sheet
- 1 sheet parchment paper
Ingredients
- 1 cup rolled oats
- 1 cup chocolate protein powder
- 1/4 cup unsweetened cocoa powder
- 1/2 cup natural peanut butter smooth
- 1/3 cup honey
- 1/4 cup mini dark chocolate chips
- 1/3 cup milk of choice
- 1 teaspoon vanilla extract
- 1/4 teaspoon fine sea salt
Instructions
- Line a baking sheet with parchment paper and set aside.
- In a mixing bowl, combine rolled oats, chocolate protein powder, cocoa powder, and sea salt and stir to mix evenly.
- Add peanut butter, honey, milk, and vanilla extract to the dry mixture.
- Stir with a wooden spoon or spatula until a thick, slightly sticky dough forms and no dry pockets remain.
- Fold in the mini dark chocolate chips until evenly distributed.
- If the mixture feels too dry and crumbly, add milk 1 teaspoon at a time and stir until it holds together when pressed.
- If the mixture feels too sticky, add 1 tablespoon of oats at a time and stir until it is firm enough to roll.
- Scoop out tablespoon-sized portions of the dough and roll them between your palms into balls.
- Place each ball on the prepared baking sheet, spacing them slightly apart.
- Refrigerate the brownie protein balls for at least 30 minutes to firm up before serving.
- Store the chilled balls in an airtight container in the refrigerator.
Notes

Cynthia Weatherford is a seasoned chef and culinary enthusiast who serves as the Recipe creator of Somonday. With decades of experience in the kitchen and a passion for exploring diverse cuisines, Cynthia brings a blend of creativity and technique to every dish. Known for transforming simple ingredients into show-stopping meals, Cynthia believes that cooking is an art form anyone can master. Dedicated to inspiring home cooks, Cynthia shares approachable recipes, pro tips, and culinary wisdom to make every meal memorable.