There’s something about a swirl of frosting and a burst of color that makes the whole kitchen feel like a fairground.
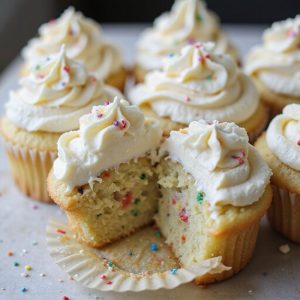
These Carnival Cupcakes are a cozy, joy-sparking dessert—fluffy vanilla cakes crowned with billowy, butter-smooth icing and pops of sprinkles that crunch softly between your teeth.
You’ll smell warm sugar and butter in under 30 minutes, and they’re on the table soon after, making them perfect for busy weeknights, school events, or last‑minute celebrations.
I still remember a rainy Tuesday when a forgotten bake-sale note surfaced at bedtime.
These quick cupcakes saved the day—no fancy skills, just simple steps, pantry staples, and a tray of color that made my child beam the next morning.
They shine at birthday parties, casual gatherings, or whenever a sudden sweet craving hits and you need something fun, fast, and festive.
Ready to bring this dish to life?
Why You’ll Love It
- Delivers colorful, bakery-style cupcakes perfect for birthdays and celebrations
- Uses simple pantry ingredients and straightforward, beginner-friendly steps
- Bakes up light, tender crumb with rich vanilla buttercream frosting
- Showcases cheerful rainbow sprinkles inside and on top for fun
- Customizes easily with different sprinkle colors, liners, or toppings
Ingredients
- 1 1/2 cups all-purpose flour — measure lightly spooned and leveled
- 1 1/2 teaspoons baking powder — make sure it’s fresh for best rise
- 1/4 teaspoon fine salt — balances sweetness and flavor
- 1/2 cup unsalted butter, softened — should indent easily when pressed
- 3/4 cup granulated sugar — regular white sugar works best
- 2 large eggs, room temperature — helps batter emulsify smoothly
- 2 teaspoons vanilla extract — real vanilla gives better flavor
- 1/2 cup whole milk, room temperature — adds richness and moisture
- 1/4 cup rainbow sprinkles (jimmies style) — choose bake-stable sprinkles
- 1 cup unsalted butter, softened (for frosting) — butter should be pliable, not greasy
- 3 cups powdered sugar, sifted (for frosting) — sifting prevents lumpy frosting
- 2 tablespoons heavy cream or milk (for frosting) — adjust for desired frosting texture
- 1 teaspoon vanilla extract (for frosting) — adds classic buttercream flavor
- 1 pinch fine salt (for frosting) — cuts sweetness slightly
- 1/4 cup rainbow sprinkles (for topping) — add just before serving so colors stay bright
Step-by-Step Method
Preheat & Prep Pan
Preheat the oven to 350°F (175°C). Line a standard 12-cup muffin pan with paper cupcake liners. Set the pan aside on a stable surface near your workspace.
Gather all ingredients and equipment so everything is ready before you start mixing.
This helps the batter come together quickly and bake evenly.
Combine Dry Ingredients
Measure the flour, baking powder, and salt into a medium mixing bowl. Whisk them together until fully combined and lump-free.
This distributes the leavening and salt evenly through the flour. Set the bowl aside.
Keeping the dry mixture ready guarantees you can add it smoothly to the wet ingredients later without overworking the batter.
Cream Butter & Sugar
Place the softened butter and granulated sugar in a large mixing bowl. Beat with an electric mixer on medium speed until light and fluffy, about 2–3 minutes.
Scrape down the sides of the bowl as needed. Proper creaming adds air, helping the cupcakes rise and develop a tender, soft crumb.
Add Eggs & Vanilla
Crack the eggs into a small bowl to check for shells, then add them to the butter mixture one at a time.
Beat well after each addition until fully incorporated. Mix in the vanilla extract until combined.
Scrape down the bowl again. This step builds structure and flavor while keeping the batter smooth and cohesive.
Add Dry Ingredients & Milk Alternately
Add half of the dry ingredient mixture to the wet ingredients. Mix on low speed just until combined, avoiding overmixing.
Pour in the milk and mix on low until incorporated. Add the remaining dry ingredients and mix again just until no dry streaks remain.
Stop as soon as the batter looks uniform and smooth.
Fold In Sprinkles Gently
Sprinkle the 1/4 cup rainbow jimmies over the batter. Use a rubber spatula to fold them in gently with broad, sweeping motions.
Turn the bowl as you fold to distribute evenly. Avoid vigorous stirring, which can cause the colors to bleed and toughen the cupcake texture by overworking the gluten.
Fill the Cupcake Liners
Use a spoon, scoop, or measuring cup to divide the batter evenly among the 12 liners. Fill each liner about two-thirds full to allow room for rising.
Smooth the tops slightly if needed. Evenly filled cups help the cupcakes bake at the same rate and produce consistent sizes and nicely domed tops.
Bake & Test Doneness
Place the muffin pan in the preheated oven. Bake for 16–18 minutes, rotating the pan once if your oven bakes unevenly.
Check for doneness by inserting a toothpick into the center of a cupcake. It should come out clean or with a few moist crumbs, but no wet batter clinging to it.
Cool Completely on Rack
Remove the pan from the oven and place it on a heat-safe surface. Let the cupcakes cool in the pan for 5 minutes so they set and are easier to handle.
Transfer each cupcake to a wire cooling rack. Allow them to cool completely, about 25 minutes, before adding frosting to prevent melting.
Beat Butter for Frosting
Add the softened butter for the frosting to a large mixing bowl. Beat on medium speed for about 2 minutes until creamy, smooth, and slightly lighter in color.
Scrape down the sides and bottom of the bowl. Properly creamed butter forms the base of a fluffy, stable buttercream that pipes beautifully.
Add Sugar, Cream & Flavor
Gradually add the sifted powdered sugar, about 1 cup at a time, mixing on low after each addition until incorporated.
Pour in the heavy cream or milk, vanilla extract, and a pinch of salt. Increase the mixer speed to medium-high and beat for 2–3 minutes until the frosting is light, fluffy, and spreadable.
Adjust Texture & Pipe
Check the frosting consistency. If it’s too soft, beat in a little more powdered sugar; if too thick, add a splash more cream.
Fit a piping bag with a large star tip and fill it with the frosting. Pipe generous swirls onto each fully cooled cupcake, then immediately top with remaining rainbow sprinkles so they adhere.
Ingredient Swaps
- Dairy-free: Use plant-based butter and non-dairy milk (soy, oat, or almond) in both batter and frosting; swap heavy cream for the same non-dairy milk.
- Gluten-free: Replace all-purpose flour with a 1:1 gluten-free baking blend that contains xanthan gum.
- Egg-free: Substitute each egg with 1/4 cup unsweetened applesauce or use a commercial egg replacer per package directions.
- Lower-budget: Use regular salted butter (omit added salt) and 2% milk instead of whole milk and heavy cream.
- Sprinkles: If jimmies aren’t available, use finely chopped chocolate or colored sanding sugar, adding them just before baking to reduce color bleed.
You Must Know
– Flavor Boost – To deepen flavor without extra sweetness, swap 2–3 tablespoons of the milk for sour cream or plain yogurt; the gentle tang and added fat give a slightly denser, “bakery-style” crumb while keeping the same 1/2 cup total dairy volume.
Serving Tips
- Serve on a bright cake stand with extra loose sprinkles scattered around.
- Pair with vanilla ice cream or rainbow sherbet for a fun party dessert.
- Arrange cupcakes in a circle and add candles for a festive cupcake “cake.”
- Display in colorful paper wrappers that match your party theme or decor.
- Serve with small glasses of milk or fruity punch for kids’ parties.
Storage & Make-Ahead
Carnival Cupcakes keep well covered at cool room temperature for 2 days or refrigerated up to 5 days.
For best make-ahead results, bake cupcakes a day early and frost before serving.
Unfrosted cupcakes and buttercream each freeze well separately for up to 2 months; thaw overnight in the refrigerator.
Reheating
Reheat cupcakes gently: in microwave at 50% power 8–10 seconds.
In a 300°F (150°C) oven for 5–8 minutes.
Avoid stovetop, which heats unevenly and can dry them out.
State-Fair Bake Sale Favorites
Every summer, I can spot a good state-fair bake sale table from across the midway by the bright frosting, crinkled paper liners, and handwritten recipe cards curling at the corners.
That’s where cupcakes like these always steal the show—tall swirls of buttercream catching the sun, rainbow sprinkles winking like confetti after a parade.
I love how a simple vanilla base fits right in beside blue-ribbon pies and church-lady bars.
Your first bite is all tender crumb and creamy frosting, familiar as the tilt-a-whirl’s hum.
Kids point to the brightest one; adults pretend they’re buying “for later” and lick frosting off their thumbs before they’ve stepped away.
These carnival cupcakes don’t just sell out—they disappear into memories.
Final Thoughts
Now that you’ve got the basics down, it’s your turn to bring these Carnival Cupcakes to life—sprinkle them your way, play with colors or flavors, and make them your own.
However you tweak them, they’re sure to bring a little celebration to your kitchen.
Frequently Asked Questions
Can I Turn These Cupcakes Into a Full-Size Layer Cake Instead?
Yes, you can. I’d double the recipe, bake it in two 8-inch pans, and watch the batter puff up like a county-fair prize cake—perfect crumb, confetti bursts, and swoops of frosting between tender layers.
How Do I Adapt This Recipe for High-Altitude Baking Conditions?
You’ll tweak for altitude: I’d reduce sugar slightly, increase flour and liquid a bit, raise oven temp 15–25°F, shorten baking time, and add structure—an extra egg white—so your crumb stays tender, nostalgic, and sky-high.
What’s the Best Way to Freeze the Unfrosted Cupcakes Long-Term?
Freeze them cooled and unfrosted: I’d wrap each one tightly in plastic, tuck them into a freezer bag, press out the air, then freeze up to three months—thaw gently at room temperature, like saving a little celebration.
How Can I Make These Cupcakes Allergy-Friendly for School Events?
You can make them allergy-friendly by swapping butter and milk for oat-based alternatives, using a flax “egg,” and choosing gluten-free flour; I’d frost simply, label ingredients clearly, and watch kids’ faces light up like childhood summers.
Can I Decorate These Cupcakes With Fondant Instead of Buttercream?
Yes, you can absolutely use fondant instead of buttercream. I’d spread a thin buttercream “glue,” then blanket each cupcake with soft fondant, adding playful cut‑out shapes that feel like old‑fashioned bakery window memories.
Carnival Cupcakes
Equipment
- 1 Standard 12-cup muffin pan
- 12 paper cupcake liners
- 2 medium mixing bowls
- 1 large mixing bowl
- 1 Whisk
- 1 electric mixer or stand mixer
- 1 Rubber spatula
- 1 measuring cup set
- 1 measuring spoon set
- 1 wire cooling rack
- 1 piping bag
- 1 large star piping tip
Ingredients
- 1 1/2 cup all-purpose flour
- 1 1/2 teaspoon baking powder
- 1/4 teaspoon fine salt
- 1/2 cup unsalted butter softened
- 3/4 cup granulated sugar
- 2 large eggs room temperature
- 2 teaspoon vanilla extract
- 1/2 cup whole milk room temperature
- 1/4 cup rainbow sprinkles jimmies style
- 1 cup unsalted butter for frosting; softened
- 3 cup powdered sugar sifted for frosting
- 2 tablespoon heavy cream or milk for frosting
- 1 teaspoon vanilla extract for frosting
- 1 pinch fine salt for frosting
- 1/4 cup rainbow sprinkles for topping
Instructions
- Line the muffin pan with paper cupcake liners and preheat the oven to 350°F (175°C).
- In a medium mixing bowl, whisk together the flour, baking powder, and salt, then set aside.
- In a large mixing bowl, beat the softened butter and granulated sugar with an electric mixer until light and fluffy, about 2 to 3 minutes.
- Add the eggs to the butter mixture one at a time, beating well after each addition, then mix in the vanilla extract.
- Add half of the dry ingredients to the wet mixture and mix on low speed just until combined.
- Pour in the milk and mix on low until incorporated, then add the remaining dry ingredients and mix just until no dry streaks remain.
- Gently fold in the 1/4 cup rainbow sprinkles with a rubber spatula, being careful not to overmix.
- Divide the batter evenly among the 12 lined muffin cups, filling each about two-thirds full.
- Bake the cupcakes for 16 to 18 minutes, or until a toothpick inserted in the center comes out clean or with a few moist crumbs.
- Remove the pan from the oven and let the cupcakes cool in the pan for 5 minutes.
- Transfer the cupcakes to a wire cooling rack and let them cool completely, about 25 minutes, before frosting.
- While the cupcakes cool, beat 1 cup softened butter in a large mixing bowl until creamy and smooth, about 2 minutes.
- Gradually add the powdered sugar, 1 cup at a time, mixing on low after each addition until incorporated.
- Add the heavy cream or milk, vanilla extract, and pinch of salt, then beat on medium-high speed for 2 to 3 minutes until light and fluffy.
- Adjust the frosting consistency by adding a little more powdered sugar if too soft or a splash more cream if too thick.
- Fit a piping bag with a large star tip and fill it with the prepared frosting.
- Pipe generous swirls of frosting onto each cooled cupcake.
- Immediately sprinkle the frosted cupcakes with the remaining rainbow sprinkles so they stick to the frosting.
Notes

Cynthia Weatherford is a seasoned chef and culinary enthusiast who serves as the Recipe creator of Somonday. With decades of experience in the kitchen and a passion for exploring diverse cuisines, Cynthia brings a blend of creativity and technique to every dish. Known for transforming simple ingredients into show-stopping meals, Cynthia believes that cooking is an art form anyone can master. Dedicated to inspiring home cooks, Cynthia shares approachable recipes, pro tips, and culinary wisdom to make every meal memorable.