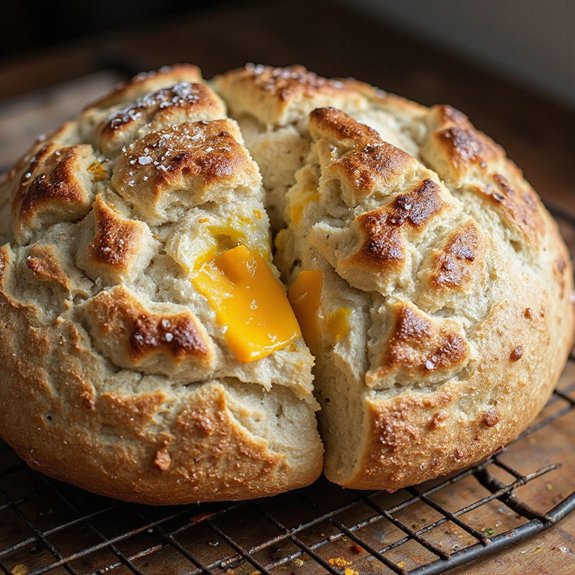
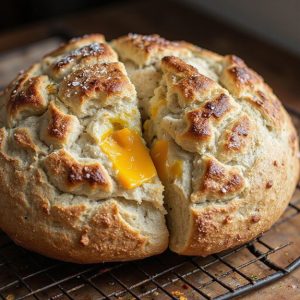
There’s something about pulling a loaf of cheddar sourdough from the oven that makes the whole kitchen feel like home.
The crust is a deep, burnished gold, crackling as it cools, while ribbons of melted cheddar peek through every rustic fold. This is cozy comfort food at its best—a slow-rise, bake-on-the-weekend kind of bread that rewards a little patience with big, cheesy flavor.
It’s perfect for anyone who loves hearty soups and stews, grilled cheese with a twist, or impressive yet approachable loaves for sharing.
I still remember a rainy Sunday when friends dropped by unexpectedly. I sliced a warm cheddar sourdough, piled it next to a simple pot of tomato soup, and suddenly an ordinary afternoon turned into an easy, laughter-filled meal.
This loaf shines at casual gatherings, Sunday suppers, or whenever you need an effortless showstopper on the table. Ready to bring this loaf to life?
Why You’ll Love It
- Delivers bold, tangy-cheddar flavor in every bite of crusty sourdough
- Creates gorgeous cheese pockets and a tender, slightly chewy crumb
- Elevates simple meals, from soups to sandwiches, with bakery-quality bread
- Relies on simple ingredients and hands-off overnight fermentation time
- Bakes beautifully in a Dutch oven for impressive oven spring
Ingredients
- 100 g active sourdough starter — 100% hydration, recently peaked and bubbly
- 350 g water — room temperature for easier mixing
- 500 g bread flour — high-protein for better gluten structure
- 10 g fine sea salt — helps strengthen gluten and boost flavor
- 150 g sharp cheddar cheese — cut into small even cubes for good distribution
- 15 g unsalted butter, melted — for brushing crust after baking, optional
- 5 g olive oil — for lightly greasing bowl if desired
- 10 g coarse cornmeal or flour — for dusting banneton and Dutch oven bottom
Step-by-Step Method
Mix the Starter and Water
Whisk the active sourdough starter and room-temperature water in a large mixing bowl. Stir until the starter is mostly dissolved and the mixture looks milky and smooth. This helps distribute the wild yeast evenly. Make sure there are no thick clumps of starter before moving on to add the flour.
Combine the Flour and Form a Shaggy Dough
Add the bread flour to the starter mixture. Mix with your hand or a dough scraper until no dry flour remains. Scrape the sides and bottom of the bowl as you work.
Stop once the dough looks rough and shaggy; it doesn’t need to be smooth yet at this stage.
Rest the Dough for Autolyse
Cover the bowl with a clean kitchen towel and let the dough rest for 30 minutes at room temperature. Don’t add salt yet.
This resting time hydrates the flour and helps gluten begin to form naturally. The dough will feel softer and more extensible after this short pause.
Incorporate the Salt Thoroughly
Sprinkle the fine sea salt evenly over the dough. Pinch and squeeze the dough between your fingers to work the salt in. Fold the dough over itself several times as you go.
Continue until the salt feels fully dissolved and incorporated, with no visible grains remaining.
Perform the First Stretch and Fold
Grab one side of the dough, stretch it upward gently, and fold it over toward the center. Rotate the bowl and repeat this motion 4–6 times around.
Work carefully to avoid tearing the dough. This technique builds structure and strength without heavy kneading.
Rest the Dough Between Folds
Cover the bowl again and let the dough rest for 30 minutes at room temperature. During this rest, the gluten relaxes and fermentation begins.
You should start to see small bubbles forming on the surface. Avoid disturbing the dough until the next round of folds.
Repeat Stretch and Folds to Build Strength
Perform three more rounds of stretch-and-folds, every 30 minutes. Each time, stretch and fold 4–6 times around the bowl.
The dough will gradually feel smoother, stronger, and more elastic. Keep the bowl covered between rounds to prevent drying and to maintain warmth.
Fold in the Cheddar Cheese Gently
During the second or third round of stretch-and-folds, add the cheddar cubes. Sprinkle them over the dough surface, then fold the dough repeatedly to trap the cheese inside.
Distribute the cubes as evenly as possible. Work gently so the cheese doesn’t poke through and tear the dough.
Finish Bulk Fermentation Until Doubled
After the final stretch-and-fold, cover the dough and let it continue fermenting at room temperature. Wait until it looks roughly doubled in size, airy, and domed, usually 3–5 hours total from initial mixing.
Look for visible bubbles and a jiggly, light feel when you gently shake the bowl.
Turn the Dough Out Carefully
Lightly flour your work surface to prevent sticking. Gently loosen the dough from the sides of the bowl with a scraper.
Turn it out onto the counter, trying not to deflate it too much. Preserve as many air bubbles as possible to keep the crumb open and light.
Shape the Dough into a Tight Loaf
Fold the edges of the dough toward the center to form a rough ball or oval. Then gently drag the dough against the counter to create surface tension.
Use small, controlled movements, rotating as you go. Aim for a smooth, taut top and a neatly sealed underside seam.
Prepare the Banneton or Bowl
Dust your banneton basket or a medium bowl generously with flour or coarse cornmeal. Make sure the sides are coated so the dough won’t stick during proofing.
If using a bowl, you can also line it with a lightly floured kitchen towel. Tap out any large clumps of flour.
Transfer and Proof the Shaped Dough
Place the shaped dough seam-side up into the prepared banneton or bowl. Cover it with a clean kitchen towel.
Let it proof at room temperature for 45–60 minutes. During this time, it should puff slightly and relax. Don’t let it overproof or it may weaken and spread.
Cold Proof the Dough Overnight
Move the covered dough to the refrigerator for a cold proof of 8–12 hours. This slow fermentation deepens flavor and makes the dough easier to score.
Keep it on a stable shelf where it won’t be disturbed. The dough will continue to rise slightly in the cold.
Preheat the Dutch Oven Thoroughly
About 45 minutes before baking, place your Dutch oven with its lid into the oven. Preheat to 475°F (245°C).
Allow the pot to heat fully so it can create strong oven spring. Don’t skip this step, as a hot vessel is essential for a crisp, well-risen loaf.
Prepare the Hot Dutch Oven for Baking
Carefully remove the preheated Dutch oven from the oven and set it on a heat-safe surface. Sprinkle a little cornmeal or flour on the bottom to prevent sticking.
Keep the lid nearby and work quickly to avoid losing too much heat while transferring the dough.
Invert and Position the Chilled Dough
Gently invert the chilled dough onto a piece of parchment paper or directly into the hot Dutch oven, seam-side down. If using parchment, use it as a sling to lower the dough safely.
Center the loaf so it bakes evenly. Handle it gently to keep the gas bubbles intact.
Score the Top for Controlled Expansion
Use a sharp knife or bread lame to score the top of the dough with a 1/4-inch deep slash. Make one confident, continuous cut.
This score allows the loaf to expand in a controlled way as it bakes. Without scoring, the crust may tear randomly and unevenly.
Steam-Bake with the Lid On
Cover the Dutch oven with its lid and place it in the preheated oven. Bake covered for 20 minutes at 475°F (245°C).
The lid traps steam, helping the loaf rise and creating a thin, shiny crust. Avoid opening the oven during this initial phase.
Finish Baking Uncovered and Brown
Remove the lid and reduce the oven temperature to 450°F (230°C). Continue baking uncovered for 18–22 minutes.
Watch for a deep golden-brown crust and caramelized cheese spots. If the loaf darkens too quickly, tent loosely with foil near the end.
Cool the Bread on a Wire Rack
Carefully lift the baked loaf out of the Dutch oven and place it on a wire cooling rack. If desired, brush the top lightly with melted butter while still warm.
Allow the bread to cool completely for at least 1 hour. This sets the crumb and keeps the interior from turning gummy.
Ingredient Swaps
- Use up to 30–40% whole wheat or rye flour in place of bread flour; add 10–20 g extra water if the dough feels stiff.
- Swap cheddar with other firm, flavorful cheeses (Gruyère, Comté, aged Gouda, or a good melting cheese mix); avoid very soft or fresh cheeses that leak excess moisture.
- For a vegetarian (non–animal rennet) option, choose certified vegetarian cheddar; for lactose-sensitive bakers, use a well-aged hard cheese, which is naturally lower in lactose.
You Must Know
- Doneness • If the loaf looks done but you’re unsure, insert an instant-read thermometer into the center; pull it at 205–210°F (96–99°C) — this guarantees the crumb is set even if the crust and cheese look fully browned.
- Troubleshoot • If your loaf spreads out and bakes flat, shorten bulk fermentation next time so it’s only ~75–90% bigger, not fully doubled — overproofed dough can’t hold height and collapses in the oven.
- Flavor Boost • For a stronger cheddar presence, increase cheese up to 200 g and choose an extra-sharp, well-aged block — stronger, drier cheddar gives more punch and cleaner pockets than mild or pre-shredded cheese.
- Scale • To make a smaller loaf, cut all ingredients in half (e.g., 50 g starter, 250 g flour total weight halved) but keep fermentation times guided by visual cues: dough should look smooth, airy, and slightly domed, not slack or sticky-flat.
- Avoid • To keep cheese from burning on the crust, guarantee most cubes are folded into the middle third of the dough and not sitting on the outer surface — exposed cheese turns very dark and bitter by the last 18–22 minutes of uncovered time.
Serving Tips
- Serve warm slices with softened butter and a drizzle of honey.
- Pair with tomato soup or creamy broccoli cheddar for a cozy meal.
- Use for grilled cheese sandwiches to double up on the cheddar flavor.
- Toast and top with fried eggs and chives for a savory breakfast.
- Slice thin for cheese boards, alongside apples, cured meats, and grainy mustard.
Storage & Make-Ahead
Cheddar sourdough keeps in the fridge, well-wrapped, for up to 5 days, though texture is best in the first 3.
For make-ahead, cool completely, slice, and freeze up to 2 months.
Toast slices directly from frozen or rewarm the whole loaf in a 325°F oven until heated through.
Reheating
Reheat slices gently in a 300°F (150°C) oven or covered on a skillet until warmed through.
For the microwave, use short 10–15 second bursts to avoid drying or toughness.
Cheddar Sourdough in Festivals
Nothing draws people in at a festival quite like the smell of tangy, cheesy bread crackling out of an oven or off a hot griddle.
When I bring cheddar sourdough to a market or street fair, the air shifts—steam curls up, carrying notes of toasted cheese, warm butter, and that gentle sour tang.
I love watching people follow their noses to my stall, eyes landing on golden loaves with blistered, cheese-streaked crusts. I’ll slice a warm heel, and the crumb sighs open, pockets of melted cheddar glowing like embers.
Served in thick wedges with chili, alongside smoky grilled meats, or simply dipped in salted butter, this bread turns a simple paper plate into something you remember.
Final Thoughts
Give this cheddar sourdough a try and enjoy the pockets of melty, tangy cheese in every slice.
Once you’ve made it once, don’t be afraid to tweak the flavors—try different cheddars, add herbs, or mix in your favorite extras to make it your own.
Frequently Asked Questions
How Can I Adapt This Cheddar Sourdough for a Gluten-Free Diet?
You can swap in a 1:1 gluten‑free bread flour blend, add 1–2 teaspoons psyllium husk, and use an active gluten‑free starter. I’d keep hydration similar, expect a softer dough, and savor that molten cheddar aroma.
What Common Mistakes Ruin Cheddar Sourdough and How Do I Fix Them?
You’ll ruin it by underproofing, overheating cheese, and slicing hot. I watch for jiggly, airy dough, tuck cheese deep, preheat fiercely, then wait for that crackling, cooled loaf before cutting into molten pockets.
Can I Scale This Recipe for Commercial Bakery Production?
You can, but you’ll need baker’s percentages. I’d convert everything to percentages, test a 5–10 kg batch, watch dough temperature and fermentation speed, then adjust hydration, cheese load, and proofing schedules for your bakery’s rhythm.
How Do Altitude and Climate Changes Affect Cheddar Sourdough Fermentation?
They shift time and texture: at high, dry altitudes I watch dough rise faster yet dry out, so I warm water, increase hydration, shorten bulk, and lean on sight, touch, and aroma instead of clocks.
Are There Nutritional Benefits or Drawbacks to Adding Cheddar to Sourdough?
You gain protein, calcium, and satisfying richness, but I’d remind you you’re adding saturated fat, sodium, and calories. I taste nutty warmth, feel stretchy pockets of cheese, yet balance slices with lighter meals and plenty of vegetables.
Cheddar Sourdough Bread
Equipment
- 1 large mixing bowl
- 1 Small bowl
- 1 digital kitchen scale
- 1 dough scraper or spatula
- 1 banneton basket or medium bowl
- 1 Dutch oven with lid
- 1 sharp knife or bread lame
- 1 wire cooling rack
- 1 clean kitchen towel
Ingredients
- 100 gram active sourdough starter 100% hydration
- 350 gram water room temperature
- 500 gram bread flour
- 10 gram fine sea salt
- 150 gram sharp cheddar cheese cut into small cubes
- 15 gram unsalted butter for brushing, optional; melted
- 5 gram olive oil optional; for greasing bowl
- 10 gram coarse cornmeal or flour for dusting
Instructions
- In a large mixing bowl, whisk together the active sourdough starter and water until mostly dissolved.
- Add the bread flour to the bowl and mix with your hand or a dough scraper until no dry flour remains and a shaggy dough forms.
- Cover the bowl with a clean kitchen towel and let the dough rest (autolyse) for 30 minutes.
- Sprinkle the salt over the dough and pinch and fold it into the dough until evenly incorporated.
- Perform the first set of stretch-and-folds by grabbing one side of the dough, stretching it up, and folding it over, rotating the bowl and repeating 4–6 times.
- Cover the dough and let it rest for 30 minutes at room temperature.
- Repeat the stretch-and-fold process three more times, every 30 minutes, for a total of four rounds during the bulk fermentation.
- During the second or third round of stretch-and-folds, gently fold in the cheddar cheese cubes, distributing them evenly through the dough.
- After the final stretch-and-fold, cover the dough and let it continue bulk fermenting at room temperature until roughly doubled in size and airy, 3–5 hours total from mixing.
- Lightly flour your work surface and gently turn the dough out, taking care not to deflate it too much.
- Shape the dough into a round or oval loaf by folding the edges toward the center, then tightening the surface by dragging it gently against the counter.
- Dust the banneton or bowl generously with flour or cornmeal and place the shaped dough seam-side up into it.
- Cover the dough and let it proof at room temperature for 45–60 minutes, then transfer it to the refrigerator to cold proof for 8–12 hours.
- About 45 minutes before baking, place the Dutch oven with its lid into the oven and preheat to 475°F (245°C).
- Carefully remove the hot Dutch oven from the oven and sprinkle a little cornmeal or flour on the bottom.
- Gently invert the chilled dough onto a piece of parchment or directly into the hot Dutch oven so it is seam-side down.
- Use a sharp knife or bread lame to score the top of the dough with a 1/4-inch deep slash to allow expansion.
- Cover the Dutch oven with the lid and place it in the preheated oven.
- Bake covered for 20 minutes, then remove the lid and reduce the oven temperature to 450°F (230°C).
- Continue baking uncovered for 18–22 minutes, until the crust is deep golden brown and the cheese spots are caramelized.
- Remove the bread from the Dutch oven and place it on a wire cooling rack.
- If desired, brush the top lightly with melted butter while still warm.
- Allow the loaf to cool completely for at least 1 hour before slicing to set the crumb and melted cheese pockets.
Notes

Cynthia Weatherford is a seasoned chef and culinary enthusiast who serves as the Recipe creator of Somonday. With decades of experience in the kitchen and a passion for exploring diverse cuisines, Cynthia brings a blend of creativity and technique to every dish. Known for transforming simple ingredients into show-stopping meals, Cynthia believes that cooking is an art form anyone can master. Dedicated to inspiring home cooks, Cynthia shares approachable recipes, pro tips, and culinary wisdom to make every meal memorable.


