Picture a scarlet cake cloaked in cloud-soft frosting, velvety crumbs catching the light, and cool, tangy cheesecake bites nestled on top like little treasures.
Imagine slicing through plush layers, the cocoa-kissed aroma rising as creamy, citrus-bright bites give a gentle, custardy sigh—comfort and celebration in every forkful.
This cake matters to me because it turns ordinary moments into milestones: a showstopper that’s surprisingly doable, and a reminder that dessert can be both playful and elegant.
It’s the dessert I lean on for birthdays, office potlucks, or when I need a make-ahead treat for busy weeknights or slow Sunday suppers.
When my niece’s party ballooned from six guests to twenty, this cake saved the day—slices stretched further, and those cheesecake bites doubled as built-in “extras” for enthusiastic little hands.
We’ll keep the batter tender, the frosting light, and the finish stunning without fuss.
Ready? Let’s cook!
Why You’ll Love It
- Delivers bold flavor: tangy cocoa cake meets creamy cheesecake bites
- Impresses visually with vibrant red layers and jeweled cheesecake tops
- Stays tender and moist thanks to oil and buttermilk
- Assembles easily with stable, light cream cheese whipped frosting
- Offers fun textures: fluffy crumb, creamy bites, delicate crumble garnish
Ingredients
- 2 cups all-purpose flour, sifted — measure lightly to avoid dense cake (use fresh, finely milled flour)
- 1.5 cups granulated sugar — for cake batter sweetness (use pure cane sugar)
- 1 teaspoon baking soda — leavening for tender crumb (check freshness date)
- 1 teaspoon fine salt — balances sweetness (use fine sea salt)
- 2 tablespoons unsweetened cocoa powder — classic red velvet flavor (use natural, not Dutch-process)
- 1 cup buttermilk, room temperature — acidity for lift and tang (shake well before using)
- 1 cup neutral oil — keeps cake moist (use canola or vegetable)
- 2 large eggs, room temperature — structure and richness (use true large grade)
- 2 teaspoons vanilla extract, divided — for cake and cheesecake (use real vanilla)
- 1 tablespoon white vinegar — reacts with cocoa and soda (distilled)
- 2 tablespoons red gel food coloring — vibrant color without thinning (use gel, not liquid)
- 8 ounces cream cheese, softened — for cheesecake bites (full-fat for best set)
- 0.25 cup granulated sugar — sweetens cheesecake bites (fine granules dissolve well)
- 1 large egg — binds cheesecake bites (room temp mixes smoothly)
- 0.5 teaspoon lemon zest, optional — brightens cheesecake flavor (zest just the yellow)
- 1.5 cups heavy cream, cold — for whipped frosting body (36%+ fat)
- 8 ounces cream cheese, cold and cubed — frosting base (keep chilled for stability)
- 0.75 cup powdered sugar, sifted — sweetens frosting smoothly (prevents lumps)
- 0.25 teaspoon fine salt — balances frosting sweetness (tiny pinch goes far)
- Cooking spray — for greasing pans (use neutral, non-stick)
- Parchment paper — line pans to prevent sticking (cut to fit)
Step-by-Step Method
Preheat, Line & Grease
Preheat oven to 350°F. Line two 9-inch round pans and one 8×8-inch pan with parchment. Grease parchment and a 12-cup mini muffin tin. Prepare all tools and measure ingredients. Keep dairy at room temperature for batter, except cold cream and cream cheese for frosting. Set wire racks out for cooling. This staging speeds assembly and prevents sticking.
Whisk Dry Ingredients
Combine sifted flour, granulated sugar, baking soda, fine salt, and cocoa powder in a large bowl. Whisk until evenly blended and lump-free. Sifting flour guarantees a light crumb and even rise. Keep the mixture airy—avoid compacting. Set aside near your mixer. This dry base forms the structure of the red velvet cake.
Blend Wet & Color
In a separate bowl, whisk buttermilk, neutral oil, eggs, vanilla, white vinegar, and red gel food coloring. Mix until smooth and uniformly red. The vinegar activates baking soda for lift, while oil keeps the cake moist. Make certain no streaks of egg or color remain. Work briskly to maintain batter fluidity.
Combine Batter Gently
Pour wet into dry. Whisk just until no dry streaks remain. Stop as soon as the batter looks homogeneous to prevent gluten overdevelopment. Scrape bowl sides and bottom with a spatula to incorporate pockets of flour. The batter should be silky and pourable. Overmixing can toughen the cake.
Divide, Bake & Test
Divide batter evenly between the two 9-inch pans. Smooth tops and tap pans lightly to release bubbles. Bake 25–30 minutes until a toothpick shows a few moist crumbs. Rotate pans once if needed for even browning. Don’t overbake. Set pans on a rack and cool 10 minutes before unmolding.
Beat Cheesecake Base
While cakes bake, beat softened cream cheese with granulated sugar until smooth and creamy. Add the cheesecake egg, remaining vanilla, and optional lemon zest. Beat until just combined. Scrape the bowl to remove lumps. Avoid overbeating to minimize air, which can cause cracks. The batter should be glossy.
Bake Mini Cheesecake Bites
Spoon cheesecake batter into the greased mini muffin tin, filling each about three-quarters full. Bake 10–12 minutes until set with a slight jiggle. If using a dark pan, start checking at 9 minutes. Cool in the pan 10 minutes. Loosen edges with a small knife, then transfer to a rack to cool completely.
Create Cheesecake Crumble
Pour any remaining cheesecake batter into the lined 8×8-inch pan. Bake 15–18 minutes until set. Cool fully on a rack. Crumble into small, even bits for garnish. Keep crumbs in the fridge to firm up. These add texture and emphasize the cheesecake theme atop the finished cake.
Cool Cake Layers
After 10 minutes in the pans, turn cake layers out onto a wire rack. Remove parchment and cool completely. Chilling briefly can help firm the crumb for cleaner frosting. Don’t frost warm cake, or the frosting will melt and slide. Level domes only if necessary for stacking.
Whip Cream to Peaks
In a clean, chilled bowl, whip cold heavy cream to medium peaks. Peaks should hold shape but curl at the tip. Avoid stiff peaks, which are harder to fold and can become grainy. Keep the whipped cream refrigerated while preparing the cream cheese base to maintain structure.
Sweeten Cream Cheese
Beat cold, cubed cream cheese with sifted powdered sugar and fine salt until smooth, fluffy, and lump-free. The cold temperature helps create a stable frosting. Scrape the bowl frequently to avoid pockets of sugar. Aim for a silky texture. This forms the tangy backbone of the frosting.
Fold for Stable Frosting
Gently fold whipped cream into the sweetened cream cheese in two additions. Use a spatula and broad strokes to preserve air. Stop folding when streaks disappear. Overmixing deflates the frosting. Keep the bowl chilled as you work. The result is light, stable, and ideal for clean edges.
Layer & Fill
Place one cooled red velvet layer on a serving board. Add a thick, even layer of frosting, pushing to the edges with an offset spatula. Keep the surface level for stability. Spin the board as you spread for control. Reserve enough frosting for the top and sides. Work swiftly to keep it cool.
Stack & Frost Smoothly
Set the second layer on top, aligning edges. Apply a thin crumb coat over the top and sides. Chill 10–15 minutes to set. Add the final coat, smoothing with long strokes. Use a hot, dry spatula for a sleek finish. Make certain the top is flat to properly seat the cheesecake bites.
Top with Cheesecake Bites
Nestle cooled mini cheesecake bites over the top in a circular pattern. Press gently to adhere without crushing the frosting. Space evenly for visual appeal and easy slicing. Use the best-shaped bites for the perimeter. Keep the cake chilled as you decorate to maintain structure.
Garnish & Chill to Set
Sprinkle cheesecake crumble over and between the bites for texture. Add more at the center for height. Chill the assembled cake at least 1 hour to set the frosting and secure the toppings. Longer chilling improves clean slices. Keep covered to prevent drying or fridge odors.
Slice Clean & Serve
Warm a sharp knife under hot water, then dry. Slice straight down in decisive cuts. Wipe and rewarm the blade between slices. Serve chilled for best texture and stability. Store leftovers covered in the refrigerator. Enjoy the contrast of tangy cheesecake bites and tender red velvet crumb.
Ingredient Swaps
– Buttermilk: 1 cup milk + 1 tbsp white vinegar or lemon juice (rest 5–10 min).
Dairy-free: use oat/almond milk + 1 tbsp acid.
- Neutral oil: swap with melted butter for richer flavor, or applesauce (up to 1/2) for lighter cake.
- Eggs: use 2 flax eggs (2 tbsp ground flax + 6 tbsp water) or commercial egg replacer for vegan.
- Red gel food coloring: beet powder (2–3 tbsp) or natural red coloring; omit for “cocoa velvet” if unavailable.
- Cream cheese: lactose-free or vegan cream cheese works for both bites and frosting; soften per package directions.
- Heavy cream (frosting): coconut cream (chilled, whipped) for dairy-free; stabilize with a little powdered sugar.
- Cocoa powder: Dutch-process or natural both work; if out, use hot chocolate mix in a pinch and reduce sugar slightly.
- Vinegar: apple cider or lemon juice substitute 1:1.
- Sugar: use superfine or caster for smoother batters; coconut sugar works but darkens color.
- Flour: cake flour yields softer crumb; gluten-free 1:1 baking blend substitutes well—don’t overmix.
You Must Know
- Doneness • If cake centers dome or feel springy but toothpick is gooey, tent loosely and continue until the pick shows a few moist crumbs and tops register ~205–210°F; this prevents underbaked gummy bands near the core.
- Troubleshoot • When red hue looks dull or brownish, add 1–2 more teaspoons gel color to the batter portion you’re about to portion, because cocoa alkalinity mutes color; visual cue: batter should look a shade brighter than you want after baking (it dulls slightly).
- Avoid • To prevent cream cheese frosting from turning soupy, keep both components cold and stop whipping cream at medium peaks that softly curl; if it droops like yogurt, chill bowl 10–15 minutes, then gently fold—no re-whipping.
- Scale • For 8-inch rounds, reduce all batter ingredients to 85% (multiply by 0.85) and start checking layers 5 minutes earlier; for a tall 3-layer 9-inch, make 1.5× batter and 1.25× frosting, extending layer time by 3–6 minutes.
- Flavor Boost • For tangier, cheesecake-forward notes, swap 2 tablespoons buttermilk for lemon juice and add 1/4 teaspoon almond extract to frosting; taste should be lightly tart with a fragrant hint, not almond-forward.
Serving Tips
- Serve chilled slices with a drizzle of warm chocolate or salted caramel sauce.
- Add a dollop of lightly sweetened whipped cream and fresh raspberries.
- Plate with a smear of berry coulis and a sprinkle of cheesecake crumbs.
- Offer coffee or espresso; for dessert wine, pair with ruby port.
- Garnish each slice with a mint sprig and a dusting of cocoa.
Storage & Make-Ahead
Refrigerate the assembled cake, covered, for up to 3 days.
Slices stay moist and the cheesecake bites remain set.
For make-ahead, bake cake layers and cheesecake bites 1–2 days early.
Chill separately, then assemble day of serving.
The fully frosted cake freezes well up to 1 month.
Thaw overnight refrigerated.
Reheating
For gentle reheating, warm individual slices. Microwave 10–15 seconds at 50% power.
Oven: 275°F, 8–10 minutes covered.
Stovetop: covered skillet on low, 3–5 minutes.
Always chill leftovers promptly.
Juneteenth Bake-Sale Favorite
Kick things off with a cake that sings in red and cream—our Red Velvet Cheesecake Bite Cake draws a crowd and tells a story. For a Juneteenth bake sale, I lean into that vibrant hue—freedom’s red ribbon—set against cool, cloud-soft frosting.
I slice it cold so the layers gleam clean, then nestle cheesecake bites like little drums on a parade route, sprinkle ruby crumbs, and watch eyes light up.
I price by the slice, stack boxes, and keep a cooler humming nearby. The cocoa whispers, buttermilk tangs, and the cream cheese lifts every bite.
I offer napkins dyed pink by crumbs, share seconds for elders, and slip extra to kids counting coins. It’s celebration you can taste—tender crumb, bright history, generous joy.
Final Thoughts
Ready to bake? Try this Red Velvet Cheesecake Bite Cake as written for a showstopping dessert, or tweak it with flavored cheesecake bites (think lemon or chocolate) and different sprinkle toppings to make it your own.
Frequently Asked Questions
Can I Make This Cake Gluten-Free Without Compromising Texture?
Yes—you can. I swap the flour for a 1:1 gluten-free blend with xanthan, sift it, and don’t overmix. The crumb stays tender, velvet-red, and moist; the cheesecake bites still melt like little clouds.
How Do I Adjust for High-Altitude Baking Conditions?
At altitude, I reduce sugar 1–2 tablespoons, increase flour 1–2 tablespoons, add 1–2 teaspoons extra buttermilk, raise oven to 365°F, and shorten bake slightly. I breathe in thinner air; batters thicken, aromas sharpen, crumbs set faster.
What’s the Best Way to Color Without Food Dye?
Use beet powder or reduced beet juice; I stir it into wet ingredients for a ruby blush without earthy bite. For warmth, I blend hibiscus or pomegranate concentrate—fruity aroma, tangy whispers, and gorgeously stained crumbs.
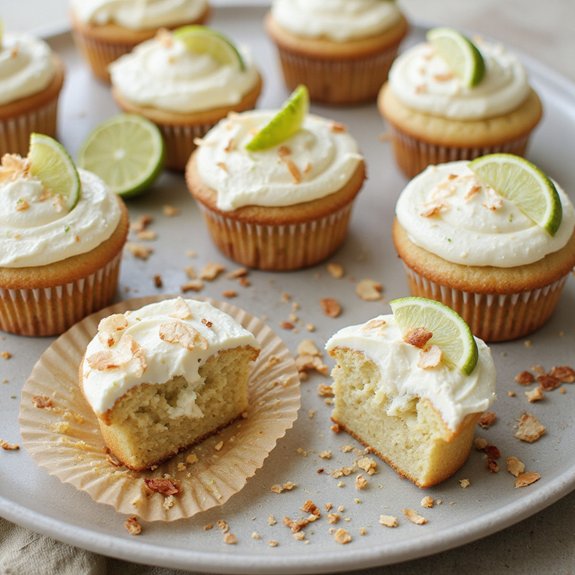
Can I Convert This Into Cupcakes With Cheesecake Centers?
Yes—you can. I’d bake red velvet batter in lined tins, fill halfway, spoon a tablespoon cheesecake batter, cover with more red velvet. Bake 18–20 minutes. You’ll smell cocoa, see ruby crowns, and bite creamy, tangy centers.
How Do I Ship Slices Without Ruining the Toppings?
Chill slices hard, nestle each in a snug acetate collar, crown secured with a dab of frosting “glue.” Wrap tightly, box with cold packs, cushion with crumpled parchment, and mark “this side up.” I’d ship overnight.
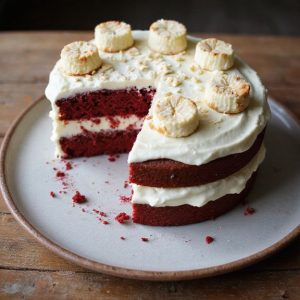
Cheesecake Bite Topped Red Velvet Cake
Equipment
- 1 9-inch round cake pan 2 pans
- 1 8×8-inch baking pan
- 1 12-cup mini muffin tin
- 1 stand mixer or hand mixer
- 3 Mixing bowl
- 1 Whisk
- 1 Rubber spatula
- 1 Wire rack
- 1 parchment paper sheet
- 1 cooking spray can
- 1 Measuring cups set
- 1 Measuring spoons set
- 1 toothpick pack
- 1 offset spatula
Ingredients
- 2 cup all-purpose flour sifted
- 1 1/2 cup granulated sugar
- 1 teaspoon baking soda
- 1 teaspoon fine salt
- 2 tablespoon unsweetened cocoa powder
- 1 cup buttermilk room temperature
- 1 cup neutral oil
- 2 large egg room temperature
- 2 teaspoon vanilla extract divided
- 1 tablespoon white vinegar
- 2 tablespoon red gel food coloring
- 8 ounce cream cheese softened
- 1/4 cup granulated sugar for cheesecake bites
- 1 large egg for cheesecake bites
- 1/2 teaspoon lemon zest optional
- 1 1/2 cup heavy cream cold
- 8 ounce cream cheese cold and cubed, for frosting
- 3/4 cup powdered sugar sifted
- 1/4 teaspoon fine salt for frosting
Instructions
- Preheat oven to 350°F and line the two 9-inch cake pans and the 8×8-inch pan with parchment, then grease the parchment and the mini muffin tin.
- Whisk flour, 1.5 cups granulated sugar, baking soda, salt, and cocoa powder together in a large bowl.
- In a second bowl whisk buttermilk, oil, eggs, 1 teaspoon vanilla, vinegar, and red food coloring until smooth and evenly colored.
- Pour the wet mixture into the dry mixture and whisk just until combined with no dry streaks.
- Divide the red velvet batter evenly between the two round cake pans and bake for 25 to 30 minutes until a toothpick comes out with a few moist crumbs.
- While cakes bake, make cheesecake bite batter by beating 8 ounces softened cream cheese with 0.25 cup granulated sugar until smooth, then beat in the cheesecake egg, remaining 1 teaspoon vanilla, and lemon zest.
- Spoon the cheesecake batter into the mini muffin tin filling each cup three-quarters full and bake for 10 to 12 minutes until set with a slight jiggle.
- Cool the cheesecake bites in the pan for 10 minutes, then loosen edges with a small knife and transfer to a rack to cool completely.
- Bake any remaining cheesecake batter in the 8×8-inch pan for 15 to 18 minutes to create crumbs for garnish, then cool and crumble.
- Let the red velvet cake layers cool in their pans for 10 minutes, then turn out onto a wire rack to cool completely.
- For frosting, whip cold heavy cream to medium peaks in a clean bowl and set aside.
- In another bowl beat cold cubed cream cheese with powdered sugar and 0.25 teaspoon salt until smooth and fluffy.
- Gently fold the whipped cream into the sweetened cream cheese in two additions to make a stable cream cheese whipped frosting.
- Place one cooled red velvet layer on a serving board and spread a thick layer of frosting over the top.
- Set the second cake layer on top and frost the top and sides smoothly with the remaining frosting.
- Nestle the cooled cheesecake bites over the top of the cake in a circular pattern, pressing gently to adhere.
- Sprinkle the cheesecake crumble over and between the bites and chill the assembled cake for at least 1 hour to set.
- Slice with a hot, dry knife and serve chilled.
Notes

Cynthia Weatherford is a seasoned chef and culinary enthusiast who serves as the Recipe creator of Somonday. With decades of experience in the kitchen and a passion for exploring diverse cuisines, Cynthia brings a blend of creativity and technique to every dish. Known for transforming simple ingredients into show-stopping meals, Cynthia believes that cooking is an art form anyone can master. Dedicated to inspiring home cooks, Cynthia shares approachable recipes, pro tips, and culinary wisdom to make every meal memorable.