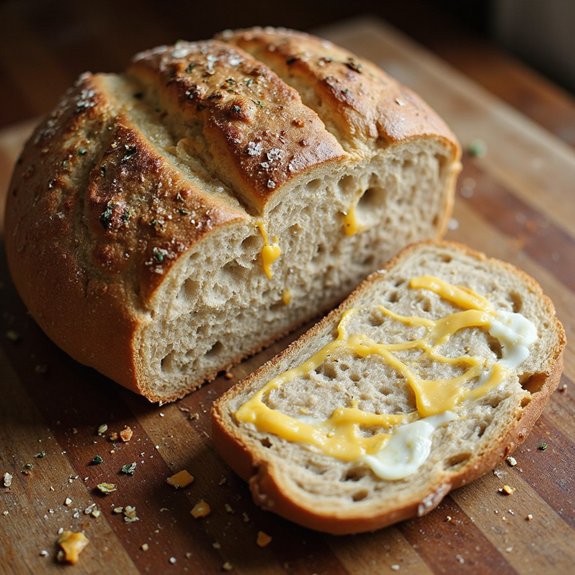
There’s something about tearing into a warm loaf of cheesy sourdough that makes the whole day exhale.
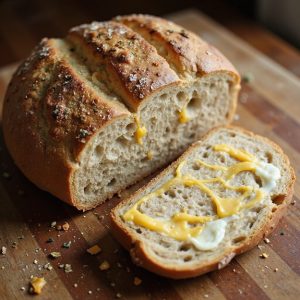
Picture a burnished, crackling crust, marbled with deep golden blisters, giving way to a tender, tangy crumb threaded with pockets of melted cheese.
This is cozy comfort food at its best—an artisan-style loaf that feels bakery-special, yet is simple enough for home bakers and weekend cooks.
It’s ideal for comfort seekers, cheese lovers, and anyone building confidence with sourdough.
I still remember one rainy Sunday when dinner plans fell apart; this loaf, a pot of tomato soup, and a simple salad turned a disappointing evening into one of our most relaxed, talkative family meals.
It’s perfect for slow Sunday suppers, easy entertaining, or those last-minute “we need something special” moments when friends drop by.
Ready to bring this loaf from your oven to the table?
Why You’ll Love It
- Delivers bold, tangy sourdough flavor with pockets of gooey cheese
- Elevates simple meals, perfect with soups, salads, or breakfast eggs
- Builds great texture: crisp crust outside, soft and cheesy inside
- Makes ahead easily with overnight proof for flexible baking schedule
- Freezes beautifully; slice and store for quick, toasty snacks
Ingredients
- 100 g sourdough starter, active and bubbly — use at peak rise for best oven spring
- 350 g water, room temperature — cooler water slows fermentation slightly
- 450 g bread flour — higher protein helps build strong gluten
- 50 g whole wheat flour — adds flavor and a bit of extra nutrition
- 10 g fine sea salt — dissolves evenly and seasons the crumb
- 150 g cheddar cheese, shredded — sharp cheddar gives the best cheesy punch
- 50 g mozzarella cheese, shredded — low-moisture mozzarella melts without excess grease
- 15 g unsalted butter, melted — brush on after baking for a soft, flavorful crust
- 5 g olive oil — lightly oil the bowl to prevent sticking during fermentation
Step-by-Step Method
Mix Starter & Water
Whisk the active, bubbly sourdough starter with room-temperature water in a large mixing bowl. Dissolve the starter as much as possible so it disperses evenly.
This guarantees consistent fermentation throughout the dough. Use a kitchen scale for accuracy. Mix until the liquid looks milky and only small bits of starter remain.
Combine Flours & Form Shaggy Dough
Add the bread flour and whole wheat flour directly into the starter-water mixture. Stir with a rubber spatula until no dry streaks of flour remain. Scrape down the sides of the bowl as needed.
Aim for a rough, shaggy dough; it will look messy, but all flour should be moistened.
Rest Dough for Autolyse
Cover the bowl with a clean kitchen towel and let the dough rest for 30 minutes at room temperature. Allow the flour to fully hydrate and gluten to begin forming naturally. Avoid touching or kneading during this time.
This rest makes the dough easier to handle later and improves texture and flavor.
Add Salt & Incorporate Fully
Sprinkle the fine sea salt evenly over the surface of the dough. Use your hands to pinch, squeeze, and fold the dough until the salt disappears. Rotate the bowl as you work to season all areas.
Continue until the dough feels more cohesive and slightly stronger, without visible grains of salt.
Perform First Stretch & Fold
Grasp one edge of the dough with damp fingers. Stretch it upward gently without tearing, then fold it back over the center. Rotate the bowl a quarter turn and repeat on all sides.
Strengthen the gluten network with these folds. Cover the bowl and let the dough rest for 30 minutes afterward.
Repeat Stretch & Folds
Perform two more sets of stretch-and-folds, every 30 minutes. Lift and fold each side of the dough toward the center, rotating the bowl each time.
Notice the dough becoming smoother and more elastic. Keep your movements gentle to avoid tearing. Cover and rest between sets to allow gluten to relax.
Flatten Dough & Add Cheese
After the final fold and short rest, gently tip the dough onto a lightly oiled surface or keep it in the bowl. Pat it into a loose rectangle without deflating too much.
Sprinkle shredded cheddar and mozzarella evenly over the top. Keep the cheese in small, light layers for even distribution.
Encase & Distribute Cheese
Fold the dough edges over the cheese from all sides, like closing an envelope. Gently knead or perform several light folds to spread the cheese throughout.
Avoid aggressive handling that could rip the dough or cause cheese clumps. Stop as soon as the cheese seems fairly well dispersed inside.
Bulk Ferment Until Puffy
Return the dough to a lightly oiled bowl, turning once to coat. Cover with a clean towel and let it bulk ferment at room temperature for 4–6 hours.
Watch for volume increase and a puffy, airy feel, rather than exact time. Adjust duration if your kitchen is particularly warm or cool.
Shape Dough into Tight Loaf
Lightly flour your work surface and gently turn out the risen dough. Use a dough scraper to help if sticky.
Shape into a round or oval by folding edges to the center, then tightening the surface with gentle pulls. Aim for a smooth, taut exterior while preserving internal air pockets.
Proof in Basket & Chill
Place the shaped dough seam-side up in a floured proofing basket or a medium bowl lined with a floured kitchen towel. Dust lightly on top if sticky. Cover well to prevent drying.
Refrigerate for 4–6 hours or overnight. Allow a slow, controlled final proof that enhances flavor and structure.
Preheat Dutch Oven Thoroughly
About 45 minutes before baking, place your Dutch oven with its lid into the oven. Preheat to 475°F (245°C).
Allow enough time for the pot and oven to become fully hot. This high heat and enclosed environment help create strong oven spring and a crisp, well-developed crust.
Transfer & Score the Dough
Carefully remove the hot Dutch oven from the oven. Gently invert the chilled dough seam-side down onto parchment or directly into the pot.
Use a sharp knife or lame to score the top with a deep slash or pattern. Provide room for expansion so the loaf opens attractively while baking.
Bake Covered for Initial Rise
Cover the Dutch oven with its lid and place it back into the hot oven. Bake at 475°F (245°C) for 20 minutes.
Trap steam inside to encourage maximum oven spring and a glossy crust. Avoid opening the oven during this phase. Let the loaf rise and set its initial structure.
Finish Baking & Cool Properly
Remove the lid, reduce the oven temperature to 450°F (230°C), and bake for about 15 more minutes until deep golden brown. Carefully transfer the loaf to a cooling rack.
Brush the hot crust with melted butter for extra flavor and shine. Cool at least 1 hour before slicing to set the crumb.
Ingredient Swaps
- Use up to 100 g of the bread flour as all-purpose if needed; you can also replace the whole wheat with more bread flour for a lighter loaf.
- Swap cheddar with other firm, melty cheeses (Colby, Monterey Jack, Gouda, Gruyère); replace mozzarella with any mild, good-melting cheese.
- For a vegetarian (but not vegan) loaf, choose cheeses made with microbial/vegetable rennet; for dairy-free, omit cheese and butter and use plant cheese shreds plus vegan butter or olive oil.
- If you don’t have sourdough starter, this specific recipe won’t work as-is—use a yeasted cheesy bread formula instead rather than trying to substitute commercial yeast directly.
You Must Know
- Doneness • If your loaf looks done outside but feels soft on the sides: Leave it in the oven until the crust is deep brown and the loaf sounds hollow when tapped on the bottom (or the internal temp hits 205–210°F / 96–99°C). This guarantees the cheesy crumb is fully set and not gummy from underbaking.
- Troubleshoot • If the dough barely rises during bulk: Move it to a slightly warmer spot (75–80°F / 24–27°C) and give it another 30–60 minutes; if still sluggish, your starter likely wasn’t at peak. The rich cheese and butter slow fermentation, so you’re looking for volume increase and visible bubbles, not just clock time.
- Avoid • If cheese leaks and burns on the crust: Use finer shreds (about 2–3 mm thick) and keep them mostly inside the dough, with a light, even fold. Large clumps near the surface melt out and scorch, leading to bitter, hard spots.
- Flavor Boost • For a sharper cheesy taste without more grease: Swap 50–75 g of the cheddar for an aged, hard cheese like Parmigiano or Gruyère and keep total cheese around 180–200 g max. Older cheeses give big flavor in smaller amounts, preventing an oily crumb.
- Scale • To make a larger loaf for a crowd: Increase all ingredients by 50% (e.g., 150 g starter, 525 g water, 675 g bread flour, 75 g whole wheat, 225 g cheddar, 75 g mozzarella) and watch the dough, not the clock—bulk and cold proof may each extend by 1–2 hours because a bigger mass warms and cools more slowly.
Serving Tips
- Serve warm slices with tomato soup or chili for a cozy, comforting meal.
- Pair with a crisp green salad and vinaigrette to balance the rich, cheesy crumb.
- Toast leftover slices and top with garlic butter or pesto for an easy snack.
- Use thick slices for gourmet grilled cheese or patty melts.
- Cube and toast into cheesy croutons for soups and salads.
Storage & Make-Ahead
Cheesy sourdough keeps covered at room temperature for 1–2 days, or in the fridge up to 4–5 days, though refrigeration slightly firms the crumb.
For make-ahead, cool completely, slice, and freeze well-wrapped up to 2 months; reheat slices in a toaster or hot oven to refresh.
Reheating
Reheat slices gently: in the oven at 300°F wrapped in foil.
In a covered skillet over low heat.
Or briefly in the microwave with a damp towel to avoid drying.
Cheesy Sourdough in Pop Culture
Once those warm slices are revived and fragrant again, I can’t help thinking about how this kind of cheesy sourdough has quietly become a little star beyond our own kitchens.
I notice it sliding into food shows, where hosts tear open bronzed loaves and the camera lingers on molten pockets of cheese stretching like slow sunrise.
I see it on cozy sitcom tables too, standing in for the old-fashioned casserole: a crackling, burnished loaf shared during heart-to-hearts, butter glistening in the scoring.
On social media, it’s practically a character—cheese-pull videos, crumb shots, steam fogging the lens.
When I bake it, I feel synced with that wider story, as if my Dutch oven’s lid lifts on a tiny stage.
Final Thoughts
Give this cheesy sourdough a try and enjoy the combination of tangy crumb, melty pockets of cheese, and crisp crust.
Once you’ve baked it once, feel free to tweak the cheeses, flours, or fermentation time to make it truly your own.
Frequently Asked Questions
Can I Adapt This Cheesy Sourdough for a Bread Machine or Stand Mixer?
Yes, you can. I’d use a stand mixer for kneading, then let it rise and bake by hand; a bread machine handles mixing and first proof, but I’d still shape and oven‑bake for crust.
How Do Altitude or Climate Changes Affect This Cheesy Sourdough Recipe?
Altitude and climate quietly reshape your dough: in thin, dry air, I shorten proofs, add a splash more water, and lower baking temperature slightly so your loaf still rises, crackles, and smells like warm, buttery comfort.
Is This Cheesy Sourdough Suitable for People With Lactose Intolerance?
No, it’s usually not suitable, though some mildly lactose-intolerant folks might tolerate small slices. Imagine warm, bubbling pockets of cheese and a buttery crust—rich, comforting, but still carrying enough lactose to unsettle your evening.
Can I Use This Dough as a Base for Sourdough Pizza or Focaccia?
Yes, you can. I’d stretch this dough into a rustic pizza or dimple it into focaccia, letting cheese blister and crisp, the crust crackling softly as buttery, tangy aromas drift through your warm kitchen.
How Do I Troubleshoot Dense or Gummy Texture in Cheesy Sourdough Loaves?
I fix dense, gummy loaves by baking longer, cooling completely, and slightly reducing cheese. I also strengthen gluten with thorough folds, avoid overproofing, and guarantee my starter’s lively so your crumb bakes tender, airy, and irresistibly fragrant.
Cheesy Sourdough Bread
Equipment
- 1 large mixing bowl
- 1 Kitchen scale
- 1 measuring cup
- 2 Measuring spoons
- 1 Rubber spatula
- 1 Dough scraper
- 1 proofing basket or medium bowl
- 1 clean kitchen towel
- 1 Dutch oven with lid
- 1 sharp knife or lame
- 1 Cooling rack
Ingredients
- 100 gram sourdough starter active and bubbly
- 350 gram water room temperature
- 450 gram bread flour
- 50 gram whole wheat flour
- 10 gram fine sea salt
- 150 gram cheddar cheese shredded
- 50 gram mozzarella cheese shredded
- 15 gram unsalted butter melted
- 5 gram olive oil for greasing
Instructions
- In a large mixing bowl, whisk together the sourdough starter and water until mostly dissolved.
- Add the bread flour and whole wheat flour to the bowl and mix with a rubber spatula until no dry flour remains and a shaggy dough forms.
- Cover the bowl with a clean kitchen towel and let the dough rest for 30 minutes at room temperature.
- Sprinkle the salt over the dough and use your hands to pinch and fold the dough until the salt is fully incorporated.
- Perform the first set of stretch-and-folds by lifting and folding each side of the dough toward the center, rotating the bowl as you go.
- Cover the dough and let it rest for 30 minutes at room temperature.
- Repeat the stretch-and-fold process 2 more times, every 30 minutes, for a total of 3 sets.
- After the final set, gently flatten the dough into a rough rectangle in the bowl or on a lightly oiled surface.
- Sprinkle the shredded cheddar and mozzarella cheeses evenly over the dough.
- Fold the dough over the cheese from all sides to encase it, then gently knead or fold a few times to distribute the cheese without tearing the dough.
- Place the dough back in the lightly oiled bowl, cover, and let it bulk ferment at room temperature for 4–6 hours, or until roughly doubled and puffy.
- Lightly flour your work surface, gently turn out the dough, and shape it into a tight round or oval loaf.
- Place the shaped dough seam-side up in a floured proofing basket or a medium bowl lined with a floured kitchen towel.
- Cover and refrigerate the dough for 4–6 hours or overnight for a slow final proof.
- About 45 minutes before baking, place the Dutch oven with its lid in the oven and preheat to 475°F (245°C).
- Carefully remove the hot Dutch oven from the oven and gently invert the dough seam-side down onto a piece of parchment or directly into the pot.
- Score the top of the dough with a sharp knife or lame to allow for controlled expansion.
- Cover the Dutch oven with its lid and bake for 20 minutes at 475°F (245°C).
- Remove the lid, reduce the temperature to 450°F (230°C), and bake for another 15 minutes or until deep golden brown and crisp.
- Carefully transfer the loaf to a cooling rack and brush the top with melted butter while still warm.
- Allow the bread to cool for at least 1 hour before slicing to let the crumb set and melted cheese firm slightly.
Notes

Cynthia Weatherford is a seasoned chef and culinary enthusiast who serves as the Recipe creator of Somonday. With decades of experience in the kitchen and a passion for exploring diverse cuisines, Cynthia brings a blend of creativity and technique to every dish. Known for transforming simple ingredients into show-stopping meals, Cynthia believes that cooking is an art form anyone can master. Dedicated to inspiring home cooks, Cynthia shares approachable recipes, pro tips, and culinary wisdom to make every meal memorable.


