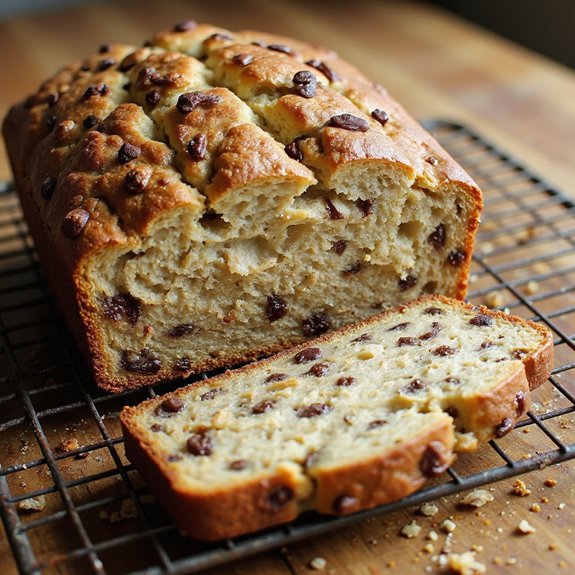
There’s something about the sight of a golden loaf studded with melty chocolate and toasted walnuts that makes a kitchen feel instantly cozy.
This chocolate chip walnut banana bread is a tender, sweet-but-not-too-sweet dessert or snack that comes together quickly—perfect for using up those spotty bananas on the counter.
It’s ideal for busy families, beginner bakers, and anyone who craves an easy comfort bake without fuss.
I still remember a rainy Sunday when friends dropped by unexpectedly. I’d just three overripe bananas and a half bag of chocolate chips.
An hour later, the house smelled of warm vanilla and caramelized bananas, and we sliced into this loaf while it was still slightly warm, the chocolate soft and gooey.
It shines for Sunday suppers, last-minute cravings, casual gatherings, or a simple treat with your morning coffee. Ready to bring this dish to life?
Why You’ll Love It
- Delivers rich banana flavor with melty chocolate and crunchy toasted walnuts
- Stirs together in minutes—no mixer or special equipment needed
- Uses simple pantry staples and overripe bananas you already have
- Bakes up ultra-moist, tender slices that stay soft for days
- Freezes beautifully for make-ahead breakfasts, snacks, or desserts
Ingredients
- 3 large bananas, very ripe, mashed — heavily speckled for sweetness and moisture
- 120 g unsalted butter, melted and slightly cooled — good-quality butter boosts flavor
- 150 g granulated sugar — standard white sugar for structure and sweetness
- 50 g light brown sugar, packed — adds moisture and a hint of caramel
- 2 large eggs, room temperature — room temp helps batter mix evenly
- 5 ml vanilla extract — pure vanilla if possible for best aroma
- 190 g all-purpose flour — regular unbleached flour works well here
- 5 g baking soda — guarantees proper lift with acidic bananas
- 2 g baking powder — supports rise for a tender crumb
- 3 g fine sea salt — balances sweetness and enhances flavor
- 120 g semi-sweet chocolate chips — choose 50–60% cacao for balance
- 80 g walnuts, chopped and lightly toasted — toast briefly to deepen nuttiness
- 60 ml whole milk, room temperature — full-fat milk keeps the loaf tender
Step-by-Step Method
Preheat & Prepare Pan
Preheat the oven to 175°C (350°F). Grease a 9×5-inch loaf pan with butter or nonstick spray, or line it with parchment for easier removal.
Make sure the rack is in the center of the oven. Lightly grease the parchment as well. Set the prepared pan aside while you mix the batter.
Combine Dry Ingredients
Whisk together the flour, baking soda, baking powder, and fine sea salt in a medium bowl.
Break up any flour lumps as you whisk to make certain an even distribution of leavening. Set this dry mixture aside; you’ll fold it into the wet ingredients later to avoid overmixing the batter.
Mash the Bananas
Peel the very ripe bananas and place them in a separate medium bowl. Mash them with a fork or potato masher until mostly smooth, leaving a few small lumps for texture.
The bananas should look thick and pourable. Their sweetness and moisture will help keep the banana bread soft and flavorful.
Mix Wet Ingredients
Pour the melted, slightly cooled butter over the mashed bananas. Add the granulated sugar, packed light brown sugar, eggs, and vanilla extract.
Whisk the mixture until it looks smooth and cohesive, with no visible streaks of egg. Make sure the butter isn’t hot to avoid scrambling the eggs in the bowl.
Add the Milk
Stir in the room-temperature whole milk with a whisk or spoon until fully incorporated. The batter will loosen slightly and become more fluid.
Using milk at room temperature helps the mixture combine evenly and prevents the butter from firming up. Set this wet mixture aside, ready for the dry ingredients.
Fold in Dry Ingredients
Add the flour mixture to the wet ingredients in two additions. Gently fold with a rubber spatula, scraping the sides and bottom of the bowl.
Stop as soon as no dry flour streaks remain. Avoid vigorous stirring, which can develop gluten and make the banana bread dense instead of tender.
Stir in Chocolate & Walnuts
Fold in the chocolate chips and chopped, lightly toasted walnuts. Reserve a small handful of each for topping, if desired.
Distribute them evenly through the batter with a few gentle strokes. Be certain you don’t overmix at this stage. The batter should be thick and studded with nuts and chocolate.
Fill the Pan & Top
Scrape the batter into the prepared loaf pan using a rubber spatula. Smooth the surface so it bakes evenly.
Sprinkle the reserved chocolate chips and walnuts over the top in an even layer. Press them very lightly into the batter so they adhere but still remain mostly on the surface.
Bake Until Set
Place the loaf pan on the center rack of the preheated oven. Bake for 50–60 minutes.
Check doneness by inserting a toothpick into the center; it should come out with a few moist crumbs, not wet batter. If the top browns too quickly, tent the loaf loosely with foil near the end of baking.
Cool & Slice
Set the pan on a cooling rack and let the bread rest in the pan for 15 minutes. Carefully lift it out using the parchment or invert it gently onto the rack.
Cool at least 5 more minutes, ideally longer, before slicing. Cut into slices with a serrated knife and serve warm or at room temperature.
Ingredient Swaps
- Use melted coconut oil or neutral vegetable oil instead of butter for a dairy-free loaf; swap milk with any unsweetened plant milk.
- Replace eggs with 2 “flax eggs” (2 tbsp ground flaxseed + 6 tbsp water, rested 5–10 minutes) for an egg-free/vegan version.
- For nut allergies, omit walnuts or substitute sunflower seeds or pumpkin seeds; for budget or availability, use chopped chocolate bars instead of chips, or skip chocolate and add extra banana or 40–60 g raisins.
You Must Know
– Doneness • If the center looks done but you’re unsure: Insert a toothpick in the very middle and also 1 inch from an edge; you want a few moist crumbs in both spots, no wet streaks, and the top should spring back lightly when tapped.
This prevents a gummy strip in the center at around 50–60 minutes.
– Avoid • If the top is deeply browned by 35–40 minutes: Loosely drape a piece of foil over the loaf without sealing the edges.
This shields the surface so the inside can reach doneness without the crust tasting bitter or overly hard.
– Troubleshoot • If your batter seems very thick or very loose: For thick, add 1–2 teaspoons milk; for loose, stir in 1–2 tablespoons flour just until combined.
Banana size and ripeness can vary, so this quick adjustment keeps the crumb tender, not heavy or soggy.
– Scale • For two loaves or a taller bake: Double all ingredients by weight (e.g., 190 g flour → 380 g, 3 bananas → about 6) and divide evenly between two 9×5-inch pans; start checking doneness around 45–50 minutes.
This keeps the same texture instead of risking underdone centers in one oversized pan.
– Flavor Boost • For deeper banana and nut flavor: Use bananas that are mostly brown on the peel and toast walnuts until fragrant and slightly darkened, about 3–5 minutes in a dry pan, then cool.
The extra caramelization and nuttiness show up clearly even after 55 minutes in the oven.
Serving Tips
- Serve warm slices with a pat of salted butter or a drizzle of honey.
- Pair with hot coffee, chai, or cold brew for a cozy breakfast or snack.
- Plate with a scoop of vanilla or salted caramel ice cream for dessert.
- Add fresh berries and a dollop of whipped cream for a brunch-worthy presentation.
- Toast leftover slices lightly and top with cream cheese or nut butter.
Storage & Make-Ahead
This banana bread keeps well, tightly wrapped, in the fridge for 4–5 days.
It’s a great make-ahead dessert or snack.
For longer storage, slice, wrap individually, and freeze in an airtight container or bag for up to 2 months.
Thaw at room temperature or gently warm before serving.
Reheating
For best texture, gently reheat slices.
Microwave 10–20 seconds wrapped in a damp paper towel, warm in a 150°C (300°F) oven for 8–10 minutes, or briefly toast on a covered skillet.
Banana Bread in Pop Culture
Almost without realizing it, I see banana bread showing up everywhere—from cozy sitcom kitchens to nostalgic novels and Instagram baking frenzies—and it always signals comfort, healing, or a fresh start.
When a character in a movie pulls a golden loaf from the oven, I can almost smell that warm banana cloud drifting through the screen, thick with butter and sugar.
I notice how often it appears after a breakup, a big move, or some quiet heartbreak. The camera lingers on the crumb as it’s sliced, steam curling up, chocolate glistening.
Even online, when someone posts a studded chocolate chip walnut loaf, I read it as a gentle announcement: “I’m still here, I’m taking care of myself, one slice at a time.”
Final Thoughts
Give this Chocolate Chip Walnut Banana Bread a try and enjoy how cozy and nostalgic it tastes fresh from the oven.
Feel free to make it your own by swapping the walnuts for your favorite nuts, changing up the chocolate, or adding fun mix-ins like cinnamon or shredded coconut.
Frequently Asked Questions
Can I Make This Banana Bread Gluten-Free Without Sacrificing Texture?
Yes, you can. I’d swap in a 1:1 gluten‑free baking flour with xanthan gum, then gently fold the batter. You’ll still slice into a tender, moist loaf, fragrant with caramelized banana, chocolate, and toasted walnuts.
How Can I Adjust This Recipe for High-Altitude Baking Conditions?
You’ll tweak this gently: I’d reduce sugar slightly, add 1–2 tablespoons extra milk, cut baking soda a pinch, and bake a bit hotter and shorter, watching until the loaf domes and smells deeply caramelized.
What’s the Best Way to Ship This Banana Bread as a Gift?
I’d bake it fully, cool overnight, then wrap slices snugly in plastic and foil. I’d nestle them in a snug box with crumpled parchment, add a handwritten note, and ship priority so aromas survive.
Can I Scale This Recipe for a Bakery or Café Menu?
You absolutely can. I’d test a double batch first, weigh everything in grams, and note bake times per oven. Then imagine your case: thick slices, glossy chips, toasted walnut perfume drifting through the café.
How Do I Convert This Loaf Into Muffins or Mini Loaves?
You can, and I’d keep the batter the same. For muffins, bake 18–22 minutes; mini loaves, 25–35. I’d fill them ¾ full, watch for domed tops, and test with a fragrant, crumb-speckled toothpick.

Chocolate Chip Walnut Banana Bread
Equipment
- 1 loaf pan (9×5 inch)
- 2 mixing bowls (medium)
- 1 Whisk
- 1 Rubber spatula
- 1 Wooden spoon
- 1 Measuring cups set
- 1 Measuring spoons set
- 1 Cooling rack
- 1 parchment paper sheet (optional, to line pan)
Ingredients
- 3 large bananas very ripe mashed
- 120 gram unsalted butter melted and slightly cooled
- 150 gram granulated sugar
- 50 gram light brown sugar packed
- 2 large eggs room temperature
- 5 milliliter vanilla extract
- 190 gram all-purpose flour
- 5 gram baking soda
- 2 gram baking powder
- 3 gram fine sea salt
- 120 gram semi-sweet chocolate chips plus extra for topping
- 80 gram walnuts chopped and lightly toasted
- 60 milliliter whole milk room temperature
Instructions
- Preheat the oven to 175°C (350°F) and grease or line a 9×5-inch loaf pan with parchment paper.
- In a medium bowl, whisk together the flour, baking soda, baking powder, and salt, then set aside.
- In a separate bowl, mash the bananas until mostly smooth with a few small lumps remaining.
- Add the melted butter, granulated sugar, brown sugar, eggs, and vanilla extract to the mashed bananas and whisk until well combined.
- Stir the milk into the banana mixture until evenly incorporated.
- Add the dry ingredients to the wet ingredients and gently fold with a spatula just until no dry flour streaks remain.
- Fold in the chocolate chips and chopped walnuts, reserving a small handful of each for topping if desired.
- Pour the batter into the prepared loaf pan and smooth the top with a spatula.
- Sprinkle the reserved chocolate chips and walnuts evenly over the surface of the batter.
- Bake for 50–60 minutes, or until a toothpick inserted into the center comes out with a few moist crumbs but no wet batter.
- Remove the pan from the oven and place it on a cooling rack, then let the bread cool in the pan for 15 minutes.
- Carefully lift or turn out the banana bread from the pan onto the rack and let it cool for at least 5 more minutes before slicing and serving.
Notes

Cynthia Weatherford is a seasoned chef and culinary enthusiast who serves as the Recipe creator of Somonday. With decades of experience in the kitchen and a passion for exploring diverse cuisines, Cynthia brings a blend of creativity and technique to every dish. Known for transforming simple ingredients into show-stopping meals, Cynthia believes that cooking is an art form anyone can master. Dedicated to inspiring home cooks, Cynthia shares approachable recipes, pro tips, and culinary wisdom to make every meal memorable.


