There’s something about watching glossy ribbons of chocolate cascade from a spoon that instantly feels like comfort.
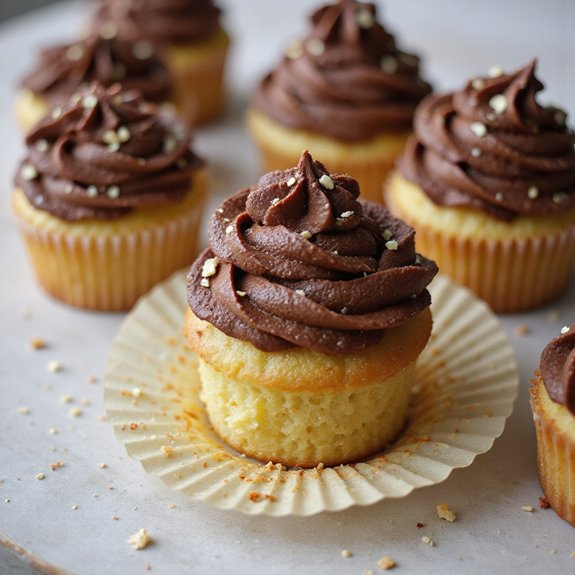
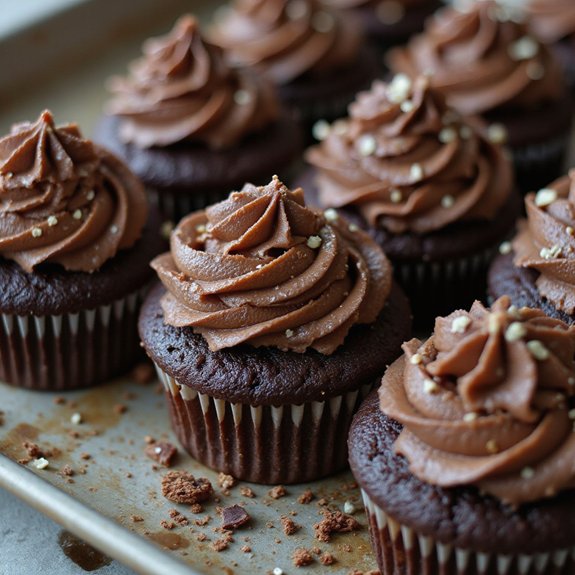
This chocolate fudge frosting is a cozy, bakery-style dessert topper—silky, rich, and deeply cocoa-forward—that comes together in about 10 minutes.
It’s perfect for sweet-tooth fans, busy bakers, beginners, and anyone who wants cupcakes to look and taste like they came from a fancy shop, without the stress.
I still remember a late Sunday afternoon when guests texted they’d be “a little early.”
The cupcakes were baked, but plain. In a small saucepan, butter melted, cocoa bloomed, and soon the kitchen smelled like warm chocolate bars and vanilla.
By the time the doorbell rang, I’d whipped up this velvety frosting and crowned every cupcake with generous, fudgy swirls.
Problem solved—no one guessed how fast it came together.
It’s ideal for last-minute celebrations, bake sales, or weeknight treats. Ready to bring this frosting to life?
Why You’ll Love It
- Delivers deep, rich chocolate flavor with classic old-fashioned fudge vibes
- Whips up fast with simple pantry ingredients and minimal equipment
- Sets to a thick, fudgy texture perfect for piping or spreading
- Easily adjustable thickness with extra milk or powdered sugar
- Makes enough to generously frost a full dozen cupcakes
Ingredients
- 1/2 cup unsalted butter, cubed — use real butter for best flavor
- 1/3 cup unsweetened cocoa powder, sifted — choose a good-quality cocoa
- 2 1/2 cups powdered sugar, sifted — sifting prevents lumps in the frosting
- 1/4 cup whole milk, at room temperature — room temp helps everything blend smoothly
- 1 teaspoon vanilla extract — pure vanilla deepens the chocolate flavor
- 1/4 teaspoon fine salt — a pinch of salt balances the sweetness
Step-by-Step Method
Melt the Butter
Set the saucepan over low heat. Add the cubed butter and melt gently, stirring occasionally. Don’t let it sizzle or brown.
Remove from heat as soon as it’s fully liquefied.
Keeping the butter warm but not hot helps the cocoa blend smoothly and prevents a greasy or separated frosting texture later.
Whisk in the Cocoa
Immediately add the sifted cocoa powder to the warm melted butter.
Whisk steadily until the mixture looks smooth, thick, and glossy with no visible lumps.
Scrape around the edges and bottom of the pan to make sure all cocoa is incorporated evenly, then transfer this cocoa mixture to a heatproof mixing bowl.
Cool the Cocoa Mixture
Let the cocoa mixture sit in the bowl for 3–5 minutes. Allow it to cool until it feels warm but not hot to the touch.
This brief cooling step helps prevent the powdered sugar from melting on contact.
It also makes the frosting easier to whisk without forming lumps or becoming too runny.
Add Half the Sugar and Milk
Add about half of the sifted powdered sugar and half of the room-temperature milk to the bowl.
Whisk slowly at first to avoid a sugar cloud, then increase speed until mostly combined.
The mixture may look slightly thick or uneven at this stage, which is fine. Focus on incorporating most of the dry spots.
Incorporate Remaining Ingredients
Add the remaining powdered sugar, the rest of the milk, the vanilla extract, and the salt.
Whisk thoroughly until the frosting becomes thick, smooth, and shiny.
Scrape down the sides and bottom of the bowl with a spatula as you work. Continue whisking until you see no streaks of sugar or cocoa.
Adjust the Consistency
Evaluate the texture. If the frosting is too thick to spread, whisk in milk 1 teaspoon at a time until it loosens.
If it seems too thin or runny, add powdered sugar 1 tablespoon at a time.
Mix well after each addition. Aim for a soft, fudgy mixture that holds soft peaks on the whisk.
Rest to Thicken
Leave the bowl of frosting at room temperature for about 30 minutes. Let it sit undisturbed so it can firm up.
This resting time allows the sugar to fully hydrate and the frosting to develop a fudgy, spreadable consistency.
If your kitchen is very warm, briefly chill it, stirring every few minutes.
Frost the Cupcakes
Check the frosting; it should now be thick, smooth, and easily spreadable. Stir briefly to loosen.
Use a spatula to spread generous swirls onto completely cooled cupcakes, or transfer to a piping bag for neater designs.
Pipe or spread immediately for best texture, then let the frosted cupcakes sit to set slightly.
Ingredient Swaps
- Use salted butter and omit the added salt, or swap in margarine for a budget option (flavor will be slightly less rich).
- For dairy-free: replace butter with vegan butter or refined coconut oil and use any neutral, unsweetened plant milk.
- Use Dutch-process cocoa for a deeper, more intense chocolate flavor, or natural cocoa if that’s what you have on hand.
- Vanilla extract can be replaced with equal amounts of vanilla paste or another extract (almond, hazelnut, or coffee) for a flavor twist.
You Must Know
- Troubleshoot • If it looks grainy or sandy: Warm the bowl over a pot of barely steaming water for 10–20 seconds at a time, stirring in between, until the frosting turns glossy and smooth. Gentle warmth helps dissolve stubborn sugar/cocoa bits without melting it into a sauce.
- Doneness • When you’re unsure it’s thick enough: Drag a spatula through the center; if the line stays visible for 5–7 seconds before slowly softening, it’s ready for spreading/piping.
If it fills in immediately, give it another 10–15 minutes at room temp or add 1–2 tablespoons powdered sugar.
– Avoid • If your kitchen is hot (above ~75°F/24°C): Chill the bowl in the fridge for 3–5 minutes, stirring once or twice, until the frosting holds a soft peak that bends over like soft-serve.
This prevents it from sliding off cupcakes or losing piped details.
– Scale • For a larger batch (24 cupcakes): Use 1 cup butter, about 2/3 cup cocoa, 5 cups powdered sugar, and 1/2 cup milk; vanilla and salt can stay proportional (2 teaspoons vanilla, 1/2 teaspoon salt).
Adjust at the end with 1–2 teaspoons extra milk if you need a looser swirl.
– Flavor Boost • For deeper chocolate or custom flavors: Add 1–2 tablespoons extra cocoa for more intensity (you may need 1–2 teaspoons more milk), or stir in 1–2 teaspoons espresso powder, orange zest, or peppermint extract at the same time as the vanilla for a clear, noticeable flavor lift.
Serving Tips
- Pipe tall swirls and top with chocolate shavings or sprinkles for bakery-style cupcakes.
- Add a fresh raspberry or strawberry slice on each frosted cupcake for color and contrast.
- Drizzle with warm caramel or chocolate sauce, then sprinkle with flaky sea salt.
- Serve on a tiered stand lined with parchment rounds for an elegant dessert display.
- Pair with vanilla, red velvet, or peanut butter cupcakes to highlight the fudgy chocolate flavor.
Storage & Make-Ahead
Store chocolate fudge frosting in an airtight container in the fridge for up to 1 week.
Let it come to room temperature, then re-whisk before using.
You can also freeze it for up to 2 months.
Thaw overnight in the refrigerator, then beat or whisk until smooth and fluffy again.
Reheating
Gently reheat chilled frosting in a microwave at 50% power, stirring every 5–10 seconds, or warm briefly over a low stovetop bain-marie.
Avoid the oven to prevent drying.
Cupcake Shop Nostalgia
Memory wraps itself around chocolate fudge frosting the way those glass display cases used to hug rows of perfect little cupcakes, each one crowned with a glossy swirl.
I still picture my nose almost pressed to the glass, breathing in that dense, buttery chocolate cloud that seemed to leak from the kitchen door.
Remember that tiny crinkle of the bakery box, the way the string dug into your fingers on the walk home?
You’d lift the lid, and the frosting’s shine caught the light like polished fudge.
The first bite always crushed the paper liner, smeared frosting on your thumb, and left that deep cocoa sweetness lingering.
When I make this frosting now, I’m really chasing that same small, perfect moment.
Final Thoughts
Give this chocolate fudge frosting a try the next time you bake cupcakes—it comes together quickly and adds a rich, nostalgic touch to any batch.
Feel free to tweak the consistency and sweetness to suit your taste, and make it your own with fun variations like espresso powder, a pinch of cinnamon, or a swirl of caramel.
Frequently Asked Questions
Can I Make This Frosting Without Dairy or With Vegan Substitutes?
Yes, you can. I swap butter for vegan butter, whole milk for creamy oat or coconut milk, then whisk. You’ll still get lush, glossy ribbons of fudge that cling to cupcakes like soft, chocolate-scented velvet.
How Can I Fix Frosting That Tastes Too Sweet or Not Chocolatey Enough?
I’d stir in more cocoa and a pinch of salt, maybe a splash of hot coffee or vanilla. Taste as you go, letting the frosting darken, deepen, and lose that cloying edge on your tongue.
Is This Frosting Stable Enough for Outdoor or Warm-Weather Parties?
It’s somewhat stable, but in real heat it softens fast. I’d keep your cupcakes shaded and chilled, then bring them out last minute so the frosting stays lush, glossy, and holds those dreamy swirls.
Can I Use This Frosting Under Fondant or for Layer Cakes?
Yes, you can. I’d spread a thicker layer between cake tiers, chill until slightly firm, then cloak everything in fondant—smooth, dark chocolate beneath a soft, sweet shell, like velvet tucked under satin.
What Piping Tips Work Best for Tall, Bakery-Style Cupcake Swirls?
For tall, bakery-style swirls, I reach for large open star tips—Wilton 1M or Ateco 829—and sometimes a round tip like Ateco 808. They pipe generous, ruffled peaks that look like soft-serve towers of chocolate.

Chocolate Fudge Frosting For Cupcakes
Equipment
- 1 Medium saucepan
- 1 heatproof mixing bowl
- 1 Whisk
- 1 Rubber spatula
- 1 measuring cup set
- 1 Measuring spoons set
- 1 Fine sieve optional, for cocoa powder
Ingredients
- 1/2 cup unsalted butter cubed
- 1/3 cup unsweetened cocoa powder sifted
- 2 1/2 cup powdered sugar sifted
- 1/4 cup whole milk at room temperature
- 1 teaspoon vanilla extract
- 1/4 teaspoon fine salt
Instructions
- Melt the butter in a medium saucepan over low heat until fully liquefied but not sizzling.
- Remove the pan from the heat and whisk in the cocoa powder until smooth and glossy.
- Transfer the cocoa mixture to a heatproof mixing bowl and let cool for 3–5 minutes.
- Add half of the powdered sugar and half of the milk to the bowl and whisk until mostly combined.
- Add the remaining powdered sugar, milk, vanilla extract, and salt, whisking until thick, smooth, and shiny.
- If the frosting is too thick, add milk 1 teaspoon at a time; if too thin, add powdered sugar 1 tablespoon at a time, mixing well after each addition.
- Let the frosting rest at room temperature for about 30 minutes to thicken to a spreadable consistency.
- Once thickened, use a spatula to spread or a piping bag to pipe the frosting onto completely cooled cupcakes.
Notes

Cynthia Weatherford is a seasoned chef and culinary enthusiast who serves as the Recipe creator of Somonday. With decades of experience in the kitchen and a passion for exploring diverse cuisines, Cynthia brings a blend of creativity and technique to every dish. Known for transforming simple ingredients into show-stopping meals, Cynthia believes that cooking is an art form anyone can master. Dedicated to inspiring home cooks, Cynthia shares approachable recipes, pro tips, and culinary wisdom to make every meal memorable.