
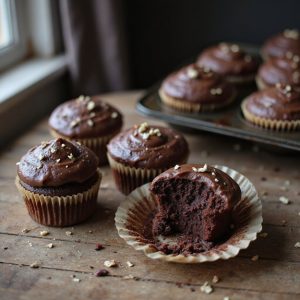
There’s something about peeling back a cupcake wrapper to reveal a glossy pool of chocolate ganache that feels instantly comforting.
Picture tender, deeply cocoa-rich cupcakes crowned with a silky, mirror-like ganache that catches the light and melts at the first bite.
This is a cozy dessert through and through—simple to make, yet indulgent enough for celebrations—and it comes together surprisingly fast, especially if you bake the cupcakes ahead.
These ganache-topped treats are perfect for sweet-tooth fans, beginner bakers, and anyone who needs a reliable “wow” dessert without fuss.
I still remember a stressful weekday when friends dropped by unannounced; a batch of these cupcakes turned the evening from frazzled to festive in minutes.
They shine at birthday parties, Sunday suppers, last-minute dinner invites, or whenever a chocolate craving strikes out of nowhere.
Ready to bring this dish to life?
Why You’ll Love It
- Delivers bold chocolate flavor with a silky, bakery-style ganache topping
- Stays incredibly moist thanks to oil, milk, and hot water
- Uses simple pantry ingredients and basic equipment—no special tools required
- Feels impressively gourmet yet comes together in under an hour
- Adapts easily for parties, holidays, or everyday chocolate cravings
Ingredients
- 1 cup all-purpose flour, sifted — spoon and level for accuracy
- 1 cup granulated sugar — standard white sugar works best
- 6 tablespoons unsweetened cocoa powder, sifted — use natural, not Dutch-process
- 1 teaspoon baking powder — make sure it’s fresh for good rise
- 1/2 teaspoon baking soda — helps cupcakes rise and spread properly
- 1/4 teaspoon fine salt — balances sweetness and enhances chocolate flavor
- 1/2 cup whole milk, room temperature — cold milk can toughen the batter
- 1/4 cup vegetable oil — neutral oil keeps cupcakes moist
- 1 large egg, room temperature — blends more evenly into batter
- 1 teaspoon vanilla extract — pure extract gives best flavor
- 1/2 cup hot water — just-off-the-boil to bloom the cocoa
- 4 ounces semi-sweet chocolate, finely chopped — choose a good-quality bar
- 1/2 cup heavy cream — at least 36% fat for smooth ganache
- 1 tablespoon unsalted butter, room temperature — adds shine and richness to ganache
Step-by-Step Method
Preheat & Prepare Pan
Preheat the oven to 350°F (175°C). Line a standard 12-cup muffin tin with paper cupcake liners, pressing each liner firmly into the cups. Clear and organize your workspace.
Gather all ingredients and equipment so everything is within reach. This preparation helps the batter come together smoothly and guarantees even baking.
Combine Dry Ingredients
Whisk together the sifted flour, granulated sugar, sifted cocoa powder, baking powder, baking soda, and salt in a large mixing bowl. Break up any remaining lumps as you whisk.
Mix until the color and texture are uniform. Properly combining the dry ingredients guarantees the leaveners distribute evenly and the cupcakes rise consistently.
Mix Wet Ingredients
In a separate medium bowl, whisk the milk, vegetable oil, egg, and vanilla extract until fully combined. Beat gently but thoroughly so the mixture looks smooth and uniform, with no streaks of egg.
Using room-temperature ingredients helps them blend more easily. This step creates a cohesive liquid base for your cupcake batter.
Combine Wet & Dry
Pour the wet mixture into the bowl of dry ingredients. Whisk just until a thick, smooth batter forms and all dry spots disappear. Avoid overmixing, which can make cupcakes dense.
Stop as soon as everything is evenly incorporated. The batter should be pourable but still fairly thick at this stage.
Add Hot Water Carefully
Pour the hot water into the batter slowly, whisking as you go. Mix until the batter becomes smooth, thin, and glossy.
Scrape the sides and bottom of the bowl with a rubber spatula to guarantee everything is incorporated. The batter will look quite runny; this is normal and gives the cupcakes a tender crumb.
Fill Cupcake Liners
Divide the batter evenly among the 12 prepared liners. Fill each liner about two-thirds full to allow room for rising.
Use a measuring cup or spoon for accuracy and to minimize drips. Tap the pan gently on the counter to release any large air bubbles, helping the cupcakes bake evenly.
Bake Until Set
Place the muffin tin in the preheated oven on the center rack. Bake for 18–20 minutes.
Check doneness by inserting a toothpick into the center of a cupcake; it should come out clean or with a few moist crumbs. Avoid opening the oven door too often, which can affect baking time and rise.
Cool in Pan Briefly
Remove the muffin tin from the oven and set it on a heatproof surface. Let the cupcakes cool in the pan for about 5 minutes.
This short rest allows them to set and firm slightly, making them easier to handle. Don’t leave them in the pan too long or they may become soggy.
Transfer & Cool Completely
Carefully transfer the cupcakes to a wire cooling rack. Space them slightly apart to allow air to circulate.
Let them cool completely for 30–40 minutes. Guarantee there’s no warmth left in the centers before adding ganache. Frosting warm cupcakes can cause the ganache to melt and slide off.
Heat Cream & Soak Chocolate
Place the finely chopped semi-sweet chocolate in a medium heatproof bowl. In a microwave-safe bowl or small saucepan, heat the heavy cream until just simmering, not boiling.
Pour the hot cream over the chocolate, ensuring it’s mostly submerged. Let the mixture sit undisturbed for 2–3 minutes to soften and melt the chocolate.
Stir Ganache Smooth
Add the room-temperature unsalted butter to the bowl. Starting from the center, gently stir in small circles, gradually working outward.
Continue until the chocolate and cream become smooth, glossy, and fully combined. Avoid whisking vigorously to prevent air bubbles. The ganache should look silky and uniform without streaks.
Thicken Ganache to Spread
Let the ganache rest at room temperature for 10–15 minutes, stirring occasionally. Watch for it to thicken to a spreadable consistency, similar to soft frosting.
If it’s too thin, wait a few more minutes and stir again. If it thickens too much, gently warm it in short bursts, stirring between each.
Top & Set Cupcakes
Spoon or pipe the thickened ganache onto the completely cooled cupcakes. Swirl or smooth the tops with the back of a spoon or an offset spatula.
Aim for an even layer on each cupcake. Let the ganache-topped cupcakes rest at least 10 minutes so the topping sets slightly before serving or storing.
Ingredient Swaps
- Flour: Swap all-purpose flour with a 1:1 gluten-free baking blend for gluten-free cupcakes.
- Dairy: Use oat or almond milk in place of whole milk, and a coconut-based cream plus vegan butter or coconut oil for a dairy-free ganache.
- Egg: Replace the egg with a flax egg (1 tbsp ground flax + 3 tbsp water, rested 5 minutes) for an egg-free version.
- Oil/Butter: Any neutral oil (canola, sunflower) works instead of vegetable oil; for a richer ganache on a budget, use a mix of chocolate chips and bar chocolate.
You Must Know
– Scale – For a half-batch (6 cupcakes), use exactly half of every ingredient (½ cup flour, ½ cup sugar, 3 Tbsp cocoa, etc.) and keep the oven temperature the same while checking doneness a bit earlier, around 15–17 minutes, since a smaller batch can finish faster.
Serving Tips
- Serve on a white platter, topped with fresh raspberries and a light powdered sugar dusting.
- Pair with vanilla ice cream or whipped cream and a drizzle of leftover ganache.
- Add elegance with chocolate curls, gold sprinkles, or a single raspberry on each cupcake.
- Serve alongside hot coffee, espresso, or milk to balance the rich chocolate flavor.
- Arrange cupcakes on a tiered stand for parties, alternating with fresh berries or flowers.
Storage & Make-Ahead
Store cupcakes in an airtight container in the fridge for up to 4–5 days.
Let them sit at room temperature 15–20 minutes before serving so the ganache softens.
Great for making ahead: bake and frost a day in advance.
Cupcakes also freeze well (tightly wrapped) for up to 2 months.
Reheating
Reheat cupcakes gently: in microwave at 50% power for 10–15 seconds.
In a 300°F (150°C) oven for 5–8 minutes.
Or warm ganache separately over low stovetop heat, stirring.
Cupcakes in American Celebrations
Often, when I think about American celebrations—from backyard birthdays to cozy holiday gatherings—I picture a tray of cupcakes stealing the spotlight, each one a tiny, personal cake waiting to be claimed.
There’s something wonderfully democratic about them: no slicing, no jockeying for the “corner piece,” just a neat swirl of frosting or ganache, ready in one graceful grab.
When I bring chocolate ganache cupcakes to a party, I watch people’s faces first. Eyes track the glossy tops, the way the ganache catches the light like polished satin.
Kids hover, adults pretend they’re “just looking,” and then the first wrapper crinkles. That sound feels like the unofficial start of the celebration—small, shared, and instantly joyful.
Final Thoughts
Give these Chocolate Ganache Cupcakes a try and enjoy how simple ingredients turn into something bakery-worthy at home.
Feel free to tweak the flavors—add a flavored extract, a sprinkle of sea salt, or a filling of your choice to make them your own.
Frequently Asked Questions
Can I Make These Cupcakes Gluten-Free, and Which Flour Blend Works Best?
Yes, you can; I’d swap in a 1:1 gluten-free baking blend with xanthan gum. You’ll still whisk, pour, and watch tender domes rise, smelling rich cocoa while the crumb stays soft, not sandy.
How Do I Adjust Baking Time for Mini or Jumbo Cupcake Sizes?
For minis, I’d start checking at 10–12 minutes; for jumbo, 22–26. Watch for domed tops, fragrant cocoa steam, and a toothpick with moist crumbs—your kitchen will tell you when they’re ready.
What’s the Best Way to Transport Ganache Cupcakes Without Smudging the Tops?
I use a tall cupcake carrier, chill the ganache till lightly firm, then nestle each cupcake into its own well. As you lift the lid, the glossy domes arrive untouched, like little midnight moons.
Can I Freeze the Ganache Separately and Frost Freshly Baked Cupcakes Later?
Yes, you can. I freeze ganache flat in a zip bag, then thaw until glossy and soft. As your warm cupcakes cool, you’ll spread that velvety, truffle-like layer over them like molten silk.
How Can Kids Safely Help With This Recipe, and Which Steps Should Adults Handle?
Kids can whisk dry and wet ingredients, line tins, and decorate; I’d let you stir the glossy ganache. Adults should handle the oven, hot water, hot cream, and chopping chocolate—anything sharp, heavy, or sizzling.
Chocolate Ganache Cupcakes
Equipment
- 1 standard 12-cup muffin tin
- 12 paper cupcake liners
- 2 medium mixing bowls
- 1 large mixing bowl
- 1 Whisk
- 1 Rubber spatula
- 1 hand mixer or stand mixer
- 1 microwave-safe bowl or small saucepan
- 1 wire cooling rack
- 1 measuring cup set
- 1 measuring spoon set
Ingredients
- 1 cup all-purpose flour sifted
- 1 cup granulated sugar
- 6 tablespoon unsweetened cocoa powder sifted
- 1 teaspoon baking powder
- 1/2 teaspoon baking soda
- 1/4 teaspoon fine salt
- 1/2 cup whole milk room temperature
- 1/4 cup vegetable oil
- 1 large egg room temperature
- 1 teaspoon vanilla extract
- 1/2 cup hot water
- 4 ounce semi-sweet chocolate finely chopped
- 1/2 cup heavy cream
- 1 tablespoon unsalted butter room temperature
Instructions
- Preheat the oven to 350°F (175°C) and line the muffin tin with paper cupcake liners.
- In a large mixing bowl, whisk together the flour, granulated sugar, cocoa powder, baking powder, baking soda, and salt until well combined.
- In a separate medium bowl, whisk together the milk, vegetable oil, egg, and vanilla extract until smooth.
- Pour the wet ingredients into the dry ingredients and whisk just until a thick batter forms.
- Add the hot water to the batter and whisk carefully until the mixture is smooth and thin.
- Divide the batter evenly among the 12 cupcake liners, filling each about two-thirds full.
- Bake the cupcakes for 18–20 minutes or until a toothpick inserted in the center comes out clean or with a few moist crumbs.
- Remove the muffins from the oven and let them cool in the pan for 5 minutes.
- Transfer the cupcakes to a wire cooling rack and let them cool completely, about 30–40 minutes.
- While the cupcakes cool, place the chopped semi-sweet chocolate in a medium heatproof bowl.
- Heat the heavy cream in a microwave-safe bowl or small saucepan until just simmering but not boiling.
- Pour the hot cream over the chopped chocolate and let it sit undisturbed for 2–3 minutes.
- Add the unsalted butter to the bowl and gently stir the mixture from the center outward until the ganache is smooth and glossy.
- Let the ganache sit at room temperature for 10–15 minutes, stirring occasionally, until it thickens to a spreadable consistency.
- Once the cupcakes are completely cool, spoon or pipe the ganache onto the tops of the cupcakes, swirling or smoothing as desired.
- Allow the ganache-topped cupcakes to rest for at least 10 minutes to set before serving.
Notes

Cynthia Weatherford is a seasoned chef and culinary enthusiast who serves as the Recipe creator of Somonday. With decades of experience in the kitchen and a passion for exploring diverse cuisines, Cynthia brings a blend of creativity and technique to every dish. Known for transforming simple ingredients into show-stopping meals, Cynthia believes that cooking is an art form anyone can master. Dedicated to inspiring home cooks, Cynthia shares approachable recipes, pro tips, and culinary wisdom to make every meal memorable.


