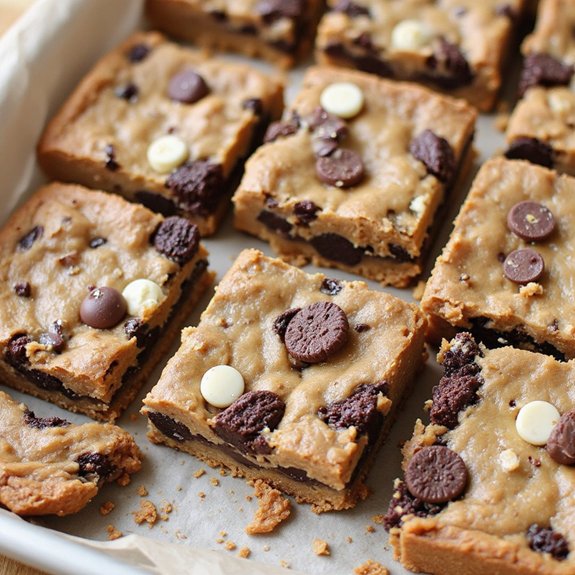
Picture a pan of glossy, speckled squares—ivory white chocolate peeking through cocoa-cookie freckles, each bar lightly tacky with peanut butter sheen and fragrant with warm vanilla.
Imagine the soft crackle as you bite in: crisp rice giving way to chewy sweetness, a whisper of sea salt balancing honeyed richness—comfort in a hand-held package.
These bars matter to me because they’re the kind of no-bake magic that turns a craving into a small celebration, the smell of nutty warmth filling the kitchen without turning on the oven.
They’re perfect for lunchbox treats, after-practice pick-me-ups, busy weeknights when dessert feels impossible, or casual Sunday suppers when you want just one more square at the table.
Once, a last-minute school fundraiser had me scrambling; a single batch of these bars saved the day and disappeared in minutes.
Ready? Let’s cook!
Why You’ll Love It
- Delivers nostalgic cookies-and-cream meets peanut butter flavor
- Comes together fast with no-bake, minimal cleanup
- Uses simple pantry staples and one pan
- Sets sturdy yet stays soft and chewy
- Easily customizable for nut-free or texture tweaks
Ingredients
- 3 cups crispy rice cereal — lightly crush any large clusters (stay crisp in bars)
- 18 chocolate sandwich cookies, roughly chopped — include some fine crumbs (boost flavor)
- 1 cup creamy peanut butter — no-stir style works best (binds mixture)
- 1/2 cup honey — warm flows easier (natural sweetener)
- 1/4 cup unsalted butter — cut into pieces (melts evenly)
- 1/2 teaspoon vanilla extract — real vanilla preferred (rounds flavor)
- 1/4 teaspoon fine sea salt — balances sweetness (don’t skip)
- 1/2 cup white chocolate chips — reserve a few for topping (visual pop)
- 1/4 cup mini chocolate chips — fold in once slightly cool (prevent melt)
Step-by-Step Method
Line the Pan
Prepare a 9×9-inch pan with parchment paper, leaving overhang on two sides for easy lifting. Smooth the paper into the corners. Lightly mist with nonstick spray if desired. Set the pan aside within easy reach.
Clear space on your counter for mixing and pressing so you can work quickly once everything is combined.
Combine Dry Ingredients
Add crispy rice cereal to a large mixing bowl. Roughly chop the chocolate sandwich cookies and add them to the bowl. Toss gently with a wooden spoon to distribute the cookie pieces evenly.
Keep a few larger chunks for texture. Set aside while you prepare the peanut butter mixture.
Melt the Peanut Butter Mixture
Place peanut butter, honey, and unsalted butter in a microwave-safe bowl. Microwave in 20–30 second bursts, stirring between each, until fully melted and smooth.
Don’t overheat. The mixture should be pourable and glossy. Remove from the microwave and set on a heatproof surface.
Flavor and Season
Stir in vanilla extract and fine sea salt while the mixture is warm. Mix until evenly incorporated.
Taste a small dab to confirm the balance of sweetness and salt is pleasant. Adjust with a pinch more salt if needed. Work promptly so the mixture stays fluid for easy coating.
Coat the Cereal and Cookies
Pour the warm peanut butter mixture over the cereal and cookie blend. Fold with a spatula, scraping the bottom and sides to coat everything evenly.
Use gentle, sweeping motions to avoid crushing the cereal. Make certain no dry pockets remain. Work efficiently to maintain flowy consistency.
Cool Briefly, Then Add Chips
Let the mixture rest 2–3 minutes to cool slightly. This helps prevent the chocolate from melting.
Sprinkle in white chocolate chips and mini chocolate chips. Fold gently to distribute without smearing. If chips begin to melt, pause another minute and continue folding once cooler.
Press Firmly into Pan
Transfer the mixture to the prepared pan. Press firmly and evenly using a parchment-lined spatula or slightly damp hands.
Compact the edges and corners to prevent crumbling later. Smooth the top for a neat finish. Sprinkle reserved cookie crumbs on top if desired.
Chill to Set
Place the pan in the refrigerator and chill for about 1 hour, or until firm. Avoid frequent checking to maintain even setting.
Once set, lift the slab out using the parchment overhang and transfer to a cutting board. Keep the parchment underneath to minimize sticking.
Slice and Store
Warm a knife under hot water, wipe dry, then cut into 16 bars. Wipe the blade between cuts for clean edges.
Store bars in an airtight container. Keep at room temperature up to 3 days, or refrigerate up to 1 week.
For drier mix, add warm honey; for looser, add more cereal.
Ingredient Swaps
- Nut/seed butter: swap peanut butter with almond, cashew, or sunflower seed butter (nut-free). Tahini works but is less sweet—add 1–2 tsp extra honey.
- Sweetener: replace honey with maple syrup or brown rice syrup (vegan); rice syrup makes firmer bars.
- Butter: use coconut oil or vegan butter for dairy-free/vegan.
- Cookies: any chocolate sandwich cookie (store brand), gluten-free variety for GF; or use plain digestives/Marie biscuits plus 2–3 tbsp cocoa for a similar vibe.
- Cereal: any puffed/crispy rice or cornflakes; for gluten-free, choose certified GF crispy rice.
- Mix-ins: swap white/mini chips with chopped dark chocolate, dairy-free chips, or cacao nibs; add roasted peanuts for crunch.
You Must Know
Doneness • If the slab feels tacky or smears when lifted from the pan, chill an extra 20–30 minutes until the top is matte and edges hold a clean corner; this guarantees the sugars and fats have set for clean cuts.
Troubleshoot • If the cereal-cookie base looks dusty or pockets of dry cereal remain, drizzle in 1–2 tablespoons warm honey and fold just until glossy spots disappear; the added moisture binds without making it soggy.
Avoid • Avoid stirring in chips while the base is hotter than “warm to the touch” (about 95–100°F); wait until steam is no longer visible so chips keep their shape and don’t streak.
Scale • For a 9×13-inch pan (about 1.6× area), multiply all ingredients by 1.5 and increase chill time to 1 hour 20 minutes; press to the same thickness for similar chew.
Flavor Boost • For deeper cookies-and-cream contrast, reserve 2 tablespoons fine cookie crumbs and 1 tablespoon mini chips to sprinkle on top, then gently press; visual speckling and a slight crunch cue the flavor.
Serving Tips
- Cut into bite-size squares; serve in mini cupcake liners for tidy snacking.
- Drizzle melted white chocolate; sprinkle reserved cookie crumbs for a bakery-style finish.
- Pair with cold milk or vanilla milkshakes for a classic cookies-and-cream vibe.
- Serve alongside fresh strawberries or banana slices to balance sweetness.
- Pack in parchment wrappers; tie with twine for grab-and-go treats.
Storage & Make-Ahead
Refrigerate bars in an airtight container up to 1 week.
They keep best when well-pressed and fully chilled before storing.
For make-ahead, prepare and chill the slab, then cut just before serving.
Freeze tightly wrapped (whole slab or bars) up to 2 months.
Thaw in the fridge for best texture.
Reheating
Reheat bars gently: microwave 5–8 seconds per piece.
Oven at 250°F for 5–7 minutes, tented.
Or stovetop in covered skillet on low 2–3 minutes.
Avoid overheating to prevent melting.
Bake Sale Favorite Status
Once you’ve warmed a bar just enough to soften the bite, you’ll see why these become instant bake sale best-sellers. The buttery peanut butter glow, cookie crunch, and creamy chocolate chips hit every craving in one tidy square.
I watch people take one bite, then pivot back to buy three more—no sales pitch needed.
Here’s how I turn them into a table-stopping hit:
- Price smart: offer singles and a wrapped 2-pack—impulse-friendly and lunchbox-ready.
- Make them pop: sprinkle extra cookie crumbs on top so the “cookies and cream” promise reads from across the room.
- Package for grab-and-go: parchment-wrapped bars with a label listing peanut butter, honey sweetness, and crispy rice texture.
They hold beautifully and taste even better by noon.
Final Thoughts
Ready to whip up a batch? Give these chewy bars a try as written, or tweak them with your favorite nut butter, extra cookie crumbles, or a sprinkle of mini chips on top to make them your own!
Frequently Asked Questions
Can I Make These Bars Gluten-Free and How?
Yes—you can. I’d swap in certified gluten-free crispy rice cereal and gluten-free sandwich cookies. I’d check peanut butter, chips, and vanilla labels. I’d press firmly, chill until set, and enjoy that sweet, creamy crunch guilt-free.
What’s the Best Way to Ship These Bars Safely?
Ship them chilled. I cut tightly, wrap each bar in parchment, then plastic, nestle in a tin with parchment layers, add cold packs, and cushion with crumpled paper. I choose two-day shipping and label “Perishable—Keep Cool.”
Are These Bars Suitable for Freezing Long-Term?
Yes—they freeze well for 2–3 months. I wrap each bar tightly, double-bag with air pressed out, and freeze. Thaw in the fridge overnight; the bite stays chewy, the chocolate snaps, and the peanut aroma blooms.
How Can I Reduce the Overall Sugar Content?
Yes—I’d cut honey to 1/3 cup, swap some cookies for toasted nuts, choose no-sugar peanut butter, and use 85% dark or sugar-free chips. I’d also add vanilla, salt, and extra cereal to balance sweetness.
What Allergens Should I Disclose for School or Workplace Treats?
Disclose peanuts, tree nuts (possible cross-contact), milk, soy, gluten/wheat, and eggs (often in cookies/chips). I’d add a may-contain statement. I’ll label ingredients clearly so readers can breathe easy and savor safely without second-guessing.

Cookies and Cream Peanut Butter Chewy Bars
Equipment
- 1 9×9 inch baking pan
- 2 Mixing bowl
- 1 microwave-safe bowl
- 1 Spatula
- 1 Wooden spoon
- 1 parchment paper sheet
- 1 Knife
Ingredients
- 3 cup crispy rice cereal
- 18 chocolate sandwich cookies roughly chopped
- 1 cup creamy peanut butter
- 1/2 cup honey
- 1/4 cup unsalted butter
- 1/2 teaspoon vanilla extract
- 1/4 teaspoon fine sea salt
- 1/2 cup white chocolate chips
- 1/4 cup mini chocolate chips
Instructions
- Line a 9×9-inch pan with parchment paper, leaving overhang for easy lifting.
- In a large bowl combine crispy rice cereal and chopped chocolate sandwich cookies.
- In a microwave-safe bowl add peanut butter, honey, and butter, then microwave in 20–30 second bursts stirring between until smooth and melted.
- Stir vanilla extract and sea salt into the warm peanut butter mixture.
- Pour the peanut butter mixture over the cereal and cookies, then fold with a spatula until evenly coated.
- Let the mixture cool 2–3 minutes, then fold in white chocolate chips and mini chocolate chips.
- Transfer the mixture to the prepared pan and press firmly and evenly with a parchment-lined spatula or your hands.
- Refrigerate until set for about 1 hour.
- Lift the slab out using parchment, place on a board, and cut into 16 bars.
- Store bars in an airtight container at room temperature for up to 3 days or refrigerated for up to 1 week.
Notes

Cynthia Weatherford is a seasoned chef and culinary enthusiast who serves as the Recipe creator of Somonday. With decades of experience in the kitchen and a passion for exploring diverse cuisines, Cynthia brings a blend of creativity and technique to every dish. Known for transforming simple ingredients into show-stopping meals, Cynthia believes that cooking is an art form anyone can master. Dedicated to inspiring home cooks, Cynthia shares approachable recipes, pro tips, and culinary wisdom to make every meal memorable.


