There’s something about the smell of banana bread drifting through a kitchen that makes everything feel okay again.
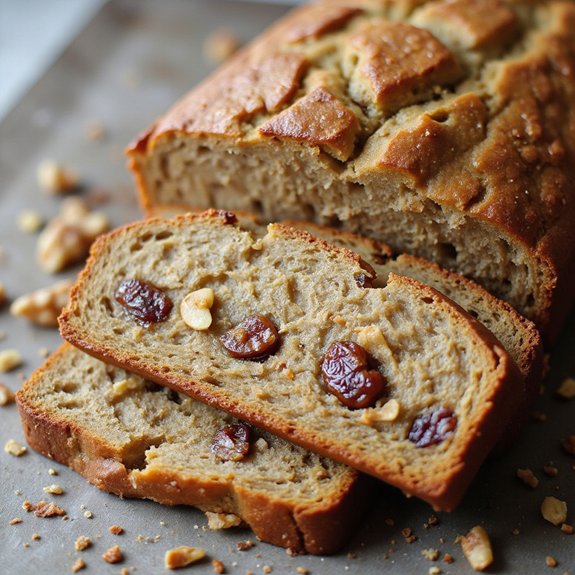
This date and walnut banana bread is a cozy, slice-and-savor dessert—moist, golden brown, and freckled with caramel-sweet dates and toasty walnut pieces.
It comes together quickly, then bakes away while you tidy up or relax, making it ideal for busy weeknights, beginners, and anyone with a soft spot for old-fashioned comfort.
I still remember a rainy Sunday when plans fell apart and everyone was restless; stirring this batter by hand, then pulling out a crackly-topped loaf, turned the whole day around.
Warm slices, steam curling up, suddenly made the living room feel like a little bakery.
This bread shines for last-minute cravings, casual gatherings, easy entertaining, and make-ahead breakfasts or snacks. Ready to bring this dish to life?
Why You’ll Love It
- Delivers rich, caramel-like sweetness from ripe bananas and soft dates
- Packs satisfying crunch and nutty depth from toasted walnuts
- Stays incredibly moist for days, even better the next morning
- Uses simple pantry ingredients, no mixer or special tools needed
- Works for breakfast, snack, or dessert with coffee or tea
Ingredients
- 4 medium ripe bananas, mashed — use very ripe with brown spots for best sweetness
- 120 ml vegetable oil — choose a neutral variety like canola or sunflower
- 100 g granulated sugar — helps with structure and sweetness balance
- 80 g brown sugar, packed — adds moisture and caramel flavor
- 2 large eggs, room temperature — guarantees smoother mixing and better rise
- 5 ml vanilla extract — real vanilla gives deeper aroma
- 240 g all-purpose flour — measure accurately to avoid dense bread
- 5 ml baking soda — key leavener to react with bananas’ acidity
- 2 ml baking powder — adds extra lift and lightness
- 2 ml fine sea salt — enhances overall flavor and sweetness
- 3 ml ground cinnamon (optional) — adds warm spice note
- 120 g pitted dates, chopped — chop small so they distribute evenly
- 80 g walnuts, roughly chopped — toast lightly for better flavor if desired
- 30 ml milk or yogurt (optional) — add only if batter is very thick for better texture
Step-by-Step Method
Prep the Pan and Preheat the Oven
Preheat the oven to 175°C (350°F). Grease a 9×5-inch loaf pan lightly with oil or butter, then line it with parchment paper, leaving an overhang for easy lifting. Smooth the paper into the corners.
Set the pan aside on a baking sheet if you like extra stability when moving it in and out of the oven.
Mash the Bananas Thoroughly
Place the peeled ripe bananas in a large mixing bowl. Use a fork or potato masher to mash them until mostly smooth with just a few small lumps.
Aim for a loose, pourable texture. The bananas should be very speckled or brown for maximum sweetness, moisture, and flavor in the finished bread.
Whisk Together the Wet Ingredients
Add the vegetable oil, granulated sugar, brown sugar, eggs, and vanilla extract to the mashed bananas. Whisk until the mixture looks smooth and slightly thickened.
Make sure the eggs are fully incorporated and the sugars start to dissolve. This forms the flavor base and guarantees even sweetness throughout the batter.
Combine the Dry Ingredients Separately
In another bowl, add the flour, baking soda, baking powder, salt, and ground cinnamon if using. Whisk or stir with a spoon until everything is evenly distributed.
This step prevents clumps of leavening or salt, so they disperse well in the batter. Keep this bowl nearby, ready to fold into the wet mixture.
Fold the Dry Ingredients into the Wet
Pour the dry mixture into the bowl with the wet ingredients. Use a spatula or wooden spoon to gently fold the two together.
Stir just until you no longer see streaks of dry flour. If the batter feels extremely thick, add the milk or yogurt a tablespoon at a time until loosened slightly.
Stir In the Dates and Walnuts
Add the chopped dates and walnuts to the batter. Fold them in gently with a spatula so they’re evenly distributed, scraping the bottom and sides of the bowl.
Avoid vigorous mixing, which can toughen the bread. Make certain no large clumps of dates remain, as they can create overly wet pockets while baking.
Fill the Pan and Smooth the Surface
Transfer the batter into the prepared loaf pan, using a spatula to scrape out every bit. Spread the batter evenly, pushing it gently into the corners.
Smooth the top so it bakes level. If desired, sprinkle a few extra walnut pieces or chopped dates over the surface for added texture and appearance.
Bake Until Set and Golden
Place the pan in the preheated oven on the center rack. Bake for 50–60 minutes, checking around 50 minutes.
Insert a toothpick into the center; it should come out with just a few moist crumbs, not wet batter. If the top browns too quickly, loosely tent it with foil for the last 10–15 minutes.
Cool the Bread in the Pan Briefly
Remove the pan from the oven and set it on a cooling rack. Let the banana bread cool in the pan for about 10 minutes.
This resting time helps it firm up and pull slightly from the sides, making it easier to remove. Avoid slicing immediately to prevent crumbling and loss of moisture.
Transfer, Cool Fully, and Slice
Use the parchment overhang to carefully lift the loaf out of the pan and place it directly on the cooling rack. Cool for another 10 minutes before slicing, or longer for cleaner cuts.
Use a sharp serrated knife to slice into about 10 pieces. Serve plain, or toast lightly and spread with butter or cream cheese.
Ingredient Swaps
- Use melted coconut oil or canola oil instead of vegetable oil; swap white and brown sugar for coconut sugar or all-granulated if needed.
- Replace eggs with 2 “flax eggs” (2 tbsp ground flax + 6 tbsp water, rested) for a vegan version, and use plant-based milk or yogurt.
- Substitute part or all of the all-purpose flour with whole wheat flour or oat flour (by weight) for a heartier loaf.
- Swap walnuts with pecans, almonds, or sunflower seeds; replace dates with raisins, chopped prunes, or any soft dried fruit available locally.
You Must Know
– Doneness • If the center looks set but you’re unsure
Gently press the top center of the loaf with a fingertip; it should spring back and not leave an indentation, and a skewer in 2–3 different spots should come out with moist crumbs, not wet streaks.
This double-check helps catch underdone “wet tunnels” around dates.
– Troubleshoot • When your batter feels very stiff
Drizzle in 15–30 ml milk or yogurt until the batter slowly plops off the spoon rather than clinging in one heavy mass.
This prevents a dry, dense crumb while still keeping the loaf tall.
– Avoid • If the top is browning by 30–35 minutes
Tent the pan loosely with foil, leaving gaps at the sides, and continue baking until the internal temperature is about 96–98°C (205–208°F).
You’ll protect the crust while the interior finishes setting.
– Scale • For two loaves or a thicker slice yield
Double all ingredients (8 bananas, 240 ml oil, 480 g flour, etc.) and portion evenly into two 9×5-inch pans; start checking for doneness around 45 minutes.
Two smaller loaves often finish a bit quicker and freeze better in halves.
– Flavor Boost • To deepen the date and nut notes
Lightly toast walnuts on a tray at 175°C (350°F) for 6–8 minutes until fragrant, and briefly warm chopped dates in 1–2 tsp hot water or coffee until glossy.
Toasting intensifies nuttiness; softening dates improves their caramel flavor and keeps them from turning tough.
Serving Tips
- Serve slightly warm with a pat of salted butter or cream cheese.
- Pair with hot coffee, chai, or black tea for an afternoon treat.
- Add a scoop of vanilla ice cream and drizzle with warm caramel sauce.
- Toast slices lightly and top with Greek yogurt and a drizzle of honey.
- Cut into cubes for a dessert board with fresh fruit and nuts.
Storage & Make-Ahead
Date and Walnut Banana Bread keeps well, tightly wrapped, in the fridge for up to 5 days.
It’s a great make-ahead dessert, as the flavors deepen overnight.
For longer storage, wrap slices or the whole loaf in plastic and foil, then freeze for up to 3 months.
Reheating
Reheat slices gently: in microwave at 50% power for 15–25 seconds.
In a 150°C (300°F) oven wrapped in foil for 8–10 minutes.
Or on a covered stovetop skillet briefly.
Afternoon Coffee Break Tradition
Once a slice is warm again, I love turning it into the centerpiece of a slow afternoon coffee break. I pour a small cup of coffee, nothing fancy, just strong and dark enough to stand up to the sweetness.
The room gets quiet in that soft, midafternoon way, and the only sound is the spoon clinking against the mug.
I take a bite, and the dates taste almost caramel-like, sticky and rich against the nutty crunch of walnuts. The banana crumb is tender, steam curling up as if the loaf just left the oven.
Coffee cuts through the sweetness, leaving a toasty bitterness on my tongue. For a few minutes, it’s just you, me, and this humble little slice.
Final Thoughts
Give this date and walnut banana bread a try the next time you have ripe bananas—you might find it becomes a new staple in your kitchen.
Don’t hesitate to tweak it with your favorite add-ins, like chocolate chips or different nuts, to make it truly your own.
Frequently Asked Questions
Can I Make This Banana Bread Gluten-Free Without Compromising Texture?
Yes, you can. I’d swap in a good 1:1 gluten‑free flour blend, then add a spoonful of yogurt; as it bakes, you’ll still get that tender crumb, fragrant bananas, and caramel‑sweet dates.
How Do I Adjust Baking Time for Mini Loaves or Muffins?
I’d bake mini loaves about 25–30 minutes and muffins 18–22, until domes spring back and a tester shows moist crumbs. Watch the edges: once they’re golden and the kitchen smells nutty-sweet, you’re there.
Can I Freeze the Batter Unbaked and Bake It Later?
Yes, you can freeze this batter unbaked. I’d pour it into a lined pan, wrap it well, freeze, then bake from frozen, adding 10–15 fragrant minutes until the kitchen smells irresistibly caramel-banana sweet.
How Can Kids Safely Help With This Banana Bread Recipe?
Kids can mash bananas, stir sugars, whisk eggs, and gently fold in dates and walnuts while I handle knives, oven, and hot pans; I set a cozy pace, praising floury hands and sweet, sticky smiles.

Date And Walnut Banana Bread
Equipment
- 2 Mixing bowls
- 1 9×5-inch loaf pan
- 1 Whisk
- 1 Rubber spatula
- 1 Wooden spoon
- 1 Cutting board
- 1 Chef's knife
- 1 Cooling rack
- 1 Measuring cups set
- 1 Measuring spoons set
Ingredients
- 4 medium ripe bananas mashed
- 120 milliliter vegetable oil neutral
- 100 gram granulated sugar
- 80 gram brown sugar packed
- 2 large eggs room temperature
- 5 milliliter vanilla extract
- 240 gram all-purpose flour
- 5 milliliter baking soda
- 2 milliliter baking powder
- 2 milliliter fine sea salt
- 3 milliliter ground cinnamon optional
- 120 gram pitted dates chopped
- 80 gram walnuts roughly chopped
- 30 milliliter milk or yogurt if batter is too thick; optional
Instructions
- Preheat the oven to 175°C (350°F) and lightly grease and line the 9×5-inch loaf pan with parchment paper.
- In a large mixing bowl, whisk together the mashed bananas, vegetable oil, granulated sugar, brown sugar, eggs, and vanilla extract until smooth.
- In a separate bowl, combine the all-purpose flour, baking soda, baking powder, salt, and ground cinnamon.
- Gently fold the dry ingredients into the wet mixture until just combined, adding the milk or yogurt only if the batter seems very thick.
- Fold in the chopped dates and walnuts with a spatula, being careful not to overmix the batter.
- Pour the batter evenly into the prepared loaf pan and smooth the top with a spatula.
- Bake the loaf for 50–60 minutes, or until a toothpick inserted into the center comes out with only a few moist crumbs.
- Remove the pan from the oven and let the bread cool in the pan on a cooling rack for 10 minutes.
- Carefully lift the bread out using the parchment paper and transfer it directly to the cooling rack to cool for another 10 minutes before slicing.
Notes

Cynthia Weatherford is a seasoned chef and culinary enthusiast who serves as the Recipe creator of Somonday. With decades of experience in the kitchen and a passion for exploring diverse cuisines, Cynthia brings a blend of creativity and technique to every dish. Known for transforming simple ingredients into show-stopping meals, Cynthia believes that cooking is an art form anyone can master. Dedicated to inspiring home cooks, Cynthia shares approachable recipes, pro tips, and culinary wisdom to make every meal memorable.