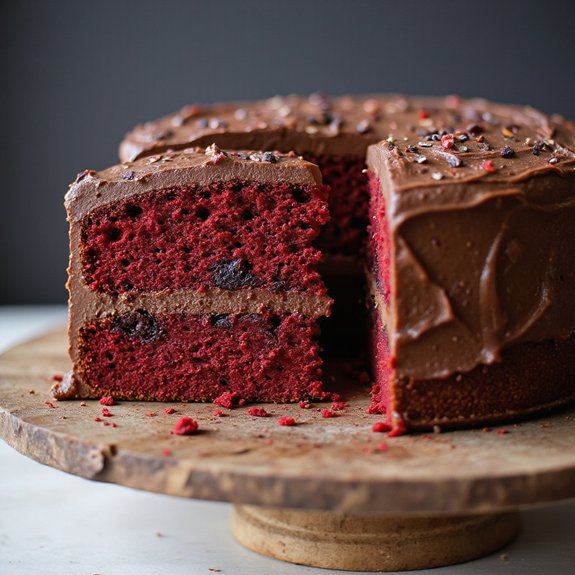
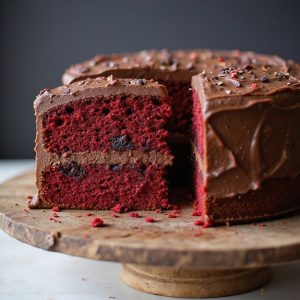
Picture a crimson crumb that looks like velvet under candlelight, crowned with swoops of glossy chocolate fudge that melt at the touch of a warm knife.
Imagine the first slice releasing a whisper of cocoa and coffee, a hug of sweetness and depth that perfumes the whole kitchen.
This cake matters to me because it’s where celebration and comfort meet: the reliable red velvet you grew up with, deepened by double chocolate for a grown-up finish.
It’s the showstopper you can pull off without fuss—perfect for busy weeknights when you need a make-ahead dessert, Sunday suppers that deserve a finale, birthdays, or potlucks where one bite turns strangers into friends.
Once, after a long week and a last-minute dinner invite, this cake saved the night—mixed in minutes, baked while I set the table, and frosted as the coffee brewed.
Ready? Let’s cook!
Why You’ll Love It
- Delivers bold flavor from dual cocoas and melted dark chocolate
- Produces ultra-moist, tender crumb with buttermilk and hot coffee
- Mixes quickly; simple, one-bowl wet and dry method
- Frosts luxuriously with glossy, fudge-forward chocolate frosting
- Slices beautifully; sturdy layers with even chocolate chip pockets
Ingredients
- 2 cups all-purpose flour — spoon and level for accuracy (unbleached if possible)
- 1.5 cups granulated sugar — fine crystal dissolves best
- 0.25 cup unsweetened natural cocoa powder — classic tang and color
- 0.25 cup Dutch-process cocoa powder — adds deep chocolate flavor
- 1 teaspoon baking soda — check freshness for proper rise
- 1 teaspoon baking powder — aluminum-free preferred
- 0.5 teaspoon fine salt — balances sweetness
- 2 large eggs, room temperature — guarantees better emulsion
- 0.75 cup vegetable oil — neutral flavor (canola or safflower)
- 1 cup buttermilk, room temperature — tenderizes crumb
- 1 tablespoon red liquid food coloring — gel works too for vibrancy
- 2 teaspoons vanilla extract — pure extract for best aroma
- 1 teaspoon white vinegar — reacts with leaveners for lift
- 0.5 cup hot brewed coffee — enhances chocolate notes
- 1 cup semisweet chocolate chips — choose good melting chips
- 0.5 cup mini chocolate chips (optional) — extra pockets of chocolate
Chocolate Fudge Frosting:
- 0.75 cup unsalted butter, softened — cool room temp for whipping
- 2 cups powdered sugar — sift to prevent lumps
- 0.5 cup unsweetened cocoa powder — Dutch-process for smoother taste
- 0.25 teaspoon fine salt — sharpens chocolate flavor
- 0.33 cup heavy cream — adjust for spreadable consistency
- 1 teaspoon vanilla extract — rounds out flavors
- 4 ounces dark chocolate, melted and cooled — 60–70% cacao melts silky
Step-by-Step Method
– Prep the Pans
Line two 9-inch pans with parchment rounds and lightly grease the sides. Preheat the oven to 350°F (175°C). Gather equipment and measure all ingredients. Make certain eggs and buttermilk are at room temperature. Cut parchment to fit snugly. Set a wire rack nearby for cooling later. Keep an offset spatula ready for smoothing.
– Whisk the Dry Mix
Combine flour, natural cocoa, Dutch-process cocoa, baking soda, baking powder, and salt in a large bowl. Whisk until the color is uniform and no streaks remain. Break up any cocoa clumps with the whisk.
This makes sure even rise and consistent chocolate flavor throughout the cake layers.
– Combine the Wet Base
In a separate bowl, whisk eggs, granulated sugar, oil, buttermilk, red food coloring, vanilla, and vinegar. Mix until silky and uniformly red. Avoid overwhisking to prevent excess air bubbles.
The vinegar activates leavening for tenderness. Make sure sugar dissolves slightly for a smoother batter.
– Loosen with Hot Coffee
Stir in the hot brewed coffee to the wet mixture. Pour slowly while whisking to avoid scrambling the eggs.
Coffee should be hot, not boiling. This deepens chocolate notes and thins the batter for better hydration. Mix until fully combined and the color is evenly darkened.
– Bring Wet and Dry Together
Add dry ingredients to wet ingredients. Mix gently with a whisk or spatula until just combined. Stop when no dry pockets remain. Don’t overmix, which can toughen the crumb.
Scrape the bowl’s sides and bottom to catch hidden flour. The batter should be slightly fluid and glossy.
– Fold in the Chips
Add semisweet chocolate chips and optional mini chips. Fold with a spatula until evenly dispersed. Keep strokes broad and gentle to maintain batter structure.
Make certain chips aren’t clumped. The mix-ins create fudgy pockets and texture contrast. Avoid overmixing, which could sink chips or deflate the batter.
– Fill and Smooth the Pans
Divide batter evenly between prepared pans. Use a scale for precision or eyeball carefully. Smooth tops with an offset spatula.
Tap pans lightly on the counter to release air bubbles. Even layers bake uniformly and stack neatly. Clean rims for tidy edges after baking and release.
– Bake to Moist Crumb
Bake 30 to 35 minutes. Check at 28 minutes. Insert a toothpick in centers; look for a few moist crumbs, not wet batter. Rotate pans if your oven has hot spots.
Avoid overbaking to keep the crumb tender. The cakes should spring back lightly when gently pressed.
– Cool and Unmold Cleanly
Cool cakes in pans on a wire rack for 10 minutes. Run a thin knife around edges if needed. Invert onto the rack, peel off parchment, and cool completely.
Don’t frost warm cakes; frosting will melt. For neater assembly, chill layers 20 minutes to firm before leveling and frosting.
– Beat the Butter Base
Beat softened butter until creamy and smooth. Add powdered sugar, cocoa powder, and salt. Mix on low until combined to prevent a sugar cloud.
Scrape the bowl. Aim for a thick, cohesive base. Proper creaming sets the foundation for a fluffy, stable fudge frosting.
– Add Cream and Air
Stream in heavy cream and vanilla. Increase mixer speed and beat until fluffy and light. Look for slight sheen and soft peaks.
Adjust with a teaspoon more cream if too stiff, or a spoon of sugar if too loose. Well-aerated frosting spreads easily and holds decorative swirls.
– Enrich with Melted Chocolate
Fold in melted, cooled dark chocolate until glossy and uniform. Make sure chocolate is cool to the touch to prevent melting the frosting base.
Mix just until streak-free. Taste and balance with a pinch of salt if needed. The melted chocolate deepens flavor and creates a silky fudge finish.
– Level and Fill Generously
Level cake tops if domed using a serrated knife. Place the first layer on a stand. Spread a generous, even layer of fudge frosting to the edges.
Keep thickness consistent for stability. Use an offset spatula for control. Add extra frosting at the rim to prevent gaps when stacking.
– Stack and Frost Smoothly
Set the second layer on top, aligning edges. Apply a thin crumb coat over top and sides to seal crumbs. Chill 10 to 15 minutes to set.
Finish with a thicker coat, smoothing sides or creating swirls as desired. Clean the spatula frequently for sleek edges and a polished look.
– Rest, Slice, and Serve
Let the assembled cake rest at least 1 hour at cool room temperature. This sets the crumb and melds flavors.
Slice with a warm, dry knife for clean edges. Wipe between cuts. Serve at room temperature for best texture. Store covered 1 day at room temp or refrigerate up to 4 days.
Ingredient Swaps
- Buttermilk: 1 cup milk + 1 tablespoon white vinegar or lemon juice (rest 5–10 min), or dairy-free milk + 1 tbsp acid for lactose-free/vegan.
- Eggs: 2 flax eggs (2 tbsp ground flax + 6 tbsp water, rest 10 min) or aquafaba (6 tbsp) for vegan; note slightly denser crumb.
- Vegetable oil: Any neutral oil (canola, sunflower) or 3/4 cup melted coconut oil/butter; for budget, use generic canola.
- Cocoa powders: If you have only one type, use 1/2 cup of whichever you have; for color, add 1–2 tsp extra cocoa if increasing red dye.
- Red food coloring: 2–3 tbsp beet juice concentrate or natural red gel; or omit for a “chocolate velvet” cake.
- Buttermilk/coffee-free: Use hot water or hot brewed tea (black) instead of coffee; dairy-free buttermilk as above.
- Chocolate chips: Swap with chopped bar chocolate, milk or dark; omit minis or replace with nuts (pecans/walnuts) for crunch.
- Vinegar: Use apple cider vinegar or lemon juice.
- Frosting dairy: Butter → vegan butter; heavy cream → coconut cream or oat cream; dark chocolate → dairy-free dark chocolate.
- Gluten-free: Use 1:1 gluten-free all-purpose flour blend with xanthan gum; let batter rest 10 minutes before baking.
You Must Know
- Doneness • If the center domes or the edges pull away early, tent loosely with foil and rotate at the 20-minute mark; aim for a toothpick with a few moist crumbs, not wet batter, at 30–35 minutes. Prevents dry rims and underdone centers; look for a spring-back when lightly pressed.
- Troubleshoot • If batter looks curdled after adding coffee, emulsify by stirring in 1–2 tablespoons extra buttermilk until glossy. Temperature shock can split the mixture; smooth, slightly thin batter flows in thick ribbons off a spatula.
- Scale • For 3 layers (three 8-inch pans), increase all ingredients by 1.5x; fill pans ~2/3 full and start checking at 24–26 minutes. Keeps layer height similar; finished layers should be about 1–1.25 inches tall each.
- Flavor Boost • For deeper cocoa notes without muting the red, add 1 teaspoon espresso powder to the dry mix and increase vanilla to 3 teaspoons. Enhances chocolate perception; you’ll smell a fuller aroma when batter is mixed and in the first 5 minutes of baking.
- Make-Ahead • For cleaner slicing, chill the fully frosted cake 45–60 minutes until the frosting firms (surface no longer tacky), then wrap and refrigerate up to 4 days; bring to room temp 45–60 minutes before serving. Yields neat slices with defined layers and soft crumb.
Serving Tips
- Serve slightly chilled slices with a dollop of lightly sweetened whipped cream.
- Pair with vanilla bean ice cream and a drizzle of warm chocolate sauce.
- Garnish plates with fresh raspberries and a dusting of powdered sugar.
- Pour small glasses of cold milk or robust espresso alongside.
- Add chocolate shavings and a few cocoa-dusted red velvet crumbs on top.
Storage & Make-Ahead
Refrigerate the frosted cake, well-covered, for up to 4 days.
Bring slices to room temperature before serving for best texture.
Layers can be baked 2 days ahead, wrapped tightly, and chilled.
This cake freezes well.
Wrap unfrosted layers or the fully frosted cake securely.
Freeze up to 2 months.
Thaw overnight refrigerated.
Reheating
Reheat slices gently.
Microwave at 50% power 15–20 seconds.
Oven: wrap in foil, 300°F for 8–10 minutes.
Stovetop: steam briefly in covered skillet to warm without drying.
Juneteenth Cookout Staple
Sometimes a Juneteenth table begs for a showstopper, and this double chocolate fudge red velvet delivers with pride. I bring it out last, letting the sun catch the crimson crumb while the fudge frosting glistens like a quiet drumroll. You’ll hear a hush, then forks tap plates.
I bake it for the cookout spread—smoky ribs, tangy slaw, sweet corn—and this cake bridges it all. The buttermilk keeps each slice tender, the coffee-deepened cocoa hums beneath the red, and the melted dark chocolate in the frosting coats tongues like velvet.
I cut generous wedges, slipping parchment between slices for easy passing. Kids angle for the chips; aunties ask for the recipe. It tastes like celebration—rich, bold, and joyfully gathered on one plate.
Final Thoughts
Ready to bake? Give this double-chocolate red velvet a try and make it your own—add extra chips, a splash more vanilla, or your favorite sprinkles on top.
Can’t wait to hear how you customize it!
Frequently Asked Questions
Can I Bake This as Cupcakes Instead of a Layer Cake?
Yes—you can. I’ll fill a 12-cup muffin tin, two-thirds full, and bake at 350°F for 18–22 minutes. I’ll cool completely, swirl on fudgy frosting, and enjoy tender, scarlet crumbs whispering chocolate warmth.
How Do I Convert This Recipe for High-Altitude Baking?
Adjust for altitude: I reduce sugar 2 tablespoons, increase flour 2 tablespoons, add 1 tablespoon buttermilk, bake at 365°F, and cut leaveners to 3/4 teaspoon each. I watch moist crumbs, inhale cocoa steam, frost once cooled.
Is This Cake Suitable for Freezing the Frosted Layers?
Yes—I freeze frosted layers beautifully. I chill them until firm, wrap snugly in plastic and foil, and freeze up to 2 months. Thaw overnight in the fridge; the frosting stays velvety, the crumb tender, flavors deepening.
What’s the Best Way to Transport the Assembled Cake?
Use a snug cake carrier; I chill the cake an hour, secure it on a non-slip mat, and keep it level in my car’s footwell. Drive gently—windows up—so frosting stays glossy, layers serene, aroma teasing.
Can I Make This Recipe Gluten-Free Successfully?
Yes—you can. I swap in a 1:1 gluten-free baking flour with xanthan gum, weigh ingredients, don’t overmix, and let the batter rest 15 minutes. The cake bakes tender, chocolatey, and beautifully plush. Enjoy.
Double Chocolate Fudge Red Velvet Cake
Equipment
- 2 9-inch round cake pans
- 1 stand mixer or hand mixer
- 3 Mixing bowls
- 1 Whisk
- 1 Rubber spatula
- 1 Wire rack
- 1 measuring cup set
- 1 Measuring spoons set
- 1 parchment paper sheet cut to fit pans
- 1 offset spatula
Ingredients
- 2 cup all-purpose flour
- 1 1/2 cup granulated sugar
- 1/4 cup unsweetened natural cocoa powder
- 1/4 cup Dutch-process cocoa powder
- 1 teaspoon baking soda
- 1 teaspoon baking powder
- 1/2 teaspoon fine salt
- 2 large eggs room temperature
- 3/4 cup vegetable oil
- 1 cup buttermilk room temperature
- 1 tablespoon red liquid food coloring
- 2 teaspoon vanilla extract
- 1 teaspoon white vinegar
- 1/2 cup hot brewed coffee
- 1 cup semisweet chocolate chips
- 1/2 cup mini chocolate chips optional
- 3/4 cup unsalted butter softened
- 2 cup powdered sugar
- 1/2 cup unsweetened cocoa powder
- 1/4 teaspoon fine salt
- 1/3 cup heavy cream
- 1 teaspoon vanilla extract
- 4 ounce dark chocolate melted and cooled
Instructions
- Preheat the oven to 350°F (175°C) and line two 9-inch cake pans with parchment rounds and lightly grease the sides.
- In a large bowl whisk together flour, both cocoas, baking soda, baking powder, and salt until evenly combined.
- In a separate bowl whisk eggs, granulated sugar, oil, buttermilk, food coloring, vanilla, and vinegar until smooth and uniformly red.
- Stir the hot coffee into the wet mixture to loosen the batter and enhance the chocolate flavor.
- Add the dry ingredients to the wet ingredients and mix gently until just combined with no dry pockets.
- Fold in the semisweet chocolate chips and optional mini chocolate chips until evenly dispersed.
- Divide the batter evenly between prepared pans and smooth the tops with an offset spatula.
- Bake for 30 to 35 minutes until a toothpick inserted in the center comes out with a few moist crumbs.
- Cool cakes in pans on a wire rack for 10 minutes, then turn out onto the rack, peel parchment, and cool completely.
- For the frosting, beat softened butter until creamy, then add powdered sugar, cocoa, and salt and mix on low until combined.
- Stream in heavy cream and vanilla, increase speed, and beat until fluffy and light.
- Fold in the melted and cooled dark chocolate until the frosting is glossy and spreadable.
- Level cake layers if needed, place one layer on a stand, and spread a generous layer of fudge frosting to the edges.
- Set the second layer on top and frost the top and sides smoothly or with swirls as desired.
- Let the assembled cake rest for at least 1 hour to set the crumb and allow flavors to meld before slicing.
Notes

Cynthia Weatherford is a seasoned chef and culinary enthusiast who serves as the Recipe creator of Somonday. With decades of experience in the kitchen and a passion for exploring diverse cuisines, Cynthia brings a blend of creativity and technique to every dish. Known for transforming simple ingredients into show-stopping meals, Cynthia believes that cooking is an art form anyone can master. Dedicated to inspiring home cooks, Cynthia shares approachable recipes, pro tips, and culinary wisdom to make every meal memorable.


