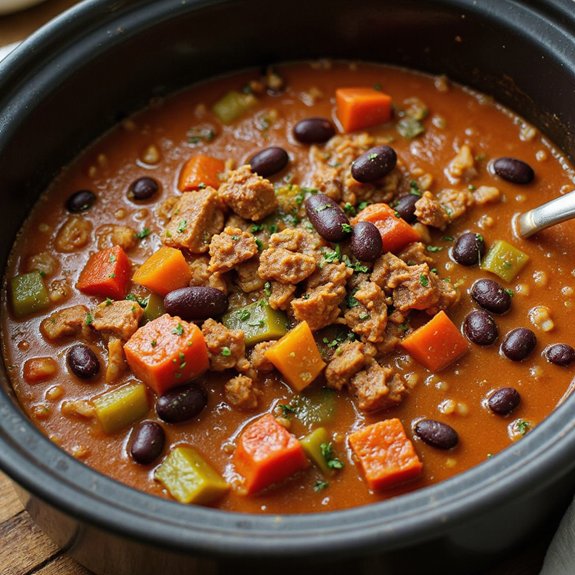
Picture a steaming bowl of Dutch Oven Chili, its rich aroma filling your kitchen with a comforting warmth.
This dish is both simple to prepare and delightfully indulgent, making it a beloved favorite for cozy nights in.
As the ingredients meld together, the chili transforms into a hearty symphony of flavors, each bite more satisfying than the last.
Let’s bring this heartwarming dish to life!
Kitchen Tools Required
- 1 Dutch oven
- 1 Wooden spoon
- 1 Chef’s knife
- 1 Cutting board
- 1 Measuring cups set
- 1 Measuring spoons set
- 1 Can opener
Ingredients
- 1 pound ground beef
- 1 tablespoon olive oil
- 1 large onion, diced
- 3 cloves garlic, minced
- 1 bell pepper, diced
- 2 tablespoons chili powder
- 1 teaspoon ground cumin
- 1 teaspoon smoked paprika
- 1/2 teaspoon cayenne pepper
- 1 teaspoon salt
- 1/2 teaspoon black pepper
- 1 can (15 ounces) diced tomatoes
- 1 can (15 ounces) kidney beans, drained and rinsed
- 1 can (15 ounces) black beans, drained and rinsed
- 2 cups beef broth
- 1 tablespoon tomato paste
Cook & Prep Time
To efficiently manage your time while preparing and cooking Dutch Oven Chili, follow this timeline:
- Reading the Recipe (5 minutes):
- Start by reading through the entire recipe to familiarize yourself with the steps and ingredients.
- Prep Work (15 minutes):
- Gather all the necessary equipment: Dutch oven, wooden spoon, chef’s knife, cutting board, measuring cups, measuring spoons, and can opener.
- Prepare ingredients: Dice the onion, mince the garlic, and dice the bell pepper.
- Cooking (1 hour 30 minutes):
- 0 to 10 minutes:
- Heat the olive oil in the Dutch oven over medium heat.
- Add the ground beef and cook until browned, breaking it up with a wooden spoon.
- 10 to 15 minutes:
- Remove the beef and set it aside.
- 15 to 25 minutes:
- Sauté the onion, garlic, and bell pepper in the same Dutch oven until softened.
- 25 to 30 minutes:
- Stir in the chili powder, cumin, smoked paprika, cayenne pepper, salt, and black pepper.
- 30 to 35 minutes:
- Add diced tomatoes, kidney beans, black beans, beef broth, and tomato paste.
- 35 to 40 minutes:
- Return the cooked beef to the Dutch oven and stir to combine.
- 40 to 100 minutes:
- Bring the mixture to a simmer, then reduce the heat to low.
- Cover the Dutch oven and let the chili cook for 1 hour, stirring occasionally.
- 100 to 130 minutes:
- Remove the lid and simmer for an additional 30 minutes to thicken.
- Resting Time (10 minutes):
- Remove from heat and let the chili rest for 10 minutes before serving.
Adjust the timing as needed based on your pace and any additional garnishes you might want to add.
Recipe Instructions
Heat the olive oil in a Dutch oven over medium heat.
Add the ground beef and cook until browned, breaking it up with a wooden spoon.
Remove the beef and set it aside.
In the same Dutch oven, add the onion, garlic, and bell pepper, and sauté until softened.
Stir in the chili powder, cumin, smoked paprika, cayenne pepper, salt, and black pepper.
Add the diced tomatoes, kidney beans, black beans, beef broth, and tomato paste.
Return the cooked beef to the Dutch oven and stir to combine.
Bring the mixture to a simmer, then reduce the heat to low.
Cover the Dutch oven and let the chili cook for 1 hour, stirring occasionally.
Remove the lid and simmer for an additional 30 minutes to thicken.
Remove from heat and let the chili rest for 10 minutes before serving.
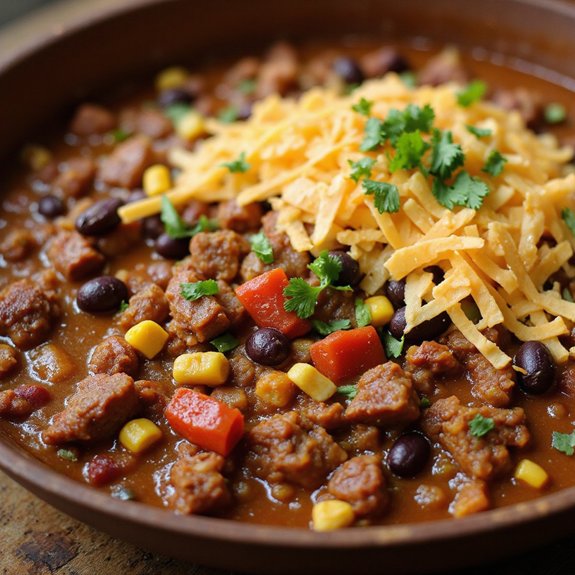
Serving Tips
- Crusty Bread: Perfect for dipping and soaking up the rich chili sauce.
- Steamed Rice: A great way to make the meal more filling and absorb the flavorful broth.
- Tortilla Chips: Adds a crunchy texture and can be used as edible scoops.
- Sour Cream and Shredded Cheese: Adds creaminess and an extra layer of flavor on top.
- Avocado Slices: Provides a fresh and creamy contrast to the hearty chili.
Storage
To store Dutch Oven Chili, let it cool completely.
Then transfer it to airtight containers.
Refrigerate for up to 4 days.
Or freeze for up to 3 months for longer storage.
Freezing
To freeze Dutch Oven Chili, let it cool completely.
Then, transfer to airtight containers or freezer bags, leaving some space for expansion.
Label with the date and freeze for up to 3 months.
Reheating
To reheat Dutch Oven Chili, gently warm it on the stovetop over low heat.
Stir occasionally.
Alternatively, use a microwave.
Cover the chili to prevent splatters, and heat in intervals.
Final Thoughts
Enjoy the rich and hearty flavors of this Dutch Oven Chili.
Letting the chili rest before serving allows the ingredients to meld together.
Adjust the spices to your preference for a personalized taste.
This dish is perfect for a cozy meal with family or friends.
Frequently Asked Questions
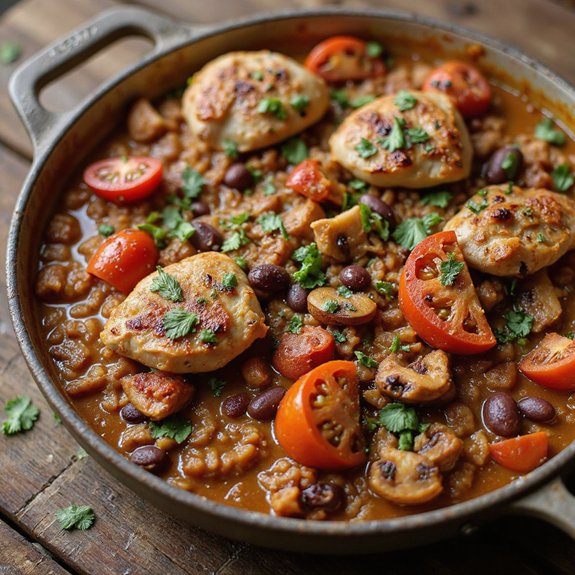
Can I Use a Different Type of Meat Instead of Ground Beef?
Absolutely, substitute ground beef with equal amounts of ground turkey, chicken, or pork. Guarantee thorough browning for flavor development. Adjust cooking times slightly as needed. Experiment with seasoning adjustments to complement the chosen meat’s unique taste profile.
Is It Possible to Make This Chili Vegetarian?
You can make it vegetarian by replacing ground beef with an additional can of beans or lentils. Sauté vegetables in olive oil, then proceed with the recipe, ensuring spices are adjusted to complement the meatless base.
How Can I Make the Chili Spicier?
Increase spiciness by adding 1-2 teaspoons of cayenne pepper or diced jalapeños. Include a pinch of crushed red pepper flakes. Taste frequently to guarantee heat level suits your preference. Adjust chili powder to maintain a balanced flavor.
What Toppings Go Well With Dutch Oven Chili?
Top your chili with shredded cheddar cheese, 2 tablespoons sour cream, and 1/4 cup chopped green onions for a creamy finish. Add 1/2 teaspoon crushed red pepper or jalapeño slices for extra heat. Don’t forget tortilla chips!
Can I Make This Recipe in a Slow Cooker Instead?
Yes, you can! Brown the beef first, then transfer all ingredients to the slow cooker. Cook on low for 6-8 hours or high for 3-4 hours. Stir occasionally for even cooking and ideal flavor development.
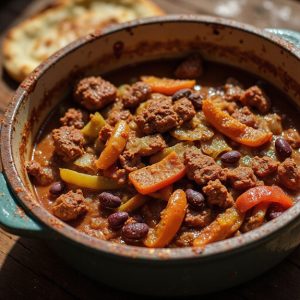
Dutch Oven Chili
Equipment
- 1 Dutch oven
- 1 Wooden spoon
- 1 Chef's knife
- 1 Cutting board
- 1 Measuring cups set
- 1 Measuring spoons set
- 1 can opener
Ingredients
- 1 pound ground beef
- 1 tablespoon olive oil
- 1 large onion diced
- 3 cloves garlic minced
- 1 bell pepper diced
- 2 tablespoons chili powder
- 1 teaspoon ground cumin
- 1 teaspoon smoked paprika
- 1/2 teaspoon cayenne pepper
- 1 teaspoon salt
- 1/2 teaspoon black pepper
- 1 can diced tomatoes 15 ounces
- 1 can kidney beans drained and rinsed
- 1 can black beans drained and rinsed
- 2 cups beef broth
- 1 tablespoon tomato paste
Instructions
- Heat the olive oil in a Dutch oven over medium heat.
- Add the ground beef and cook until browned, breaking it up with a wooden spoon.
- Remove the beef and set it aside.
- In the same Dutch oven, add the onion, garlic, and bell pepper, and sauté until softened.
- Stir in the chili powder, cumin, smoked paprika, cayenne pepper, salt, and black pepper.
- Add the diced tomatoes, kidney beans, black beans, beef broth, and tomato paste.
- Return the cooked beef to the Dutch oven and stir to combine.
- Bring the mixture to a simmer, then reduce the heat to low.
- Cover the Dutch oven and let the chili cook for 1 hour, stirring occasionally.
- Remove the lid and simmer for an additional 30 minutes to thicken.
- Remove from heat and let the chili rest for 10 minutes before serving.
Notes

Cynthia Weatherford is a seasoned chef and culinary enthusiast who serves as the Recipe creator of Somonday. With decades of experience in the kitchen and a passion for exploring diverse cuisines, Cynthia brings a blend of creativity and technique to every dish. Known for transforming simple ingredients into show-stopping meals, Cynthia believes that cooking is an art form anyone can master. Dedicated to inspiring home cooks, Cynthia shares approachable recipes, pro tips, and culinary wisdom to make every meal memorable.