When you commence on the journey of making easy authentic Italian tiramisu, precise measurements and detailed techniques become your guiding stars.
Begin with kitchen tools like a mixing bowl, whisk, and spatula.
Carefully layer coffee-soaked ladyfingers with a mascarpone mixture, ensuring the egg whites are gently folded in for that light texture.
A dusting of cocoa powder adds elegance.
Curious about the exact steps and serving tips? There’s more to discover in this classic no-bake dessert.
Kitchen Tools Required
- 1 Mixing bowl
- 1 Electric mixer
- 1 Shallow dish
- 1 9×13 inch baking dish
- 1 Spatula
- 1 Fine mesh sieve
Ingredients
- 1 ½ cups espresso, cooled
- 3 tablespoons coffee liqueur
- 4 large eggs, separated
- ½ cup granulated sugar
- 1 pinch salt
- 8 ounces mascarpone cheese
- 24 ladyfingers
- 2 tablespoons unsweetened cocoa powder
Cook & Prep Time
To efficiently manage your time while preparing the Authentic Italian Tiramisu, here’s a suggested timeline based on the prep and resting times:
Timeline for Preparing Tiramisu
Before You Start:
– Gather all ingredients and equipment: This includes the mixing bowl, electric mixer, shallow dish, baking dish, spatula, and fine mesh sieve.
Prep Activities (30 minutes):
1. 0:00 – 0:05: Brew the espresso and set it aside to cool.
2. 0:05 – 0:10: Mix the cooled espresso with the coffee liqueur in a shallow dish.
3. 0:10 – 0:15: In a mixing bowl, beat the egg yolks and sugar until pale and thick.
4. 0:15 – 0:20: Add the mascarpone cheese to the egg yolk mixture and beat until smooth and creamy.
5. 0:20 – 0:25: In another bowl, whisk the egg whites with a pinch of salt until stiff peaks form.
6. 0:25 – 0:30: Gently fold the egg whites into the mascarpone mixture.
Assembly (10 minutes):
7. 0:30 – 0:35: Quickly dip each ladyfinger into the espresso mixture, ensuring not to soak them.
8. 0:35 – 0:40: Arrange half of the dipped ladyfingers on the bottom of the baking dish.
9. 0:40 – 0:45: Spread half of the mascarpone mixture over the ladyfingers.
10. 0:45 – 0:50: Repeat with another layer of dipped ladyfingers and mascarpone mixture.
Resting Time (4 hours):
11. 0:50: Cover the tiramisu and refrigerate for at least 4 hours or overnight.
Before Serving:
12. 4:50: Before serving, dust the top of the tiramisu with cocoa powder using a fine mesh sieve.
Recipe
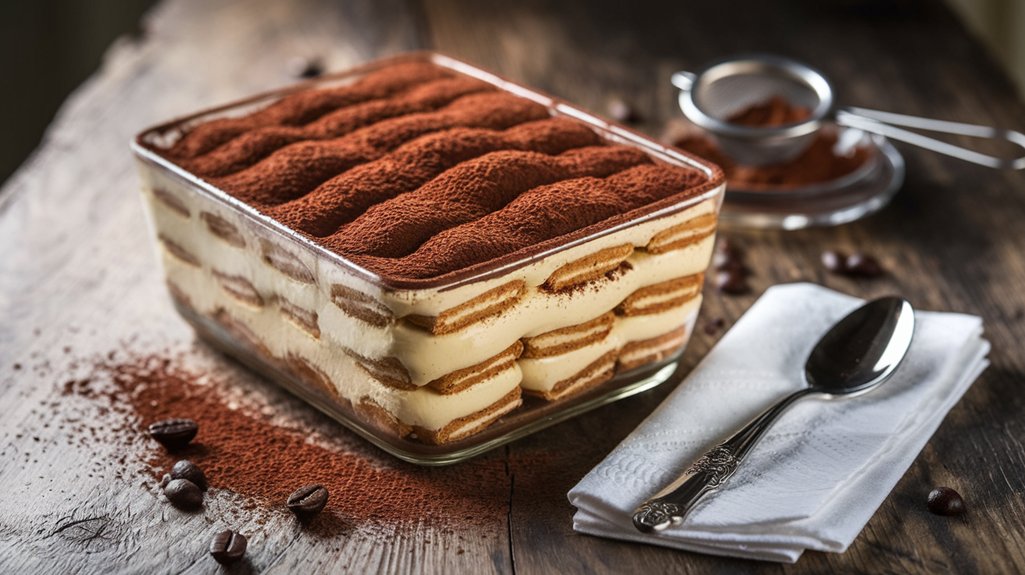
Tiramisu is a classic Italian dessert known for its rich, creamy texture and coffee-infused flavors.
Originating from the Veneto region of Italy, this no-bake dessert combines layers of coffee-soaked ladyfingers with a luscious mascarpone filling.
It’s a perfect ending to any meal and is bound to impress guests with its authentic taste.
The key to a great tiramisu lies in the quality of its ingredients and the care taken in its preparation.
To make an authentic Italian tiramisu, start by preparing a mixture of espresso and coffee liqueur, which will be used to give the ladyfingers their distinctive coffee flavor.
Meanwhile, the creamy filling is made by beating together egg yolks and sugar until pale and thick, then incorporating mascarpone cheese until smooth.
The lightness of the filling is achieved by folding in stiffly beaten egg whites, creating a delicate balance of flavors and textures.
Once assembled, the tiramisu is refrigerated to allow the flavors to meld and the texture to set.
To assemble the tiramisu, begin by quickly dipping each ladyfinger into the espresso mixture, taking care not to soak them.
Arrange half of the dipped ladyfingers in a single layer at the bottom of a 9×13 inch baking dish.
Spread half of the mascarpone mixture over the ladyfingers, guaranteeing an even layer.
Repeat the process with the remaining ladyfingers and mascarpone mixture.
Cover the dish and refrigerate for at least 4 hours or overnight to allow the flavors to develop.
Before serving, use a fine mesh sieve to dust the top with unsweetened cocoa powder for a finished look and an added hint of chocolate flavor.
For best results, make certain that the mascarpone cheese is at room temperature before mixing, as this will help achieve a smooth, creamy filling.
Use high-quality espresso and coffee liqueur to capture the authentic Italian taste.
Additionally, be cautious not to over-soak the ladyfingers, as this can lead to a soggy texture.
Allowing the tiramisu to rest in the refrigerator for several hours or overnight is essential for the flavors to meld and the dessert to set properly.
Cooking Steps
To start crafting your authentic Italian tiramisu, brew 1 ½ cups of espresso and let it cool completely before combining it with 3 tablespoons of coffee liqueur in a shallow dish.
Next, beat the yolks of 4 large eggs with ½ cup of granulated sugar until the mixture becomes pale and thick, then incorporate 8 ounces of room-temperature mascarpone until smooth.
In a separate bowl, whisk the egg whites with a pinch of salt until stiff peaks form, and gently fold them into the mascarpone mixture to maintain a light texture.
Step 1. Brewed Espresso Preparation

Start by brewing 1 ½ cups of espresso using freshly ground high-quality coffee beans for best flavor.
Use an espresso machine for precision, guaranteeing water temperature reaches approximately 195°F.
Measure the coffee grounds accurately, using 18-20 grams per shot for peak strength.
Tamp the grounds evenly with consistent pressure to guarantee uniform extraction.
Initiate the brewing process, allowing the espresso to flow for 25-30 seconds, aiming for a rich, crema-topped shot.
Once brewed, transfer the espresso into a heatproof container and set aside to cool to room temperature.
This step is vital to prevent the ladyfingers from becoming too soggy when dipped.
Step 2. Beat Yolks With Sugar
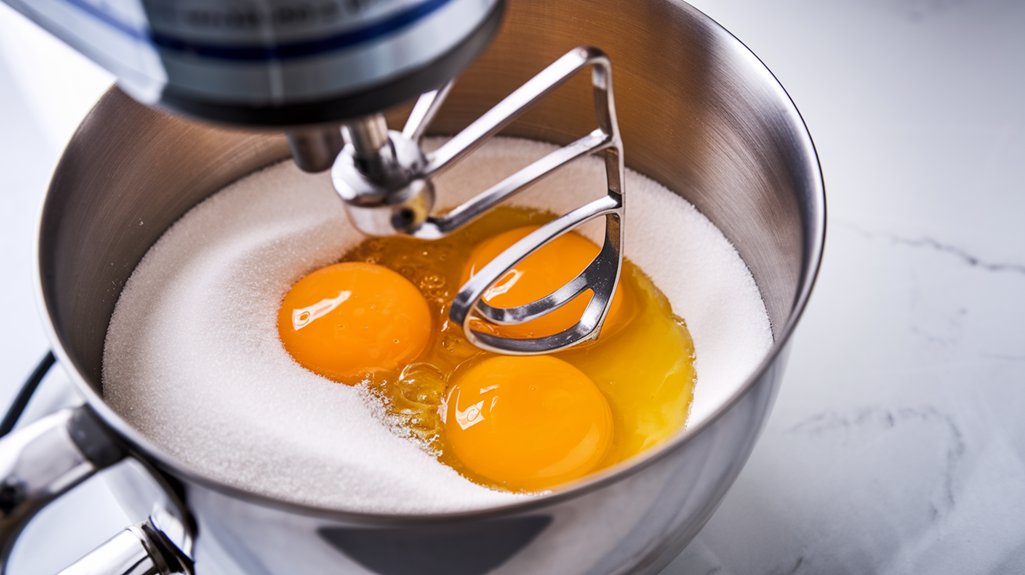
Grab your mixing bowl and introduce the separated egg yolks and ½ cup of granulated sugar.
With an electric mixer, set to medium speed, begin beating the yolks and sugar.
You’re aiming for a pale, thickened mixture, which takes about 3-5 minutes.
As you beat, the granulated sugar will dissolve, integrating seamlessly with the yolks.
The mixture should achieve a ribbon-like consistency, meaning when you lift the beaters, the mixture falls in a continuous stream, resembling thick ribbons.
This stage is essential as it guarantees the sugar is fully incorporated, providing the necessary structure and sweetness for your tiramisu.
Maintain a steady hand and even speed to avoid over-whipping, which can lead to a grainy texture.
Step 3. Combine Mascarpone With Yolks

With your yolk mixture ready, it’s time to incorporate the mascarpone.
Make certain the mascarpone cheese is at room temperature for ideal blending.
Measure out 8 ounces of mascarpone and add it directly to the yolk-sugar mixture.
Using an electric mixer on medium speed, beat the mixture until it achieves a smooth, creamy consistency.
This process typically takes about 2-3 minutes.
It’s important to scrape down the sides of the bowl with a spatula to guarantee even mixing.
Avoid overbeating; you want a uniform blend without breaking down the mascarpone’s texture.
Properly combined, the mixture should be thick and thoroughly homogeneous, with no visible lumps.
This step is vital for achieving the tiramisu’s signature creamy layer, making sure each bite melts seamlessly in your mouth.
Step 4. Whisk Egg Whites Until Stiff

To achieve the perfect stiff peaks, guarantee your mixing bowl and whisk are impeccably clean and dry.
Begin by placing 4 large egg whites into the bowl. Add a pinch of salt to stabilize the proteins, ensuring better volume.
Utilize an electric mixer, starting on medium speed to gradually incorporate air. Once frothy, increase to high speed.
Watch as the egg whites shift from soft to firm, forming glossy peaks that hold shape.
To test readiness, lift the whisk: peaks should stand with slightly curled tips.
Avoid over-whisking as this can cause them to collapse.
Properly whipped egg whites are essential for the tiramisu’s light, airy texture, providing vital lift to the mascarpone mixture in the subsequent steps.
Step 5. Fold in Egg Whites Gently
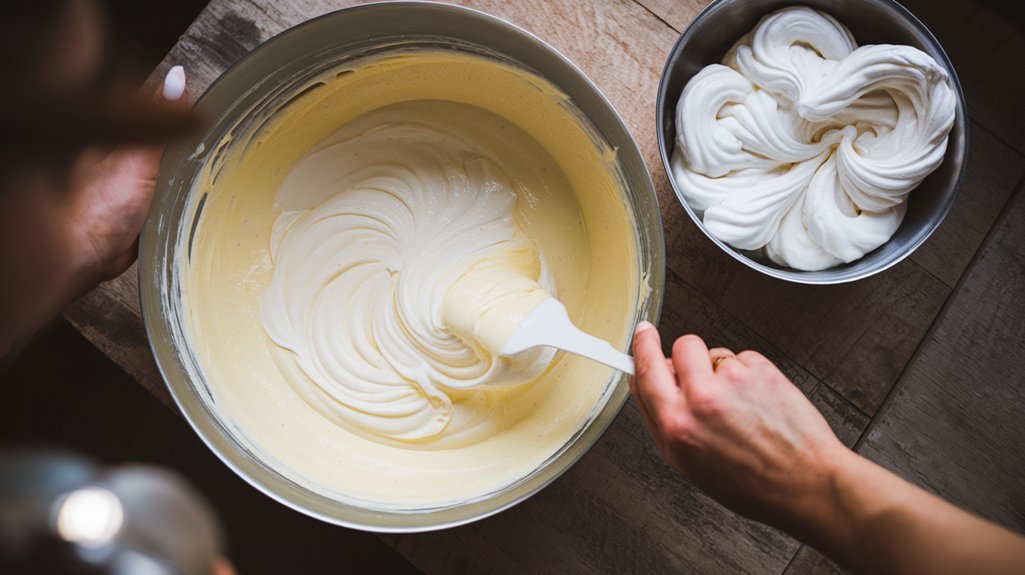
Incorporate the whipped egg whites into the mascarpone mixture with precision to maintain their airy structure.
Use a spatula to fold the egg whites, guaranteeing minimal deflation.
Hold the bowl at a slight angle, moving the spatula in a gentle, sweeping motion from the bottom, over the top, and down the sides.
This technique guarantees even blending without compromising volume.
| Technique | Purpose | Outcome |
|---|---|---|
| Gentle sweep | Preserve airiness | Light texture |
| Bowl tilting | Facilitate mixing | Homogeneous mixture |
| Minimal turns | Avoid over-mixing | Consistent structure |
Incorporate in thirds, allowing each part to integrate before adding more.
This gradual process guarantees a uniform texture, vital for the tiramisu’s final creaminess.
Remember, patience and a delicate touch yield the best results.
Serving Tips
- Fresh Berries: Add a pop of color and a burst of freshness by serving with a side of mixed fresh berries like strawberries, raspberries, or blueberries.
- Espresso Shots: Complement the flavors with small espresso shots for an added coffee kick that pairs perfectly with the tiramisu.
- Whipped Cream: Serve with a dollop of freshly whipped cream to enhance the creamy texture and richness of the dessert.
- Grated Chocolate: Sprinkle some grated dark chocolate on top for an extra layer of indulgence and a touch of bitterness.
- Amaretto Liqueur: Offer a small glass of Amaretto on the side to enhance the almond notes and provide an aromatic pairing.
Storage/Freezing/Reheating
Storage: Store the tiramisu in an airtight container in the refrigerator for up to 3 days.
Make sure it’s well-covered to prevent it from absorbing any odors from other foods.
Freezing: Tiramisu can be frozen for up to 2 months.
Wrap it tightly with plastic wrap and aluminum foil before freezing to maintain its texture and flavors.
Reheating: Tiramisu is best served chilled, so reheating is unnecessary.
Simply transfer it from the freezer to the refrigerator and allow it to thaw overnight before serving.
Final Thoughts
Although crafting an authentic Italian tiramisu might seem intimidating, following precise measurements and techniques guarantees a delightful result.
Start by making sure your mascarpone is at room temperature, which facilitates a smooth, creamy filling.
When whisking the egg whites, aim for stiff peaks; this guarantees the structure and lightness of the final dish.
Be cautious with the espresso-dipped ladyfingers—submerge them briefly to maintain their integrity.
Layering is key: alternate between the espresso-dipped ladyfingers and mascarpone mixture in your 9×13 inch baking dish.
Once assembled, refrigerate for at least four hours to allow flavors to meld.
Before serving, dust with unsweetened cocoa powder using a fine mesh sieve for an even, delicate finish.
Enjoy the rich, harmonious flavors of your expertly crafted tiramisu.
Frequently Asked Questions
Can I Substitute the Coffee Liqueur With Something Non-Alcoholic?
You can substitute the coffee liqueur with an equal amount of coffee extract or vanilla extract. This guarantees a non-alcoholic tiramisu while maintaining flavor depth. Measure precisely to avoid overpowering the espresso notes. Adjust sweetness if needed.
What Can I Use Instead of Mascarpone Cheese?
You can substitute mascarpone with a mixture of 8 ounces cream cheese, 2 tablespoons heavy cream, and 2 tablespoons sour cream. This blend replicates mascarpone’s creamy texture and tang, making it a suitable alternative in your tiramisu.
How Do I Make This Recipe Egg-Free?
Replace each egg with ¼ cup silken tofu, blended until smooth. In step 2, mix tofu with sugar until creamy. Skip step 4. Continue by folding blended tofu mixture into mascarpone, maintaining a gentle folding technique.
Can I Use Instant Coffee Instead of Espresso?
Yes, you can substitute 1 ½ cups of brewed instant coffee for espresso. Use 1 tablespoon of instant coffee granules per 1 cup of water. Confirm the coffee cools before dipping ladyfingers to maintain texture integrity.
How Long Can Tiramisu Be Left Out at Room Temperature?
You shouldn’t leave tiramisu out at room temperature for more than two hours. Bacteria can grow rapidly between 40°F and 140°F. To preserve quality and safety, refrigerate it promptly after serving or preparing.

Easy Authentic Italian Tiramisu
Equipment
- 1 Mixing bowl
- 1 Electric mixer
- 1 Shallow dish
- 1 9×13 inch baking dish
- 1 Spatula
- 1 Fine mesh sieve
Ingredients
- 1 ½ cups espresso cooled
- 3 tablespoons coffee liqueur
- 4 large eggs separated
- ½ cup granulated sugar
- 1 pinch salt
- 8 ounces mascarpone cheese
- 24 ladyfingers
- 2 tablespoons unsweetened cocoa powder
Instructions
- Brew and cool the espresso, then mix with coffee liqueur in a shallow dish.
- In a mixing bowl, beat egg yolks and sugar until pale and thick.
- Add mascarpone to the yolks and beat until smooth and creamy.
- In another bowl, whisk egg whites with salt until stiff peaks form.
- Gently fold egg whites into the mascarpone mixture.
- Quickly dip each ladyfinger into the espresso mixture, ensuring not to soak them.
- Arrange half of the dipped ladyfingers on the bottom of the baking dish.
- Spread half of the mascarpone mixture over the ladyfingers.
- Repeat with another layer of dipped ladyfingers and mascarpone mixture.
- Cover and refrigerate for at least 4 hours or overnight.
- Before serving, dust the top with cocoa powder using a fine mesh sieve.
Notes

Cynthia Weatherford is a seasoned chef and culinary enthusiast who serves as the Recipe creator of Somonday. With decades of experience in the kitchen and a passion for exploring diverse cuisines, Cynthia brings a blend of creativity and technique to every dish. Known for transforming simple ingredients into show-stopping meals, Cynthia believes that cooking is an art form anyone can master. Dedicated to inspiring home cooks, Cynthia shares approachable recipes, pro tips, and culinary wisdom to make every meal memorable.


