There’s something about waking up to a kitchen that smells faintly of warm wheat, toasted crust, and tangy sourdough that makes the whole day feel calmer.
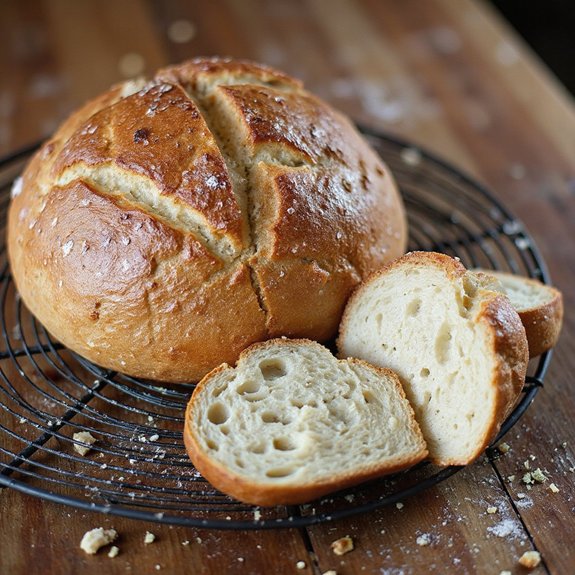
This overnight sourdough bread is a simple, hands-off loaf that rests while you sleep, then bakes into a crackling, golden boule—perfect for breakfast toast, hearty sandwiches, or dunking into soup.
It’s ideal for beginners who feel nervous about bread, busy home cooks who don’t have time for an all-day project, and anyone who loves the comfort of real, homemade loaves.
I remember a particularly hectic week when work ran late every night; knowing dough was quietly rising on the counter felt like a small promise that tomorrow would be better.
On slow Sunday suppers, easy entertaining, or when last-minute company stops by, this bread turns the most basic meal into something special.
Ready to bring this loaf to life?
Why You’ll Love It
- Delivers deep, tangy sourdough flavor with minimal hands-on time
- Simplifies timing with an easy overnight rise while you sleep
- Uses just four basic ingredients—flour, water, salt, and starter
- Bakes in a Dutch oven for impressive bakery-style crust and crumb
- Adapts easily with add-ins like seeds, herbs, or whole grains
Ingredients
- 500 g bread flour — strong bread flour builds good structure
- 350 g water, lukewarm — slightly warm helps starter disperse evenly
- 100 g active sourdough starter (100% hydration) — use bubbly, recently fed starter
- 10 g fine sea salt — fine grains dissolve and season the dough uniformly
Step-by-Step Method
Mix Starter & Water
Whisk the lukewarm water and active sourdough starter in a large mixing bowl. Dissolve the starter as much as possible so it disperses evenly.
This helps create consistent fermentation. Scrape down the sides of the bowl. Make certain the mixture looks milky and uniform before moving on to add the flour and salt.
Combine Flour & Salt
Add the bread flour and fine sea salt directly to the starter-water mixture. Mix with your hand or a dough scraper until no dry flour remains. Form a shaggy, sticky dough. Avoid adding extra flour now.
Scrape the bowl sides and press everything together so all ingredients are fully incorporated before resting.
Rest for Autolyse
Cover the bowl with a clean kitchen towel or plastic wrap. Let the dough rest at room temperature for about 30 minutes.
Allow the flour to hydrate and gluten to begin forming on its own. Avoid touching or mixing during this stage. Use this time to clean up and prepare for stretch-and-folds.
Stretch & Fold the Dough
Perform 3–4 sets of stretch-and-folds over 60–90 minutes. Wet your hand, grab one edge of the dough, stretch it up, and fold it over the center. Rotate the bowl and repeat 3–4 times per set. Rest 20–30 minutes between sets. Continue until the dough feels smoother, stronger, and more elastic.
Bulk Ferment Overnight
Cover the bowl tightly to prevent drying. Leave the dough to rise at room temperature for 8–10 hours. Let it roughly double in size and become airy and bubbly. Adjust timing for your kitchen temperature. Avoid moving or disturbing the bowl too often. The dough should look domed and jiggly when ready.
Pre-Shape the Dough
Lightly flour your work surface. Gently turn the dough out without deflating it too much. Use a scraper to help. Fold the edges toward the center to form a rough round. Keep movements gentle to preserve gas. Let the dough rest seam-side down while it relaxes before the final shaping step.
Final Shape the Loaf
After 10–15 minutes, shape the dough into a tighter round. Use your hands or scraper to drag the dough toward you, tightening the surface. Rotate and repeat to build tension. Avoid tearing the dough skin. Aim for a smooth, taut ball that will hold its shape during proofing and baking.
Prepare the Proofing Basket
Generously flour a proofing basket or line a medium bowl with a well-floured kitchen towel. Dust heavily to prevent sticking. Place the shaped dough seam-side up into the basket. Adjust its position so it sits centered. Lightly flour the top if needed. Prepare to cover and proof the dough.
Proof Before Baking
Cover the basket and proof at room temperature for 45–60 minutes, or refrigerate for 1–2 hours. Let the dough puff slightly but not overproof. Use the fridge time to preheat the oven and Dutch oven. Check that the dough slowly springs back when gently pressed with a fingertip.
Preheat the Dutch Oven
Place the empty Dutch oven with its lid in your oven. Preheat to 475°F (245°C) for at least 30 minutes. Allow the pot to get thoroughly hot. This intense heat creates strong oven spring and a crisp crust. Keep the lid on while preheating. Prepare a sheet of parchment paper during this time.
Invert onto Parchment
Carefully remove the hot Dutch oven from the oven and set it aside, still covered. Place a sheet of parchment on the counter. Gently invert the proofed dough from the basket onto the parchment, turning it out seam-side down. Adjust the loaf shape slightly if needed without pressing out the air.
Score the Dough
Use a sharp knife or lame to score the top of the dough. Make confident, swift cuts about ½ inch deep. Angle the blade slightly for a better ear. Create one main slash or a simple pattern. Scoring directs expansion and prevents random bursting. Work quickly so the dough doesn’t spread.
Load into Dutch Oven
Use the parchment as a sling to lift the scored dough. Carefully lower it into the hot Dutch oven. Arrange the parchment so it doesn’t cover the loaf. Cover with the lid to trap steam. Return the pot to the oven. Handle everything cautiously, as both pot and lid are extremely hot.
Bake Covered, Then Uncovered
Bake covered at 475°F (245°C) for 20 minutes. Then reduce the oven temperature to 450°F (230°C). Remove the lid and continue baking 18–20 minutes. Watch for a deep golden-brown crust. If needed, bake a few extra minutes for more color. Make certain the loaf sounds hollow when tapped on the bottom.
Cool Completely
Carefully lift the baked loaf from the Dutch oven using the parchment. Transfer it to a wire rack. Let it cool for at least 1 hour before slicing. Allow the crumb to set fully and moisture to redistribute. Resist cutting early to avoid a gummy interior. Store leftovers cut-side down or in a paper bag.
Ingredient Swaps
- Flour: Swap up to half the bread flour for whole wheat or rye; if using all-purpose flour, reduce water by 10–20 g to keep the dough manageable.
- Gluten-free: Use a 1:1 gluten-free bread flour blend designed for yeast breads and consider adding 5–10 g psyllium husk for structure.
- Starter: You can use a rye or whole wheat starter instead of white; keep the same weight (100 g, 100% hydration).
- Salt: Any fine salt (Kosher, sea, table) works; if using coarse salt, grind it or dissolve it in a bit of the water first.
- No Dutch oven: Bake on a preheated stone or baking sheet with a pan of hot water on the oven floor to mimic steam.
You Must Know
- Troubleshoot • If your dough feels like thick clay after combining: Add 10–20 g water and gently squeeze it in with damp hands; too-stiff dough won’t trap gas well and usually bakes up dense, especially at this 70%+ hydration level.
- Doneness • To know bulk fermentation is ready: Look for dough that’s risen about 60–100%, jiggles like set Jell-O when you shake the bowl, and shows bubbles on top and around the edges; this is more reliable than the clock in a 68–75°F (20–24°C) kitchen.
- Avoid • If the shaped loaf spreads like a pancake in the basket or on parchment: Shorten the bulk rise next time or chill the dough 30–60 minutes before shaping; over-fermented dough loses strength and won’t give good oven spring.
- Flavor Boost • For a tangier, more complex loaf: After the room-temp bulk, chill the dough covered for 4–12 hours, then shape cold; cooler, longer fermentation builds acidity and aroma without over-inflating the dough.
- Scale • When doubling or halving the recipe: Change all ingredients by the same factor (e.g., 1.5× everything for a 750 g flour loaf) but keep the Dutch oven size similar so the dough fills about half its height; fermentation times stay similar, but larger masses may need ~15–30 extra minutes to reach the same bubbly, jiggly look.
Serving Tips
- Serve warm with salted butter and a drizzle of good olive oil.
- Pair slices with soft cheeses, cured meats, and olives for a simple board.
- Toast and top with smashed avocado, lemon, and flaky salt for breakfast.
- Use thick slices for grilled cheese or paninis with melty cheddar.
- Accompany hearty soups or stews; serve in rustic chunks for dipping.
Storage & Make-Ahead
This sourdough keeps well at room temperature for 2–3 days, stored cut-side down on a board or in a paper bag.
For longer storage, refrigerate up to 5 days, well wrapped.
It also freezes excellently, whole or sliced, tightly wrapped for up to 2 months; thaw at room temperature.
Reheating
Reheat slices briefly in the microwave wrapped in a damp towel.
Or warm in a 300°F (150°C) oven.
For crusty results, re-crisp in a covered skillet on the stovetop.
Sourdough in American Traditions
Sourdough has quietly shaped American kitchens for centuries, long before trendy bakery loaves and Instagram crumb shots.
When I mix this overnight dough, I’m tapping into those trail cooks feeding gold rush camps, homesteaders guarding their starter like family, and city bakeries scenting early-morning streets.
You’re doing the same in your kitchen. Each feeding and fold links you to San Francisco’s tangy loaves, New England’s tender sourdough breads, and the skillet rounds baked over campfires in the West.
I love how one simple crock of starter crosses regions, seasons, and generations, turning basic flour and water into something with memory.
As you bake, you’re not just making bread; you’re carrying forward a distinctly American sourdough story.
Final Thoughts
Give this overnight sourdough bread a try and wake up to a beautiful, artisan-style loaf with almost no hands-on work.
Once you’ve baked it once, have fun tweaking the timing, hydration, or scoring to make it your own signature bread.
Frequently Asked Questions
How Do I Fix a Dough That’s Too Sticky to Shape?
I dust my hands and the dough lightly with flour, then let it rest 10 minutes. You’ll feel it relax, surface turning silky, easier to tuck and tighten into a gentle, plump round.
Why Did My Sourdough Loaf Turn Out Dense and Not Airy?
Your loaf’s dense because the starter wasn’t lively enough, the gluten underdeveloped, or it overproofed. I’d feed the starter earlier, stretch-and-fold thoroughly, watch for a puffy, jiggly rise, then bake before it slumps.
Can I Make This Bread Without a Dutch Oven?
Yes, you can. I’d preheat a sturdy baking sheet or stone, add a pan of hot water for steam, then slide your shaped loaf on parchment atop it, watching the crust deepen like evening candlelight.
How Do Altitude or Climate Affect Fermentation and Baking Times?
They change everything: in dry, high-altitude air, dough ferments and proofs faster, while baking takes longer and dries more. I watch dough, not clocks—shorter rises, gentler handling, sometimes slightly cooler, steamier ovens for you.
What’s the Best Way to Troubleshoot Poor Oven Spring?
I first check proofing: your dough likely overproofed, so shorten the final rise. Then I’d deepen scores, preheat the Dutch oven longer, confirm oven temperature with an oven thermometer, and strengthen gluten with extra folds.

Easy Overnight Sourdough Bread
Equipment
- 1 large mixing bowl
- 1 kitchen scale or measuring cups and spoons
- 1 dough scraper or spatula
- 1 clean kitchen towel or plastic wrap
- 1 proofing basket or medium bowl
- 1 parchment paper sheet
- 1 Dutch oven with lid (4–6 quart)
- 1 sharp knife or lame
Ingredients
- 500 gram bread flour
- 350 gram water lukewarm
- 100 gram active sourdough starter 100% hydration
- 10 gram fine sea salt
Instructions
- In a large mixing bowl, whisk together the water and active sourdough starter until the starter is mostly dissolved.
- Add the bread flour and salt to the bowl and mix with your hand or a dough scraper until no dry flour remains and a shaggy dough forms.
- Cover the bowl with a kitchen towel or plastic wrap and let the dough rest at room temperature for 30 minutes (autolyse).
- After resting, perform 3–4 sets of stretch-and-folds over 60–90 minutes, resting 20–30 minutes between each set, until the dough feels smoother and more elastic.
- Cover the bowl tightly and let the dough rise at room temperature for 8–10 hours, or until roughly doubled and bubbly (overnight is ideal).
- Lightly flour your work surface, gently turn the dough out, and shape it into a rough round by folding the edges toward the center.
- Let the dough rest seam-side down for 10–15 minutes, then perform a final tightening shape into a taut round loaf.
- Generously flour a proofing basket or a medium bowl lined with a floured kitchen towel, then place the dough seam-side up inside.
- Cover and proof at room temperature for 45–60 minutes, or refrigerate for 1–2 hours while you preheat the oven.
- Place the Dutch oven with its lid in the oven and preheat to 475°F (245°C) for at least 30 minutes.
- Carefully remove the hot Dutch oven, place a sheet of parchment on the counter, and gently invert the dough onto the parchment seam-side down.
- Score the top of the dough with a sharp knife or lame to allow controlled expansion during baking.
- Use the parchment as a sling to lower the dough into the hot Dutch oven, cover with the lid, and return it to the oven.
- Bake covered for 20 minutes, then reduce the oven temperature to 450°F (230°C), remove the lid, and bake for another 18–20 minutes until deep golden brown.
- Carefully remove the loaf from the Dutch oven and cool completely on a wire rack for at least 1 hour before slicing.
Notes

Cynthia Weatherford is a seasoned chef and culinary enthusiast who serves as the Recipe creator of Somonday. With decades of experience in the kitchen and a passion for exploring diverse cuisines, Cynthia brings a blend of creativity and technique to every dish. Known for transforming simple ingredients into show-stopping meals, Cynthia believes that cooking is an art form anyone can master. Dedicated to inspiring home cooks, Cynthia shares approachable recipes, pro tips, and culinary wisdom to make every meal memorable.


