Imagine the aroma of freshly baked croissants wafting through your kitchen—a reflection of both tradition and technique.
You’ve initiated a journey that starts with simple ingredients but requires patience and precision.
As you layer buttery dough into delicate folds, you create the magic of those iconic, flaky layers.
But do you know what truly sets a homemade croissant apart from its store-bought counterpart?
There’s a secret in the process, a pivotal step that transforms your effort into a melt-in-your-mouth masterpiece. What could this elusive element be, and how does it elevate your baking skills?
History
While croissants are synonymous with French cuisine, their origins trace back to Austria.
You’ll find that the croissant’s precursor, the kipferl, was crafted in the 13th century.
These crescent-shaped breads were made using less butter and sugar compared to today’s croissants.
In 1683, during the Ottoman siege of Vienna, bakers created the kipferl in the shape of the crescent on the Ottoman flag as a symbolic gesture of victory.
Fast forward to the early 19th century, Austrian officer August Zang introduced the Viennese bakery to Paris, popularizing the kipferl.
French bakers refined the recipe, increasing the butter ratio and incorporating lamination techniques.
This innovation resulted in the renowned flaky, buttery croissant, a staple in French pastry craftsmanship.
Recipe
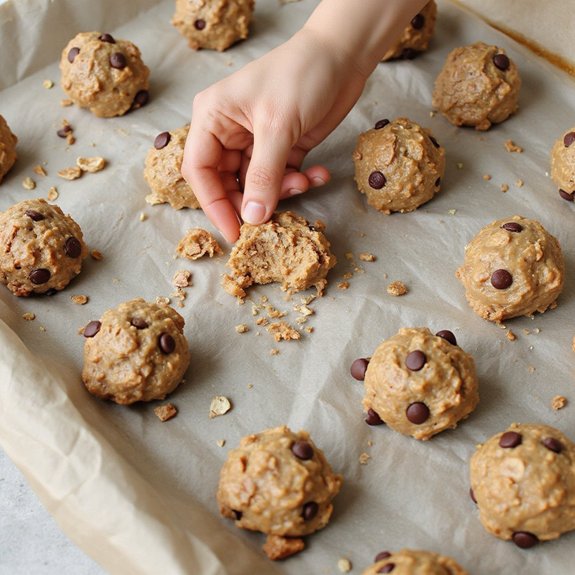
Croissants are a classic French pastry that are loved worldwide for their flaky, buttery layers.
Making them from scratch is a labor of love, but the end result is worth every minute spent in the kitchen.
The process involves a series of folding and rolling techniques known as lamination, which creates the distinct layers that make croissants so irresistible.
The key to achieving perfect croissants lies in ensuring that the dough is kept cold throughout the process, allowing the butter to stay solid and create the desired flakiness during baking.
Creating homemade croissants requires patience and attention to detail.
While it might seem daunting at first, following the steps carefully will yield delicious results.
The dough must be prepared in advance, allowing enough time for proofing and chilling.
As you work through the recipe, you’ll develop an understanding of the dough’s texture and the importance of precise measurements.
With practice, you’ll be able to produce croissants that rival those from any French bakery.
Ingredients:
- All-purpose flour
- Unsalted butter
- Granulated sugar
- Active dry yeast
- Whole milk
- Salt
- Egg (for egg wash)
To make the croissants, start by mixing the yeast with warm milk and a bit of sugar, allowing it to activate.
Combine this mixture with flour, sugar, and salt to form a dough, then knead until smooth.
Roll out the dough and encase a slab of cold butter in its center.
Perform the lamination process by folding the dough multiple times, ensuring to chill it between folds to maintain the butter’s integrity.
Once the dough is laminated, cut it into triangles, roll them into crescent shapes, and let them proof until doubled in size.
Finally, brush the croissants with an egg wash and bake them in a preheated oven until golden brown and flaky.
When making croissants, it’s crucial to keep the dough and butter cold throughout the process to achieve the signature layers.
Work quickly when handling the dough to prevent the butter from melting.
Additionally, ensure your workspace is dusted with just enough flour to prevent sticking but not so much that it alters the dough’s consistency.
If possible, use a kitchen scale for accurate measurements, as precision is key in baking.
With practice, these tips will help you bake perfect croissants every time.
Cooking Steps
Begin by activating the yeast with 110°F warm milk and a teaspoon of sugar, ensuring it becomes frothy.
Integrate this yeast mixture with 500 grams of flour, 50 grams of sugar, and 10 grams of salt to form a cohesive dough, kneading until elastic.
Encase 250 grams of cold butter within the dough, then execute the lamination by folding and chilling between each fold to maintain the butter’s structure and achieve ideal flakiness.
Step 1. Activate Yeast With Warm Milk
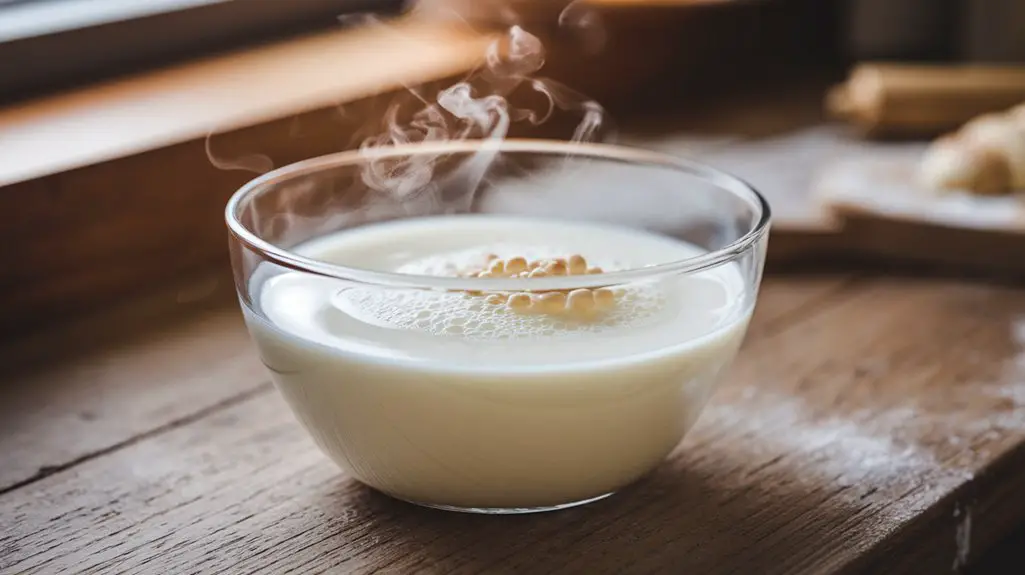
Start by measuring 1 cup of whole milk and gently warming it to a precise temperature of 105°F to 110°F.
Use an instant-read thermometer to verify accuracy, as temperatures above 115°F can kill the yeast.
Once the milk reaches the desired warmth, transfer it to a mixing bowl.
Add 2¼ teaspoons of active dry yeast, verifying it’s evenly sprinkled over the milk’s surface.
Include 1 tablespoon of granulated sugar to feed the yeast, promoting activation.
Stir the mixture gently to dissolve the yeast and sugar completely.
Let it rest for about 5 to 10 minutes.
You’ll know the yeast is activated when it becomes frothy and bubbly, signaling it’s ready to incorporate into the dough-making process.
Step 2. Combine Ingredients for Dough
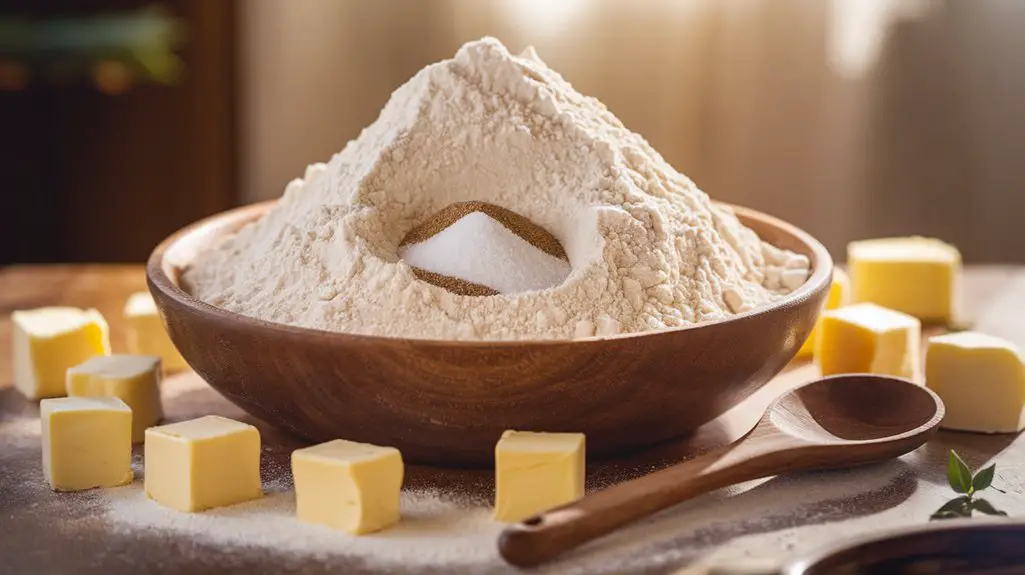
With the yeast mixture now frothy, it’s time to incorporate it into the dough preparation.
Begin by measuring 500 grams of all-purpose flour into a large mixing bowl.
Add 50 grams of granulated sugar and 10 grams of salt, mixing thoroughly to guarantee even distribution.
Create a well in the center of the dry ingredients and pour in the yeast mixture.
Gradually add 250 milliliters of lukewarm whole milk, stirring with a wooden spoon until a shaggy dough forms.
Transfer the dough to a lightly floured surface. Knead vigorously for 8-10 minutes until it becomes smooth and elastic. Avoid adding excess flour to maintain the dough’s softness.
Shape the dough into a ball, place it in a greased bowl, and cover it with plastic wrap to rise.
Step 3. Encasing Butter in Dough
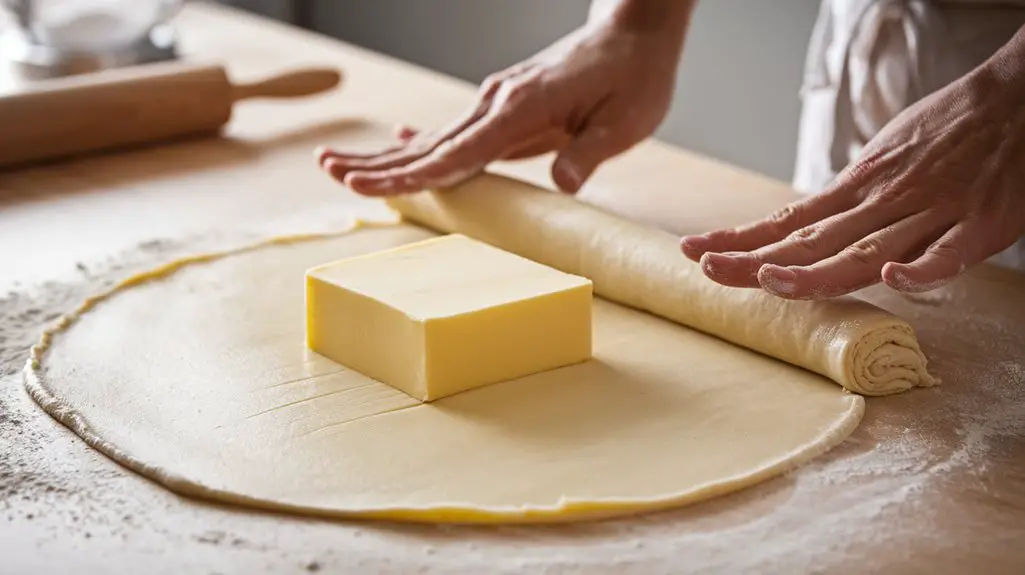
To encase the butter in the dough, you’ll first need to prepare a butter block.
Take 250 grams of unsalted butter, place it between two sheets of parchment paper, and use a rolling pin to flatten it into a uniform 6×6-inch square. Make sure the butter remains cold but pliable.
Next, roll out the dough to a 10×10-inch square on a lightly floured surface. Position the butter block diagonally in the center of the dough square.
Fold each corner of the dough over the butter, enclosing it completely like an envelope.
Seal the edges by pressing firmly to prevent butter leakage. Use your rolling pin gently to make certain of even distribution without tearing the dough.
Keep the dough chilled to maintain the butter’s integrity.
Step 4. Fold Dough, Chill Between Laminations
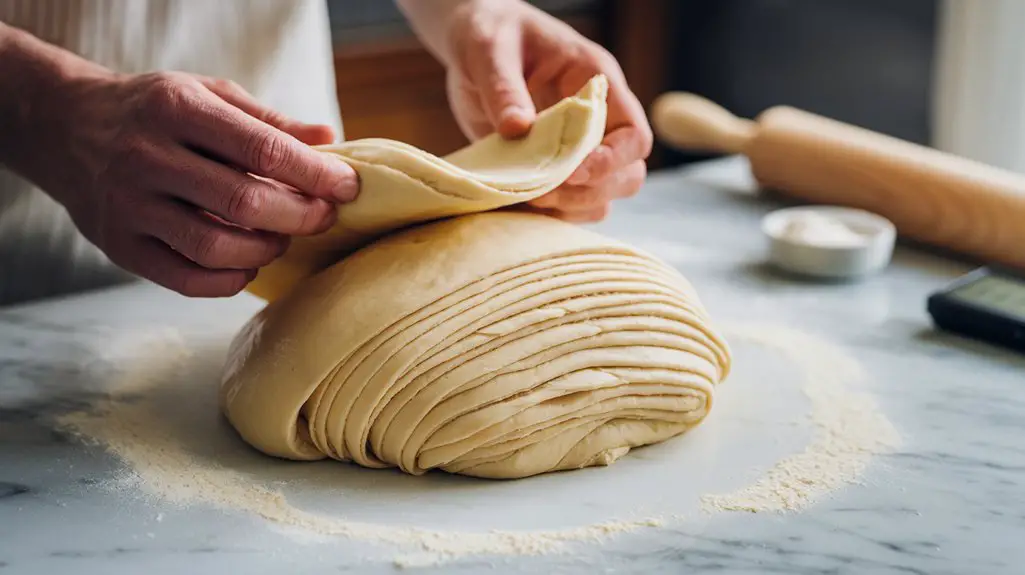
After enclosing the butter within the dough, proceed to the lamination process, which is essential for creating croissants’ flaky layers.
Roll the dough into a 20×10-inch rectangle on a lightly floured surface. Fold the dough into thirds, like a letter. This is your first “turn.”
Rotate the dough 90 degrees, ensuring even distribution of butter layers. Cover with plastic wrap and refrigerate for 30 minutes.
Repeat this process two more times for a total of three turns, ensuring the dough remains cold to prevent butter from melting. If necessary, chill longer between turns.
Each fold multiplies the layers, vital for achieving the desired flakiness. Maintain precise measurements and handle the dough gently to prevent tearing, which compromises the lamination.
Step 5. Proof Dough Until Doubled
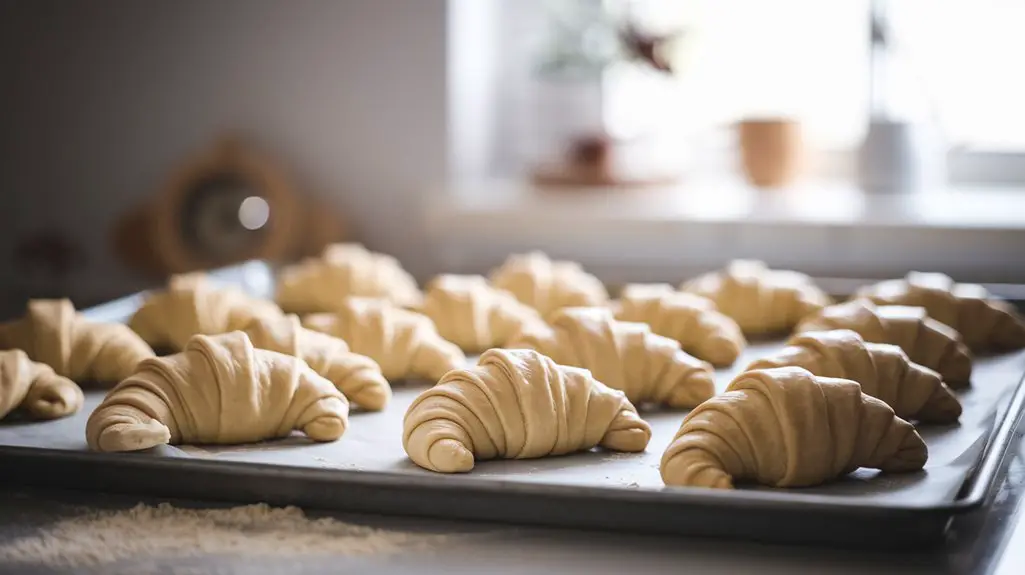
Once the lamination process is complete, it’s vital to allow the dough to proof until it doubles in size.
Place the dough in a lightly oiled bowl, ensuring enough space for expansion. Cover it with plastic wrap or a damp towel to prevent drying.
Ideal proofing conditions require a warm, draft-free environment, approximately 75°F (24°C).
At this temperature, the yeast will ferment efficiently, producing carbon dioxide and causing the dough to rise.
Monitor the dough closely; it should take about 1 to 2 hours. Avoid over-proofing, as this can lead to an overly airy texture.
Gently press the dough with your finger; if it springs back slightly, it’s ready. This step develops flavor and structure, vital for perfect croissants.
Step 6. Apply Egg Wash Before Baking
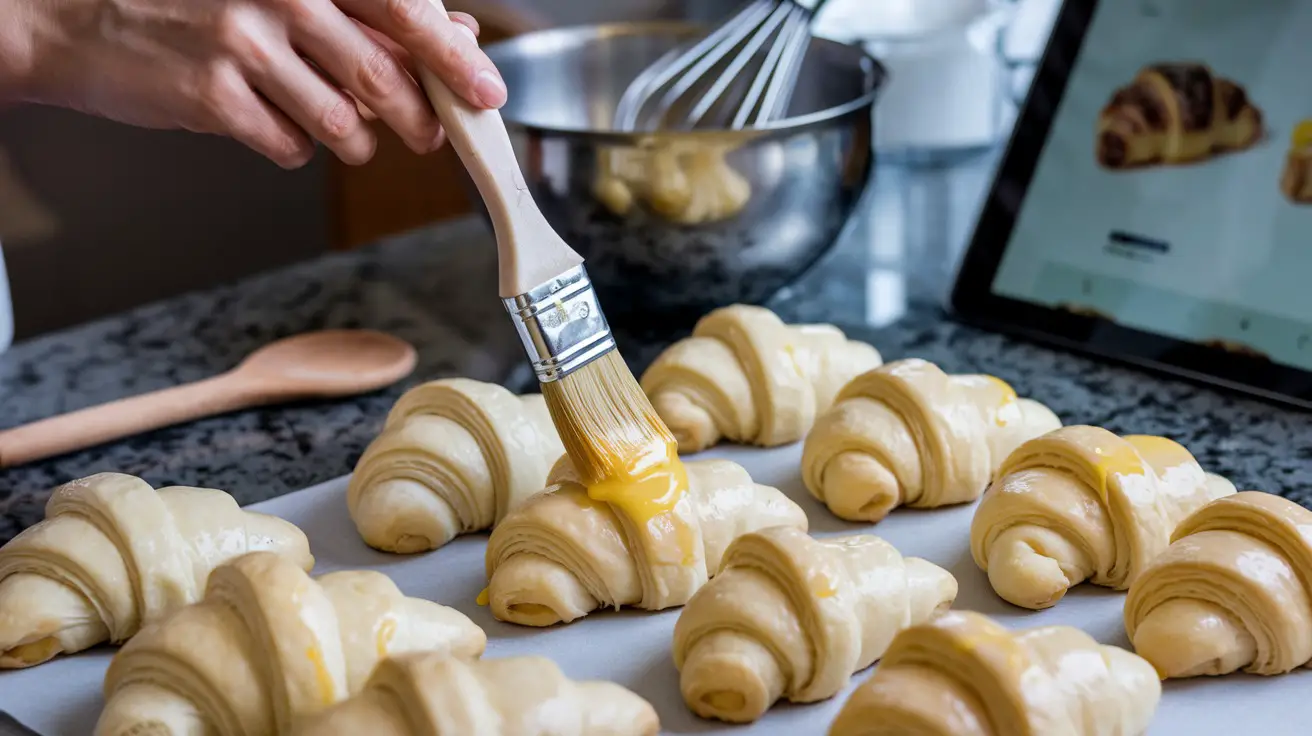
Before baking, applying an egg wash is essential for achieving that classic golden-brown finish on your croissants.
Start by whisking one egg with one tablespoon of water until fully combined.
Using a pastry brush, gently apply the egg wash to each croissant, ensuring even coverage without pooling. This step enhances the croissants’ color and adds a subtle sheen.
Here’s a quick reference to keep your egg wash technique on point:
| Step | Measurement | Technique |
|---|---|---|
| Whisk Ingredients | 1 egg, 1 tbsp water | Full incorporation |
| Application | Thin layer | Light, even strokes |
| Avoid | Excess pooling | Use a clean brush |
Make sure to brush only the surface, avoiding exposed edges to prevent burning.
A well-applied egg wash will elevate your croissants’ appearance, making them visually irresistible.
Step 7. Bake Until Golden Brown
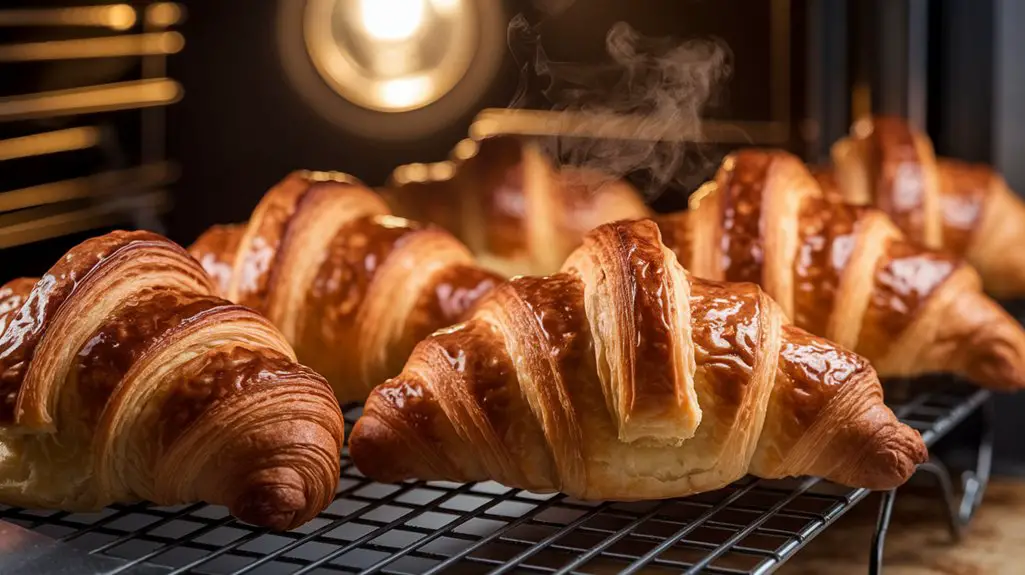
With your croissants proofed to perfection, it’s time to bake them to a golden brown finish. Preheat your oven to 375°F (190°C) for ideal results.
Position the baking rack in the center to promote even heat distribution.
Follow these steps for success:
- Temperature Regulation: Verify the oven is fully preheated to maintain the butter’s integrity, preventing it from melting prematurely.
- Baking Duration: Bake for 18-22 minutes. Keep a close eye on the color; you’re looking for a deep golden hue, indicating flakiness and thorough cooking.
- Cooling: Once baked, transfer croissants to a wire rack. This prevents the bottoms from becoming soggy, preserving the desired crispiness.
Final Thoughts
Mastering the art of homemade croissants is an achievement that rewards you with unparalleled satisfaction and delicious results.
With precise attention to temperature control and lamination techniques, you’ve crafted pastries that embody authentic French craftsmanship.
Remember, maintaining the dough at a consistent 60°F (15°C) is essential to prevent butter from melting prematurely.
Precision is key: measure ingredients by weight to guarantee a balanced dough, enhancing gluten development and flakiness.
As you roll and shape, keep your workspace dusted minimally with flour—too much can compromise texture.
Proofing at 75°F (24°C) allows peak yeast activity without risking butter leakage.
You’ve now embraced the patience and skill required for perfect croissants, and each bake will deepen your understanding and appreciation of this delicate craft.

Cynthia Weatherford is a seasoned chef and culinary enthusiast who serves as the Recipe creator of Somonday. With decades of experience in the kitchen and a passion for exploring diverse cuisines, Cynthia brings a blend of creativity and technique to every dish. Known for transforming simple ingredients into show-stopping meals, Cynthia believes that cooking is an art form anyone can master. Dedicated to inspiring home cooks, Cynthia shares approachable recipes, pro tips, and culinary wisdom to make every meal memorable.