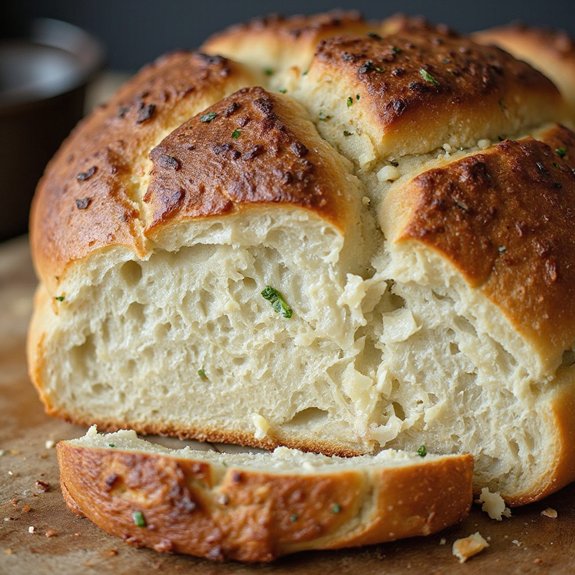
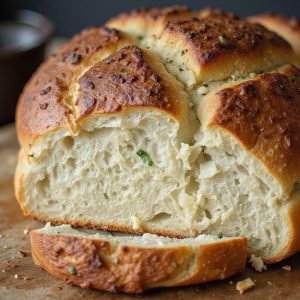
There’s something about the sight of a golden sourdough loaf, its crust blistered and crackling, that instantly makes a kitchen feel like home.
Now imagine that same loaf infused with roasted garlic and flecks of green herbs, filling the air with a warm, savory aroma.
This garlic and herb sourdough is a cozy, versatile bread—perfect beside a hearty stew, cradling a quick grilled-cheese lunch, or elevating a simple pasta dinner—and it fits naturally into a relaxed weekend schedule.
It’s ideal for comfort seekers, families, and anyone who loves baking projects that feel special but approachable.
I still remember one rainy Sunday when this loaf turned a “there’s-nothing-for-dinner” panic into a slow, peaceful afternoon; by evening, we were tearing off warm pieces and dipping them into olive oil.
This bread shines at Sunday suppers, casual gatherings, and easy entertaining. Ready to bring this loaf to life?
Why You’ll Love It
- Delivers bold, bakery-style garlic and herb flavor in every slice
- Elevates simple meals, from soups to sandwiches and cheese boards
- Relies on natural sourdough fermentation for better texture and digestibility
- Makes your kitchen smell incredible while it bakes and cools
- Stays moist and flavorful for days, perfect for make-ahead baking
Ingredients
- 100 g active sourdough starter — 100% hydration, recently fed and bubbly
- 350 g water — lukewarm to help fermentation along
- 500 g bread flour — higher protein for better gluten structure
- 10 g fine sea salt — evenly seasons and strengthens gluten
- 30 g olive oil — extra-virgin for richer flavor and softer crumb
- 4 cloves garlic — finely minced for even distribution
- 10 g fresh parsley — finely chopped for fresh, green flavor
- 5 g fresh rosemary — finely chopped, use tender leaves only
- 5 g fresh thyme leaves — finely chopped, woody stems discarded
- 20 g unsalted butter — melted, optional for brushing hot crust
Step-by-Step Method
Mix the starter and water
Whisk the active sourdough starter with lukewarm water in a medium bowl until mostly dissolved. Aim for an even, milky mixture with only a few streaks of starter remaining.
Properly dispersing the starter helps fermentation begin evenly throughout the dough, improving rise, flavor, and overall texture in the finished loaf.
Hydrate the flour (autolyse)
Stir the bread flour into the starter mixture until no dry spots remain. Scrape the bowl sides to make certain all flour is moistened.
Cover and rest for 30–45 minutes. Use this time to let the flour fully hydrate and gluten begin developing naturally, which makes the dough easier to handle and shape later.
Incorporate salt and olive oil
Sprinkle fine sea salt and olive oil over the dough. Use your hands to squeeze and fold the dough until both are completely absorbed.
Expect the dough to feel slightly slippery at first. Continue working it gently until it regains cohesion. This step seasons the dough and enriches it with fat for a tender crumb.
Prepare the garlic and herbs
Combine finely minced garlic, parsley, rosemary, and thyme in a small bowl. Mix thoroughly so the flavors distribute evenly.
Keep this mixture nearby, ready to add after the first folds. Finely chopping the herbs ensures they blend well into the dough, giving you a consistent garlic-herb flavor in every slice.
Perform the first stretch-and-fold
Begin strengthening the dough with a set of stretch-and-folds. Wet or lightly oil your hands.
Pull one edge of the dough up and fold it over itself. Rotate the bowl and repeat 4–6 times. Work gently to avoid tearing. This technique builds gluten while keeping the dough soft and manageable.
Fold in the garlic-herb mixture
Gently spread the garlic and herb mixture over the dough’s surface after the first folds. Lightly fold the dough over itself a few times to distribute the mixture without clumping.
Avoid aggressive mixing, which can tear the dough or push fillings to the surface. Aim for even pockets of flavor throughout the loaf.
Continue stretch-and-folds during bulk rise
Over the next 2–3 hours, perform 2–3 additional sets of stretch-and-folds every 30–45 minutes. Keep the bowl covered between sets.
Notice the dough becoming smoother, stronger, and more elastic. Each round of folds helps organize the gluten network, improving oven spring and creating a more open, airy crumb.
Finish bulk fermentation until doubled
Let the dough rest undisturbed at room temperature after the final folds. Allow it to rise until roughly doubled in volume and bubbly, about 4–6 hours total.
Watch the dough, not the clock. Look for a domed surface, visible bubbles, and a lighter, jiggly feel when the bowl is gently shaken.
Pre-shape the dough on the counter
Lightly flour your work surface and gently turn the dough out. Use a bench scraper to tuck the edges underneath and form a rough round.
Handle it carefully to preserve gas bubbles. This pre-shape organizes the dough and prepares it for final shaping without overworking or deflating it.
Let the dough relax
Leave the pre-shaped round uncovered on the counter for 15–20 minutes. Allow the gluten to relax so the dough becomes easier to shape.
It should spread slightly but still hold some height. This bench rest reduces resistance when you perform the final shaping, helping you create better surface tension.
Shape into a tight boule or batard
Shape the dough into your desired form, either a round boule or an oval batard. Gently stretch the surface and tuck the dough underneath, tightening it without tearing.
Use a bench scraper to help rotate and tension the dough. Proper shaping builds structure and promotes good oven spring and an even crumb.
Prepare the banneton and place dough
Generously flour a banneton or a medium bowl lined with a floured kitchen towel. Use rice flour or a mix for better release.
Place the shaped dough seam-side up into the prepared basket. Adjust its shape slightly if needed. Adequate flouring prevents sticking and preserves the loaf’s structure during proofing.
Cold-proof overnight in the fridge
Cover the banneton and refrigerate the dough for 8–12 hours. Let it proof slowly in the cold environment.
This extended fermentation develops deeper flavor and makes the dough easier to score. By morning, it should look slightly puffed and hold its shape well, ready for baking straight from the fridge.
Preheat the Dutch oven and oven
About 45 minutes before baking, place your Dutch oven with its lid into the oven. Preheat to 475°F (245°C).
Allow the pot and oven to heat thoroughly. A properly preheated Dutch oven traps steam and provides intense heat, which helps the loaf achieve maximum oven spring and a crisp, blistered crust.
Transfer and score the dough
Carefully remove the hot Dutch oven from the oven. Gently invert the dough onto parchment or directly into the pot, now seam-side down.
Use a sharp knife or lame to score the top with a confident slash or pattern. Proper scoring directs expansion and prevents random tearing as the bread rises in the oven.
Steam-bake with the lid on
Cover the Dutch oven with its lid and return it to the hot oven. Bake at 475°F (245°C) for 20 minutes.
Keep the lid closed during this time to trap steam. This steamy environment allows the loaf to expand fully before the crust sets, resulting in a taller loaf with a glossy, crackly exterior.
Finish baking uncovered
Remove the lid and reduce the oven temperature to 450°F (230°C). Continue baking for 15–20 minutes until the crust is deep golden brown.
Rotate the pot if needed for even color. Watch the loaf rather than the clock. A fully baked sourdough sounds hollow when tapped on the bottom.
Brush with melted butter (optional)
Brush the hot crust lightly with melted unsalted butter as soon as the loaf comes out, if desired. Use a pastry brush for even coverage.
This step softens the crust slightly and adds rich aroma, complementing the garlic and herbs. Skip this step if you prefer a drier, extra-crispy crust.
Cool completely before slicing
Transfer the loaf to a cooling rack and let it cool for at least 1 hour. Resist cutting while hot.
Cooling allows the crumb to set and moisture to redistribute, preventing a gummy texture. Once fully cooled, slice with a sharp bread knife to reveal the open, aromatic garlic and herb interior.
Ingredient Swaps
- Use up to 30% whole‑wheat or rye flour in place of bread flour; add 10–20 g extra water if the dough feels stiff.
- Swap fresh herbs for 1/3 the amount of dried (e.g., 3–4 g each dried rosemary/thyme, 3 g dried parsley).
- For dairy‑free, skip the butter or brush with olive oil; for milder flavor, replace raw garlic with roasted or sautéed garlic.
You Must Know
– Make-Ahead • To fit a tight schedule, keep the dough in the fridge for bulk fermentation up to 24 hours once it has risen about 50–75%.
Chilling at this stage slows yeast activity, builds flavor, and lets you shape and finish on your own timeline.
Serving Tips
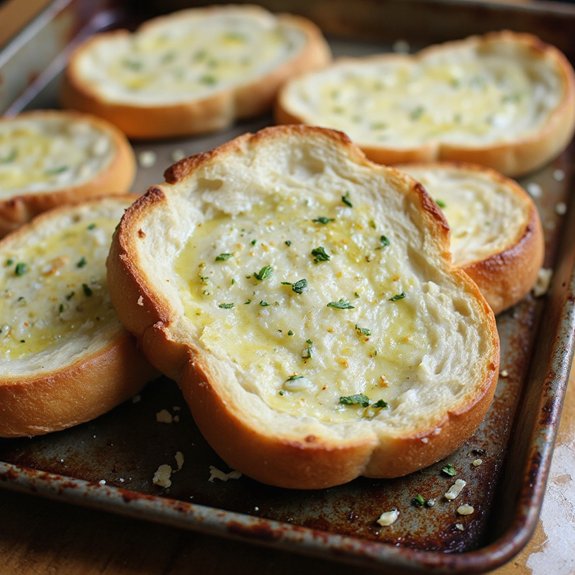
- Serve warm slices with salted butter or olive oil for dipping.
- Pair with creamy soups like tomato bisque or potato-leek for a cozy meal.
- Use as a base for open-faced sandwiches with fresh mozzarella and roasted vegetables.
- Toast slices and top with scrambled eggs for a savory breakfast.
- Cube and toast leftovers into garlicky sourdough croutons for salads.
Storage & Make-Ahead
Garlic and herb sourdough keeps in the fridge, well-wrapped, for 4–5 days.
For best texture, slice once fully cooled, then freeze in a zip-top bag up to 2 months.
Toast slices straight from frozen.
You can also refrigerate shaped dough overnight for easy bake-ahead convenience.
Reheating
Reheat slices in a 300°F (150°C) oven, wrapped in foil, 8–10 minutes.
For softer slices, microwave 10–15 seconds.
On stovetop, warm in a covered skillet over low heat.
Garlicky Sourdough in Tradition
When I tear into a warm slice of garlicky sourdough, I’m tapping into a long line of cooks who’ve used fermented dough and pungent cloves to turn simple meals into small celebrations.
I think of stone ovens in small European villages, loaves blistering beside braised beans, garlic rubbed over crusts instead of measured in grams.
When I mix starter with flour and fold in herbs, I’m echoing those quiet, practical rituals.
You and I might bake in modern kitchens, but the rhythm’s the same: evening feeding, slow overnight rise, bread greeting the day.
Each slice carries that history—tangy crumb, charred bubbles, soft garlic pockets—reminding us that humble ingredients, tended with patience, can still feel like ceremony at the table.
Final Thoughts
Give this garlic and herb sourdough a try and enjoy how it fills your kitchen with an incredible aroma and flavor.
Feel free to tweak the herbs or garlic level to make the loaf perfectly your own.
Frequently Asked Questions
Can I Make This Garlic Herb Sourdough Completely Gluten-Free?
Yes, you can, but it’s tricky. I’d swap bread flour for a good gluten-free sourdough blend, add psyllium husk for structure, then watch the dough like a soft, fragile cloud as it rises.
How Do I Troubleshoot a Dense or Gummy Garlic Sourdough Loaf?
I fix dense, gummy loaves by proofing longer, baking fully, and letting them cool completely. When I rushed mine once, the crumb smeared like clay—now I wait, listening to the crackling crust like a tiny fireplace.
What’s the Best Way to Scale This Recipe for a Crowd?
I scale everything by weight—double or triple each gram, keep hydration the same, then mix multiple smaller doughs. I picture crowded tables, warm slices passed around, and I’m always grateful I made extra.
Can I Bake This Loaf in a Bread Machine or Countertop Oven?
You can, but I’d only use a bread machine for mixing and proofing, then bake in a hot countertop oven. I picture you listening to the crust crackle, kitchen glowing, as steam curls from the loaf.
How Can I Adapt This Recipe for a Same-Day, Quicker Bake?
You can shorten this to same‑day by using warmer water, a very active starter, and proofing at room temp instead of overnight. I do that on rainy Sundays, filling my kitchen with impatient, garlicky warmth.
Garlic And Herb Sourdough Bread
Equipment
- 1 digital kitchen scale
- 2 medium mixing bowls
- 1 large mixing bowl
- 1 dough scraper or bench knife
- 1 Wooden spoon or spatula
- 1 banneton or medium bowl lined with a clean kitchen towel
- 1 sharp knife or lame
- 1 Dutch oven with lid (4–5 qt)
- 1 Cooling rack
- 1 pastry brush (optional
Ingredients
- 100 gram active sourdough starter 100% hydration
- 350 gram water lukewarm
- 500 gram bread flour
- 10 gram fine sea salt
- 30 gram olive oil extra-virgin
- 4 clove garlic finely minced
- 10 gram fresh parsley finely chopped
- 5 gram fresh rosemary finely chopped
- 5 gram fresh thyme leaves finely chopped
- 20 gram unsalted butter melted optional, for brushing crust
Instructions
- In a medium bowl, whisk together the active sourdough starter and lukewarm water until mostly dissolved.
- Add the bread flour to the mixture and stir until no dry patches remain, then cover and rest for 30–45 minutes (autolyse).
- Sprinkle the sea salt and olive oil over the dough and squeeze and fold the dough with your hands until the salt and oil are fully incorporated.
- In a small bowl, combine the minced garlic, parsley, rosemary, and thyme and set aside.
- Perform a set of stretch-and-folds in the bowl by pulling one side of the dough up and folding it over itself 4–6 times, rotating the bowl as you go.
- After the first set of folds, gently spread the herb and garlic mixture over the surface of the dough and lightly fold it in to avoid clumps.
- Over the next 2–3 hours of bulk fermentation at room temperature, perform 2–3 additional sets of stretch-and-folds every 30–45 minutes until the dough feels smoother and more elastic.
- Allow the dough to continue bulk fermenting undisturbed at room temperature until roughly doubled in volume and bubbly, which may take 4–6 hours total depending on room temperature and starter strength.
- Lightly flour the work surface and gently turn the dough out, then pre-shape it into a rough round by tucking the edges underneath with a bench scraper.
- Let the pre-shaped dough rest uncovered for 15–20 minutes to relax the gluten.
- Shape the dough into a tight boule or batard by gently stretching the surface and tucking the dough underneath to create surface tension.
- Generously flour your banneton or towel-lined bowl, then place the shaped dough seam-side up into it.
- Cover the dough and proof in the refrigerator for 8–12 hours (overnight) for a slow, cold fermentation.
- About 45 minutes before baking, place the Dutch oven with its lid into the oven and preheat to 475°F (245°C).
- When ready to bake, carefully remove the hot Dutch oven from the oven and gently invert the dough onto a piece of parchment or directly into the pot, now seam-side down.
- Score the top of the dough with a sharp knife or lame to allow for controlled expansion during baking.
- Cover the Dutch oven with the lid and bake for 20 minutes at 475°F (245°C).
- After 20 minutes, remove the lid, reduce the oven temperature to 450°F (230°C), and bake for an additional 15–20 minutes until the crust is deep golden brown.
- If desired, brush the hot crust lightly with melted butter right after baking for a softer, more aromatic finish.
- Transfer the bread to a cooling rack and let it cool completely for at least 1 hour before slicing.
Notes

Cynthia Weatherford is a seasoned chef and culinary enthusiast who serves as the Recipe creator of Somonday. With decades of experience in the kitchen and a passion for exploring diverse cuisines, Cynthia brings a blend of creativity and technique to every dish. Known for transforming simple ingredients into show-stopping meals, Cynthia believes that cooking is an art form anyone can master. Dedicated to inspiring home cooks, Cynthia shares approachable recipes, pro tips, and culinary wisdom to make every meal memorable.