There’s something about the sizzle of butter in a pan and the sharp, warm scent of garlic that makes a kitchen feel instantly welcoming.
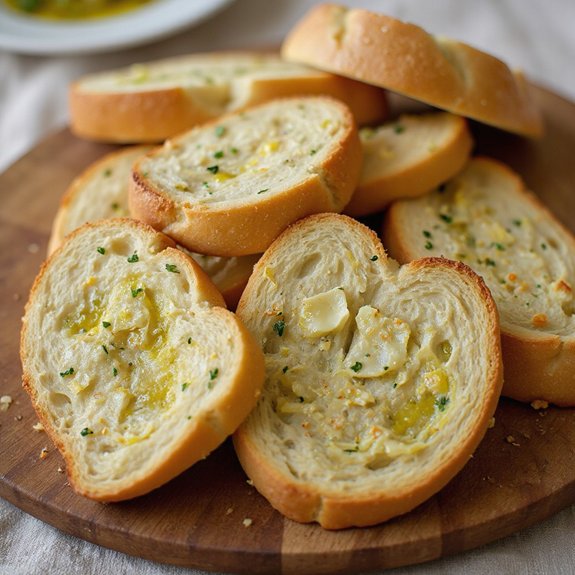
Picture thick slices of bread turning golden at the edges, their centers soft and fluffy, while flecks of bright green parsley and melted cheese cling to the top. This is quick, skillet-style garlic bread—no oven needed—ready in about 15 minutes from craving to first bite.
It’s perfect for busy weeknights, dorm kitchens, small apartments, or anyone still building confidence at the stove.
I first leaned on this recipe during a heatwave, when turning on the oven was unthinkable but my family still wanted something cozy with our pasta. A single pan and a few minutes later, everyone was tearing pieces straight from the plate.
It shines for last-minute guests, Sunday suppers, or solo comfort dinners.
Ready to bring this dish to life?
Why You’ll Love It
- Delivers bold flavor from fresh garlic, parsley, butter, and parmesan
- Skips the oven, using a simple stovetop skillet instead
- Uses basic ingredients you likely already have in your kitchen
- Toasts up in minutes, perfect for busy weeknights or last-minute sides
- Adapts easily with extra cheese, herbs, or different bread types
Ingredients
- 4 slices bread, thick-cut — day‑old bread crisps better
- 3 tablespoons butter, softened — salted or unsalted, good quality
- 1 tablespoon olive oil, extra-virgin — adds flavor, keeps butter from burning
- 4 cloves garlic, finely minced — use fresh, not pre‑minced
- 2 tablespoons fresh parsley, finely chopped — flat‑leaf for best flavor
- 2 tablespoons Parmesan cheese, grated (optional) — adjust salt if using
- 1 pinch salt, to taste — reduce if butter/Parmesan are salty
- 1 pinch black pepper, freshly ground — adds mild heat and aroma
- 1 pinch chili flakes (optional) — for a light spicy kick
- 1 tablespoon mozzarella cheese, grated (optional) — helps create a melty top
Step-by-Step Method
Make the Garlic Butter
Soften the butter in a mixing bowl. Add olive oil, minced garlic, chopped parsley, Parmesan (if using), salt, pepper, and chili flakes. Mix thoroughly with a spoon until the mixture is smooth and spreadable.
Taste and adjust seasoning carefully, especially if using salted butter or cheese, to avoid making the garlic butter overly salty.
Prepare and Butter the Bread
Place thick-cut bread slices on a cutting board. Confirm they’re dry and at room temperature for best crisping. Generously spread the garlic butter on one side of each slice, reaching all corners.
If using mozzarella, sprinkle it evenly over the buttered side. Keep slices in a single layer, ready to go into the heated skillet.
Toast the Buttered Side First
Preheat a non-stick skillet over low to medium-low heat for one to two minutes. Gently place bread slices buttered side down in a single layer. Cook slowly for three to five minutes.
Watch closely and adjust the heat to prevent burning. Let the bottom become golden, crisp, and fragrant while the garlic infuses the bread.
Lightly Toast the Other Side
Flip each slice carefully with a spatula. Toast the plain side for one to two minutes over low heat. The goal is light browning and thorough warming, not deep color.
If using mozzarella, briefly cover the pan with a lid to help the cheese melt. Remove slices once both sides are crisped to your liking.
Serve and Customize
Transfer the garlic bread to a plate or board. Cut into halves or strips for easier sharing and dipping. Serve immediately while hot and crisp.
Sprinkle with extra parsley or chili flakes if desired. Enjoy alongside pasta, soups, or salads. Store any leftover garlic butter covered in the fridge and reuse within a few days.
Ingredient Swaps
- Use any sturdy bread you have (baguette, sliced loaf, or even burger buns); day‑old works best.
- For dairy-free, swap butter and Parmesan for olive oil or vegan butter and nutritional yeast.
- Replace parsley with cilantro, dried Italian seasoning, or mixed herbs; use any mild oil instead of extra-virgin olive oil if it’s pricey or unavailable.
You Must Know
- Doneness • If the garlic smell turns sharp or bitter before the bread browns, lower the heat and slide the slices to a cooler spot in the pan; garlic should smell sweet and nutty and bread should be light-golden at about 3–4 minutes on low heat.
- Avoid • Avoid crowding more than 3–4 slices in a medium pan; leave small gaps between pieces so steam can escape—overcrowding makes the crust soft instead of crisp.
- Troubleshoot • If the cheese is melting but the bottom is pale after 2 minutes, turn heat up slightly and press gently with a spatula; light pressure improves contact so the surface crisps without needing much extra time.
- Scale • For more servings, multiply all ingredients evenly and keep each batch to a single layer, holding finished slices on a wire rack instead of a plate so the bottoms stay crisp for up to 15–20 minutes.
- Flavor Boost • To intensify garlic without harshness, let the garlic butter sit 5–10 minutes at room temperature before spreading; this short rest infuses flavor so you can use 1–2 fewer cloves if you prefer milder garlic.
Serving Tips
- Serve alongside tomato soup or creamy pasta for a comforting Italian-style meal.
- Cut into thin strips and pair with marinara sauce as a snack or appetizer.
- Arrange on a wooden board with olives, cheese, and cured meats for a quick platter.
- Top with chopped tomatoes and basil for a bruschetta-style twist.
- Serve in a breadbasket lined with a napkin to keep slices warm.
Storage & Make-Ahead
Garlic bread is best fresh, but leftovers keep in the fridge for up to 2 days in an airtight container.
Reheat in a covered pan on low heat.
You can also freeze cooked slices for 1 month—cool completely, wrap well, then re-crisp in a skillet from thawed.
Reheating
Reheat garlic bread gently using a covered skillet over low heat.
Use a low-temperature oven until warmed through.
Or give it a brief microwave burst wrapped in a damp paper towel to prevent drying.
Italian Street-Food Nostalgia
Even without a wood-fired oven on a cobbled Italian street, I can still chase that same feeling: warm bread sizzling in butter, garlic blooming in the pan, and herbs perfuming the air like a tiny corner trattoria.
When I stand over the skillet, I’m not just toasting bread; I’m recreating the hush of a back alley in Rome, where someone hands you a hot, greasy napkin bundle and your whole world smells like garlic.
- A narrow lane glowing gold under old streetlamps
- A vendor’s pan hissing as garlic hits the oil
- Your first bite, shatteringly crisp, then tender and buttery inside
That’s the mood I’m after: simple, humble bread that tastes like a stolen moment in Italy.
Final Thoughts
Give this easy skillet garlic bread a try and enjoy how quickly it comes together—no oven needed.
Feel free to tweak the herbs, cheese, and spice level to make it perfectly your own.
Frequently Asked Questions
Can I Make This Garlic Bread Vegan or Dairy-Free Without Sacrificing Flavor?
Yes, you can. I’d swap in vegan butter and a rich olive oil blend, add extra minced garlic, parsley, and nutritional yeast. As it sizzles in the pan, your kitchen still smells warmly, luxuriously garlicky.
How Do I Scale This Recipe for a Large Party or Gathering?
I’d simply multiply every ingredient by your guest count ratio—say, five times for 20 people—then mix one big bowl of garlic butter, toast in batches, and keep slices warm under a towel, fragrant and crackling.
What Type of Pan Works Best if I Don’T Have a Non-Stick Skillet?
I’d reach for a heavy cast-iron or stainless-steel pan, well-buttered. You’ll hear the gentle sizzle, smell buttery garlic blooming, and see bread edges bronzing slowly, turning your stovetop into a tiny, golden-lit bakery.
Is It Safe for Kids, and How Can I Reduce the Spiciness?
Yes, it’s safe for kids. I’d simply skip chili flakes and use mild cheese. As the bread sizzles gently, you’ll smell warm butter and garlic, perfect for small hands and softer palates.
Can I Freeze the Uncooked Garlic-Buttered Bread for Later Use?
Yes, you can. I’d freeze slices flat on a tray, then bag them. Later, slide frozen pieces onto a warm skillet; smell the butter, hear the gentle sizzle, and watch edges turn golden.

Garlic Bread Without Oven
Equipment
- 1 non-stick skillet or frying pan
- 1 Mixing bowl
- 1 Small bowl
- 1 Spoon
- 1 Knife
- 1 Cutting board
- 1 pastry brush (optional
- 1 Spatula
Ingredients
- 4 piece bread slices thick-cut
- 3 tablespoon butter softened
- 1 tablespoon olive oil extra-virgin
- 4 clove garlic finely minced
- 2 tablespoon fresh parsley finely chopped
- 2 tablespoon grated Parmesan cheese optional
- 1 pinch salt to taste
- 1 pinch black pepper freshly ground
- 1 pinch chili flakes optional
- 1 tablespoon mozzarella cheese grated optional for topping
Instructions
- Place the softened butter in a mixing bowl and add olive oil, minced garlic, parsley, Parmesan, salt, pepper, and chili flakes.
- Mix everything well with a spoon until you have a smooth, spreadable garlic butter.
- Lay the bread slices on a cutting board and spread a generous layer of the garlic butter on one side of each slice.
- If using mozzarella cheese, sprinkle it evenly over the buttered side of the bread.
- Heat a non-stick skillet over low to medium-low heat for 1–2 minutes.
- Place the bread slices buttered side down on the skillet, fitting as many as you can in a single layer.
- Cook slowly for 3–5 minutes until the bottom is golden and crisp and the garlic is fragrant, adjusting heat to avoid burning.
- Flip the slices and lightly toast the other side for 1–2 minutes to warm through, keeping the heat low.
- Transfer the garlic bread to a plate and repeat with remaining slices if necessary.
- Serve hot, cutting into halves or strips if desired.
Notes

Cynthia Weatherford is a seasoned chef and culinary enthusiast who serves as the Recipe creator of Somonday. With decades of experience in the kitchen and a passion for exploring diverse cuisines, Cynthia brings a blend of creativity and technique to every dish. Known for transforming simple ingredients into show-stopping meals, Cynthia believes that cooking is an art form anyone can master. Dedicated to inspiring home cooks, Cynthia shares approachable recipes, pro tips, and culinary wisdom to make every meal memorable.


