There’s something about the scent of chocolate drifting from the oven that makes the whole day feel softer.
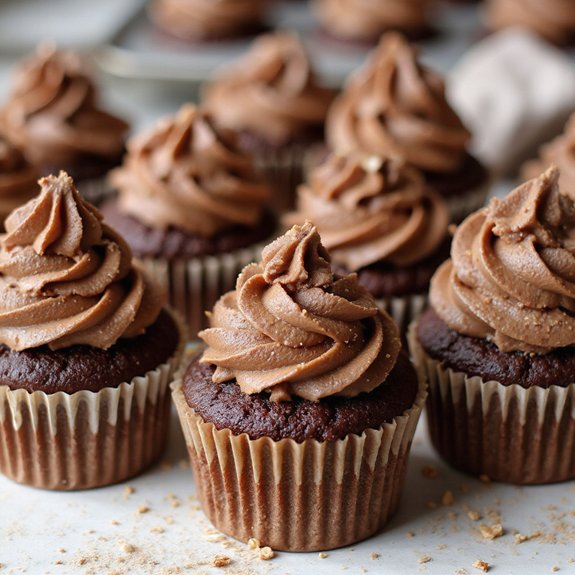
Picture a tray of gluten free chocolate cupcakes rising gently, their domed tops glossy and dark, the crumb tender and moist, the kitchen filled with the warm aroma of cocoa and vanilla.
This is a cozy dessert you can whip up surprisingly fast—perfect for those last-minute sweet cravings or a simple treat after dinner.
These cupcakes are ideal for gluten free bakers, beginners who feel nervous about “special” flours, busy parents, and devoted sweet-tooth fans who don’t want to miss out.
I still remember a rainy Sunday when a friend with celiac disease dropped by unexpectedly; a quick batch of these cupcakes turned a grey afternoon into a shared, chocolatey pause.
They shine at birthday gatherings, weeknight treats, and easy entertaining. Ready to bring this dish to life?
Why You’ll Love It
- Delivers rich, bakery-style chocolate flavor with everyday gluten-free ingredients
- Bakes up moist, tender crumbs—no dry or gritty texture here
- Mixes in one bowl with simple steps, perfect for beginners
- Adapts easily to dairy-free swaps without sacrificing taste or texture
- Stays fresh and soft, ideal for make-ahead parties and events
Ingredients
- 1 cup gluten-free all-purpose flour blend — choose a blend that includes xanthan gum for structure
- 0.5 cup unsweetened cocoa powder — use a high-quality, Dutch-process or natural cocoa
- 0.75 cup granulated sugar — regular white sugar works best for sweetness and structure
- 0.25 cup light brown sugar, packed — adds moisture and a hint of caramel flavor
- 1 teaspoon baking powder — check that it’s labeled gluten free
- 0.5 teaspoon baking soda — helps the cupcakes rise and stay tender
- 0.5 teaspoon fine sea salt — enhances the chocolate flavor
- 2 large eggs, room temperature — leave out 30 minutes so they blend smoothly
- 0.5 cup whole milk, room temperature — or use your favorite dairy-free milk
- 0.25 cup sour cream, room temperature — or dairy-free yogurt for a lactose-free option
- 0.33 cup neutral vegetable oil — canola or sunflower oil keeps the crumb moist
- 1 teaspoon pure vanilla extract — avoid imitation for best flavor
- 0.5 cup hot coffee, strong brewed — or hot water to deepen chocolate flavor without coffee taste
Optional Chocolate Frosting
- 0.5 cup unsalted butter, softened — or dairy-free butter brought to room temperature
- 1.75 cups powdered sugar, sifted — sifting prevents lumps in the frosting
- 0.25 cup unsweetened cocoa powder — same cocoa as in the cupcakes for consistent flavor
- 2–3 tablespoons milk — add just enough (dairy or dairy free) for spreadable consistency
- 1 teaspoon pure vanilla extract — rounds out the chocolate flavor
- 0.25 teaspoon fine sea salt — balances sweetness and intensifies chocolate taste
Step-by-Step Method
Preheat the Oven & Prepare the Pan
Preheat the oven to 350°F (175°C). Line a standard 12-cup muffin tin with paper cupcake liners, pressing each firmly into place.
Set the pan aside on a flat surface. This guarantees even baking and easy removal.
Check that the oven rack is in the center position for consistent heat circulation.
Combine the Dry Ingredients
Whisk together the gluten-free flour, cocoa powder, baking powder, baking soda, and salt in a medium bowl. Break up any cocoa or flour lumps as you whisk.
Guarantee the mixture looks uniform in color and texture. Set this bowl aside so it’s ready to add to the wet ingredients later.
Mix the Wet Ingredients
Whisk the granulated sugar, brown sugar, eggs, milk, sour cream, oil, and vanilla in a large bowl.
Stir until the mixture looks smooth and glossy, with no streaks of egg or dairy.
Use room-temperature ingredients for better blending. Make sure the sugar begins dissolving into the liquids.
Combine Wet & Dry Mixtures
Add the dry ingredients to the large bowl with the wet ingredients. Whisk gently or use an electric mixer on low speed.
Mix just until no dry streaks of flour remain. Avoid overmixing so the cupcakes stay tender.
Scrape the sides and bottom of the bowl with a rubber spatula as needed.
Add the Hot Coffee & Finish the Batter
Slowly pour the hot coffee into the batter while whisking. Mix until the batter becomes smooth and slightly thin.
Don’t overmix once the coffee is incorporated. Confirm there are no pockets of dry ingredients left. Let the batter sit briefly so bubbles settle for even cupcakes.
Fill the Cupcake Liners
Divide the batter evenly among the 12 cupcake liners. Fill each liner about two-thirds full to allow room for rising.
Use a measuring cup or scoop for consistent portions. Wipe any spills from the pan so they don’t burn. Gently tap the pan to level the batter.
Bake the Cupcakes
Place the muffin tin in the preheated oven on the center rack. Bake for 16–18 minutes.
Check for doneness by inserting a toothpick into the center of a cupcake.
Look for a few moist crumbs, not wet batter. Avoid overbaking so the cupcakes remain soft and moist.
Cool the Cupcakes Completely
Transfer the muffin tin to a wire cooling rack. Let the cupcakes cool in the pan for 5 minutes to set their structure.
Carefully remove each cupcake from the tin and place them directly on the rack. Cool completely for about 15 minutes before applying any frosting.
Beat the Butter for Frosting
Place the softened butter in a mixing bowl. Beat with an electric mixer on medium speed for about 2 minutes.
Aim for a light, creamy, and slightly fluffy texture. Scrape the bowl sides to guarantee even mixing. Properly whipped butter creates a smoother, more stable frosting.
Add Sugar, Cocoa & Flavorings
Add powdered sugar, cocoa powder, salt, vanilla, and 2 tablespoons of milk to the bowl. Start mixing on low speed to avoid a sugar cloud.
Increase to medium-high once ingredients begin to combine. Beat until the frosting looks light and fluffy. Add more milk a teaspoon at a time if needed.
Adjust the Frosting Consistency
Assess the frosting’s texture. Add a few drops of milk if it feels too thick to spread or pipe.
Add a spoonful of powdered sugar if it’s too thin. Beat again briefly after each adjustment.
Aim for a smooth, spreadable consistency that holds soft peaks without being stiff.
Frost & Finish the Cupcakes
Make sure the cupcakes are completely cool before frosting. Use a spatula to swirl frosting generously on top, or pipe it with a piping bag for a decorative finish.
Work gently to avoid tearing the cupcake tops. Serve immediately or store in an airtight container until ready to enjoy.
Ingredient Swaps
- Dairy-free: Use plant milk (almond, oat, soy) instead of whole milk; dairy-free yogurt for sour cream; and vegan butter plus non-dairy milk in the frosting.
- Egg-free: Replace each egg with a “flax egg” (1 tbsp ground flax + 3 tbsp water, rested 5–10 minutes) or a commercial egg replacer.
- Coffee-free: Swap the hot coffee for equal hot water or hot dairy/non-dairy milk.
- Lower budget / pantry-friendly: Use any neutral oil (canola, sunflower) and regular table salt instead of sea salt; light brown sugar can be replaced 1:1 with more granulated sugar.
- Flour blends: Any 1:1 gluten-free all-purpose blend works; if it doesn’t contain xanthan gum, add 1/4 teaspoon to the dry ingredients.
You Must Know
– Scale – To double the recipe for 24 cupcakes, keep the oven temp the same (350°F/175°C) and start checking for doneness at 15 minutes.
Larger batches can bake a touch faster or slower; use the springy top + moist-crumb toothpick as your final guide rather than time alone.
Serving Tips
- Top with fresh berries and a dusting of powdered sugar for a simple finish.
- Serve on a tiered stand with mixed gluten-free cookies for a dessert display.
- Pair with vanilla ice cream and drizzle with warm chocolate or caramel sauce.
- Add colorful sprinkles or shaved chocolate and arrange on a contrasting platter.
- Serve alongside coffee or cold brew to complement the rich chocolate flavor.
Storage & Make-Ahead
Store cupcakes (unfrosted or frosted) in an airtight container in the fridge for up to 4–5 days.
Bring to room temperature before serving for the best texture.
These cupcakes freeze well (unfrosted is best) for up to 2 months.
Wrap individually, then place in a sealed freezer bag or container.
Reheating
Reheat cupcakes gently: in the microwave 5–10 seconds at a time.
In a 300°F oven for 5–8 minutes, tented with foil.
Avoid stovetop to prevent drying or scorching.
Gluten-Free Birthdays on Trend
When you set down a platter of these glossy-frosted cupcakes, you’re not announcing an allergy; you’re revealing the star of the party.
The cocoa perfume curls through the room, kids lean in, and adults ask, “These are gluten-free?” with genuine surprise.
Gluten-free birthdays aren’t a compromise anymore; they’re a standard.
You’re offering soft crumbs, deep chocolate flavor, and peace of mind in every bite—thoughtful, modern hosting on a plate.
Final Thoughts
Give these gluten free chocolate cupcakes a try and see just how rich, moist, and simple they can be.
Don’t be afraid to tweak the recipe with your favorite toppings or dairy-free swaps to make it perfectly your own.
Frequently Asked Questions
Can I Make These Cupcakes Egg-Free Without Compromising Texture?
Yes, you can, but texture shifts. I’d swap each egg for 3 tablespoons aquafaba or 1 tablespoon ground flax plus 3 tablespoons water, then expect slightly denser crumbs, still moist, chocolaty, and tender.
How Do Altitude Changes Affect Baking Time and Rise?
Altitude makes your batter rise faster, then fall flatter, and it often bakes quicker. I’d tell you: lower leavening, add a splash more liquid, and watch through the oven window—tops should look softly domed, not sunken.
What’s the Best Way to Ship These Cupcakes Safely?
I’d chill them overnight, nestle each frosted beauty in a snug cupcake insert, then box, bubble-wrap, and double-box. I’d ship fastest possible so you unwrap tender crumbs, glossy swirls, and intact chocolate perfume.
Can I Scale This Recipe for a Large Wedding or Event?
Yes, you can scale it; I’d mix one batch at a time so the batter stays silky, then bake in waves. Picture rows of glossy domes cooling, chocolate-scented air drifting through the venue’s quiet bustle.
How Can Kids Help With This Recipe Safely?
Kids can safely whisk dry ingredients, stir glossy batter, place crinkly liners, and decorate cooled cupcakes. I’ll handle hot coffee, oven, and mixers while you guide their sticky fingers, chocolatey smiles, and careful handwashing.
Gluten Free Chocolate Cupcakes
Equipment
- 1 standard 12-cup muffin tin
- 12 paper cupcake liners
- 2 medium mixing bowls
- 1 large mixing bowl
- 1 Whisk
- 1 Rubber spatula
- 1 electric hand mixer or stand mixer
- 1 Measuring cups set
- 1 Measuring spoons set
- 1 wire cooling rack
Ingredients
- 1 cup gluten-free all-purpose flour blend with xanthan gum
- 0.5 cup unsweetened cocoa powder
- 0.75 cup granulated sugar
- 0.25 cup light brown sugar packed
- 1 teaspoon baking powder
- 0.5 teaspoon baking soda
- 0.5 teaspoon fine sea salt
- 2 large eggs room temperature
- 0.5 cup whole milk room temperature or dairy-free milk
- 0.25 cup sour cream room temperature or dairy-free yogurt
- 0.33 cup vegetable oil neutral
- 1 teaspoon pure vanilla extract
- 0.5 cup hot coffee strong brewed or hot water
- 0.5 cup unsalted butter or dairy-free butter; softened
- 1.75 cup powdered sugar sifted
- 0.25 cup unsweetened cocoa powder
- 1 2–3 tablespoons milk or dairy-free milk
- 1 teaspoon pure vanilla extract
- 0.25 teaspoon fine sea salt
Instructions
- Preheat the oven to 350°F (175°C) and line a 12-cup muffin tin with paper cupcake liners.
- In a medium bowl whisk together gluten-free flour, cocoa powder, baking powder, baking soda, and salt until well combined.
- In a large bowl whisk together granulated sugar, brown sugar, eggs, milk, sour cream, oil, and vanilla until smooth.
- Add the dry ingredients to the wet ingredients and whisk or mix on low just until no dry streaks remain.
- Carefully pour in the hot coffee and whisk until the batter is smooth and thin, without overmixing.
- Divide the batter evenly among the 12 liners, filling each about two-thirds full.
- Bake for 16–18 minutes, or until a toothpick inserted in the center of a cupcake comes out with a few moist crumbs.
- Transfer the muffin tin to a wire rack and let the cupcakes cool in the pan for 5 minutes.
- Remove the cupcakes from the tin and place them directly on the wire rack to cool completely, about 15 minutes.
- While the cupcakes cool, beat the softened butter with an electric mixer until creamy and light, about 2 minutes.
- Add powdered sugar, cocoa powder, salt, vanilla, and 2 tablespoons milk to the butter and beat on low, then increase to medium-high until fluffy, adding more milk a teaspoon at a time if needed for spreadable consistency.
- Once the cupcakes are completely cool, frost them with the chocolate frosting using a spatula or piping bag.
Notes

Cynthia Weatherford is a seasoned chef and culinary enthusiast who serves as the Recipe creator of Somonday. With decades of experience in the kitchen and a passion for exploring diverse cuisines, Cynthia brings a blend of creativity and technique to every dish. Known for transforming simple ingredients into show-stopping meals, Cynthia believes that cooking is an art form anyone can master. Dedicated to inspiring home cooks, Cynthia shares approachable recipes, pro tips, and culinary wisdom to make every meal memorable.


