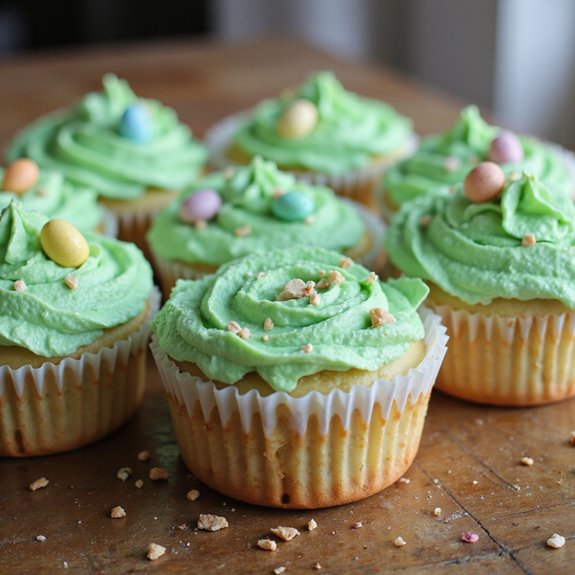
Picture a tray of cupcakes that look like tiny spring lawns—swirls of bright green “grass,” little sugar flowers, maybe a hidden chocolate egg tucked on top.
These grass cupcakes are a cheerful, cozy dessert that comes together surprisingly fast, perfect when you need something fun but don’t have hours to decorate.
They’re ideal for beginners, busy parents, and anyone planning kid-friendly parties, potlucks, or seasonal gatherings.
I still remember an early Easter morning when I realized I’d promised to bring dessert to a family brunch—and completely forgot.
A simple batch of cupcakes, a quick tint of frosting, and a grass piping tip turned my near-disaster into the star of the table. The kids were thrilled, the adults smiled, and I quietly exhaled.
These cupcakes shine at Sunday suppers, last-minute celebrations, or any time you want dessert to double as décor. Ready to bring this dish to life?
Why You’ll Love It
- Delivers soft, tender vanilla cupcakes with rich, creamy buttercream frosting
- Looks impressively like real grass, perfect for spring or sports themes
- Uses simple, familiar ingredients you likely already have on hand
- Decorates easily with candy eggs, flowers, or themed cupcake toppers
- Pipes clean, defined “grass” texture using reliable, beginner-friendly techniques
Ingredients
- 190 g all-purpose flour, sifted — level the cup for accuracy
- 200 g granulated sugar — standard white caster sugar works well
- 8 g baking powder — be sure it’s fresh and active
- 2 g fine salt — enhances overall flavor
- 120 ml whole milk, room temperature — cold milk can toughen the crumb
- 60 ml vegetable oil — choose a neutral-flavored oil
- 2 large eggs, room temperature — helps batter mix evenly
- 5 ml vanilla extract — pure vanilla gives best flavor
- 60 ml warm water — aids a smooth, pourable batter
- 113 g unsalted butter, softened — should dent easily when pressed
- 360 g powdered sugar, sifted — prevents lumpy frosting
- 30 ml heavy cream — adjust slightly for desired frosting consistency
- 5 ml vanilla extract — flavors the buttercream base
- 2–3 drops green gel food coloring — adds vibrant color without thinning frosting
Step-by-Step Method
Preheat the Oven & Prepare the Pan
Preheat the oven to 175°C (350°F). Line a 12-cup muffin tin with paper cupcake liners. Make sure the rack is in the center of the oven for even baking. Set the pan aside while you prepare the batter.
Having everything ready helps the cupcakes bake evenly and rise properly once mixed.
Combine the Dry Ingredients
Whisk the flour, baking powder, and salt together in a medium bowl. Break up any lumps and make sure the mixture looks uniform.
Sifting the flour first keeps the batter light. Set this bowl aside so it’s ready to add to the wet ingredients without delay or extra handling.
Mix the Wet Ingredients
In a large bowl, whisk the sugar, milk, vegetable oil, eggs, vanilla, and warm water.
Whisk until the mixture looks smooth and homogenous. Make sure the eggs are fully incorporated and no streaks remain.
Using room-temperature ingredients helps them blend easily and creates a more even cupcake texture.
Combine Wet & Dry Mixtures
Add the dry ingredients to the wet ingredients in two additions. Whisk gently until just combined and no dry streaks of flour remain.
Avoid vigorous mixing so you don’t develop too much gluten. Stop as soon as the batter looks smooth.
Overmixing can lead to dense or tough cupcakes when baked.
Fill the Cupcake Liners
Divide the batter evenly among the 12 liners, filling each about two-thirds full. Use a spoon or a measuring cup for consistent portions.
Avoid overfilling, which can cause overflow and uneven tops. Gently tap the pan on the counter to release any large air bubbles trapped in the batter.
Bake & Cool the Cupcakes
Place the pan in the preheated oven and bake for 16–18 minutes. Check doneness with a toothpick; it should come out clean or with a few moist crumbs.
Remove the pan and cool the cupcakes in the tin for 5 minutes. Transfer them to a wire rack and cool completely for about 25 minutes.
Beat the Butter for Frosting
Place the softened butter in a medium bowl. Beat with a hand mixer or stand mixer on medium speed for about 2 minutes.
Continue until the butter is creamy and slightly pale. Scrape down the sides of the bowl as needed.
Properly creamed butter gives the frosting a light, fluffy texture.
Add the Sugar & Whip the Frosting
Gradually add the powdered sugar on low speed to avoid a sugar cloud. Once incorporated, increase the mixer speed to medium and beat until fluffy.
Add the heavy cream and vanilla, then beat again on medium-high until smooth and spreadable. Adjust the cream slightly if needed for your preferred consistency.
Tint the Frosting Green
Add 2–3 drops of green gel food coloring to the frosting. Beat on low until the color is evenly distributed.
Add more gel a tiny bit at a time until you reach a grass-like shade. Avoid adding too much at once.
Gel coloring is concentrated and can quickly become darker than desired.
Prepare the Piping Bag
Fit a piping bag with a grass piping tip, such as a multi-opening #233. Fill the bag with green frosting, pushing it down gently to remove air pockets.
Twist the top of the bag to secure it. If the frosting feels too soft, chill it briefly so the grass texture holds its shape when piped.
Pipe the Grass Texture
Hold the piping bag at a 90-degree angle to the cupcake surface. Squeeze gently, then quickly release and pull up to form short blades of “grass.”
Work in small clusters to cover the top completely. Vary the length and direction slightly for a natural look.
Refill or chill the bag as needed.
Decorate & Serve the Cupcakes
Top the grassy surface with candy eggs, fondant flowers, or themed toppers if desired. Arrange decorations gently to avoid flattening the frosting.
Store the cupcakes loosely covered in a cool place or refrigerator. Let them sit at room temperature about 15 minutes before serving for the best flavor and texture.
Ingredient Swaps
- Dairy-free: Use a neutral dairy-free milk (soy, oat, or almond) in place of whole milk and heavy cream; swap butter for vegan stick butter (not soft spread) in the frosting.
- Egg-free: Replace each egg with 60 ml (¼ cup) unsweetened applesauce or a commercial egg replacer prepared per package directions.
- Gluten-free: Use a 1:1 gluten-free all-purpose flour blend that includes xanthan gum, and let the batter rest 10 minutes before baking.
- Lower-cost: Substitute half or all of the butter in the frosting with vegetable shortening for a more budget-friendly, stable icing.
- Flavor twists: Replace part of the vanilla with almond, lemon, or coconut extract; add citrus zest to the batter for a brighter flavor.
You Must Know
- Doneness • If cupcakes look pale and flat: Leave them in the oven 2–4 minutes longer until the tops are lightly golden and spring back when gently tapped; a toothpick should come out with only a few moist crumbs, not shiny batter. This guarantees the centers are fully set and not gummy.
- Troubleshoot • When cupcakes sink in the middle: Check that the batter wasn’t filled beyond about 2/3 full and avoid opening the oven for the first 12 minutes; sudden temp drops or overfilled cups cause collapse and dense, wet centers.
- Flavor Boost • For richer vanilla flavor: Increase vanilla in the batter to 7–8 ml and in the frosting to 7–10 ml, or swap half for almond extract (about 2–3 ml); this gives a more pronounced aroma without changing texture.
- Scale • To serve a crowd (24 cupcakes): Double all ingredients (e.g., 380 g flour, 400 g sugar, 4 eggs, 226 g butter for frosting) and use two 12-cup tins; keep oven temp the same and start checking doneness at the same 16-minute mark.
- Make-Ahead • To split the work: Store unfrosted cupcakes in an airtight container at room temp up to 24 hours, and chill frosting (well-covered) up to 3 days; let frosting sit 20–30 minutes, then re-beat briefly so it pipes clean, defined “grass” strands.
Serving Tips
- Serve on a white platter to highlight the green “lawn” effect.
- Top with mini chocolate eggs for a spring or Easter-themed display.
- Arrange cupcakes in a rectangle to resemble a grass field or garden.
- Add small animal or flower toppers for kids’ party decorations.
- Pair with lemonade or iced tea to balance the sweetness.
Storage & Make-Ahead
Grass cupcakes keep in the fridge, loosely covered, for up to 4 days.
Let them sit at room temperature 15–20 minutes before serving.
For make-ahead, you can bake cupcakes and freeze them (unfrosted) up to 2 months.
Thaw at room temperature, then frost and decorate.
Reheating
To gently reheat grass cupcakes, remove any delicate toppers.
Warm briefly in a microwave at 50% power, or in a 300°F (150°C) oven, avoiding direct stovetop heat.
Grass Cupcakes in Pop Culture
Once you’ve warmed a cupcake back to its soft, bakery-fresh texture, it’s easy to see why grassy green frosting keeps showing up everywhere from kids’ cartoons to springtime baking shows.
I see it as a tiny stage set: the crinkled paper liner becomes earth, the buttercream “blades” stand at attention, just waiting for a candy egg cameo or a fondant bunny hop-on.
When I spot grass cupcakes on screen, I don’t just watch—I taste in my imagination: the cool, sweet frosting, the tender vanilla crumb, the faint scent of sugar and food coloring.
- Notice how shows frame them in close-up, like edible meadows.
- Borrow color palettes from animated gardens.
- Recreate your favorite “scene” in cupcake form.
Final Thoughts
Now that you know how to make these fun Grass Cupcakes, it’s your turn to get creative—try them as written first, then play with different colors, flavors, or toppings to make them your own.
However you decorate them, they’re sure to be a hit at your next gathering.
Frequently Asked Questions
Can I Make Grass Cupcakes Without Any Artificial Food Coloring?
You can. I’d tint the frosting naturally—with matcha, spirulina, or spinach powder—until it blushes soft green. Taste as you go, and balance any earthiness with extra vanilla, a whisper of lemon, or more sugar.
How Do I Transport Grass Cupcakes Without Ruining the Frosting Design?
I’d nestle each cupcake in a deep, snug box, leaving space above the frosting, then chill them first. As you drive, every bump stays outside while those tiny green blades arrive standing tall.
Are Grass Cupcakes Suitable for People With Common Food Allergies?
They’re usually not, since they often hold wheat, eggs, dairy, and sometimes soy. I’d urge you to ask about ingredients, imagine each swirl as a potential trigger, and request custom swaps or certified allergen‑free versions.
Can Kids Help Decorate the Grass Cupcakes Safely and Easily?
Yes, kids can help decorate safely and easily. I’d give them pre-filled bags, show gentle squeezes, then let them “grow” frosting lawns—soft green swirls, sweet vanilla scent, tiny candies crunching under curious, sugar-dusted fingers.
How Far in Advance Can I Frost the Cupcakes for a Party?
You can frost them up to one day ahead. I chill them loosely covered, then let them warm slightly before serving, so the buttercream softens, the vanilla blooms, and each bite tastes freshly swirled just for you.

Grass Cupcakes
Equipment
- 1 Muffin tin (12-cup)
- 12 paper cupcake liners
- 2 medium mixing bowls
- 1 large mixing bowl
- 1 hand mixer or stand mixer
- 1 Whisk
- 1 Rubber spatula
- 1 wire cooling rack
- 1 measuring cup set
- 1 measuring spoon set
- 1 piping bag
- 1 grass piping tip (multi-opening tip, e.g., #233)
Ingredients
- 190 gram all-purpose flour sifted
- 200 gram granulated sugar
- 8 gram baking powder
- 2 gram fine salt
- 120 milliliter whole milk room temperature
- 60 milliliter vegetable oil
- 2 large eggs room temperature
- 5 milliliter vanilla extract
- 60 milliliter warm water
- 113 gram unsalted butter softened
- 360 gram powdered sugar sifted
- 30 milliliter heavy cream
- 5 milliliter vanilla extract
- 1 2–3 drops green gel food coloring
Instructions
- Preheat the oven to 175°C (350°F) and line the muffin tin with paper cupcake liners.
- In a medium bowl, whisk together the flour, baking powder, and salt until well combined.
- In a large bowl, whisk the sugar, milk, vegetable oil, eggs, vanilla extract, and warm water until smooth.
- Add the dry ingredients to the wet ingredients and whisk gently until just combined and no dry streaks remain.
- Divide the batter evenly among the 12 liners, filling each about two-thirds full.
- Bake the cupcakes for 16–18 minutes, or until a toothpick inserted in the center comes out clean.
- Remove the tin from the oven and let the cupcakes cool in the pan for 5 minutes.
- Transfer the cupcakes to a wire cooling rack and let them cool completely for about 25 minutes.
- In a medium bowl, beat the softened butter with a mixer on medium speed until creamy and pale, about 2 minutes.
- Gradually add the powdered sugar, mixing on low speed until incorporated, then increase speed to medium until fluffy.
- Add the heavy cream and vanilla extract, then beat on medium-high until the frosting is smooth and spreadable.
- Tint the frosting with green gel food coloring, adding a little at a time and mixing until you reach a grass-like shade.
- Fit the piping bag with the grass tip and fill it with the green frosting.
- Pipe short, quick squeezes of frosting over the surface of each cooled cupcake to create a grass texture, covering completely.
- Optionally decorate the “grass” with small candy eggs, fondant flowers, or themed toppers before serving.
Notes

Cynthia Weatherford is a seasoned chef and culinary enthusiast who serves as the Recipe creator of Somonday. With decades of experience in the kitchen and a passion for exploring diverse cuisines, Cynthia brings a blend of creativity and technique to every dish. Known for transforming simple ingredients into show-stopping meals, Cynthia believes that cooking is an art form anyone can master. Dedicated to inspiring home cooks, Cynthia shares approachable recipes, pro tips, and culinary wisdom to make every meal memorable.


