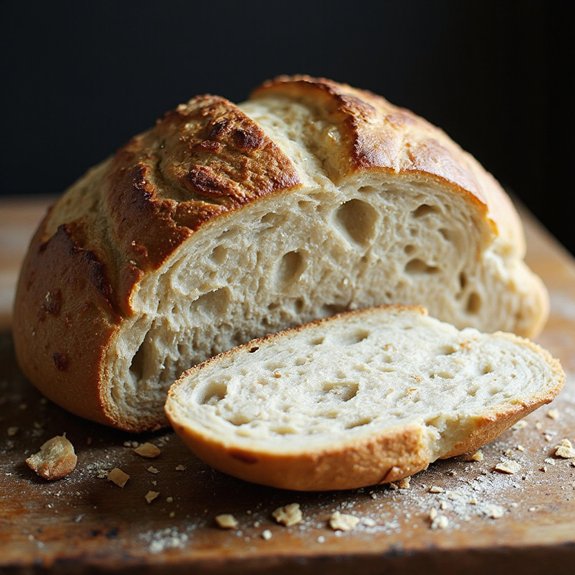
There’s something about pulling a golden, crackling loaf of honey wheat sourdough from the oven that makes the whole kitchen feel like home.
The crust sings as it cools, giving way to a tender, amber-crumb interior that smells of toasted wheat, warm honey, and a whisper of tang.
This isn’t a rushed recipe—it’s a slow, cozy bread project, perfect for relaxed weekends, Sunday suppers, or whenever you crave a nourishing, homemade loaf.
It’s ideal for beginners who want a forgiving introduction to sourdough, families who love good toast and sandwiches, and comfort seekers who find peace in simple baking rituals.
I leaned on this bread during a stressful week, slicing it warm beside a pot of soup; that first bite—slightly sweet, gently sour—quieted everything for a moment.
It’s wonderful for casual gatherings, meal prep for the week, or an easy yet impressive share at a friend’s house.
Ready to bring this loaf to life?
Why You’ll Love It
- Delivers a gently sweet, nutty flavor from honey and whole wheat
- Creates a soft, tender crumb with a beautifully chewy crust
- Offers sourdough’s natural keeping quality for fresher bread longer
- Fits easily into busy schedules with flexible rise times
- Uses simple, everyday ingredients—no commercial yeast required
Ingredients
- 150 g active sourdough starter — 100% hydration, bubbly and recently peaked
- 300 g warm water — about 80–85°F to keep fermentation steady
- 40 g honey — mild-flavored, like clover or wildflower
- 250 g bread flour — higher protein for structure and chew
- 200 g whole wheat flour — stone-ground if possible for better flavor
- 9 g fine sea salt — evenly seasons and strengthens gluten
- 15 g olive oil or melted butter — optional, adds tenderness and flavor
- 10 g flour — for dusting the work surface and proofing basket
Step-by-Step Method
Mix starter, water & honey
Combine active sourdough starter, warm water, and honey in a large mixing bowl. Whisk until the starter and honey dissolve and the mixture looks uniformly milky and smooth. Make sure no thick clumps of starter remain.
Properly dissolving now helps the yeast and bacteria distribute evenly and jump-starts fermentation for a stronger rise later.
Hydrate the flours
Add bread flour and whole wheat flour directly to the wet mixture. Stir with a wooden spoon or dough whisk until no dry patches remain.
Aim for a shaggy, sticky dough—do not knead yet. Scrape down the sides of the bowl.
Full hydration at this stage improves gluten development and supports better texture in the finished loaf.
Rest for autolyse
Cover the bowl with a towel or plastic wrap. Let the dough rest for 30–45 minutes at room temperature.
Avoid disturbing it. During this autolyse, the flour absorbs water and gluten begins forming on its own.
This rest makes the dough easier to handle, improves extensibility, and enhances flavor and structure without extra effort.
Incorporate salt and fat
Sprinkle salt evenly over the dough surface. Drizzle in olive oil or melted butter if using.
With wet hands, squeeze and fold the dough repeatedly until the salt and fat are fully mixed in. The dough will feel smoother and more elastic.
Salt strengthens gluten and moderates fermentation, while fat adds tenderness and a softer crumb.
Begin bulk fermentation
Cover the bowl and let the dough sit at room temperature. Over the first 2 hours, perform stretch-and-folds every 30 minutes: grab one edge of the dough, stretch it up, and fold it over itself, rotating the bowl.
Do 3–4 folds per session. This gentle method builds strength without kneading and keeps the dough airy.
Let dough rise undisturbed
After the final stretch-and-fold, leave the dough covered to continue bulk fermentation. Watch for a 50–75% increase in volume, a smoother surface, and small bubbles along the edges and top.
This may take 1–2 more hours depending on temperature. Avoid over-proofing; the dough should feel lively, airy, and slightly jiggly when the bowl is shaken.
Pre-shape and rest
Lightly flour the work surface, then gently turn the dough out, trying not to deflate it completely. Use a bench scraper to tuck edges under and form a loose round.
Let it rest uncovered for 10–15 minutes. This bench rest relaxes the gluten, making final shaping easier and helping the dough hold its structure.
Shape into a tight loaf
With lightly floured hands, shape the dough into a round or oval. Fold the top down, sides in, and bottom up toward the center.
Then drag the loaf gently against the counter to tighten the surface. Aim for a smooth, taut skin without tearing.
Good tension here encourages better oven spring and an attractive finished shape.
Prepare the proofing basket
Generously flour a proofing basket or a medium bowl lined with a clean towel. Use a mix of flour and rice flour if available to prevent sticking.
Place the shaped loaf seam side up into the basket. Lightly flour the exposed surface.
Proper flouring makes sure the dough releases easily later, preserving structure and scoring detail.
Proof at room temp or cold
Cover the basket with a towel or plastic wrap. Proof at room temperature for 1–2 hours until slightly puffy, or refrigerate 8–12 hours for a cold retard.
The cold option deepens flavor and makes scoring easier. The dough is ready when it springs back slowly to a gentle fingertip press without collapsing.
Preheat the Dutch oven
About 30–45 minutes before baking, place a Dutch oven with its lid in your oven. Preheat to 475°F (245°C).
Allow the pot and oven to fully heat for consistent results. The heavy, hot Dutch oven traps steam from the dough, which supports maximum oven spring, a glossy crust, and a more open crumb structure.
Transfer and score the loaf
Carefully remove the hot Dutch oven. Gently invert the proofed dough onto parchment or directly into the pot so it’s seam side down.
Quickly score the top with a sharp knife or lame, cutting ¼–½ inch deep. Use one long slash or a simple pattern.
Scoring directs expansion and prevents random bursting.
Bake with steam and finish
Cover the Dutch oven and bake at 475°F (245°C) for 20 minutes. Remove the lid, reduce the oven temperature to 450°F (230°C), and continue baking 18–22 minutes.
Look for a deeply golden crust and a hollow sound when tapped on the bottom. If it darkens too quickly, tent loosely with foil to prevent burning.
Cool completely before slicing
Transfer the baked loaf to a wire cooling rack. Let it cool for at least 1–2 hours before slicing.
This rest allows the interior crumb to set and moisture to redistribute, preventing gumminess. Cutting too early compresses the structure and releases steam.
Once fully cooled, slice with a sharp serrated knife and enjoy.
Ingredient Swaps
- Use up to 50% whole wheat with 50% all-purpose flour if you don’t have bread flour; reduce the water by 10–20 g if the dough feels too sticky.
- Swap honey 1:1 with maple syrup or agave for a similar sweetness, or with molasses for a darker, richer flavor.
- For dairy-free, stick with olive oil; for richer flavor use melted butter instead of oil, or omit the fat entirely for a leaner, chewier loaf.
You Must Know
– Avoid – Avoid cutting while still warm; wait at least 1–2 hours until the loaf is cool to the touch all over.
Slicing early vents steam, making the crumb gummy and causing slices to squish instead of cut cleanly.
Serving Tips
- Serve warm slices with salted butter and a drizzle of extra honey.
- Pair with sharp cheddar, apple slices, and nuts for a simple snack board.
- Use for grilled cheese with caramelized onions or sliced tomato.
- Toast and top with avocado, lemon, and red pepper flakes.
- Accompany hearty soups or stews; offer olive oil and balsamic for dipping.
Storage & Make-Ahead
Honey wheat sourdough keeps covered at room temperature for 2–3 days, or up to 1 week in the fridge, well wrapped to prevent drying.
For make-ahead, slice and freeze tightly wrapped for up to 2 months.
Thaw at room temperature and refresh in a 350°F oven for 5–10 minutes.
Reheating
Reheat slices gently.
Microwave 10–15 seconds wrapped in a damp towel.
Warm in a 300°F oven for 8–10 minutes.
Or toast in a covered skillet over low heat until warmed through.
Honey Wheat in Traditions
On many tables, a honey‑wheat loaf feels like a quiet celebration of everyday comfort, weaving sweetness and grain into something both humble and ceremonial. I think of it as a gentle bridge between the ordinary day and whatever we’re gathering for.
When I slice into the crust, the crackle sounds like an invitation, and the honeyed crumb releases that warm, nutty aroma that makes people drift toward the kitchen.
In my home, this bread slips easily into traditions—set beside a pot of soup on dark winter evenings, or torn by hand for holiday meals when candles burn low. It’s never the star, yet it somehow holds the moment together, anchoring memories in its subtle sweetness and wholesome chew.
Final Thoughts
Give this honey wheat sourdough a try and see how the gentle sweetness and hearty whole wheat crumb fit into your weekly baking routine.
Once you’ve made it once, don’t be afraid to tweak the hydration, honey level, or flours to truly make it your own.
Frequently Asked Questions
Can I Make This Honey Wheat Sourdough Completely Oil‑Free or Fat‑Free?
Yes, you can skip the oil entirely. I’d mix the dough as written, then expect it to feel slightly tackier, smell warmly of honey and wheat, and bake into a crackling, rustic crust with tender crumb.
How Do Altitude and Climate Affect Fermentation and Baking Times for This Loaf?
Altitude speeds fermentation and baking, while warmth does too; cold slows everything. I watch dough like rising moonlight, feel its airy softness, smell tangy sweetness, and adjust proof or bake until it looks and sounds just right.
Is This Bread Suitable for People With Mild Wheat Sensitivities or IBS?
It’s usually not ideal for mild wheat sensitivity or IBS, since it’s still wheat‑based. I’d tell you to picture a warm, crackling loaf, but for comfort, choose low‑FODMAP or gluten‑free options instead.
Can I Mix and Bake the Dough Using a Bread Machine Cycle?
Yes, you can, but I’d only use the machine to mix and knead. Let it ferment and rise in a warm bowl instead, then bake in your oven for better crust, aroma, and flavor.
How Can I Adapt This Recipe for a Tangier, Extra-Sour Flavor Profile?
You’ll coax extra tang by using a higher ratio of mature, just-fallen starter, extending cold fermentation 24–36 hours, and keeping the dough slightly cooler. I taste bright, lactic notes deepen like twilight shadows around warm, crackling crust.

Honey Wheat Sourdough Bread
Equipment
- 1 large mixing bowl
- 1 Medium bowl
- 1 kitchen scale or measuring cups and spoons
- 1 wooden spoon or dough whisk
- 1 bench scraper (optional but helpful)
- 1 proofing basket or medium bowl lined with a clean towel
- 1 Dutch oven with lid or baking stone + steam pan
- 1 sharp knife or lame for scoring
- 1 wire cooling rack
Ingredients
- 150 gram active sourdough starter 100% hydration
- 300 gram warm water about 80–85°F
- 40 gram honey
- 250 gram bread flour
- 200 gram whole wheat flour
- 9 gram fine sea salt
- 15 gram olive oil or melted butter optional; plus extra for greasing
- 10 gram additional flour for dusting
Instructions
- In a large mixing bowl, whisk together the active sourdough starter, warm water, and honey until mostly dissolved.
- Add the bread flour and whole wheat flour to the bowl and mix with a spoon or dough whisk until no dry spots remain and a shaggy dough forms.
- Cover the bowl and let the dough rest (autolyse) for 30–45 minutes at room temperature.
- Sprinkle the salt over the dough, add the olive oil or melted butter if using, and squeeze and fold the dough with your hands until the salt and fat are well incorporated.
- Begin bulk fermentation by covering the bowl and letting the dough rest at room temperature for 3–4 hours, performing 3–4 sets of stretch-and-folds every 30 minutes during the first 2 hours.
- After the final stretch-and-fold, let the dough continue to rise undisturbed until it has grown by about 50–75% in volume, looks smoother, and shows bubbles at the surface and edges.
- Lightly flour your work surface, gently turn out the dough, and let it rest for 10–15 minutes to relax.
- Shape the dough into a tight round or oval loaf by folding the edges toward the center and then tightening the surface against the work surface.
- Generously flour a proofing basket or towel-lined bowl, then place the shaped dough seam side up into the basket.
- Cover and proof the dough at room temperature for 1–2 hours, or refrigerate for 8–12 hours for a cold retard and deeper flavor.
- About 30–45 minutes before baking, place a Dutch oven (with lid) into the oven and preheat to 475°F (245°C).
- When ready to bake, carefully remove the hot Dutch oven, gently invert the dough onto a piece of parchment or directly into the pot so it is seam side down.
- Score the top of the loaf with a sharp knife or lame to allow controlled expansion in the oven.
- Cover with the lid and bake for 20 minutes at 475°F (245°C).
- Remove the lid, reduce the temperature to 450°F (230°C), and bake for another 18–22 minutes until the crust is deeply golden brown and the loaf sounds hollow when tapped on the bottom.
- Transfer the baked loaf to a wire rack and let it cool completely for at least 1–2 hours before slicing.
Notes

Cynthia Weatherford is a seasoned chef and culinary enthusiast who serves as the Recipe creator of Somonday. With decades of experience in the kitchen and a passion for exploring diverse cuisines, Cynthia brings a blend of creativity and technique to every dish. Known for transforming simple ingredients into show-stopping meals, Cynthia believes that cooking is an art form anyone can master. Dedicated to inspiring home cooks, Cynthia shares approachable recipes, pro tips, and culinary wisdom to make every meal memorable.


