
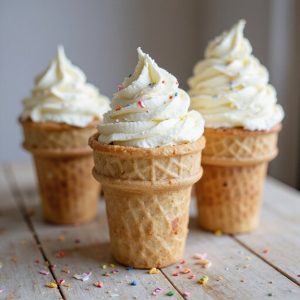
There’s something about seeing a tray of ice cream cone cupcakes come out of the oven—golden tops puffed over crisp waffle cones, sprinkles catching the light—that makes everyone stop and smile.
This cozy, whimsical dessert looks like ice cream but tastes like soft, fluffy cake, and it’s ready in about 30 minutes. It’s perfect for busy parents, beginners who want a foolproof wow-factor treat, and anyone with a soft spot for nostalgic sweets.
I still remember the rainy Saturday when these “cones” saved my niece’s birthday: the ice cream machine broke, kids were disappointed, and a quick batch of cone cupcakes turned the whole mood around.
They were easy to hold, fun to decorate, and not a single crumb was left.
They shine at classroom parties, last-minute celebrations, bake sales, or anytime you need low-stress, high-fun dessert magic. Ready to bring this playful treat to life?
Why You’ll Love It
- Delivers nostalgic ice-cream-parlor vibes in a neat, handheld treat
- Doubles as dessert and decor for parties, birthdays, and bake sales
- Uses simple pantry ingredients and flat-bottom cones for easy assembly
- Bakes upright in a muffin pan—no special stands or tools
- Invites endless customization with colorful frosting, sprinkles, and fun flavors
Ingredients
- 1 1/2 cups all-purpose flour — measure lightly spooned and leveled for accuracy
- 1 cup granulated sugar — standard white baking sugar works best
- 1 1/2 teaspoons baking powder — guarantees a good rise in the cones
- 1/2 teaspoon baking soda — helps balance acidity and lift
- 1/2 teaspoon fine salt — fine grain blends evenly into the batter
- 2 large eggs, room temperature — room temp helps batter mix smoothly
- 1/2 cup unsalted butter, melted and cooled — cooling prevents scrambling the eggs
- 3/4 cup whole milk, room temperature — adds moisture and tenderness
- 2 teaspoons vanilla extract — use pure vanilla for best flavor
- 12 flat-bottomed ice cream cones — choose sturdy, uncracked cones
- 1 cup unsalted butter, softened — soft but not greasy for smooth frosting
- 3 cups powdered sugar, sifted — sifting keeps the frosting lump-free
- 2 tablespoons heavy cream or milk — adjust for desired frosting consistency
- 1 teaspoon vanilla extract — flavors the buttercream frosting
- 1/8 teaspoon fine salt — balances the sweetness of the frosting
- 1/3 cup rainbow sprinkles (optional) — add just before serving for best crunch
Step-by-Step Method
Prepare the Cones
Preheat the oven to 350°F (175°C). Set a standard 12-cup muffin pan on a flat surface. Stand one flat-bottomed cone upright in each well.
Make sure each cone is level and stable so the batter bakes evenly. If any cones wobble, secure them with a bit of crumpled foil around the base.
Mix the Dry Ingredients
Combine the all-purpose flour, granulated sugar, baking powder, baking soda, and salt in a medium bowl. Whisk until everything looks uniform and no streaks of flour remain.
Break up any lumps with the whisk. Set the dry mixture aside so it’s ready to add to the wet ingredients without delay.
Combine the Wet Ingredients
Whisk together the eggs, melted and cooled butter, milk, and vanilla extract in a large mixing bowl. Make certain the ingredients are at room temperature so they blend smoothly.
Whisk until the mixture looks creamy and fully combined. Avoid leaving streaks of egg or butter, which can create uneven texture in the cupcakes.
Make the Batter
Add the dry ingredients to the wet ingredients in the large bowl. Gently whisk or stir with a rubber spatula just until a smooth batter forms.
Scrape the sides and bottom to incorporate all the flour. Stop mixing as soon as there are no dry patches. Avoid overmixing to keep the cupcakes light and tender.
Fill the Cones
Carefully spoon or pour the batter into each cone, filling them about two-thirds full. Use a small measuring cup or spoon to control the flow and reduce spills.
Wipe any drips from the outside of the cones. Keep the cones upright and steady in the muffin pan as you work across the row.
Bake the Cupcakes
Place the muffin pan on a centered oven rack. Bake for 16–18 minutes, resisting the urge to open the oven early.
Check doneness by inserting a toothpick into the center of a cupcake; it should come out clean or with a few moist crumbs. Remove the pan from the oven once they’re fully baked.
Cool Completely
Let the cone cupcakes cool in the muffin pan for about 5 minutes to set their structure. Carefully lift each cone from the pan and transfer it to a wire cooling rack.
Stand them upright and allow them to cool completely for about 25 minutes. Make certain they’re fully cool before adding frosting, so it doesn’t melt.
Beat the Butter
Place the softened butter in a mixing bowl. Beat with an electric hand mixer or stand mixer on medium speed for 2–3 minutes.
Whip until the butter looks pale, smooth, and fluffy. Scrape down the sides of the bowl as needed. Properly aerated butter creates a lighter, creamier frosting texture.
Add the Sugar and Cream
Gradually add the sifted powdered sugar to the butter, mixing on low speed to prevent clouds of sugar. Increase speed once mostly incorporated and beat until fluffy.
Add the heavy cream or milk, vanilla extract, and salt. Beat again until the frosting becomes smooth, light, and easily pipeable, adjusting cream if needed.
Fill the Piping Bag
Transfer the finished frosting into a piping bag fitted with a large star tip. If you don’t have a piping bag, use a large resealable plastic bag and snip off one corner.
Push the frosting down toward the tip, removing air pockets. Twist the top of the bag to keep pressure steady while piping.
Pipe the Swirls
Hold a cooled cone cupcake upright. Pipe frosting in a spiral motion, starting from the outer edge and working upward to create a tall swirl that resembles soft-serve ice cream.
Apply even pressure on the bag. Repeat with each cone, ensuring the cupcakes are fully cooled so the frosting holds its shape.
Decorate and Serve
Immediately top the frosted cupcakes with rainbow sprinkles or your favorite decorations. Press the sprinkles gently so they adhere to the frosting.
Serve the cone cupcakes the same day to keep the cones crisp. If transporting, nestle each cone in a muffin pan or a box with holes to keep them upright.
Ingredient Swaps
- Use 1:1 gluten-free all-purpose flour blend in place of regular flour for a gluten-free version (ensure cones are labeled gluten-free too).
- Swap whole milk with any unsweetened non-dairy milk (almond, oat, soy) and use vegan butter to make the cupcakes and frosting dairy-free; pair with vegan cones.
- Replace granulated sugar with an equal amount of fine cane sugar or caster sugar; use light brown sugar for a slightly deeper flavor.
- For richer flavor, substitute up to half the butter in the batter with neutral oil; for budget, use salted butter and reduce added salt slightly.
- If heavy cream isn’t available for frosting, use milk or half-and-half and add it gradually until the frosting reaches a pipeable consistency.
You Must Know
– Flavor Boost – When you want a flavor twist, replace 1/4 cup of the flour with unsweetened cocoa powder for chocolate cupcakes or add 1–2 teaspoons of finely grated citrus zest to the batter.
You’ll see a light color change in the raw batter and taste a noticeable chocolate or bright citrus note once cooled.
Serving Tips
- Serve in a muffin tin to keep cones upright and easy to pass around.
- Arrange cones in a circle on a cake stand for a “bouquet” presentation.
- Pair with small bowls of extra sprinkles so guests can customize toppings.
- Offer alongside mini scoops of real ice cream for a fun mix-and-match dessert.
- Wrap cone bottoms in colorful napkins or tissue for easier holding and less mess.
Storage & Make-Ahead
Ice cream cone cupcakes are best the day they’re made.
Refrigeration softens cones, so instead: bake cupcakes in cones up to 1 day ahead, store loosely covered at room temperature, then frost just before serving.
They don’t freeze well in cones; for freezing, bake batter as regular cupcakes (up to 2 months).
Reheating
Reheat gently to preserve texture.
Briefly microwave 5–10 seconds to soften frosting only.
For warm cake, use a 250°F (120°C) oven 5–8 minutes.
Stovetop reheating isn’t recommended.
Ice Cream Truck Nostalgia
Some summer afternoons, I can almost hear the distant jingle of the ice cream truck when I pull these cone cupcakes from the oven.
One bite and I’m back on a sun‑baked sidewalk, squinting into the glare, clutching a few warm dollar bills while that tinny song gets louder.
Instead of chasing the truck, I’m standing in my kitchen, the air sweet with vanilla and butter.
The cones feel warm and crisp in my hand, like they’ve just been handed through a little sliding window.
When I pipe the frosting into tall, soft‑serve swirls and scatter rainbow sprinkles, it’s that same small thrill of choosing a treat from faded menu photos—only now, you and I get to make the magic ourselves.
Final Thoughts
Give these Ice Cream Cone Cupcakes a try and enjoy how fun and simple they’re to bake and decorate.
Don’t be afraid to play with different cake flavors, frosting colors, and toppings to make them your own!
Frequently Asked Questions
Can I Make These Ice Cream Cone Cupcakes Gluten-Free or Dairy-Free?
You can. I swap in gluten-free flour and cones, then use dairy-free butter, plant milk, and frosting. Imagine biting into that crisp shell, tender crumb, and lush swirl—still sweet, nostalgic, and totally allergy-friendly.
How Do I Safely Transport Cone Cupcakes for School Parties or Picnics?
I nestle each cone snugly into a muffin tin or cardboard with cone-sized holes, then wrap the whole tray. They ride upright, no wobble, frosting swirls intact like little parade floats.
What’s the Best Way to Prevent Cones From Tipping in the Oven?
I nestle each cone snugly in a muffin pan, then tuck crumpled foil around any wobbly bases. You’ll feel them lock into place, standing straight and steady as they bake and rise.
Can Kids Help With This Recipe, and Which Steps Are Age-Appropriate?
Kids can absolutely help; I’d invite toddlers to pour and sprinkle, school‑age kids to whisk and fill cones, and teens to pipe frosting, while I handle the hot oven and any sharp tools.
How Can I Decorate These for Holidays, Birthdays, or Themed Events?
You can decorate these for any occasion by swapping frosting colors, sprinkles, and toppers—think red‑green sugar for Christmas, pastel stars for birthdays, themed candies or tiny flags so each cone feels like a little edible centerpiece.
Ice Cream Cone Cupcakes
Equipment
- 1 Standard 12-cup muffin pan
- 12 ice cream-style flat-bottomed cones
- 2 medium mixing bowls
- 1 large mixing bowl
- 1 whisk or electric hand mixer
- 1 Rubber spatula
- 1 Measuring cups set
- 1 Measuring spoons set
- 1 wire cooling rack
- 1 piping bag or 1 large resealable plastic bag
- 1 Oven
Ingredients
- 1 1/2 cup all-purpose flour
- 1 cup granulated sugar
- 1 1/2 teaspoon baking powder
- 1/2 teaspoon baking soda
- 1/2 teaspoon fine salt
- 2 large eggs room temperature
- 1/2 cup unsalted butter melted and cooled
- 3/4 cup whole milk room temperature
- 2 teaspoon vanilla extract
- 12 flat-bottomed ice cream cones
- 1 cup unsalted butter softened
- 3 cup powdered sugar sifted
- 2 tablespoon heavy cream or milk
- 1 teaspoon vanilla extract
- 1/8 teaspoon fine salt
- 1/3 cup rainbow sprinkles optional
Instructions
- Preheat the oven to 350°F (175°C) and place the muffin pan on a stable surface.
- Stand one flat-bottomed cone upright in each well of the muffin pan, making sure they are level and stable.
- In a medium bowl whisk together the flour, granulated sugar, baking powder, baking soda, and salt until well combined.
- In a large bowl whisk together the eggs, melted butter, milk, and vanilla extract until smooth.
- Add the dry ingredients to the wet ingredients and gently whisk or stir with a spatula just until a smooth batter forms, avoiding overmixing.
- Carefully fill each cone about two-thirds full with batter, using a spoon or small measuring cup to avoid spilling.
- Transfer the muffin pan to the oven and bake for 16–18 minutes, or until a toothpick inserted into the center of a cupcake comes out clean.
- Remove the pan from the oven and let the cone cupcakes cool in the pan for 5 minutes.
- Gently transfer the cupcakes to a wire rack and let them cool completely for about 25 minutes before decorating.
- While the cupcakes cool, beat the softened butter in a mixing bowl with a mixer until light and creamy, about 2–3 minutes.
- Gradually add the powdered sugar, mixing on low, then increase the speed and beat until fluffy, scraping the bowl as needed.
- Add the heavy cream, vanilla extract, and salt, then beat again until the frosting is smooth, light, and pipeable.
- Spoon the frosting into a piping bag fitted with a large star tip, or into a resealable plastic bag with a corner snipped off.
- Pipe the frosting onto each cooled cone cupcake in a tall swirl to resemble soft-serve ice cream.
- Immediately top the frosted cupcakes with rainbow sprinkles or other decorations, pressing gently so they adhere.
Notes

Cynthia Weatherford is a seasoned chef and culinary enthusiast who serves as the Recipe creator of Somonday. With decades of experience in the kitchen and a passion for exploring diverse cuisines, Cynthia brings a blend of creativity and technique to every dish. Known for transforming simple ingredients into show-stopping meals, Cynthia believes that cooking is an art form anyone can master. Dedicated to inspiring home cooks, Cynthia shares approachable recipes, pro tips, and culinary wisdom to make every meal memorable.


