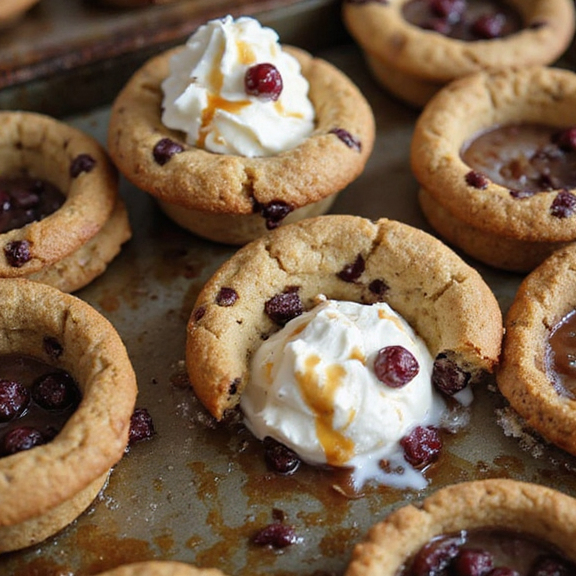
Picture warm, golden cookie cups fresh from the oven, their edges crisp and buttery, centers soft and chewy, perfumed with brown sugar and vanilla.
Imagine a scoop of velvety ice cream settling into that chocolate-studded nest, a fizz of cold cola or root beer bubbling up like tiny fireworks, crowned with a cloud of whipped cream and a shiny cherry.
This dessert matters to me because it wraps nostalgia—after-school cookies and weekend floats—into one playful bite that feels like celebration in any season.
It’s a crowd-pleaser that fits busy weeknights, birthday parties, or cozy Sunday suppers when you want something special without fuss.
One hectic summer night, these cookie cups saved dessert when the oven had to pull double duty—prep ahead, quick assemble, and everyone grinned at the first floaty sip.
They’re simple, make-ahead friendly, and pure joy from first crackle to last crumb. Ready? Let’s cook!
Why You’ll Love It
- Delivers nostalgic ice-cream-float flavor in a handheld cookie cup
- Balances chewy, crisp cookie with creamy, fizzy topping
- Uses simple pantry staples and basic kitchen tools
- Preps ahead; assemble floats in minutes for parties
- Kid-friendly, customizable with cola or root beer
Ingredients
- 1/2 cup unsalted butter, softened — room temp for easy creaming
- 1/2 cup granulated sugar — fine cane sugar dissolves best
- 1/2 cup light brown sugar, packed — fresh, soft texture
- 1 large egg, room temperature — prevents curdling
- 1 teaspoon vanilla extract — pure, not imitation
- 1 1/4 cups all-purpose flour — measure with spoon-and-level
- 1/2 teaspoon baking soda — check it’s fresh
- 1/4 teaspoon fine salt — balances sweetness
- 1 cup semisweet chocolate chips — mini chips press smoother
- 12 small scoops vanilla ice cream — firm, well-frozen
- 1 1/2 cups cold cola or root beer — very cold for best fizz
- 1/2 cup whipped cream (optional) — softly whipped
- 12 maraschino cherries (optional) — well-drained
Step-by-Step Method
Preheat and Prepare the Pan
Preheat the oven to 350°F (175°C). Lightly grease a standard 12-cup muffin tin. Set out a cooling rack. If your kitchen is warm, plan to chill shaped dough briefly later. Gather a small glass or shot glass for pressing cups. Prepare measuring tools, bowls, whisk, mixer, spatula, and a cookie scoop or tablespoon.
Cream the Butter and Sugars
Beat softened unsalted butter with granulated and light brown sugars until light and fluffy. Use a hand or stand mixer on medium speed. Scrape the bowl to guarantee even mixing. Aim for a creamy, pale mixture with no visible sugar granules. Proper creaming improves spread, texture, and structure in the cookie cups.
Add Egg and Vanilla
Beat in the room-temperature egg and vanilla extract until fully combined. Mix on low to medium speed. Scrape down the sides and bottom of the bowl. Stop as soon as the mixture looks smooth and cohesive. Avoid overmixing to prevent excess air, which can cause cups to puff too much in the oven.
Combine Dry Ingredients
In a separate bowl, whisk together all-purpose flour, baking soda, and fine salt. Break up any lumps. Whisking evenly distributes leavening and salt for consistent results. Keep the dry bowl ready to add in one addition. Proper blending prevents pockets of baking soda that could create uneven texture.
Mix the Dough Gently
Add the dry ingredients to the creamed mixture. Mix on low just until a soft dough forms. Stop when no dry streaks remain. Don’t overwork the dough, as that can toughen the cups. Use a rubber spatula to finish folding. The dough should feel soft but scoopable and hold its shape.
Fold in Chocolate Chips
Fold in semisweet chocolate chips with a spatula. Use gentle strokes to avoid overmixing the dough. Mini chips work well for smoother interiors and easier pressing. Make sure chips are evenly distributed so each cup bakes uniformly. Scrape the bowl bottom to catch any pockets of chips or flour.
Shape the Cookie Cups
Scoop about 1 1/2 tablespoons of dough into each muffin well. Press dough up the sides and across the bottom to form shallow wells. Keep walls even and not too thin. If the kitchen is warm, chill the shaped pan for 10 minutes. Chilling helps cups hold shape and reduces puffing during baking.
Bake Until Golden
Bake the cookie cups for 10–12 minutes. Look for golden edges and centers that are set but still soft. Avoid overbaking to keep tender interiors. Rotate the pan once for even browning if needed. Remove when edges color and the centers no longer look wet. Work quickly after baking.
Press and Cool Completely
Immediately press the center of each cookie with a small glass or shot glass to deepen the cup. If cups puff, repress gently. Let them cool in the pan for 10 minutes. Carefully loosen edges and transfer to a cooling rack. Cool completely to avoid melting ice cream and leaks during assembly.
Scoop the Ice Cream
Once cups are fully cool, add one small scoop of vanilla ice cream to each cup. Work efficiently to minimize melting. If assembling later, freeze scoops on a tray and add just before serving. Keep the cookie cups at room temperature for best texture. Prepare whipped cream and cherries if using.
Pour the Soda to Float
Right before serving, pour about 2 tablespoons of cold cola or root beer over each ice cream scoop. Pour slowly to control fizz and prevent overflow. The soda will foam into a mini float within the cookie cup. Serve on a wire rack or tray to catch drips. Top promptly for best bubbles.
Finish and Serve Immediately
Add a dollop of whipped cream and a maraschino cherry, if desired. Serve the cookie cups immediately while the float is fizzy and the cups are crisp. Offer napkins or small plates. For sturdier cups next time, add 1 tablespoon cornstarch to the dry mix or swap 2 tablespoons butter for melted chocolate.
Ingredient Swaps
- Dairy-free: Use plant-based butter, dairy-free chocolate chips, and non-dairy vanilla ice cream; whipped coconut cream for topping.
- Gluten-free: Substitute a 1:1 gluten-free all-purpose flour blend; add 1 tablespoon cornstarch if the blend lacks it for tenderness.
- Egg-free: Replace egg with 3 tablespoons aquafaba or a flax egg (1 tbsp ground flax + 3 tbsp water, rested 5–10 min).
- Lower sugar: Use reduced-sugar chocolate chips; cut granulated sugar by 2 tablespoons and increase vanilla to 1 1/2 teaspoons.
- Budget/availability: Swap light brown sugar with white sugar + 1 teaspoon molasses; use mini chocolate chips or chopped baking chocolate.
- Flavor twists: Try orange soda, cream soda, or cola with a splash of vanilla; swap vanilla ice cream for chocolate, coffee, or root beer–float ice cream.
- Sturdier cups: Replace 2 tablespoons butter with melted, cooled chocolate or add 1 tablespoon cornstarch to flour.
You Must Know
- Doneness • If edges look golden but centers seem puffy/wet, press the wells immediately with a shot glass for 3–5 seconds; this sets the cup shape without overbrowning and prevents collapse as they cool.
- Troubleshoot • If cups stick or crumble on release, let them sit in the pan 5 more minutes (total 10–15 min cool) and run a thin knife around the edge; the extra set time firms the fat/sugar matrix so they lift whole.
- Scale • For 24 minis, use a mini muffin tin with 2 level teaspoons dough per cup and reduce time to 7–9 minutes; the smaller mass needs less heat exposure to keep interiors soft but set.
- Flavor Boost • Swap 2 tablespoons flour for cocoa or malted milk powder and add 1/4 teaspoon espresso powder; enhances chocolate depth and makes the cola/root beer notes pop—taste is noticeable but not bitter.
- Make-Ahead • To keep cups crisp, store baked shells airtight with a silica packet at room temp up to 24 hours; freeze shaped raw dough in the tin 30 minutes, then bag and keep up to 1 month—bake from frozen adding 1–2 minutes, watching for golden edges.
Serving Tips
- Arrange on a wire rack, drizzle chocolate sauce, and dust with powdered sugar.
- Serve on small saucers with striped mini straws and cocktail napkins.
- Pair with salty snacks: kettle chips or pretzel rods for sweet-salty contrast.
- Offer soda choices: root beer, cherry cola, or cream soda flights.
- Garnish trays with crushed nuts, rainbow sprinkles, and shaved chocolate for DIY toppings.
Storage & Make-Ahead
Cookie cups keep 3–4 days in an airtight container at room temp, or up to 1 week refrigerated.
Bake cups ahead; assemble floats just before serving.
For longer storage, freeze baked, cooled cups (without ice cream) up to 2 months; thaw at room temp.
Ice cream/cola should be added fresh.
Reheating
Reheat gently: Microwave 10–15 seconds to soften, not melt.
Oven at 300°F for 3–5 minutes to crisp edges.
Stovetop skillet on low 1–2 minutes per side for light refresh.
Soda-Fountain Nostalgia Burst
Sometimes one bite transports me straight to a chrome-trimmed soda fountain: the snap of fizz, the clink of glass, the swirl of vanilla melting into cola.
That’s the feeling I chase with these cookie cups. I press the wells just deep enough to cradle a cold scoop, then pour a bright ribbon of cola so bubbles pop like tiny firecrackers against the chocolate chips.
I love the contrast: crisp edges, soft centers, and that creamy float crown. Root beer leans nostalgic sassafras; classic cola brings caramel bite.
I keep the soda icy so the hiss stays lively, and I pour at the table for drama. Whipped cream, cherry, done. One handheld sip-and-bite, and suddenly I’m perched on a red stool, smiling at the first sparkle.
Final Thoughts
Give these Ice Cream Float Chocolate Chip Cookie Cups a try and enjoy that fizzy, gooey, crunchy bite!
Feel free to tweak the soda flavor, swap in mini chips, or add a pinch of sea salt to make them your own.
Frequently Asked Questions
Can I Make These Gluten-Free Without Gritty Texture?
Yes—you can. I swap in a quality 1:1 gluten‑free flour with xanthan gum, add 1 tablespoon cornstarch, and chill the shaped dough. The cups bake tender, not gritty, with crisp edges and melty chocolate.
How Do I Prevent Soggy Bottoms After Adding Soda?
Chill cups fully, then brush interiors with melted chocolate to waterproof. Add firm ice cream, pour just 1–2 tablespoons icy soda at serving, and serve immediately. I also double-press wells and bake slightly longer for crisp, crackly edges.
What’s the Best Way to Transport Assembled Cups?
I pack them in a chilled, lidded tray, nest each cup in cupcake liners, and add soda on arrival. I freeze scooped ice cream, use cold packs, and cushion with parchment to prevent tipping and drips.
Are There Dairy-Free Ice Cream and Butter Alternatives?
Yes—I swap in coconut or oat milk ice cream and use vegan butter or refined coconut oil. I keep flavors playful: vanilla bean, chocolate, or espresso. You’ll still get creamy scoops, crisp edges, and lush, bubbly pours.
Can Kids Safely Help With the Shaping Step?
Yes—kids can safely help shape. I guide tiny hands, use cool dough, and skip sharp edges. I press gently with a shot glass, rotate slowly, and let them sprinkle chips. Supervise near hot pans, then celebrate sugary, fizzy success.

Ice Cream Float Chocolate Chip Cookie Cups
Equipment
- 2 Mixing bowl
- 1 Whisk
- 1 hand mixer or stand mixer
- 1 Rubber spatula
- 1 standard 12-cup muffin tin
- 1 Cookie scoop or tablespoon
- 1 Cooling rack
- 1 Measuring cups set
- 1 Measuring spoons set
- 1 small glass or shot glass for shaping cups
- 1 wire rack or tray for assembling floats
Ingredients
- 1/2 cup unsalted butter softened
- 1/2 cup granulated sugar
- 1/2 cup light brown sugar packed
- 1 large egg room temperature
- 1 teaspoon vanilla extract
- 1 1/4 cups all-purpose flour
- 1/2 teaspoon baking soda
- 1/4 teaspoon fine salt
- 1 cup semisweet chocolate chips
- 12 small scoops vanilla ice cream
- 1 1/2 cups cold cola or root beer
- 1/2 cup whipped cream optional
- 12 maraschino cherries optional
Instructions
- Preheat the oven to 350°F (175°C) and lightly grease a standard 12-cup muffin tin.
- In a mixing bowl cream the softened butter, granulated sugar, and brown sugar until light and fluffy.
- Beat in the egg and vanilla extract until combined.
- In a separate bowl whisk together the flour, baking soda, and salt.
- Add the dry ingredients to the wet and mix on low just until a dough forms.
- Fold in the chocolate chips with a spatula.
- Scoop about 1 1/2 tablespoons of dough into each muffin cup and press it up the sides and bottom to form a shallow well.
- Bake for 10–12 minutes until the edges are golden and the centers are set but still soft.
- Remove from the oven and immediately press the center of each cookie with a small glass or shot glass to deepen the cup.
- Let the cookie cups cool in the pan for 10 minutes, then carefully loosen and transfer to a cooling rack to cool completely.
- Once fully cooled, add one small scoop of vanilla ice cream to each cookie cup.
- Right before serving, pour 2 tablespoons of cold cola or root beer over each ice cream scoop to create a mini float.
- Top with whipped cream and a cherry if desired and serve immediately.
Notes

Cynthia Weatherford is a seasoned chef and culinary enthusiast who serves as the Recipe creator of Somonday. With decades of experience in the kitchen and a passion for exploring diverse cuisines, Cynthia brings a blend of creativity and technique to every dish. Known for transforming simple ingredients into show-stopping meals, Cynthia believes that cooking is an art form anyone can master. Dedicated to inspiring home cooks, Cynthia shares approachable recipes, pro tips, and culinary wisdom to make every meal memorable.


