There’s something about the first whiff of cocoa that feels like an instant hug.
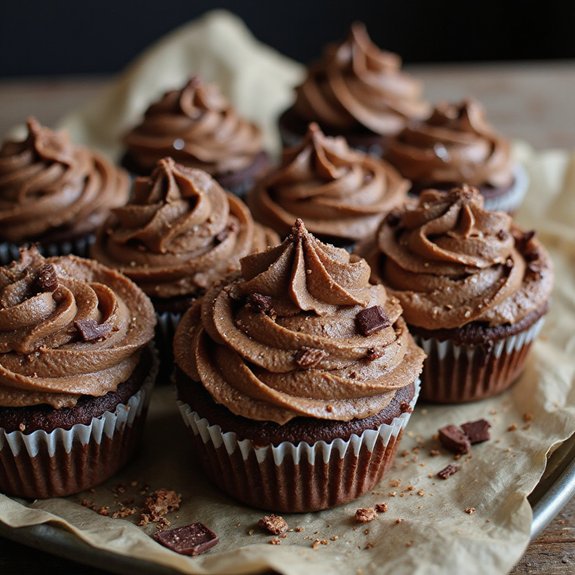
Picture a tray of milk chocolate cupcakes emerging from the oven: domes of soft, velvety crumb, tinted a gentle cocoa-brown, filling the kitchen with the warm aroma of melted chocolate and vanilla.
These are cozy, small-batch desserts—light, tender, and sweet without being heavy—and they’re ready faster than a fancy layer cake.
They’re perfect for sweet-tooth fans, busy families, and beginners who want a foolproof treat that still feels special.
I once whipped up a batch on a stressful Tuesday after my kids’ homework ended in tears; by the time the cupcakes cooled, we were all smiling, licking frosting from our fingers around the table.
These cupcakes shine for last-minute cravings, casual gatherings, or easy, make-ahead birthday treats. Ready to bring this chocolatey comfort to life?
Why You’ll Love It
- Delivers nostalgic milk chocolate flavor in a soft, tender crumb
- Stays unbelievably moist thanks to oil, milk, and hot water
- Whips up quickly with basic tools and simple pantry ingredients
- Pipes beautifully with silky, mousse-like milk chocolate frosting
- Perfect for birthdays, potlucks, or make-ahead party desserts
Ingredients
- 120 g all-purpose flour, sifted — spoon and level for accuracy
- 30 g unsweetened cocoa powder, sifted — natural cocoa, not Dutch-process
- 1 tsp baking powder — check it’s fresh for best rise
- 0.5 tsp baking soda — helps cupcakes lift and tenderize
- 0.25 tsp fine sea salt — balances sweetness and chocolate flavor
- 150 g granulated sugar — standard white sugar works best
- 2 large eggs, room temperature — leave out 30 minutes before baking
- 80 ml neutral vegetable oil — use canola or sunflower oil
- 120 ml whole milk, room temperature — adds richness and moisture
- 1 tsp vanilla extract — use pure vanilla for better flavor
- 80 ml hot water — just-off-boil to loosen cocoa and batter
- 100 g milk chocolate, finely chopped — choose a bar over chips if possible
- 115 g unsalted butter, room temperature — should be soft but not greasy (frosting)
- 200 g powdered sugar, sifted — prevents lumpy frosting (frosting)
- 80 g milk chocolate, melted & slightly cooled — let cool to lukewarm (frosting)
- 2 tbsp heavy cream, plus more as needed — adjust to reach spreadable texture (frosting)
- 0.5 tsp vanilla extract — rounds out chocolate flavor (frosting)
- 1 pinch fine sea salt — sharpens sweetness and chocolate notes (frosting)
Step-by-Step Method
Preheat & Prep Pan
Preheat the oven to 175°C (350°F). Line a 12-cup muffin tin with paper cupcake liners.
Make certain the rack is in the center of the oven for even baking. Gather all ingredients and equipment so everything is within reach.
This preparation helps prevent overmixing later and keeps the batter process quick and smooth.
Combine Dry Ingredients
Whisk together the sifted flour, sifted cocoa powder, baking powder, baking soda, and salt in a medium bowl. Break up any remaining lumps as you whisk.
Make certain everything is evenly distributed to promote a uniform rise. Set this bowl aside, ready to add to the wet mixture later without delay.
Whisk Wet Mixture
In another medium bowl, whisk the sugar, eggs, vegetable oil, milk, and vanilla extract. Mix until the mixture looks smooth and slightly thickened.
Make certain the eggs and milk are at room temperature so they blend easily. Avoid whipping too vigorously; just create a cohesive, glossy mixture without incorporating too much air.
Combine Wet & Dry Mixtures
Pour the dry ingredients into the wet mixture. Whisk gently until no dry streaks of flour remain.
Stop as soon as the batter looks mostly smooth. Avoid overmixing, which can develop too much gluten and make the cupcakes dense. Scrape the sides and bottom of the bowl to incorporate any hidden dry spots.
Add Hot Water & Fold in Chocolate
Stir the hot water into the batter until it becomes smooth and more fluid. Switch to a rubber spatula and gently fold in the finely chopped milk chocolate.
Distribute the chocolate evenly without overworking the batter. The hot water deepens the cocoa flavor and lightens the texture of the cupcakes.
Portion Batter into Liners
Use an ice cream scoop or large spoon to divide the batter evenly among the 12 liners. Fill each liner about two-thirds full to allow room for rising.
Make certain each cup has a similar amount to promote even baking. Gently tap the pan on the counter to release any large air bubbles.
Bake & Check Doneness
Place the muffin tin in the preheated oven. Bake for 16–18 minutes.
Begin checking at 15–16 minutes since ovens vary. Insert a toothpick into the center of a cupcake; it should come out with a few moist crumbs, not wet batter. Lightly press the tops; they should spring back gently.
Cool Cupcakes Completely
Remove the tin from the oven and place it on a wire cooling rack. Let the cupcakes cool in the pan for 5 minutes to set their structure.
Carefully transfer each cupcake to the rack. Cool completely for about 25 minutes before frosting. Avoid frosting warm cupcakes, as the frosting will melt and slide off.
Cream the Butter
Place the room-temperature butter in a mixing bowl. Beat with a hand mixer or stand mixer on medium speed for about 2 minutes.
Continue until the butter becomes pale, creamy, and slightly fluffy. Scrape down the bowl as needed. Properly creamed butter forms the base of a smooth, stable frosting texture.
Add Powdered Sugar Gradually
Add the sifted powdered sugar in two additions. Beat on low speed after each addition until combined to prevent a sugar cloud.
Once incorporated, increase to medium speed and beat until the mixture turns light and fluffy. Scrape down the sides and bottom of the bowl to ensure there are no unmixed sugar pockets.
Incorporate Chocolate & Cream
Pour in the melted, slightly cooled milk chocolate, heavy cream, vanilla extract, and a pinch of salt. Beat on medium speed until the frosting looks smooth, glossy, and spreadable.
Make certain the chocolate is only lukewarm, not hot, to avoid melting the butter. Adjust briefly until everything is fully emulsified and even.
Adjust Consistency & Frost
Check the frosting consistency. If it’s too thick, beat in a teaspoon of cream at a time. If it’s too thin, add a spoonful of powdered sugar.
Once satisfied, transfer the frosting to a piping bag or use an offset spatula. Generously pipe or spread frosting on each cooled cupcake, swirling or smoothing as desired.
Ingredient Swaps
- Use any neutral oil (canola, sunflower) instead of vegetable oil; or melted butter for a richer, slightly denser cupcake.
- Swap whole milk with 2% milk, buttermilk (for extra tenderness), or unsweetened non-dairy milk (oat, soy, almond) for a lactose-free option.
- Replace milk chocolate with semi-sweet or dark chocolate if that’s what you have; add 1–2 teaspoons extra sugar if using very dark chocolate.
- For gluten-free, use a 1:1 gluten-free all-purpose flour blend; for dairy-free, use vegan butter, dairy-free milk, and dairy-free chocolate in both batter and frosting.
You Must Know
– Scale – *When* doubling for a party, keep the oven temp the same (175°C / 350°F) but rotate pans front-to-back at the halfway point of the 16–18 minute range.
Two pans crowding the oven can heat unevenly; rotating helps all cupcakes rise evenly and color uniformly.
Serving Tips
- Top with chocolate shavings and berries; serve on a small dessert plate.
- Pair with cold milk, vanilla milkshakes, or lightly sweetened iced coffee.
- Add a drizzle of caramel or chocolate sauce to the plate before placing cupcake.
- Serve on a tiered stand alongside fresh strawberries and raspberries for parties.
- Warm slightly and serve with a scoop of vanilla or chocolate ice cream.
Storage & Make-Ahead
Store frosted cupcakes in an airtight container in the fridge for up to 4–5 days.
Bring to room temperature before serving.
Unfrosted cupcakes can be baked 1–2 days ahead and kept well wrapped at room temperature.
Or freeze them (well wrapped) for up to 2 months, then thaw and frost.
Reheating
Reheat cupcakes gently: in the microwave at 50% power for 10–15 seconds, or in a 150°C (300°F) oven wrapped loosely in foil.
Avoid the stovetop; it tends to dry out the cupcakes and can scorch the bottoms.
Cupcakes in Birthday Traditions
Once you’ve warmed a leftover cupcake and the chocolatey scent fills the kitchen again, it’s easy to see why milk chocolate cupcakes feel right at home in birthday traditions.
They’re small, friendly versions of a layer cake—no perfect slices, no pressure, just everyone choosing their own swirl of frosting and corner of sprinkles.
When I bake a batch for a birthday, I always picture that first candlelit moment.
The tops catch the glow like tiny bonfires, and the milk chocolate frosting softens just enough to look glossy and inviting.
I love how cupcakes make birthdays feel casual and intimate—friends leaning over the table, trading flavors, quietly going back for seconds without ceremony, just another excuse to keep celebrating.
Final Thoughts
Now that you’ve got the basics down, it’s your turn to bake a batch of these milk chocolate cupcakes and see just how irresistible they are. Feel free to tweak the flavors—add a filling, switch up the frosting, or top them with sprinkles—to make them your own.
Frequently Asked Questions
Can I Make These Milk Chocolate Cupcakes Gluten-Free Without Sacrificing Texture?
Yes, you can. I swap the flour for a good 1:1 gluten-free blend with xanthan gum, sift twice, and don’t overmix. The cupcakes still rise tender and moist—my gluten-eating friends never notice.
How Do Altitude Changes Affect Baking Time and Cupcake Rise?
Altitude makes cupcakes rise faster but set slower, so I tell you to bake a bit longer, lower the temperature slightly, and reduce leavening; I learned this after watching my Denver cupcakes overflow like chocolate volcanoes.
What’s the Best Way to Ship These Cupcakes Without Ruining the Frosting?
I’d chill them overnight, then nestle each in a snug cupcake insert, frosting protected by a tall dome. I once mailed a dozen this way in summer; they arrived soft, swirled, perfectly intact.
Can I Scale This Recipe for a Large Wedding or Event?
Yes, you can—I’ve scaled it to 4× for a friend’s backyard wedding. I’d bake in batches, weigh ingredients for accuracy, freeze unfrosted cupcakes, then thaw slowly and swirl frosting the morning of your celebration.
How Can Kids Safely Help With Making and Decorating These Cupcakes?
Kids can safely help by whisking, measuring, and adding chocolate while I handle the oven and hot water. I let them swirl frosting and sprinkles; their crooked, joyful cupcakes always become everyone’s favorite at the table.
Milk Chocolate Cupcakes
Equipment
- 1 12-cup muffin tin
- 12 paper cupcake liners
- 2 medium mixing bowls
- 1 small heatproof bowl
- 1 Whisk
- 1 hand mixer or stand mixer
- 1 Rubber spatula
- 1 Measuring cups set
- 1 Measuring spoons set
- 1 wire cooling rack
- 1 Ice cream scoop or large spoon
Ingredients
- 120 gram all-purpose flour sifted
- 30 gram unsweetened cocoa powder sifted
- 1 teaspoon baking powder
- 0.5 teaspoon baking soda
- 0.25 teaspoon fine sea salt
- 150 gram granulated sugar
- 2 large eggs room temperature
- 80 milliliter vegetable oil neutral
- 120 milliliter whole milk room temperature
- 1 teaspoon vanilla extract
- 80 milliliter hot water
- 100 gram milk chocolate finely chopped
- 115 gram unsalted butter for frosting; room temperature
- 200 gram powdered sugar for frosting; sifted
- 80 gram milk chocolate for frosting; melted and slightly cooled
- 2 tablespoon heavy cream for frosting; plus more as needed
- 0.5 teaspoon vanilla extract for frosting
- 1 pinch fine sea salt for frosting
Instructions
- Preheat the oven to 175°C (350°F) and line the muffin tin with paper cupcake liners.
- In a medium bowl whisk together flour, cocoa powder, baking powder, baking soda, and salt until well combined.
- In another medium bowl whisk the sugar, eggs, vegetable oil, milk, and vanilla extract until smooth and slightly thickened.
- Pour the dry ingredients into the wet ingredients and whisk gently just until no dry streaks remain.
- Stir the hot water into the batter until smooth and fluid, then fold in the chopped milk chocolate with a spatula.
- Divide the batter evenly among the 12 liners, filling each about two-thirds full.
- Bake the cupcakes for 16–18 minutes, or until a toothpick inserted in the center comes out with a few moist crumbs.
- Remove the tin from the oven and let the cupcakes cool in the pan for 5 minutes.
- Transfer the cupcakes to a wire rack and cool completely, about 25 minutes, before frosting.
- For the frosting, beat the room-temperature butter with a mixer on medium speed until pale and creamy, about 2 minutes.
- Add the powdered sugar in two additions, mixing on low after each until combined, then on medium until light and fluffy.
- Mix in the melted, slightly cooled milk chocolate, heavy cream, vanilla, and salt, beating until smooth and spreadable.
- Adjust the frosting consistency with a teaspoon more cream if too thick or a spoonful more powdered sugar if too thin.
- Once the cupcakes are completely cool, pipe or spread the milk chocolate frosting generously on top of each cupcake.
Notes

Cynthia Weatherford is a seasoned chef and culinary enthusiast who serves as the Recipe creator of Somonday. With decades of experience in the kitchen and a passion for exploring diverse cuisines, Cynthia brings a blend of creativity and technique to every dish. Known for transforming simple ingredients into show-stopping meals, Cynthia believes that cooking is an art form anyone can master. Dedicated to inspiring home cooks, Cynthia shares approachable recipes, pro tips, and culinary wisdom to make every meal memorable.