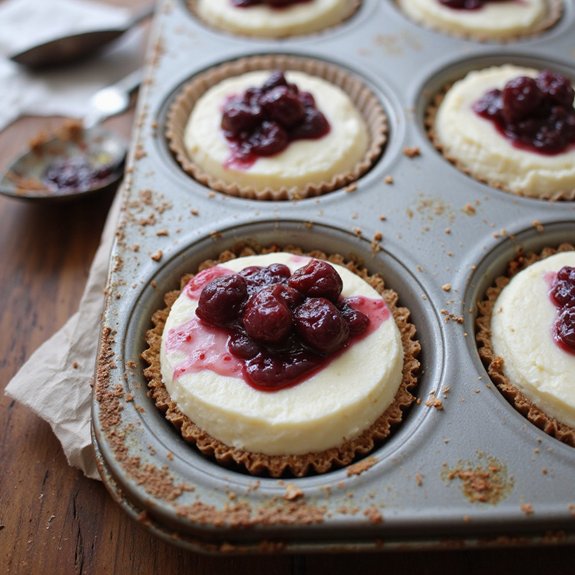
There’s something about peeling a crinkly cupcake liner away and revealing a tiny, velvety cheesecake crowned with glossy berries or a swirl of caramel.
These mini cheesecake cupcakes are a cozy dessert in bite-sized form—creamy, smooth centers on a buttery, golden crumb crust, ready in a fraction of the time a full cheesecake takes.
They’re ideal for sweet-tooth fans, beginner bakers, and anyone who needs an impressive treat without spending all day in the kitchen.
I first leaned on these during a hectic week when friends decided to “drop by” after dinner.
No time for a layered cake, but I’d cream cheese, sugar, and some cookies. Thirty minutes later, the house smelled of warm vanilla, and a tray of chilled minis turned an ordinary night into something special.
They shine at potlucks, birthday parties, or last‑minute dessert cravings. Ready to bring this dish to life?
Why You’ll Love It
- Delivers creamy, rich cheesecake flavor in perfectly portioned cupcake form
- Bakes faster than full cheesecakes, ideal for weeknights or busy schedules
- Adapts easily to different crusts, fillings, and toppings for variety
- Serves beautifully at parties, potlucks, and holidays with minimal effort
- Stores and freezes well, so you can make desserts ahead of time
Ingredients
- 1 cup graham cracker crumbs — finely crushed for a uniform crust
- 3 tablespoons granulated sugar — for sweetening the crust
- 4 tablespoons unsalted butter, melted — binds crumbs and adds richness
- 16 ounces cream cheese, softened — full-fat for best texture
- 1/2 cup granulated sugar — sweetens the cheesecake filling
- 2 large eggs, room temperature — incorporate gently to avoid overmixing
- 1/4 cup sour cream, room temperature — adds tang and creaminess
- 1 teaspoon vanilla extract — use pure vanilla for best flavor
- 1/4 teaspoon kosher salt — balances sweetness and enhances flavor
- 1 cup fresh berries (optional) — choose ripe, firm berries for topping
- 1/2 cup fruit jam or pie filling (optional) — complements berries as a glaze
Step-by-Step Method
Prep the Pan
Preheat the oven to 325°F (165°C). Line a standard 12-cup muffin tin with paper cupcake liners, pressing them neatly into each cup. Set the pan aside.
Make sure your cream cheese, eggs, and sour cream are at room temperature so they blend smoothly later. Clear some counter space for mixing and assembling.
Mix the Crust
Combine the finely crushed graham cracker crumbs, 3 tablespoons granulated sugar, and melted butter in a medium bowl. Stir until every crumb is coated and the mixture resembles wet sand.
Break up any dry pockets. The mixture should clump slightly when pressed between your fingers, indicating enough butter is incorporated.
Press and Pre-Bake
Divide the crust mixture evenly among the 12 liners, about 1–1½ tablespoons each. Press firmly into the bottoms using the back of a spoon or a small tamper to create compact, even layers.
Bake for 5 minutes. Remove the pan and let the crusts cool slightly on the counter while you prepare the filling.
Cream the Cheese
Beat the softened cream cheese in a medium bowl with a hand or stand mixer on medium speed. Mix until completely smooth, creamy, and free of lumps.
Scrape down the bowl and beater as needed. Make certain there are no chunks, because they’ll not disappear later and can affect the final texture markedly.
Add Sugar and Flavorings
Add 1/2 cup granulated sugar, the kosher salt, and vanilla extract to the cream cheese. Beat on medium speed until fully combined and silky.
Scrape down the sides and bottom of the bowl to ensure there are no pockets of unmixed sugar or cream cheese remaining. Aim for a smooth, sweet, evenly flavored base.
Blend in Sour Cream
Reduce the mixer speed to low. Add the sour cream and mix just until incorporated.
Avoid overmixing at this stage. The batter should look glossy and thick but still smooth. Scrape the bowl once more. Keeping the mixing gentle helps maintain a dense, creamy cheesecake texture without adding excess air.
Incorporate the Eggs
Add the eggs one at a time on low speed. Mix each egg just until it disappears into the batter before adding the next.
Don’t whip or beat vigorously. Overmixing can introduce air and cause cracking. When the second egg is fully combined, stop mixing and give the batter a final gentle stir with a spatula.
Fill the Liners
Pour or spoon the cheesecake batter over the pre-baked crusts, dividing it evenly among the 12 cups. Fill each liner almost to the top, leaving a small gap.
Smooth the surfaces gently with the back of a spoon if needed. Tap the pan lightly on the counter to release any visible air bubbles in the batter.
Bake Gently
Place the muffin tin in the preheated oven. Bake for 13–15 minutes, watching closely near the end.
The edges should look set, while the centers remain slightly jiggly when you gently nudge the pan. Avoid overbaking, as that can create a dry, crumbly texture instead of a creamy, smooth cheesecake.
Cool in the Oven
Turn off the oven and crack the door open slightly. Leave the cheesecakes inside for about 10 minutes.
Letting them cool gradually helps minimize sudden temperature changes that cause cracking. After 10 minutes, carefully remove the pan and set it on a wire rack. Don’t remove the cupcakes from the pan yet.
Chill to Set
Cool the cheesecakes in the pan on the wire rack until they reach room temperature, about 30–40 minutes. Then transfer the entire pan to the refrigerator.
Chill for at least 1–2 hours, or until completely cold and firmly set. This rest time develops the flavor and makes certain the texture becomes dense and creamy.
Top and Serve
Gently remove the mini cheesecakes from the muffin tin and peel off the paper liners. Spoon a little jam or pie filling onto each, if desired, and top with fresh berries.
Serve chilled. Store leftovers covered in the refrigerator for up to 4 days, or freeze without fresh fruit and thaw in the fridge overnight.
Ingredient Swaps
- Use crushed vanilla wafers, digestive biscuits, or chocolate cookies instead of graham crackers; use gluten-free cookies for a GF crust.
- Swap sour cream with plain Greek yogurt, and regular cream cheese with Neufchâtel (⅓ less fat) if desired.
- Replace butter with margarine or coconut oil for a dairy-reduced crust, and use any seasonal fruit, lemon curd, caramel, or chocolate ganache instead of berries/jam for topping.
You Must Know
– Make-Ahead – For best structure and flavor, chill at least 4 hours or overnight (up to 4 days); add fresh fruit within 2 hours of serving so the juices don’t seep and soften the tops.
Serving Tips
- Top with mixed berries and a drizzle of warmed jam or fruit coulis.
- Serve on a dessert platter with whipped cream rosettes and chocolate shavings.
- Pair with espresso or dessert wine for an elegant after-dinner treat.
- Add flavor variety: garnish some with lemon curd, others with caramel or Nutella.
- Present in decorative cupcake wrappers for parties, then label different topping flavors.
Storage & Make-Ahead
Mini cheesecake cupcakes keep well in the fridge for up to 4 days; store them in an airtight container.
They’re great for making ahead for parties or holidays.
They also freeze well (without fresh fruit topping) for up to 2 months—thaw overnight in the refrigerator before serving.
Reheating
Reheat gently to preserve texture.
In microwave, use 50% power in 10–15 second bursts.
Or bring to room temperature, then warm briefly in a low oven; avoid stovetop heating.
Cheesecake Cupcakes in Pop Culture
Every time I see cheesecake cupcakes on a screen, they feel like tiny props from a storybook kitchen—perfectly frosted, jewel-bright with berries, and just handheld enough for a rom-com heroine to eat over a late-night heart-to-heart.
I always notice how they show up when a character needs comfort: a breakup scene, a big promotion, an awkward first date.
When I rewatch my favorite baking shows, the mini cheesecakes are never just desserts; they’re little symbols of effort and care.
Someone torches the tops, swirls on jam, sets them on a chipped plate—and suddenly it feels like home. I’ve even copied those TV-worthy garnishes, just to bring a bit of that cinematic magic to my own kitchen.
Final Thoughts
Give these mini cheesecake cupcakes a try and see just how easy (and impressive!) homemade cheesecake can be.
Don’t be afraid to play with different crusts, fillings, and toppings to make the flavors your own.
Frequently Asked Questions
Can I Make These Mini Cheesecake Cupcakes Without an Electric Mixer?
Yes, you can. I’ve whisked cream cheese by hand on quiet evenings; just let everything soften, then stir slowly, like folding a blanket, until it’s silky-smooth and glossy in your favorite mixing bowl.
How Do Altitude Changes Affect Baking Time and Texture for These Cupcakes?
Altitude makes them bake faster, rise higher, and dry out a bit. When I visit my sister’s mountain cabin, I shave a few minutes off bake time and add a spoonful of extra sour cream.
Are These Mini Cheesecake Cupcakes Safe to Eat During Pregnancy?
Yes, you can usually enjoy them while pregnant if the eggs are fully baked and dairy’s pasteurized. I’d picture you savoring one slowly with tea, like a tiny café treat you don’t have to share.
What’s the Best Way to Transport Cheesecake Cupcakes Without Ruining the Tops?
I gently nestle them in a lidded cupcake carrier, leaving toppings off. I tell you to chill them firm, then tuck jam and berries into a little jar, crowning each cupcake just before serving.
How Can I Scale This Recipe for Large Events or Catering Orders?
You can comfortably double or triple the batch; I’ve done 6× for a wedding. I mix crust and filling in separate big bowls, bake in rotations, then chill trays overnight like sweet little rows of moonlit bites.

Mini Cheesecake Cupcakes
Equipment
- 1 standard 12-cup muffin tin
- 12 paper cupcake liners
- 2 medium mixing bowls
- 1 Small mixing bowl
- 1 hand mixer or stand mixer
- 1 Rubber spatula
- 1 measuring cup set
- 1 measuring spoon set
- 1 small saucepan (if melting butter on stove)
- 1 spoon or small tamper (for pressing crust)
- 1 wire cooling rack
Ingredients
- 1 cup graham cracker crumbs finely crushed
- 3 tablespoon granulated sugar for crust
- 4 tablespoon unsalted butter melted
- 16 ounce cream cheese softened
- 1/2 cup granulated sugar for filling
- 2 large eggs room temperature
- 1/4 cup sour cream room temperature
- 1 teaspoon vanilla extract
- 1/4 teaspoon kosher salt
- 1 cup fresh berries for topping optional
- 1/2 cup fruit jam or pie filling for topping optional
Instructions
- Preheat the oven to 325°F (165°C) and line a 12-cup muffin tin with paper cupcake liners.
- In a medium bowl, combine graham cracker crumbs, 3 tablespoons sugar, and melted butter, stirring until the mixture resembles wet sand.
- Divide the crust mixture evenly among the 12 liners and press firmly into the bottom of each using a spoon or tamper.
- Bake the crusts for 5 minutes, then remove from the oven and let cool slightly while preparing the filling.
- In another medium bowl, beat the softened cream cheese with a mixer on medium speed until completely smooth and creamy.
- Add 1/2 cup sugar, salt, and vanilla extract to the cream cheese and beat until well combined, scraping down the sides as needed.
- Mix in the sour cream on low speed until just incorporated and smooth.
- Add the eggs one at a time, mixing on low speed after each addition just until combined, avoiding overmixing.
- Divide the cheesecake batter evenly over the pre-baked crusts, filling each liner almost to the top.
- Tap the pan gently on the counter a few times to release any air bubbles from the batter.
- Bake for 13–15 minutes, or until the centers are mostly set but still slightly jiggly in the middle.
- Turn off the oven, crack the door slightly, and let the cheesecakes sit inside for 10 minutes to help prevent cracking.
- Remove the pan from the oven and place the cheesecakes on a wire rack to cool to room temperature, about 30–40 minutes.
- Once cooled, transfer the cheesecakes (still in the pan) to the refrigerator and chill for at least 1–2 hours, or until fully set.
- Before serving, remove the paper liners and top each mini cheesecake with berries and a spoonful of jam or pie filling, if desired.
Notes

Cynthia Weatherford is a seasoned chef and culinary enthusiast who serves as the Recipe creator of Somonday. With decades of experience in the kitchen and a passion for exploring diverse cuisines, Cynthia brings a blend of creativity and technique to every dish. Known for transforming simple ingredients into show-stopping meals, Cynthia believes that cooking is an art form anyone can master. Dedicated to inspiring home cooks, Cynthia shares approachable recipes, pro tips, and culinary wisdom to make every meal memorable.


