
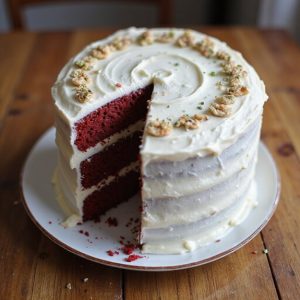
Picture a plush slice of crimson cake, its tender crumb yielding under your fork, the tang of buttermilk and cocoa wafting up as a veil of silky cream cheese frosting melts into every bite.
Imagine the gentle sheen of the layers, moist and velvety, with a whisper of chocolate and a sweet, tangy finish that feels like a hug in dessert form. Red velvet is my year-round comfort—elegant enough for celebrations, easy enough for busy weeknights or Sunday suppers when you want something special without fuss.
Once, after a long week, this cake turned a last-minute family dinner into a memory; the simple batter came together fast, and the frosting did the rest.
It’s reliable, beautiful, and delightfully forgiving—perfect for birthdays, potlucks, or any moment you need a little extra warmth on the table.
Ready? Let’s cook!
Why You’ll Love It
- Delivers bold cocoa-tang flavor with plush, tender crumb
- Stays incredibly moist thanks to oil and buttermilk
- Frosts smoothly with ultra-creamy cream cheese icing
- Mixes easily—no stand mixer required
- Slices cleanly and presents striking red layers
Ingredients
- 2 1/2 cups all-purpose flour, sifted — measure after sifting for accuracy
- 1 1/2 cups granulated sugar — fine grain dissolves evenly
- 1 teaspoon baking soda — check freshness for proper rise
- 1 teaspoon fine salt — balances sweetness
- 2 tablespoons natural unsweetened cocoa powder — avoid Dutch-process for classic color
- 1 1/2 cups vegetable oil — neutral flavor keeps crumb moist
- 1 cup buttermilk, room temperature — tangy acidity for tender crumb
- 2 large eggs, room temperature — emulsifies batter
- 2 tablespoons red liquid food coloring (or 1 teaspoon gel) — gel gives stronger color
- 1 teaspoon vanilla extract — rounds out cocoa notes
- 1 teaspoon white vinegar — activates baking soda
- 1/2 cup hot coffee (or hot water) — deepens chocolate flavor
- 8 ounces cream cheese, softened — for frosting body
- 1/2 cup unsalted butter, softened — creamy frosting texture
- 3 cups powdered sugar, sifted — guarantees smooth frosting
- 1 teaspoon vanilla extract (for frosting) — adds aroma
- 1 pinch fine salt (for frosting) — balances sweetness
Step-by-Step Method
Preheat, Prep Pans, and Line
Preheat oven to 350°F (175°C).
Grease two 9-inch round pans. Line bottoms with parchment and lightly flour sides.
Set a wire rack nearby for cooling. Gather tools and measure ingredients. Bring buttermilk and eggs to room temperature. Sift flour and powdered sugar to prevent lumps later. Make sure coffee or water is hot for later addition.
Whisk Dry Ingredients Evenly
Whisk flour, sugar, baking soda, fine salt, and natural cocoa in a medium bowl.
Break up any cocoa clumps with a whisk. Aim for an even, uniform color. Sifting helps create a lighter crumb and consistent rise.
Set aside. Keep the bowl close for quick incorporation into the wet mixture without delays.
Combine Wet Ingredients Smoothly
In a large bowl or mixer bowl, whisk vegetable oil, buttermilk, eggs, red food coloring, vanilla, and vinegar.
Mix until glossy and uniformly red. Scrape the bowl to catch streaks. Maintain a smooth emulsion to prevent tunnels.
Use room-temperature ingredients for a stable batter texture and tender crumb.
Fold Dry Into Wet Gently
Add the dry mixture to the wet in two additions on low speed.
Mix just until combined. Avoid overmixing to prevent toughness. Scrape the bowl and bottom to incorporate flour pockets.
Keep the batter thick but cohesive. This step builds minimal gluten while making certain even distribution of leavening and cocoa.
Stream In Hot Coffee, Finish Batter
With mixer on low, slowly pour in hot coffee or hot water.
Mix until batter is smooth, fluid, and pourable. Coffee deepens cocoa flavor without tasting like coffee. Don’t overbeat.
Stop as soon as it’s homogenous. The warm liquid helps bloom cocoa and creates a satiny batter for a moist crumb.
Divide, Tap, and Smooth
Divide batter evenly between pans. Use a scale for accuracy.
Tap pans gently on the counter to release air bubbles. Smooth tops with a spatula.
Even layers bake uniformly and stack neatly. Avoid overfilling. Leave some headspace for rise.
Rotate pans if your oven has hot spots for consistent results.
Bake Until Just Set
Bake 28 to 32 minutes. Check at 28 minutes.
Insert a toothpick in the center; look for a few moist crumbs. Avoid a wet batter or bone-dry crumb.
The cakes should spring back lightly when pressed. Don’t overbake. Overbaking dries the crumb. Adjust time slightly based on your oven’s behavior.
Cool, Invert, and Rest
Cool cakes in pans on a wire rack for 10 minutes.
Run a knife around edges. Invert onto the rack, peel off parchment, and cool completely.
Don’t frost warm cakes. Warm layers melt frosting. Let them reach room temperature.
Resting stabilizes structure and preserves moisture for clean stacking.
Beat Cream Cheese and Butter
In a clean bowl, beat softened cream cheese and unsalted butter on medium until creamy and fluffy, about 2 minutes.
Scrape bowl as needed. Aim for a light, aerated base. Proper softening prevents lumps.
Avoid overbeating to keep frosting stable. A smooth base ensures a silky, spreadable finish.
Add Sugar, Vanilla, and Salt
Sift powdered sugar to remove clumps. Add sugar, vanilla, and a pinch of salt.
Beat on low to combine, then medium-high until smooth, 1 to 2 minutes.
Adjust consistency with a spoonful of sugar for thicker or a teaspoon of cream for softer. Avoid whipping too long to reduce air bubbles.
Level, Fill, and Stack
Level cooled cake layers if domed. Place first layer on a serving plate.
Spread an even layer of frosting over the top. Keep the center slightly thicker.
Place the second layer on top, pressing gently to set. Check alignment. Smooth any squeeze-out.
Chill briefly if layers slide while assembling.
Crumb Coat, Chill, and Finish
Apply a thin crumb coat to lock in crumbs. Chill for 15 minutes to set.
Add the final frosting layer, smoothing top and sides with an offset spatula.
Create swoops or sharp edges as desired. Chill the finished cake 30 minutes to firm frosting.
Slice with a warm knife, wiping clean between cuts.
Ingredient Swaps
- No buttermilk? Mix 1 cup milk with 1 tbsp white vinegar or lemon juice, rest 5–10 minutes. Replace vegetable oil with the same amount of neutral oil or 1 1/2 cups melted butter (slightly denser crumb).
- Cocoa/color: Use natural cocoa for classic tang; if using Dutch-process, add 1/4 tsp extra vinegar to keep lift and expect a browner hue.
Swap liquid red coloring with 1 tsp gel or 2–3 tbsp beet puree (earthier flavor, subtler color).
– Dietary tweaks: For dairy-free, use plant milk “buttermilk” (1 cup soy/almond milk + 1 tbsp vinegar) and vegan butter/cream cheese for frosting.
For egg-free, use 1/2 cup unsweetened applesauce or 2 flax eggs (2 tbsp ground flax + 6 tbsp water) in place of 2 eggs.
You Must Know
- Doneness • If the centers dome or sink slightly, rotate pans and tent loosely with foil at the 20-minute mark; this tempers top heat so crumbs set evenly—look for edges pulling 1/8 inch from the pan and an internal temp of 200–205°F.
- Troubleshoot • When a slice seems gummy or streaked, chill layers 20 minutes and trim any dense patches; this usually points to under-emulsified batter—next time assure eggs and buttermilk are 68–72°F so the crumb sets without tunnels.
- Scale • For a 3-layer 8-inch cake, use 1.5x the batter and 1.5x frosting; portion ~650–700 g batter per pan and shorten bake by 3–5 minutes, checking for a few moist crumbs at 26–28 minutes.
- Flavor Boost • For deeper cocoa notes without losing color, add 1 teaspoon espresso powder to the hot coffee and 1/4 teaspoon almond extract to the batter; you’ll get a rounder finish while keeping the classic tang—taste is subtle but noticeable.
- Make-Ahead • To streamline, cool layers, wrap tightly, and chill up to 48 hours or freeze up to 2 months; frost directly on chilled layers for cleaner stacking, then soften the finished cake at room temp 45–60 minutes before serving.
Serving Tips
- Serve at cool room temperature; flavors bloom and frosting softens pleasantly.
- Pair slices with fresh strawberries or raspberries for brightness and color contrast.
- Add a dollop of lightly sweetened whipped cream beside each slice.
- Drizzle plates with warm chocolate or caramel sauce before plating.
- Offer coffee or cold milk; both balance the cake’s richness.
Storage & Make-Ahead
Refrigerate the frosted cake, covered, for up to 4 days.
Bring slices to room temperature before serving for best texture.
Layers can be baked ahead.
Wrap cooled layers tightly and chill up to 2 days.
This cake freezes well—wrap unfrosted layers (or whole, well-wrapped) up to 2 months.
Thaw overnight refrigerated.
Reheating
Reheat slices gently.
Microwave at 50% power 15–25 seconds.
Or wrap in foil and warm in a 300°F oven 8–10 minutes.
For stovetop, steam briefly in a covered pan.
Juneteenth Red Velvet Tradition
Although its crimson crumb looks modern, red velvet carries deep meaning at Juneteenth tables, where the color red honors resilience, joy, and the blood shed on the road to freedom.
When I slice into this cake, I’m not just serving dessert—I’m passing a story to you. The buttermilk tang, the whisper of cocoa, the plush, velvety bite: they echo gathering, remembrance, and celebration.
I think of red drinks beside it—hibiscus, strawberry soda—glinting like rubies in the sun. Elders share memories; kids lean in for frosting swirls. I bake with steady hands, letting the batter glow like a small lantern of hope.
We taste, we laugh, we honor; every crumb says, You made it here. And together, we look forward, sweet and strong.
Final Thoughts
Ready to bake? Give this red velvet cake a try, then make it your own—adjust the food coloring, swap coffee for water, or play with extra frosting between the layers.
Enjoy every slice!
Frequently Asked Questions
Can I Bake This Red Velvet Cake as Cupcakes or a Sheet Cake?
Yes—you can bake cupcakes or a sheet cake. I’d fill cupcake liners two-thirds full, bake 16–20 minutes; for a 9×13 sheet, bake 28–34 minutes. I’ll frost generously, letting silky swirls gleam like velvet under soft light.
How Do I Scale the Recipe for a Three-Layer Cake?
Scale to three 9-inch layers by multiplying every ingredient by 1.5. I’ll divide batter evenly, bake 20–25 minutes, rotate once, and cool completely. You’ll taste taller, plush slices with silky frosting swoops.
What Altitude Adjustments Are Needed for High-Altitude Baking?
Reduce sugar 1–2 tablespoons, increase flour 1–2 tablespoons, raise oven to 365°F, cut leavening by 1/8 teaspoon, add 1–2 tablespoons liquid, and shorten bake slightly. I’ll watch batter thicken, aromas bloom, tops set quickly.
Which Brand/Type of Red Food Coloring Gives the Brightest Color?
Use AmeriColor Super Red gel or Chefmaster Liqua-Gel Super Red—I get the brightest, truest scarlet. I’ll start with 1 teaspoon, then adjust. It mixes smoothly, keeps flavors clean, and paints the batter a vivid velvet glow.
How Can I Make This Recipe Gluten-Free Successfully?
Use a 1:1 cup-for-cup gluten-free blend with xanthan gum, sift well, and add 1 extra egg white. I’ll mix gently, rest batter 10 minutes, and bake promptly—tender crumb, ruby slices, and creamy swirls await.
Moist Buttermilk Red Velvet Cake
Equipment
- 2 round cake pan (9-inch)
- 1 stand mixer or hand mixer
- 3 Mixing bowl, medium
- 1 Whisk
- 1 Rubber spatula
- 1 Measuring cups set
- 1 Measuring spoons set
- 1 sifter or fine-mesh sieve
- 1 Wire rack
- 2 parchment paper sheet
- 1 offset spatula
- 1 Cooling rack
- 1 toothpick or cake tester
Ingredients
- 2 1/2 cup all-purpose flour sifted
- 1 1/2 cup granulated sugar
- 1 teaspoon baking soda
- 1 teaspoon fine salt
- 2 tablespoon natural cocoa powder unsweetened
- 1 1/2 cup vegetable oil
- 1 cup buttermilk room temperature
- 2 large eggs room temperature
- 2 tablespoon red liquid food coloring or 1 teaspoon gel
- 1 teaspoon vanilla extract
- 1 teaspoon white vinegar
- 1/2 cup hot coffee or hot water
- 8 ounce cream cheese softened
- 1/2 cup unsalted butter softened
- 3 cup powdered sugar sifted
- 1 teaspoon vanilla extract for frosting
- 1 pinch fine salt for frosting
Instructions
- Preheat oven to 350°F (175°C), grease two 9-inch round cake pans, line bottoms with parchment, and lightly flour the sides.
- In a medium bowl whisk together flour, sugar, baking soda, salt, and cocoa powder until evenly combined.
- In a large bowl or mixer bowl whisk oil, buttermilk, eggs, food coloring, vanilla, and vinegar until smooth and uniformly red.
- Add dry ingredients to the wet mixture in two additions on low speed just until combined, then stream in the hot coffee and mix until batter is smooth and fluid.
- Divide batter evenly between prepared pans, tap pans gently to release air bubbles, and smooth tops.
- Bake for 28 to 32 minutes until a toothpick inserted in the center comes out with a few moist crumbs.
- Cool cakes in pans on a wire rack for 10 minutes, then invert onto the rack, peel off parchment, and cool completely.
- For the frosting, beat cream cheese and butter on medium speed until creamy and fluffy, about 2 minutes.
- Add powdered sugar, vanilla, and a pinch of salt, then beat on low to combine and on medium-high until smooth and spreadable, 1 to 2 minutes.
- Level cake layers if needed, place one layer on a serving plate, spread frosting over the top, add the second layer, and frost the top and sides with an offset spatula.
- Chill the frosted cake for 30 minutes to set the frosting before slicing.
Notes

Cynthia Weatherford is a seasoned chef and culinary enthusiast who serves as the Recipe creator of Somonday. With decades of experience in the kitchen and a passion for exploring diverse cuisines, Cynthia brings a blend of creativity and technique to every dish. Known for transforming simple ingredients into show-stopping meals, Cynthia believes that cooking is an art form anyone can master. Dedicated to inspiring home cooks, Cynthia shares approachable recipes, pro tips, and culinary wisdom to make every meal memorable.


