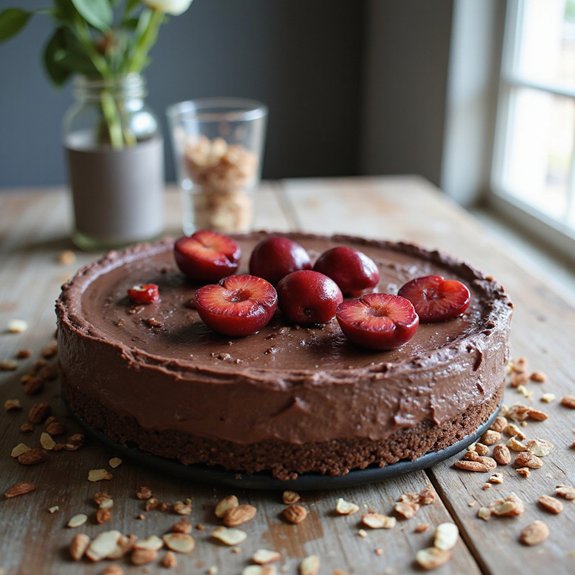
Imagine sinking your fork into a velvety slice of No-Bake Chocolate Cherry Cheesecake, where the smooth, rich chocolate filling contrasts with the juicy burst of cherries atop a nutty, cocoa-infused crust.
The indulgent aroma of cocoa mingles with the sweetness of honey and vanilla, creating a symphony of comforting flavors and textures.
This dessert holds a special place in my heart because it was my go-to recipe when I needed a quick yet impressive treat for unexpected guests during a busy holiday season.
Its simplicity and elegance make it perfect for both hectic weeknights and leisurely Sunday suppers, offering a taste of luxury without the hassle of baking.
The first time I made this cheesecake, the smiles and compliments from my family were a demonstration of its delightful impact.
Ready? Let’s cook and create a dessert that’s sure to become a staple in your home too!
Why You’ll Love It
- Delivers bold flavor with rich chocolate and sweet cherry combination.
- Uses pantry staples like dates, almonds, and cocoa powder for convenience.
- Requires no baking, making it a quick and easy dessert option.
- Offers a creamy texture with smooth cream cheese and Greek yogurt filling.
- Sets beautifully in the fridge, ensuring a perfect slice every time.
Ingredients
- 1 cup pitted dates — make certain they’re soft for easier blending
- 1 cup almonds — raw and unsalted preferred for natural flavor
- 2 tablespoons unsweetened cocoa powder — use high-quality for best taste
- 1 tablespoon coconut oil, melted — opt for organic if available
- 1/4 teaspoon salt — sea salt enhances flavor
- 1 1/2 cups cream cheese, softened — full-fat for creaminess
- 1/2 cup Greek yogurt — plain, whole milk for richness
- 1/4 cup honey — raw honey adds natural sweetness
- 1 teaspoon vanilla extract — pure extract for best aroma
- 1/2 cup dark chocolate chips, melted — 70% cocoa recommended
- 1 cup cherries, pitted and halved — fresh, ripe cherries for juiciness
Step-by-Step Method
Place pitted dates and almonds in a blender or food processor. Blend until they’re finely chopped and well combined. If the dates are too dry, soak them in warm water for about 10 minutes before blending to achieve a smoother texture. The mixture should be sticky, which helps in forming a solid crust for the cheesecake.
Mix Crust Ingredients
Add unsweetened cocoa powder, melted coconut oil, and salt to the processed dates and almonds. Blend until the mixture holds together. The coconut oil helps in binding and adds a subtle flavor. Confirm the mixture is evenly processed, as this will form the base of the cheesecake, providing a rich chocolatey flavor.
Form the Crust
Press the blended mixture firmly into the bottom of a 9-inch springform pan. Use your fingers or the back of a spoon to confirm an even layer. The crust should be compact and cover the entire base of the pan. This crust will set the foundation for the cheesecake filling, providing a contrasting texture.
Combine Filling Ingredients
In a mixing bowl, combine softened cream cheese, Greek yogurt, honey, and vanilla extract. Mix until smooth and creamy. Confirm all ingredients are at room temperature for easy blending. The resultant mixture should be thick and creamy, serving as the luscious base for the cheesecake filling.
Incorporate Melted Chocolate
Stir in the melted dark chocolate chips into the cream cheese mixture. Mix until the chocolate is fully incorporated, confirming a uniform chocolate flavor throughout the filling. This step adds richness and depth, complementing the tartness of the cherries in the finished cheesecake.
Spread Filling Over Crust
Pour the cream cheese mixture over the prepared crust in the springform pan. Use a spatula to spread it evenly, confirming a smooth surface. This layer should completely cover the crust, creating a seamless base for the cherries. The even distribution confirms each slice has a balanced taste and texture.
Arrange Cherries
Arrange the pitted and halved cherries evenly over the top of the cheesecake. Press gently to confirm they adhere to the filling. This step not only adds a pop of color but also infuses a fruity flavor that contrasts nicely with the creamy chocolate filling. Arrange them neatly for an aesthetically pleasing presentation.
Refrigerate to Set
Place the cheesecake in the refrigerator and allow it to set for at least 3 hours. This resting time is essential for the cheesecake to firm up and for the flavors to meld. Confirm it’s covered to prevent any odors from being absorbed. It’s best served chilled, making it a revitalizing dessert option.
Serve and Enjoy
Once set, remove the cheesecake from the springform pan carefully. Slice and serve chilled. Optionally, garnish with additional cherries or shaved chocolate for extra flair. This no-bake cheesecake offers a delightful combination of creamy, fruity, and nutty flavors, making it a perfect dessert for any occasion.
Ingredient Swaps
- For a dairy-free version, substitute the cream cheese and Greek yogurt with plant-based alternatives like almond or coconut-based cream cheese and yogurt.
- If almonds are unavailable or too costly, you can use walnuts, cashews, or pecans as a substitute.
- Replace honey with maple syrup or agave nectar for a vegan option.
- If cherries are out of season, consider using frozen cherries or another berry like raspberries.
You Must Know
- Blend Thoroughly: Confirm that the dates and almonds are finely chopped in the food processor to create a crust that holds together well.
- Use Room Temperature Ingredients: Make certain the cream cheese and Greek yogurt are at room temperature for a smooth and creamy cheesecake filling.
- Soak Dates if Needed: If your dates are dry, soak them in warm water for about 10 minutes to soften them before blending.
- Chill for at Least 3 Hours: Allow the cheesecake to set in the refrigerator for at least 3 hours to achieve the perfect texture.
- Customize Toppings: Enhance the cheesecake’s presentation and flavor by adding shaved chocolate or extra cherries before serving.
Serving Tips
- Serve with a dollop of whipped cream for extra creaminess.
- Top with fresh mint leaves for a pop of color and freshness.
- Pair with a glass of sweet dessert wine for a perfect flavor match.
- Add a sprinkle of shaved dark chocolate for an elegant presentation.
- Serve on a chilled dessert plate to maintain the cheesecake’s cool temperature.
Storage & Make-Ahead
The No-Bake Chocolate Cherry Cheesecake can be stored in the refrigerator for up to 5 days.
Make certain it remains fresh and delicious. For make-ahead convenience, prepare it a day prior.
Although freezing isn’t recommended due to texture changes, if necessary, freeze for up to 1 month.
Reheating
No-bake cheesecakes are best enjoyed chilled.
If needed, gently warm individual slices using a microwave on low power or a double boiler on the stovetop to avoid melting.
Dessert’s Cultural Significance
While savoring a perfectly chilled slice of no-bake chocolate cherry cheesecake, one might wonder about the broader role desserts play in our lives. They’re not just a treat for the taste buds but also a celebration of culture and tradition.
Think back to childhood, when desserts punctuated special occasions, from birthdays to festive holidays. Each bite tells a story, connecting us to our heritage and evoking cherished memories.
This cheesecake, with its rich chocolate and juicy cherries, becomes more than a dessert; it transforms into a piece of art, blending flavors that resonate with comfort and joy.
In gatherings, a dessert like this can spark conversations, bring smiles, and create a shared experience that transcends the everyday.
Final Thoughts
Give this delightful No-Bake Chocolate Cherry Cheesecake a try, and feel free to get creative by adding your favorite toppings or substituting ingredients to suit your taste. Enjoy the indulgence without the hassle of baking!
Frequently Asked Questions
Can I Use a Different Type of Nut for the Crust?
I think you can swap almonds for another nut like walnuts or pecans. They’ll bring their unique flavors and textures, making your crust just as delightful. Experimenting with different nuts can add a lovely twist!
Is It Possible to Make This Cheesecake Vegan?
Absolutely, you can make it vegan! Swap cream cheese and Greek yogurt with vegan alternatives, use agave instead of honey, and guarantee chocolate is dairy-free. It’s a deliciously inviting twist that keeps everyone coming back for more.
How Can I Prevent the Cheesecake From Sticking to the Pan?
To prevent sticking, I line the springform pan with parchment paper before pressing the crust. It works like magic! Plus, lightly greasing the sides with coconut oil guarantees a smooth release. Enjoy your cheesecake adventure!
Can I Substitute Fresh Cherries With Frozen Ones?
Absolutely, you can use frozen cherries. Just thaw them first, pat them dry to remove excess moisture, and they’ll work beautifully. They might add a little extra juiciness, enhancing the cheesecake’s flavor and texture. Enjoy!
What Can Be Used Instead of a Springform Pan?
You can use a regular cake pan lined with parchment paper instead of a springform pan. I’ve done it before, and it works beautifully. Just guarantee the parchment hangs over the edges for easy removal. Enjoy!

No-Bake Chocolate Cherry Cheesecake with Dates
Equipment
- 1 Blender or Food Processor
- 1 9-inch springform pan
- 1 Mixing bowl
- 1 Spatula
- 1 measuring cup set
- 1 measuring spoon set
Ingredients
- 1 cup pitted dates
- 1 cup almonds
- 2 tablespoon unsweetened cocoa powder
- 1 tablespoon coconut oil melted
- 1/4 teaspoon salt
- 1 1/2 cup cream cheese softened
- 1/2 cup Greek yogurt
- 1/4 cup honey
- 1 teaspoon vanilla extract
- 1/2 cup dark chocolate chips melted
- 1 cup cherries pitted and halved
Instructions
- Blend dates and almonds in a food processor until finely chopped.
- Add cocoa powder, coconut oil, and salt to the processor and blend until the mixture holds together.
- Press the mixture evenly into the bottom of a 9-inch springform pan to form the crust.
- In a mixing bowl, combine cream cheese, Greek yogurt, honey, and vanilla extract until smooth.
- Stir in the melted chocolate chips until fully incorporated.
- Pour the cream cheese mixture over the crust and spread evenly using a spatula.
- Arrange pitted and halved cherries over the top of the cheesecake.
- Refrigerate the cheesecake for at least 3 hours to set.
- Remove the cheesecake from the springform pan before serving.
Notes

Cynthia Weatherford is a seasoned chef and culinary enthusiast who serves as the Recipe creator of Somonday. With decades of experience in the kitchen and a passion for exploring diverse cuisines, Cynthia brings a blend of creativity and technique to every dish. Known for transforming simple ingredients into show-stopping meals, Cynthia believes that cooking is an art form anyone can master. Dedicated to inspiring home cooks, Cynthia shares approachable recipes, pro tips, and culinary wisdom to make every meal memorable.


