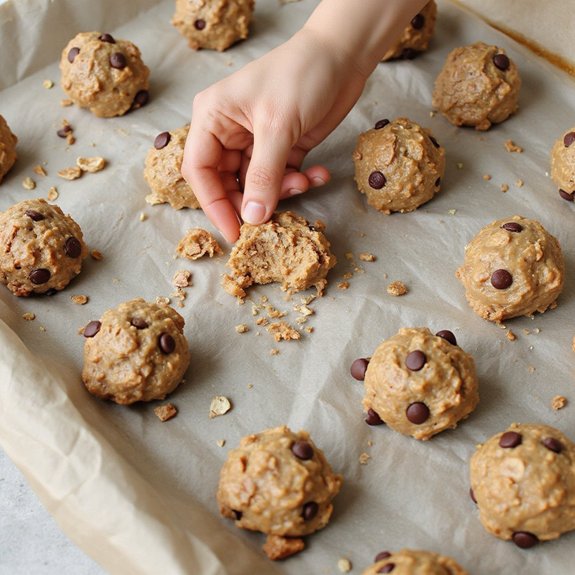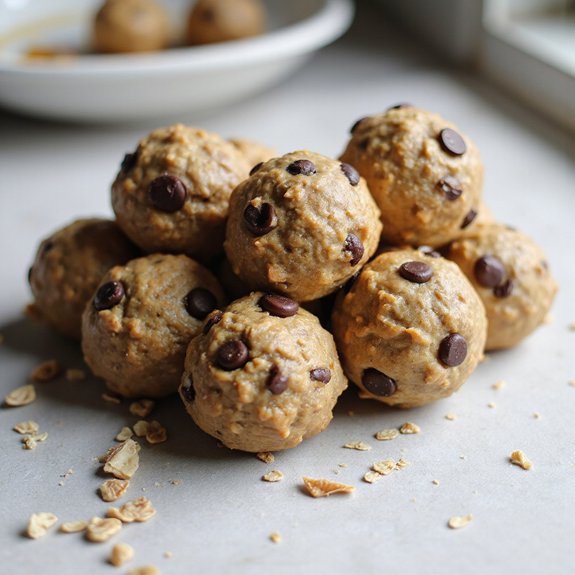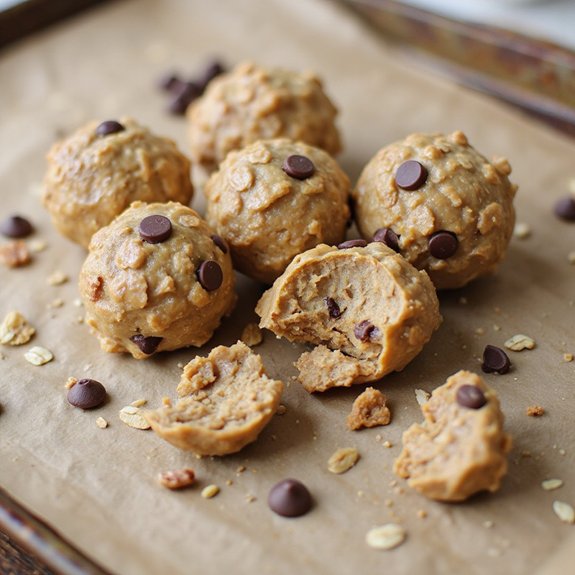
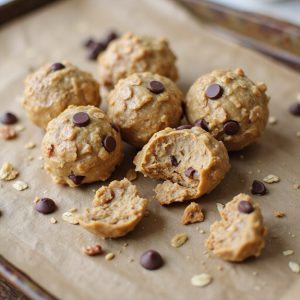
Envision this: a small plate dotted with bite-sized spheres, glossy with a light sheen of nut butter, speckled with oats, chocolate chips, and seeds.
One bite and you get a soft, chewy texture, a gentle crunch, and that cozy aroma of vanilla and toasted oats—like cookies, but lighter and brighter.
These no bake protein energy balls are a quick snack, mixed in one bowl and ready in about 15 minutes, no oven or special skills required.
They’re made for busy weekdays, gym-goers, lunchbox packers, and anyone who needs a satisfying bite between meetings or after school.
I started making them during a hectic work stretch when I kept skipping breakfast; rolling a batch on Sunday meant I could grab two on my way out the door and finally stop relying on vending machines.
They shine for meal prep, road trips, and last-minute snack cravings. Ready to bring this snack to life?
Why You’ll Love It
- Packs satisfying protein and fiber for long-lasting energy
- Comes together fast with one bowl and no baking
- Adapts easily with different nut butters and mix-ins
- Stores and freezes well for grab-and-go snacks
- Offers wholesome sweetness with honey, not refined sugar
Ingredients
- 1½ cups rolled oats — old-fashioned, not instant, for best texture
- 1 cup natural peanut butter, creamy — well-stirred, unsweetened if possible
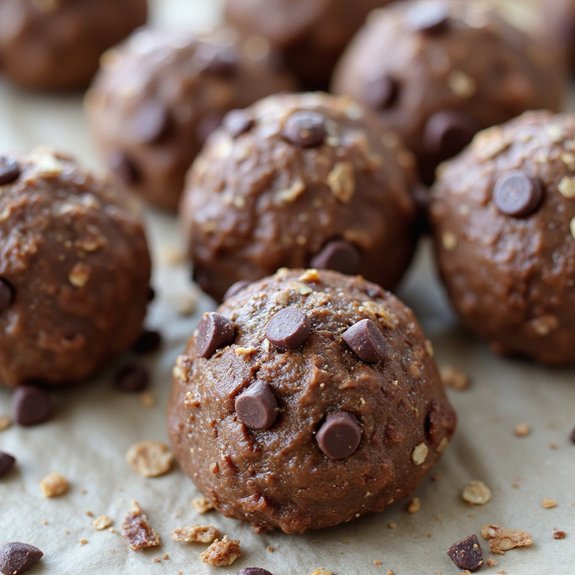
- ½ cup protein powder, vanilla or chocolate — pick a flavor you enjoy
- ⅓ cup honey — adds sweetness and helps bind the mixture
- ¼ cup ground flaxseed — for fiber and healthy fats
- ¼ cup mini chocolate chips — use dark or semi-sweet to taste
- 1 teaspoon vanilla extract — real vanilla gives better flavor
- ¼ teaspoon fine sea salt — balances sweetness and enhances taste
- 2–4 tablespoons water — add just enough for the dough to hold together
Step-by-Step Method
Line the tray
Line a baking sheet or large plate with parchment paper. Make sure the paper lies flat so the balls won’t stick or roll unevenly.
Set the prepared tray aside near your mixing area.
This step makes transferring and chilling the formed energy balls quick, clean, and organized once your dough is ready to roll.
Combine the dry ingredients
Measure rolled oats, protein powder, ground flaxseed, mini chocolate chips, and fine sea salt into a medium mixing bowl.
Stir thoroughly with a spoon or spatula to distribute everything evenly.
Break up any clumps of protein powder or flaxseed. A well-mixed dry base guarantees consistent flavor and texture in every energy ball you roll later.
Add the wet ingredients
Spoon the natural peanut butter into the bowl, then add honey and vanilla extract. Pour in 2 tablespoons of water to start.
Scrape the sides of your measuring cups so you get all the sticky ingredients.
Distribute the wet ingredients lightly over the dry mixture so they’re easier to incorporate once you start stirring together.
Mix into a sticky dough
Stir the mixture steadily with a wooden spoon or spatula. Fold from the bottom and press the ingredients together until a thick, sticky dough forms.
Check for dry patches and work them in. If the mixture feels crumbly or won’t clump when pressed, add up to 2 more tablespoons of water, a little at a time.
Adjust the consistency
Test the dough by pressing a small amount in your hand. Guarantee it holds together without cracking or falling apart.
If it’s too dry, mix in tiny amounts of water or honey, one teaspoon at a time.
If it’s too soft or sticky, sprinkle in a small handful of oats or protein powder and stir again until balanced.
Shape the energy balls
Use your hands or a small cookie scoop to portion the dough. Aim for balls about 1 inch in diameter for even chilling and serving.
Roll each portion between your palms until smooth and round.
If the dough sticks to your hands, lightly oil or dampen your palms before continuing to shape the remaining mixture.
Arrange and chill
Place each rolled ball onto the parchment-lined baking sheet in a single layer. Space them slightly so they don’t stick together.
Transfer the tray to the refrigerator and chill for at least 30 minutes.
Allow the balls to firm up so they hold their shape well when handled or packed for snacks and quick energy boosts.
Store for later
Move the chilled energy balls into an airtight container once firm. Layer them gently, using parchment between layers if necessary.
Refrigerate the container and keep the balls for up to one week.
For longer storage, freeze them and thaw briefly before eating. Maintain the lid tightly sealed to preserve freshness, texture, and flavor.
Ingredient Swaps
- Nut-free: Use sunflower seed butter or tahini instead of peanut butter; swap mini chocolate chips for cocoa nibs if needed.
- Dairy-free/vegan: Choose plant-based protein powder and use maple syrup or agave in place of honey; verify chocolate chips are dairy-free.
- Gluten-free: Use certified gluten-free oats; all other ingredients are typically gluten-free but check labels.
- Budget/regional: Any mild nut or seed butter (homemade peanut butter, almond, or sesame) works; replace flaxseed with chia seeds or extra oats if flax isn’t available.
You Must Know
– Troubleshoot • If the “dough” feels dry or crumbly
Add 1 teaspoon honey or water at a time, working it in with a spoon or your fingers until a pinch of dough presses into a smooth ball with no cracks around the edges.
– Troubleshoot • If the mixture is too soft or sticky to roll
Sprinkle in 1 tablespoon protein powder or oats at a time and fold through; stop when a scoop of dough holds its shape on the spoon for 5–10 seconds without slumping.
– Flavor Boost • For deeper flavor without more sugar
Use a tiny pinch more salt (up to ⅜ teaspoon total) and a touch more vanilla (up to 1½ teaspoons); taste a pea‑sized bit after chilling 10 minutes and adjust before forming all 20 balls.
– Scale • When doubling or halving the recipe
Keep the oats-to-peanut-butter-to-protein-powder ratio the same (about 1½ : 1 : ½ cups); only the water and honey should be adjusted by feel so the final texture matches a thick cookie dough.
– Make-Ahead • For freezer storage and best texture after thawing
Freeze the balls on a parchment-lined sheet until solid, about 1–2 hours, then transfer to a container; thaw in the fridge 20–30 minutes before eating so the centers aren’t icy but still feel fudgy.
Serving Tips
- Serve chilled in mini cupcake liners on a platter for easy, mess-free snacking.
- Pair with Greek yogurt and fresh berries for a quick, protein-packed breakfast plate.
- Add to a post-workout snack box with sliced apples, almonds, and string cheese.
- Arrange in a mason jar or tin and tie with ribbon for a giftable treat.
- Crumble over smoothie bowls or oatmeal as a crunchy, high-protein topping.
Storage & Make-Ahead
Store these no bake protein energy balls in an airtight container in the fridge for up to 1 week.
They’re ideal for meal prep—make a double batch for grab-and-go snacks.
They also freeze well for 2–3 months; thaw briefly at room temperature or overnight in the fridge.
Reheating
These are best chilled, not hot.
If desired slightly warm, briefly microwave 5–10 seconds.
Avoid oven or stovetop; they’ll dry out, melt chocolate, and ruin the chewy texture.
Energy Balls in Lunchboxes
I usually pack two or three in a small reusable container so they don’t get squished.
They hold up beautifully from breakfast rush to lunchtime—no melting frosting, no crumbs everywhere, just firm, chewy bites.
When the lid pops open at noon, there’s this cozy peanut‑butter‑and-vanilla smell that feels almost like fresh-baked cookies.
They’re my insurance policy against afternoon slumps and cranky, post-school hunger.
Final Thoughts
Give these no-bake protein energy balls a try and see how they fit into your snack routine—you might find yourself making a batch every week.
Don’t be afraid to tweak the mix-ins and flavors to make them perfectly your own.
Frequently Asked Questions
Can I Calculate the Approximate Calories and Macros per Energy Ball?
Yes, you can, and I’d do it like this: total each ingredient’s calories, protein, carbs, and fats using a nutrition calculator, divide by 20 balls, then tweak ingredients until the numbers match your goals.
Can I Make These Protein Energy Balls Vegan-Friendly?
Yes, you can. I swap honey for maple syrup, choose plant-based protein powder, and use dairy-free chocolate chips. When I bite one chilled from the fridge, it tastes like dessert snuck into my meal prep.
No Bake Protein Energy Balls
Equipment
- 1 medium mixing bowl
- 1 Wooden spoon or spatula
- 1 Measuring cups set
- 1 Measuring spoons set
- 1 baking sheet or plate
- 1 sheet parchment paper
Ingredients
- 1 1/2 cup rolled oats
- 1 cup natural peanut butter creamy
- 1/2 cup protein powder vanilla or chocolate
- 1/3 cup honey
- 1/4 cup ground flaxseed
- 1/4 cup mini chocolate chips
- 1 teaspoon vanilla extract
- 1/4 teaspoon fine sea salt
- 1 2–4 tablespoons water as needed
Instructions
- Line a baking sheet or large plate with parchment paper and set aside.
- In a medium mixing bowl, combine rolled oats, protein powder, ground flaxseed, mini chocolate chips, and sea salt.
- Add peanut butter, honey, vanilla extract, and 2 tablespoons of water to the dry mixture.
- Stir with a wooden spoon or spatula until a thick, sticky dough forms, adding up to 2 more tablespoons of water only if the mixture is too dry to hold together.
- Use your hands or a small cookie scoop to portion out dough and roll each portion into a ball about 1 inch in diameter.
- Place the formed balls on the prepared parchment-lined baking sheet or plate in a single layer.
- Refrigerate the energy balls for at least 30 minutes to firm up before serving.
- Store the chilled protein energy balls in an airtight container in the refrigerator for up to 1 week or in the freezer for longer storage.
Notes

Cynthia Weatherford is a seasoned chef and culinary enthusiast who serves as the Recipe creator of Somonday. With decades of experience in the kitchen and a passion for exploring diverse cuisines, Cynthia brings a blend of creativity and technique to every dish. Known for transforming simple ingredients into show-stopping meals, Cynthia believes that cooking is an art form anyone can master. Dedicated to inspiring home cooks, Cynthia shares approachable recipes, pro tips, and culinary wisdom to make every meal memorable.