
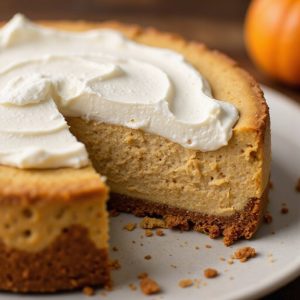
Imagine the comforting aroma of pumpkin spice wafting through your kitchen as you prepare this delightful No Bake Pumpkin Cheesecake.
With its creamy texture and warm autumn flavors, it’s an easy-to-make dessert that feels both cozy and indulgent.
Watch as simple ingredients like cream cheese and pumpkin puree transform into a luscious treat, all without needing an oven.
Let’s bring this delicious dessert to life and indulge in every bite.
Kitchen Tools Required
- 1 9-inch springform pan
- 1 mixing bowl
- 1 electric mixer
- 1 rubber spatula
- 1 measuring cup set
- 1 measuring spoon set
Ingredients
- 1 1/2 cups graham cracker crumbs
- 1/3 cup granulated sugar
- 1/2 cup unsalted butter, melted
- 8 oz cream cheese, softened
- 1 cup powdered sugar
- 1 cup pumpkin puree
- 1 teaspoon pumpkin pie spice
- 1 teaspoon vanilla extract
- 2 cups whipped topping, thawed
Cook & Prep Time
To efficiently manage your time while making the No Bake Pumpkin Cheesecake, let’s create a timeline based on the prep time, resting time, and some additional time for reading and gathering ingredients:
- Reading and Gathering Ingredients (~10 minutes):
- Start by reading through the entire recipe to familiarize yourself with the steps and ingredients.
- Gather all necessary ingredients and equipment listed in the recipe.
- Preparation (20 minutes):
- 0-5 minutes: Combine graham cracker crumbs, granulated sugar, and melted butter to make the crust.
- 5-10 minutes: Press the crust mixture evenly into the bottom of the springform pan.
- 10-15 minutes: Beat the cream cheese until smooth.
- 15-20 minutes: Mix in powdered sugar, pumpkin puree, pumpkin pie spice, and vanilla extract into the cream cheese, then fold in the whipped topping.
- Assembly (10 minutes):
- 20-25 minutes: Pour the pumpkin cheesecake filling over the prepared crust and spread it evenly.
- Refrigeration (6 hours):
- 25 minutes – 6 hours 25 minutes: Refrigerate the cheesecake for at least 6 hours until set.
- Serving (~5 minutes):
- 6 hours 25 minutes – 6 hours 30 minutes: Once set, remove the cheesecake from the springform pan.
- If desired, garnish with additional whipped topping or a sprinkle of cinnamon before serving.
Adjust the timeline as needed based on your personal cooking speed and kitchen setup.
Recipe Instructions
In a mixing bowl, combine graham cracker crumbs, granulated sugar, and melted butter.
Press the mixture evenly into the bottom of the springform pan to form the crust.
In another mixing bowl, beat the cream cheese until smooth using an electric mixer.
Add powdered sugar, pumpkin puree, pumpkin pie spice, and vanilla extract to the cream cheese and mix until well combined.
Gently fold in the whipped topping using a rubber spatula.
Pour the pumpkin cheesecake filling over the prepared crust, spreading evenly.
Refrigerate the cheesecake for at least 6 hours or until set.
Once set, remove the cheesecake from the springform pan and serve chilled.
Serving Tips
- Cinnamon Sprinkle: Add a light dusting of cinnamon on top of each slice for an extra touch of spice and aroma.
- Whipped Cream Dollop: Serve each portion with a generous dollop of whipped cream for added creaminess and visual appeal.
- Caramel Drizzle: Drizzle a bit of caramel sauce over the cheesecake for a sweet and indulgent twist.
- Candied Pecans: Garnish each slice with a few candied pecans for a crunchy contrast and nutty flavor.
- Chocolate Shavings: Top with chocolate shavings for a rich, decadent addition that pairs well with pumpkin.
Storage
Store the no bake pumpkin cheesecake in an airtight container in the refrigerator for up to 3-4 days.
For longer storage, freeze it for up to a month.
Freezing
To freeze no-bake pumpkin cheesecake, wrap it tightly in plastic wrap and aluminum foil.
Then, store it in an airtight container.
Thaw overnight in the refrigerator before serving.
Reheating
No Bake Pumpkin Cheesecake doesn’t require reheating, as it’s served chilled.
Always store leftovers in the refrigerator to maintain its creamy texture and fresh flavor.
Final Thoughts
No Bake Pumpkin Cheesecake is a delightful dessert that’s perfect for any occasion.
It combines the classic flavors of pumpkin and creamy cheesecake in a simple, no-bake recipe.
The graham cracker crust provides a sweet and crunchy base, while the pumpkin cheesecake filling is rich and flavorful.
Make certain the cream cheese is fully softened to achieve a smooth texture.
Allow the cheesecake ample time to set in the refrigerator for the best results.
This dessert is sure to impress your guests with its taste and presentation.
Serve chilled, and consider garnishing with whipped topping or cinnamon for an extra touch.
Enjoy this delicious treat with family and friends during the holiday season or any time of the year.
Frequently Asked Questions
Can I Use a Different Type of Crust Instead of Graham Cracker Crumbs?
You can substitute the graham cracker crumbs with gingersnap cookies or crushed digestive biscuits. Use 1 1/2 cups, maintain the same sugar and butter ratios, and press firmly to guarantee an even, stable base for your dessert.
Is It Possible to Substitute the Cream Cheese With a Dairy-Free Alternative?
You can substitute cream cheese with a dairy-free alternative like vegan cream cheese. Make certain it’s softened for smooth blending. This swap maintains texture while accommodating dietary needs. Adjust sweetness if necessary, as some alternatives are less tangy.
Can I Add Nuts or Chocolate Chips to the Cheesecake Filling?
You can definitely incorporate nuts or chocolate chips. Gently fold 1/2 cup of finely chopped nuts or 1/2 cup of chocolate chips into the filling before chilling. Guarantee even distribution for a delightful texture and enhanced flavor.
How Long Can the Cheesecake Be Stored in the Refrigerator Before Serving?
You can store the cheesecake in the refrigerator for up to 3-4 days. Confirm it’s tightly covered with plastic wrap or an airtight container to maintain freshness. The flavors meld beautifully, enhancing its creamy texture over time.
What Can I Use if I Don’t Have a Springform Pan?
You can substitute a 9-inch pie dish or cake pan if you don’t have a springform pan. Line it with parchment paper for easy removal. Make certain the crust is firmly pressed, and refrigerate as directed for setting.
No Bake Pumpkin Cheesecake
Equipment
- 1 9-inch springform pan
- 1 Mixing bowl
- 1 Electric mixer
- 1 Rubber spatula
- 1 measuring cup set
- 1 measuring spoon set
Ingredients
- 1 1/2 cup graham cracker crumbs
- 1/3 cup granulated sugar
- 1/2 cup unsalted butter melted
- 8 ounce cream cheese softened
- 1 cup powdered sugar
- 1 cup pumpkin puree
- 1 teaspoon pumpkin pie spice
- 1 teaspoon vanilla extract
- 2 cup whipped topping thawed
Instructions
- In a mixing bowl, combine graham cracker crumbs, granulated sugar, and melted butter.
- Press the mixture evenly into the bottom of the springform pan to form the crust.
- In another mixing bowl, beat the cream cheese until smooth using an electric mixer.
- Add powdered sugar, pumpkin puree, pumpkin pie spice, and vanilla extract to the cream cheese and mix until well combined.
- Gently fold in the whipped topping using a rubber spatula.
- Pour the pumpkin cheesecake filling over the prepared crust, spreading evenly.
- Refrigerate the cheesecake for at least 6 hours or until set.
- Once set, remove the cheesecake from the springform pan and serve chilled.
Notes

Cynthia Weatherford is a seasoned chef and culinary enthusiast who serves as the Recipe creator of Somonday. With decades of experience in the kitchen and a passion for exploring diverse cuisines, Cynthia brings a blend of creativity and technique to every dish. Known for transforming simple ingredients into show-stopping meals, Cynthia believes that cooking is an art form anyone can master. Dedicated to inspiring home cooks, Cynthia shares approachable recipes, pro tips, and culinary wisdom to make every meal memorable.


