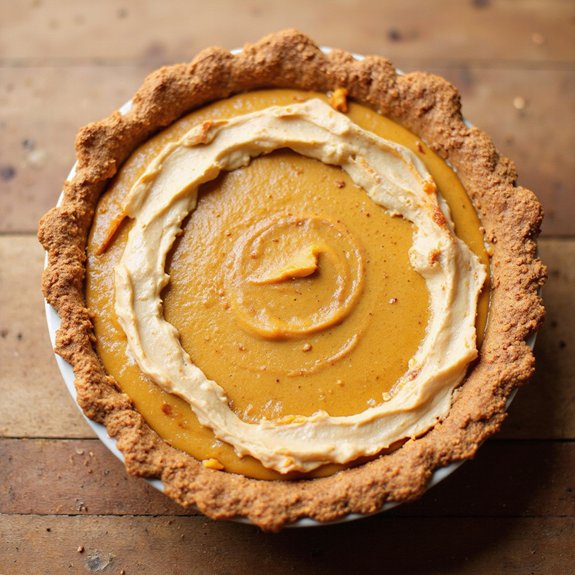
Picture a dessert that exudes warmth and coziness with every bite—the No Bake Pumpkin Pie.
Imagine the comforting aroma of cinnamon, ginger, and nutmeg mingling with the rich, creamy texture of pumpkin.
This pie is delightfully simple to make, offering a perfect balance of indulgence and ease.
As the ingredients meld together, they transform into a delicious treat that feels like a hug in dessert form. Let’s bring this delightful pie to life!
Kitchen Tools Required
- 1 Mixing bowl
- 1 Whisk
- 1 9-inch pie pan
- 1 Spatula
- 1 Measuring cups set
- 1 Measuring spoons set
- 1 Refrigerator
Ingredients
- 1 1/2 cups Graham cracker crumbs
- 1/3 cup Granulated sugar
- 1/2 cup Unsalted butter, melted
- 1 cup Canned pumpkin puree
- 1/2 cup Brown sugar
- 1 teaspoon Ground cinnamon
- 1/2 teaspoon Ground ginger
- 1/4 teaspoon Ground nutmeg
- 1/8 teaspoon Salt
- 1 1/2 cups Heavy cream
- 1 package (3.4 ounces) Instant vanilla pudding mix
Cook & Prep Time
To efficiently manage your time when making a No Bake Pumpkin Pie, follow this timeline:
- Reading and Preparation (10 minutes)
- Read through the entire recipe and instructions to familiarize yourself with the process.
- Gather all the necessary equipment and ingredients.
- Mixing the Crust (5 minutes)
- Combine the graham cracker crumbs, granulated sugar, and melted butter in a mixing bowl.
- Press the mixture into the pie pan to form the crust.
- Preparing the Pumpkin Mixture (5 minutes)
- In a separate bowl, whisk together the pumpkin puree, brown sugar, cinnamon, ginger, nutmeg, and salt until smooth.
- Preparing the Whipped Cream and Pudding Mixture (5 minutes)
- Whisk the heavy cream until it begins to thicken, then add the instant vanilla pudding mix and continue whisking until fully combined and thick.
- Combining Mixtures and Assembling the Pie (5 minutes)
- Fold the pumpkin mixture into the whipped cream and pudding mixture until well combined.
- Spoon the filling into the prepared crust and smooth the top with a spatula.
- Refrigeration (4 hours minimum)
- Place the pie in the refrigerator to set. Confirm it chills for at least 4 hours or until the filling is firm.
- Serving (5 minutes)
- Before serving, optionally garnish with whipped cream or a sprinkle of cinnamon for added flavor and presentation.
Adjust the timing as needed based on your pace and preferences.
Recipe Instructions
In a mixing bowl, combine the graham cracker crumbs, granulated sugar, and melted butter.
Press the mixture evenly into the bottom and up the sides of a 9-inch pie pan to form the crust.
In another mixing bowl, whisk together the pumpkin puree, brown sugar, cinnamon, ginger, nutmeg, and salt until smooth.
In a separate bowl, whisk the heavy cream until it begins to thicken, then add the instant vanilla pudding mix and whisk until fully combined and thick.
Fold the pumpkin mixture into the whipped cream and pudding mixture until well combined.
Spoon the pumpkin filling into the prepared crust and smooth the top with a spatula.
Refrigerate the pie for at least 4 hours or until the filling is firm.
Serve chilled and enjoy.
Serving Tips
- Whipped Cream Topping: Add a dollop of whipped cream on top for extra creaminess and flavor.
- Cinnamon Sprinkle: Lightly dust the pie with ground cinnamon for an aromatic touch and added warmth.
- Caramel Drizzle: Drizzle caramel sauce over the pie slices to enhance the sweetness and presentation.
- Chopped Nuts: Sprinkle chopped pecans or walnuts on top for a crunchy texture contrast.
- Chocolate Shavings: Garnish with chocolate shavings for a rich and indulgent twist.
Storage
To store no bake pumpkin pie, cover it with plastic wrap or foil.
Keep it in the refrigerator for up to three days.
Avoid freezing to maintain texture.
Freezing
To freeze a no-bake pumpkin pie, wrap the pie tightly in plastic wrap and aluminum foil.
Store it in an airtight container for up to one month.
Thaw overnight in the refrigerator before serving.
Reheating
No Bake Pumpkin Pie is best enjoyed chilled.
Reheating isn’t recommended as it may alter the texture and flavor.
Serve directly from the refrigerator for ideal taste and consistency.
Final Thoughts
No-bake pumpkin pie is a delightful dessert option that requires minimal preparation time and no baking.
It’s perfect for those who enjoy classic pumpkin flavors without the hassle of using an oven.
The pie combines a graham cracker crust with a creamy pumpkin filling, making it a favorite for fall gatherings.
The key to success is allowing sufficient time for the pie to set in the refrigerator, ensuring a firm texture.
Garnishing with whipped cream or a sprinkle of cinnamon can add a touch of elegance.
Preparing it a day in advance not only enhances the flavor but also allows you to focus on other meal preparations.
Enjoy this easy and delicious treat with family and friends.
Frequently Asked Questions
Can I Use Fresh Pumpkin Instead of Canned Pumpkin Puree?
Yes, you can use fresh pumpkin. Peel, seed, and cube the pumpkin. Boil until soft, then puree until smooth. Measure 1 cup of puree. Verify it’s well-drained to match canned consistency, adjusting moisture if necessary.
Is There a Gluten-Free Alternative for the Graham Cracker Crust?
You can substitute gluten-free graham crackers for the crust. Measure 1 1/2 cups of gluten-free crackers, then follow the same process: mix with 1/3 cup sugar and 1/2 cup melted butter, and press into the pan.
How Can I Make This Pie Vegan-Friendly?
To make it vegan-friendly, use vegan graham crackers, replace butter with coconut oil, substitute canned pumpkin puree with fresh, use coconut cream instead of heavy cream, and opt for a vegan vanilla pudding mix. Enjoy your vegan pie!
Can I Use Homemade Whipped Cream Instead of Heavy Cream?
Yes, you can substitute homemade whipped cream for heavy cream. Make certain you whip 1 1/2 cups of cold coconut cream or aquafaba until stiff peaks form. Then, proceed with step 4, incorporating your whipped alternative with the pudding mix.
What Can I Substitute for Instant Vanilla Pudding Mix?
You can use 3 tablespoons of cornstarch mixed with 2 teaspoons of vanilla extract and 1/4 cup of sugar as a substitute. Combine these with the heavy cream, whisk until thickened, then proceed with the recipe.

No Bake Pumpkin Pie
Equipment
- 1 Mixing bowl
- 1 Whisk
- 1 9-inch pie pan
- 1 Spatula
- 1 Measuring cups set
- 1 Measuring spoons set
- 1 refrigerator
Ingredients
- 1 1/2 cups Graham cracker crumbs
- 1/3 cup Granulated sugar
- 1/2 cup Unsalted butter melted
- 1 cup Canned pumpkin puree
- 1/2 cup Brown sugar
- 1 teaspoon Ground cinnamon
- 1/2 teaspoon Ground ginger
- 1/4 teaspoon Ground nutmeg
- 1/8 teaspoon Salt
- 1 1/2 cups Heavy cream
- 1 package Instant vanilla pudding mix 3.4 ounces
Instructions
- In a mixing bowl, combine the graham cracker crumbs, granulated sugar, and melted butter.
- Press the mixture evenly into the bottom and up the sides of a 9-inch pie pan to form the crust.
- In another mixing bowl, whisk together the pumpkin puree, brown sugar, cinnamon, ginger, nutmeg, and salt until smooth.
- In a separate bowl, whisk the heavy cream until it begins to thicken, then add the instant vanilla pudding mix and whisk until fully combined and thick.
- Fold the pumpkin mixture into the whipped cream and pudding mixture until well combined.
- Spoon the pumpkin filling into the prepared crust and smooth the top with a spatula.
- Refrigerate the pie for at least 4 hours or until the filling is firm.
- Serve chilled and enjoy.
Notes

Cynthia Weatherford is a seasoned chef and culinary enthusiast who serves as the Recipe creator of Somonday. With decades of experience in the kitchen and a passion for exploring diverse cuisines, Cynthia brings a blend of creativity and technique to every dish. Known for transforming simple ingredients into show-stopping meals, Cynthia believes that cooking is an art form anyone can master. Dedicated to inspiring home cooks, Cynthia shares approachable recipes, pro tips, and culinary wisdom to make every meal memorable.


