There’s something about rolling soft, speckled dough into bite-sized treats that feels instantly calming.
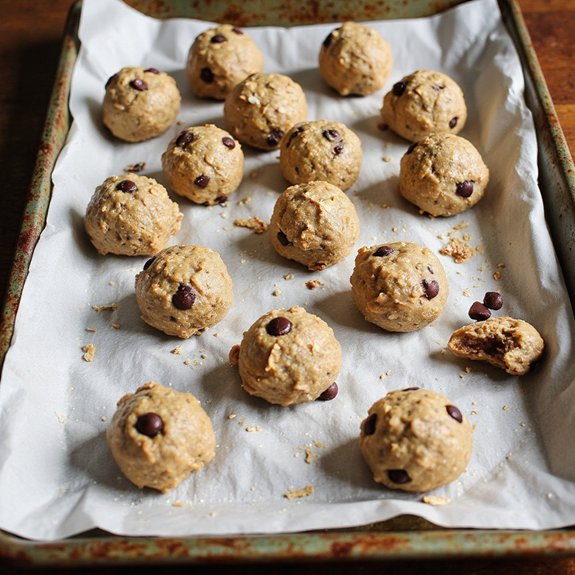
Picture a tray of nut-free protein balls: flecks of oats and seeds, glossy chocolate chips, and a subtle sheen from a drizzle of maple syrup.
They’re a no-bake, grab-and-go snack you can pull together in 15 minutes—perfect for lunch boxes, post-workout bites, or late-afternoon slumps.
These little power snacks are ideal for busy families, beginners in the kitchen, and anyone juggling nut allergies but still craving something satisfying and a bit indulgent.
I started making them after a chaotic school morning when my child’s nut-filled granola bar had to be tossed at the door due to class allergy rules.
A quick batch of these saved the day—and has ever since.
They shine for Sunday meal prep, quick desk snacks, or healthy dessert platters at gatherings. Ready to bring this recipe to life?
Why You’ll Love It
- Packs in protein, fiber, and healthy fats for lasting energy
- Stirs together quickly—no baking or special equipment required
- Stays totally nut-free, perfect for school-safe snacking
- Customizes easily with different seed butters or mix-ins
- Stores and freezes well for grab-and-go snacks all week
Ingredients
- 1 ½ cups rolled oats — use old-fashioned oats for best texture
- ½ cup sunflower seed butter — choose a thick, not runny, variety
- ¼ cup honey — liquid honey mixes in more easily
- ¼ cup ground flaxseed — freshly ground has better flavor
- ¼ cup unsweetened shredded coconut — finely shredded works best
- ¼ cup mini chocolate chips — use dairy-free if needed
- 2 tablespoons chia seeds — black or white both work
- 1 teaspoon vanilla extract — pure vanilla for best taste
- ¼ teaspoon fine sea salt — balances the sweetness
- 2–3 tablespoons water — add just enough to help the mixture bind
Step-by-Step Method
Line the tray
Line a baking sheet or flat tray with parchment paper. Smooth it out so there are no big wrinkles that could distort the balls.
Set the tray aside somewhere level in your kitchen.
You’ll place the rolled balls here before chilling them, which prevents sticking and makes transferring them to storage much easier.
Combine the dry ingredients
Add rolled oats, ground flaxseed, shredded coconut, mini chocolate chips, chia seeds, and fine sea salt to a large mixing bowl. Stir thoroughly so everything is evenly combined.
Make sure the flax and chia are dispersed throughout; this helps the balls hold together and guarantees each bite has a balanced mix of textures and flavors.
Mix in the wet ingredients
Spoon sunflower seed butter and honey into the bowl. Add vanilla extract and 2 tablespoons of water.
Stir with a wooden spoon or spatula, pressing the mixture against the sides of the bowl.
Work patiently until the oats are evenly coated and a thick, sticky dough begins to form. Avoid adding extra water too quickly.
Adjust the consistency
Check the texture of the mixture. If it feels too dry or crumbly, add the remaining tablespoon of water and mix again.
You want a dough that clumps easily when pressed. If it’s still dry, add a small spoonful of honey or seed butter.
Aim for a cohesive, slightly tacky texture that holds together well.
Rest the mixture
Let the bowl sit at room temperature for about 5 minutes. This resting time allows the oats, ground flaxseed, and chia seeds to absorb some of the moisture.
Don’t skip this step, as it helps the mixture firm up. After resting, the dough should feel thicker and easier to roll into neat, compact balls.
Shape the protein balls
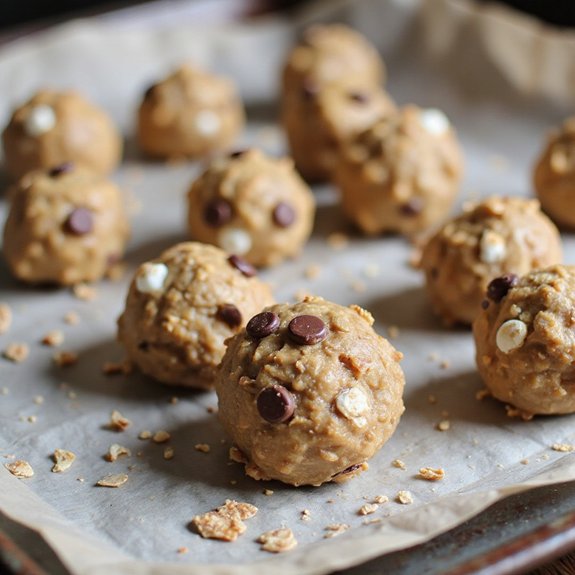
Slightly dampen your hands with water to reduce sticking. Scoop out small portions of dough using your hands or a small cookie scoop.
Roll each portion between your palms to form a ball about 1 inch in diameter.
Press any loose oats or seeds back into the surface so each ball is tightly packed and smooth.
Chill until firm
Arrange the rolled protein balls on the parchment-lined tray, spacing them slightly apart so they don’t stick together.
Place the tray in the refrigerator for at least 30 minutes.
Let the balls chill until they feel firm to the touch. This step helps them hold their shape and improves their chewy, satisfying texture.
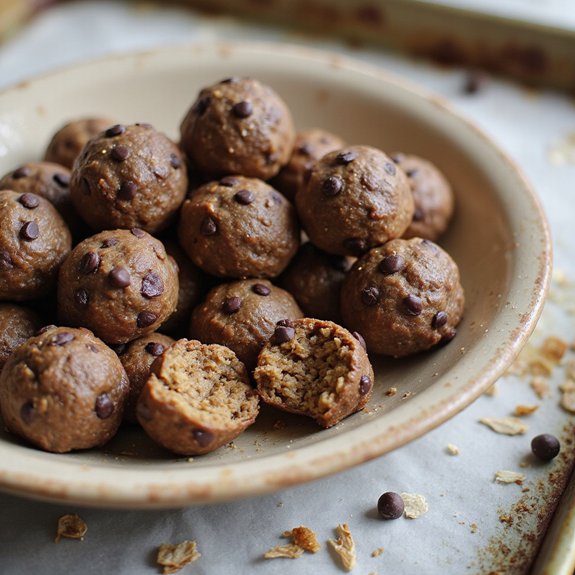
Store for later
Transfer the chilled protein balls to an airtight container. Stack them in layers, separating layers with parchment if desired.
Store the container in the refrigerator for up to one week. For longer storage, freeze the balls for up to one month.
Before eating, let a few sit at room temperature for 5–10 minutes to soften.
Ingredient Swaps
- Use pumpkin seed butter or tahini in place of sunflower seed butter; choose a thick variety so the balls hold together.
- Swap honey with maple syrup or brown rice syrup for a vegan option.
- Replace mini chocolate chips with dried fruit (raisins, cranberries, chopped dates) if you want to reduce refined sugar.
- If you can’t find ground flaxseed or chia seeds, use extra oats or unsweetened shredded coconut to reach a similar volume.
You Must Know
– Troubleshoot – If the mixture crumbles instead of holding, press a small ball in your palm:
add 1–2 teaspoons sunflower seed butter or honey at a time until it compresses into a smooth, shiny ball with no cracks.
This guarantees enough binder so the balls don’t fall apart after chilling.
– Troubleshoot – If the mixture feels sticky and gloppy, pinch a bit between two fingers:
sprinkle in 1–2 tablespoons oats or flaxseed, stir through, then re-check; it should feel tacky but release cleanly from your fingers within 1–2 seconds.
This balances moisture so they roll cleanly and keep their shape.
– Scale – For a bigger batch, double everything but add water last:
start with 3 tablespoons water for a double batch, then increase by 1 teaspoon at a time only if the dough looks dry.
Larger quantities trap moisture differently, and this keeps you from oversaturating the mix.
– Make-Ahead – For grab-and-go portions, shape slightly smaller balls (about ¾ inch, 18–20 pieces):
after chilling 30–45 minutes, store in a shallow airtight container in a single layer or with parchment between layers.
They stay firm and non-sticky for up to 7 days in the fridge.
– Flavor Boost – To adjust sweetness or flavor after tasting a test ball, flatten that ball into a disk:
if it’s too sweet, knead in 1–2 tablespoons extra oats and a pinch of salt; if it’s too bland, knead in 1–2 teaspoons honey and an extra ¼ teaspoon vanilla.
This targeted tweak lets you dial in flavor before shaping the whole batch.
Serving Tips
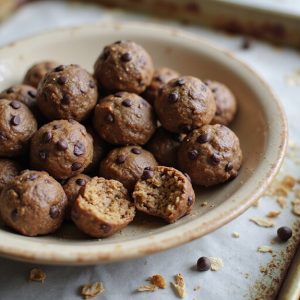
- Serve chilled on a small platter with fresh berries or sliced apple.
- Pack 2–3 balls in snack containers for on-the-go, nut-free lunches.
- Arrange in mini paper liners and drizzle lightly with melted dark chocolate.
- Pair with Greek yogurt and fruit for a more filling breakfast or snack.
- Offer alongside tea or coffee as a bite-sized, healthier dessert option.
Storage & Make-Ahead
These nut-free protein balls keep well in an airtight container in the fridge for up to 1 week, making them perfect for meal prep and grab-and-go snacks.
They also freeze well for up to 1 month; thaw briefly at room temperature before eating for the best texture and flavor.
Reheating
These protein balls are best chilled, not truly reheated.
To gently warm, briefly microwave 5–10 seconds, or place on a low-heat oven tray or warm stovetop pan just until slightly soft.
Lunchbox and School-Safe Snacks
On busy school mornings, I love having a snack I can toss into a lunchbox without second-guessing allergens or mess.
These nut-free protein balls have become that steady little hero. I can pack them for strictly nut-free classrooms, sports practices, or playdates and know they’ll fit most school policies.
I like to tuck two into a small reusable container so they don’t get squished between sandwiches and fruit. By lunchtime, they’re perfectly chilled, a little chewy, and just sweet enough to feel like a treat.
- Slip them into bento box compartments for an easy “dessert.”
- Add one alongside yogurt or fruit for extra staying power.
- Pack a few for after-school activities or long bus rides.
- Label containers clearly for teachers and caregivers.
Final Thoughts
Give these nut-free protein balls a try and see how easy it’s to whip up a wholesome snack in just a few minutes.
Feel free to tweak the mix-ins or swap the seed butter to make them perfectly your own.
Frequently Asked Questions
Can I Make These Protein Balls Vegan Without Affecting Texture Too Much?
Yes, you can. I swap honey for thick maple syrup, keep the seed butter generous, and chill the mixture longer.
How Do I Calculate the Exact Protein Content per Ball?
You’ll total each ingredient’s protein from a nutrition database, divide by 16 balls, and get grams per ball. I do this in a spreadsheet—it feels oddly satisfying, like quietly solving a tiny kitchen mystery.
Can I Use These Protein Balls as a Pre-Workout or Post-Workout Snack?
Yes, you can. I’d grab a couple before lifting for steady energy, then another after, when my muscles crave quick carbs and protein. They’re light, portable, and don’t leave me feeling weighed down.
How Can Kids Help Safely With This Recipe in the Kitchen?
Kids can safely help by scooping, rolling, and sprinkling mix-ins; I always give them aprons, tie hair back, wash hands together, then let them shape “planets” while I handle measuring sticky stuff and hot appliances.
Nut Free Protein Balls
Equipment
- 1 Mixing bowl
- 1 Wooden spoon or spatula
- 1 set measuring cups
- 1 set measuring spoons
- 1 baking sheet or tray
- 1 sheet parchment paper
Ingredients
- 1 1/2 cup rolled oats
- 1/2 cup sunflower seed butter
- 1/4 cup honey
- 1/4 cup ground flaxseed
- 1/4 cup unsweetened shredded coconut
- 1/4 cup mini chocolate chips
- 2 tablespoon chia seeds
- 1 teaspoon vanilla extract
- 1/4 teaspoon fine sea salt
- 1 2–3 tablespoons water
Instructions
- Line a baking sheet or tray with parchment paper and set aside.
- In a mixing bowl, combine rolled oats, ground flaxseed, shredded coconut, mini chocolate chips, chia seeds, and sea salt.
- Add sunflower seed butter, honey, vanilla extract, and 2 tablespoons of water to the dry mixture.
- Stir everything together with a wooden spoon or spatula until a thick, sticky dough forms, adding the remaining tablespoon of water only if needed to help it come together.
- Let the mixture rest in the bowl for 5 minutes so the oats, flaxseed, and chia seeds can absorb some moisture.
- Using your hands or a small cookie scoop, portion out the dough and roll into balls about 1 inch in diameter.
- Place each protein ball onto the prepared parchment-lined tray, spacing them slightly apart.
- Refrigerate the tray for at least 30 minutes to help the protein balls firm up.
- Once set, transfer the protein balls to an airtight container and store in the refrigerator.
Notes

Cynthia Weatherford is a seasoned chef and culinary enthusiast who serves as the Recipe creator of Somonday. With decades of experience in the kitchen and a passion for exploring diverse cuisines, Cynthia brings a blend of creativity and technique to every dish. Known for transforming simple ingredients into show-stopping meals, Cynthia believes that cooking is an art form anyone can master. Dedicated to inspiring home cooks, Cynthia shares approachable recipes, pro tips, and culinary wisdom to make every meal memorable.