Imagine yourself in the kitchen, the sweet aroma of ripe bananas mingling with the rich scent of Nutella.
You’ve got a simple recipe in front of you, promising an indulgence that’s both easy to prepare and deeply satisfying.
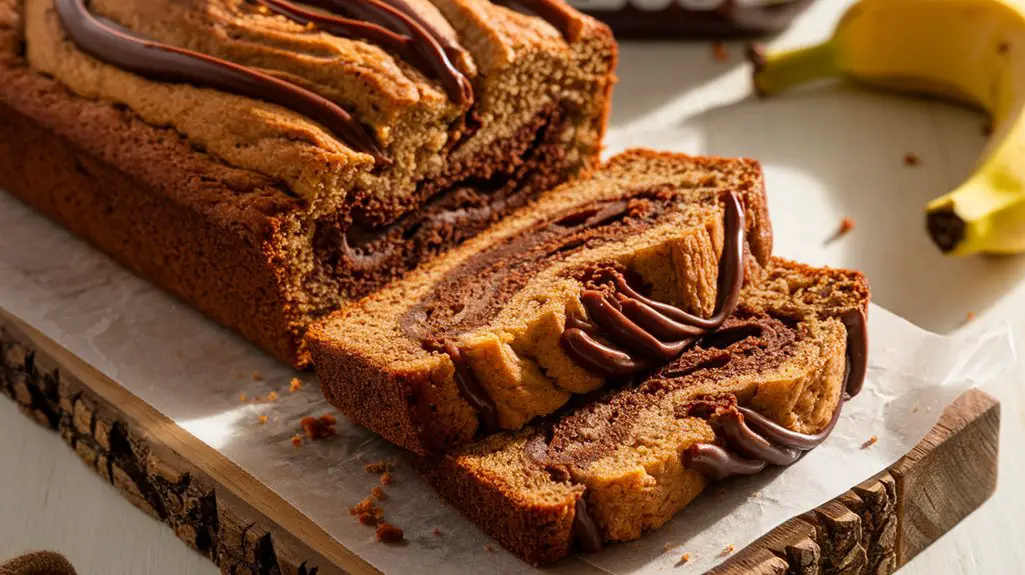
As you swirl the Nutella into the banana batter, the marbled pattern hints at the flavors yet to be disclosed.
There’s a secret to achieving that perfect texture, and just one more step will disclose the key.
Kitchen Tools Required
As you commence on this delightful baking journey, you’ll want to gather the right kitchen tools to ascertain the process is as smooth and enjoyable as the Nutella swirls themselves.
Start with your trusty loaf pan, a staple in every baker’s cupboard.
I remember my first loaf pan—it was a hand-me-down, yet it never failed me.
A large and a medium mixing bowl are essential, allowing you to blend wet and dry ingredients separately with ease.
Grab your whisk to ascertain your ingredients meld perfectly, and a spatula for those luxurious Nutella swirls.
Accurate measurements come from a reliable measuring cup and spoon set, while a toothpick becomes your trusty sidekick, testing for doneness.
Embrace these tools, and success is within reach!
Recipe
Nutella Swirled Banana Bread combines the comforting flavors of classic banana bread with the rich, hazelnut goodness of Nutella, creating a delightful twist on a beloved treat.
This recipe is perfect for using up overripe bananas and results in a moist, flavorful loaf with beautiful Nutella swirls throughout.
Whether you’re baking for a brunch, a family gathering, or simply to enjoy a sweet homemade dessert, this banana bread will surely impress.
With a prep time of just 15 minutes, this recipe is both quick and easy to pull together.
The key to achieving the perfect texture and flavor lies in using very ripe bananas and guaranteeing that the Nutella is slightly warmed for easy swirling.
Once baked, the aroma of banana and chocolate fills the kitchen, making it irresistible to wait for it to cool down completely before slicing and savoring every bite.
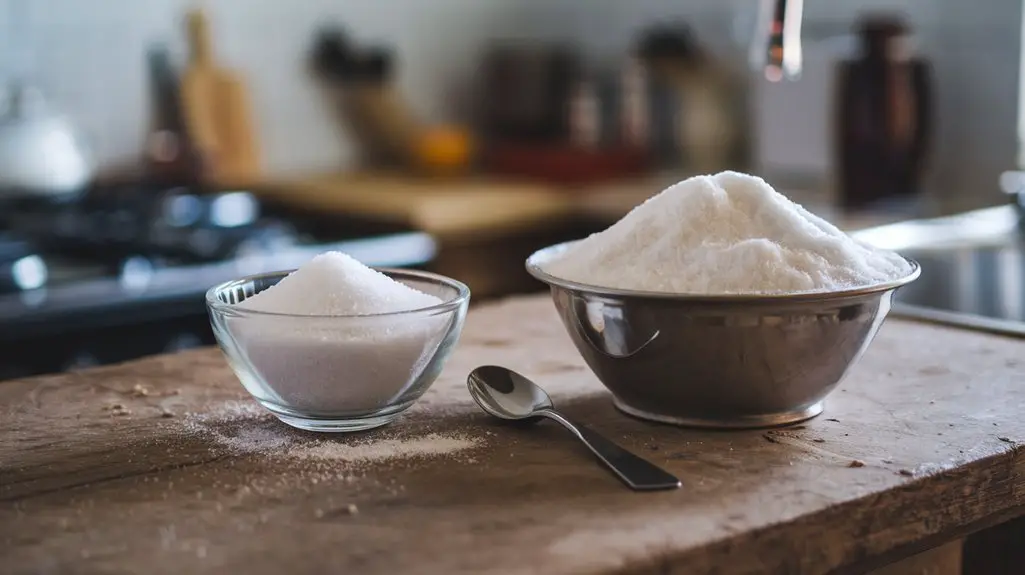
- 3 ripe bananas, mashed
- 1/3 cup melted butter
- 1 teaspoon baking soda
- 1 pinch salt
- 3/4 cup sugar
- 1 large egg, beaten
- 1 teaspoon vanilla extract
- 1 1/2 cups all-purpose flour
- 1/2 cup Nutella, slightly warmed
To prepare the Nutella Swirled Banana Bread, start by preheating your oven to 350°F (175°C) and greasing a loaf pan.
In a large mixing bowl, combine mashed bananas with melted butter, then mix in baking soda and salt.
Stir in sugar, the beaten egg, and vanilla extract.
Gradually add the flour, mixing until just combined.
Pour half of the batter into the prepared loaf pan and drizzle half of the warmed Nutella over it, swirling with a spatula.
Top with the remaining batter, repeat the Nutella drizzle and swirl, then bake for 55 minutes or until a toothpick inserted in the center comes out clean.
Allow the bread to cool in the pan for 10 minutes before transferring it to a wire rack to cool completely.
For the best results, confirm your bananas are fully ripe to enhance the sweetness and flavor of the bread.
If your Nutella is too thick, microwave it for a few seconds to make it easier to drizzle and swirl.
Be careful not to overmix the batter once the flour is added, as this can lead to a denser loaf.
Enjoy the bread slightly warm to experience its ideal texture and flavor.
Cook & Prep Time
When it comes to crafting the perfect Nutella swirled banana bread, time management is key.
You’ll want to organize your kitchen space and plan your tasks to guarantee a smooth process. Here’s a quick breakdown:
1. Prep Time: Spend 15 minutes gathering ingredients and mixing them into a harmonious batter.
It’s a delightful task, one that fills the air with the sweet aroma of ripe bananas.
2. Cook Time: Allocate 55 minutes for baking.
This is when the magic happens, as the Nutella swirls bake into the banana bread.
3. Resting Time: Give it a 10-minute rest post-baking.
Use this time to clean up or prepare a cup of tea to enjoy with your fresh, warm slice.
Cooking Steps
Before you begin your Nutella swirled banana bread adventure, preheat your oven to a cozy 350°F, ensuring it’s warm and ready for baking magic.
Coat your loaf pan with butter, just like my grandma used to do, to prevent sticking and add a touch of richness.
In a large mixing bowl, mash those ripe bananas with melted butter until they’re smooth, then stir in baking soda and a pinch of salt, creating the perfect base for your sweet creation.
Step 1. Preheat Oven to 350°F
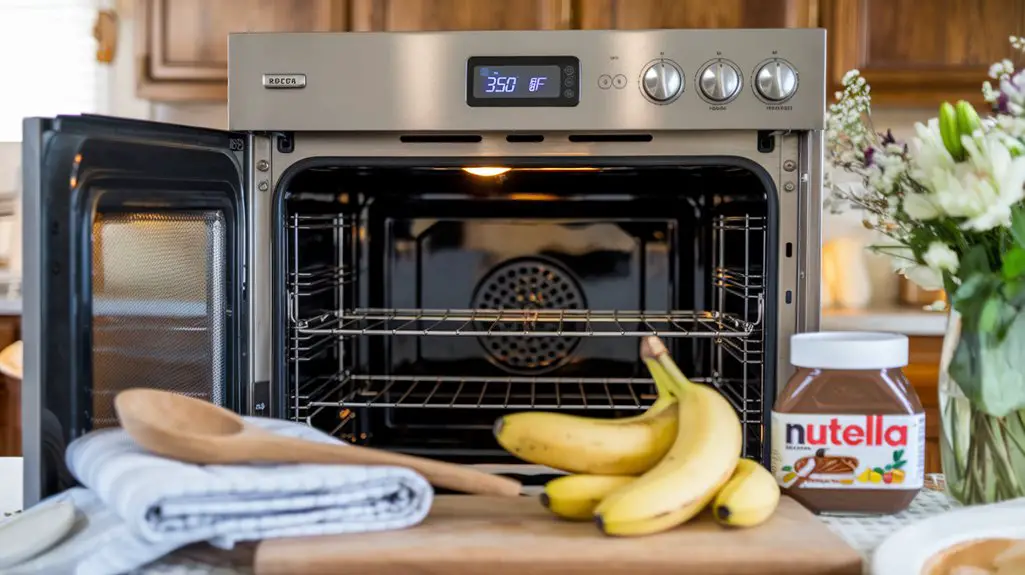
Imagine the aroma of freshly baked Nutella swirled banana bread filling your kitchen, but first, you’ll need to preheat your oven to 350°F (175°C).
This step might seem simple, but it sets the foundation for perfect baking.
As you dial up the temperature, think of your favorite baking memory—a time when the warmth of the oven meant cozy evenings and delicious treats.
Here’s what you should do:
- Check your oven rack: Confirm it’s centered for even baking.
- Set the temperature: Twist the knob or punch in the digits—350°F is key.
- Wait for the signal: Let the oven’s beep or light indicate it’s ready.
Preheating guarantees your batter bakes evenly, creating that delightful, golden crust.
Step 2. Coat Loaf Pan With Butter

As you prepare to coat your loaf pan with butter, think of this step as laying the groundwork for a trouble-free release of your banana bread.
Grab a stick of butter and glide it across the pan’s surface, guaranteeing every corner and edge gets a glossy layer.
Picture the way your fingers once smeared finger paint across paper, covering every inch with vibrant color.
Use a paper towel to spread the butter evenly, creating a protective barrier that prevents sticking.
This simple action reminds you of helping grandma in the kitchen, her voice gently instructing, “Don’t miss a spot!”
Take a moment to verify the corners are well-coated; they’re often stubborn.
With the pan prepped, you’re ready for the delicious journey ahead.
Step 3. Mash Bananas With Melted Butter
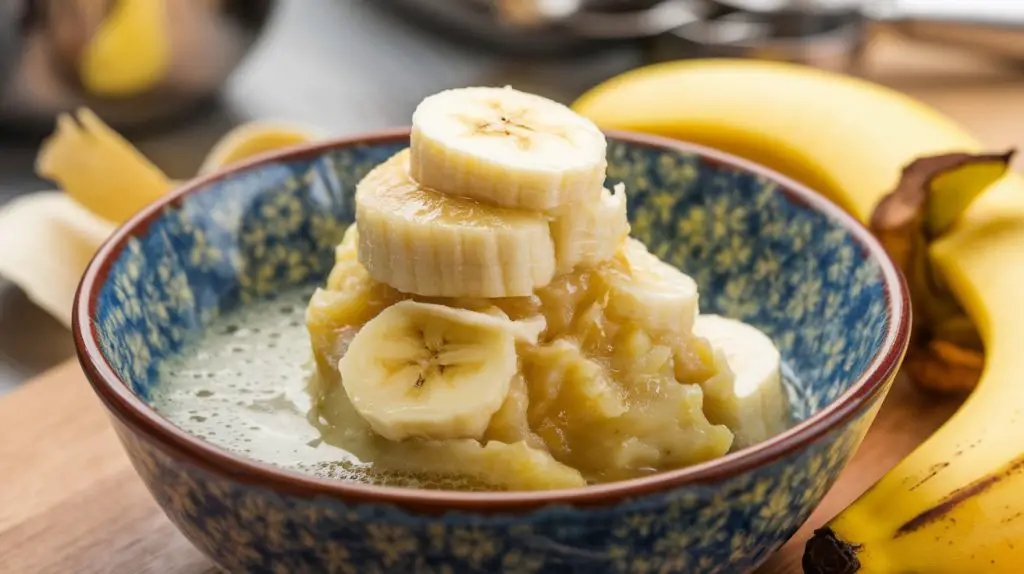
With your loaf pan perfectly prepared, it’s time to turn your attention to the star ingredient: the bananas.
Select three ripe, speckled bananas, their skins almost blackened, ensuring a sweet, moist loaf.
Place them in a large mixing bowl and begin mashing with a fork or potato masher until smooth, with a few lumps for texture.
Next, add the melted butter, letting its warmth envelop the bananas.
Mix thoroughly until you achieve a luscious, creamy consistency.
Here’s what you’ll need to do:
- Mash: Gently smash the bananas until they’re mostly smooth.
- Melt: Pour in 1/3 cup of melted butter.
- Mix: Stir together until well combined and the mixture is silky.
This step creates the rich foundation of your banana bread.
Step 4. Combine Baking Soda, Salt
Sprinkle in the baking soda and a pinch of salt into your banana-butter mixture, watching them dissolve into the creamy blend.
As you stir, remember a time when you first discovered the magic of chemistry in baking.
The fizz and sizzle of these ingredients are essential, providing that perfect rise.
Use a whisk to guarantee even distribution, giving your future loaf a tender crumb.
Reflect on past baking adventures, perhaps a loaf that didn’t quite rise.
This step might have been the culprit. Here’s a quick guide:
| Step | Ingredient | Action |
|---|---|---|
| 1 | Baking Soda | Sprinkle in |
| 2 | Salt | Add a pinch |
| 3 | Whisk | Blend evenly |
| 4 | Check Texture | Smooth & even |
| 5 | Feel Confident | Move forward |
Trust this process, and your banana bread will thank you for it!
Step 5. Add Sugar, Egg, Vanilla
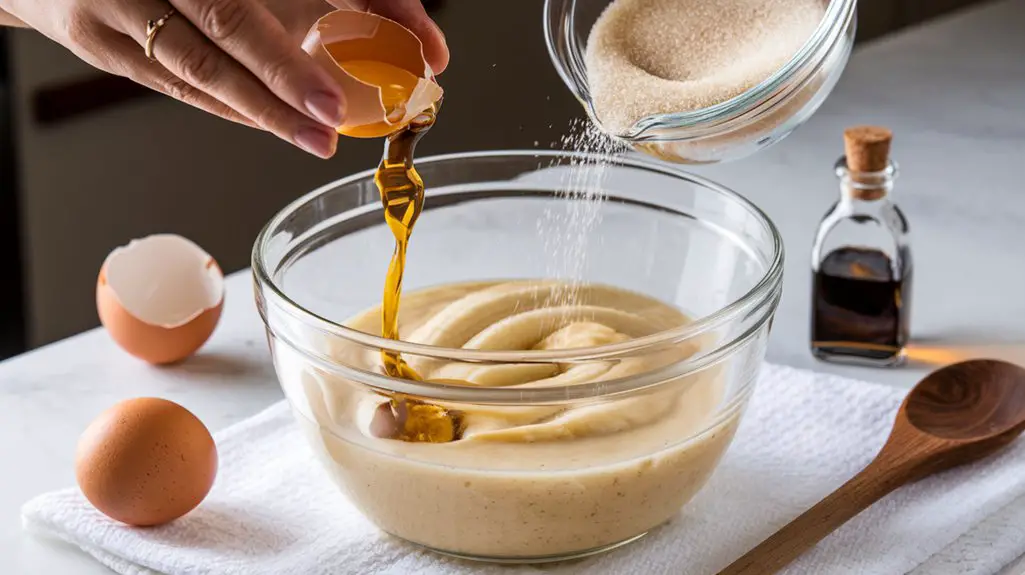
Grab your sugar, egg, and vanilla extract, and let’s bring this banana bread to life.
Imagine the sweet aroma that will soon fill your kitchen as you gather these essentials.
With your large mixing bowl ready, add the sugar, letting it flow like sand through your fingers.
Crack the egg into a small bowl, giving it a quick whisk before introducing it to the mix—remember how Mom always taught you to crack it on the counter, not the bowl?
Finally, pour in the vanilla, the fragrant elixir that ties everything together.
Here’s what you’ll do next:
- Mix thoroughly: Blend the sugar, egg, and vanilla until smooth.
- Observe the texture: Aim for a creamy consistency.
- Inhale deeply: Enjoy the tantalizing scent!
Final Thoughts
As you savor the last crumbs of your Nutella swirled banana bread, there’s a comforting realization that this delightful dessert is more than just a recipe—it’s a warm invitation to enjoy the simple pleasures of baking.
Remember the satisfaction as you swirled the Nutella, creating a marbled masterpiece.
The aroma that filled your kitchen was nothing short of heavenly.
Baking isn’t just about following steps; it’s about the joy of creation and the anticipation of sharing.
Your loaf, with its perfect blend of ripe bananas and rich Nutella, is an edible reflection of your culinary skills.
Next time you find yourself with overripe bananas, you know exactly what to do—invite warmth and sweetness into your home once again.
Frequently Asked Questions
Can I Substitute Nutella With Another Spread?
Sure, you can swap Nutella with peanut butter, almond butter, or any chocolate spread. I’ve used peanut butter before; it adds a nutty richness. Just warm it slightly to achieve a smooth swirl. Enjoy experimenting!
How Should I Store Leftover Banana Bread?
Wrap the leftover banana bread tightly in plastic wrap or foil to keep it moist. Store it in an airtight container at room temperature for up to three days. For a longer shelf life, refrigerate or freeze it.
Can I Use Frozen Bananas in This Recipe?
You can use frozen bananas, just thaw them completely and drain excess liquid. I once swapped in frozen bananas and discovered they added extra moisture, enhancing the bread’s flavor. It’s a delightful trick worth trying!
Is It Possible to Make This Recipe Gluten-Free?
Yes, you can make it gluten-free by using a gluten-free flour blend. I’ve tried it myself, and it works. Just guarantee your mix includes xanthan gum for structure. You’ll love the same delicious swirls!
What Is the Best Way to Serve This Banana Bread?
You should serve it warm with a dollop of whipped cream or a scoop of vanilla ice cream. I once paired it with coffee for a cozy breakfast, and it was an unforgettable morning delight. Enjoy!

Nutella Swirled Banana Bread
Equipment
- 1 Loaf pan
- 1 large mixing bowl
- 1 medium mixing bowl
- 1 Whisk
- 1 Spatula
- 1 measuring cup set
- 1 measuring spoon set
- 1 toothpick
Ingredients
- 3 ripe bananas mashed
- 1/3 cup melted butter
- 1 teaspoon baking soda
- 1 pinch salt
- 3/4 cup sugar
- 1 large egg beaten
- 1 teaspoon vanilla extract
- 1 1/2 cups all-purpose flour
- 1/2 cup Nutella slightly warmed
Instructions
- Grease your loaf pan and set it aside.
- In a large mixing bowl, combine the mashed bananas and melted butter.
- Mix in the baking soda and salt.
- Stir in the sugar, beaten egg, and vanilla extract.
- Gradually add the flour, mixing until just combined.
- Pour half of the banana bread batter into the prepared loaf pan.
- Drizzle half of the warmed Nutella over the batter in the pan.
- Use a spatula to swirl the Nutella into the batter.
- Add the remaining batter on top and repeat the Nutella drizzle and swirl.
- Bake for 55 minutes, or until a toothpick inserted into the center comes out clean.
- Allow the bread to cool in the pan for 10 minutes before transferring to a wire rack to cool completely.
Notes

Cynthia Weatherford is a seasoned chef and culinary enthusiast who serves as the Recipe creator of Somonday. With decades of experience in the kitchen and a passion for exploring diverse cuisines, Cynthia brings a blend of creativity and technique to every dish. Known for transforming simple ingredients into show-stopping meals, Cynthia believes that cooking is an art form anyone can master. Dedicated to inspiring home cooks, Cynthia shares approachable recipes, pro tips, and culinary wisdom to make every meal memorable.