There’s something about rolling bite-sized treats between your fingertips, feeling the soft almond dough give way, that instantly slows the day down.
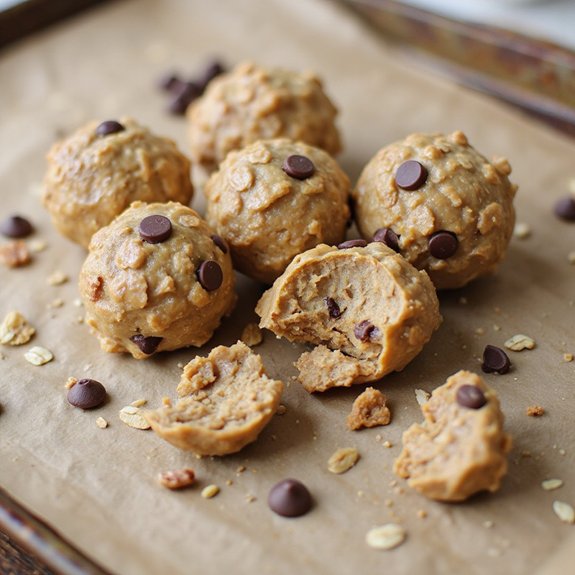
These protein balls with almond flour are a quick, no-bake snack—tender, slightly nutty, speckled with chocolate or seeds—and they’re ready in about 15 minutes.
They’re ideal for busy mornings, post-workout refuels, kids’ lunchboxes, or anyone who craves a sweet bite without turning on the oven.
I still remember a frantic Monday when my afternoon meetings stacked up and lunch never happened.
A small container of these protein balls in my bag saved me from the 4 p.m. crash; two bites of chewy almond goodness, a hint of vanilla, and I could think clearly again.
They’ve since become my go-to for Sunday meal prep, late-night cravings, and effortless snacks for friends dropping by.
Ready to bring this dish to life?
Why You’ll Love It
- Packs in protein, fiber, and healthy fats for lasting energy
- Comes together in minutes with simple, pantry-friendly ingredients
- Requires no baking and minimal cleanup for effortless snacking
- Easily customizable with different nut butters, mix-ins, or protein powders
- Stores well in the fridge for grab-and-go, make-ahead snacks
Ingredients
- 1½ cups almond flour — finely ground for best texture
- ½ cup vanilla protein powder — choose a brand you enjoy the taste of
- ¼ cup creamy almond butter — well-stirred so it’s smooth
- ¼ cup honey — flowable, not crystallized
- 2 tablespoons chia seeds — whole, not ground
- 2 tablespoons ground flaxseed — freshly ground if possible
- 2 tablespoons mini dark chocolate chips — at least 60% cocoa if you can
- 1 teaspoon vanilla extract — pure, not imitation
- ¼ teaspoon fine sea salt — finely ground for even seasoning
- 2–4 tablespoons unsweetened almond milk — add gradually to adjust dough
Step-by-Step Method
Line the tray
Line a rimmed baking sheet with parchment paper. Smooth out any wrinkles so the balls sit evenly.
Set the tray aside while you prepare the mixture. This keeps the balls from sticking and makes chilling and transferring easier.
Make sure the tray fits in your refrigerator before you start rolling.
Combine the dry ingredients
Add almond flour, vanilla protein powder, chia seeds, ground flaxseed, mini dark chocolate chips, and fine sea salt to a mixing bowl.
Stir thoroughly with a spoon to distribute everything evenly. Break up any clumps of flour or seeds.
Proper mixing at this stage guarantees uniform texture and flavor in every protein ball.
Mix in the wet ingredients
Add creamy almond butter, honey, vanilla extract, and 2 tablespoons unsweetened almond milk to the bowl.
Stir until the mixture begins to form a thick dough. Scrape the sides and bottom of the bowl as you mix.
Make sure the almond butter and honey are fully incorporated so there are no dry patches.
Adjust the dough consistency
Check the texture of the dough by pressing some between your fingers.
If it’s dry or crumbly, add almond milk 1 tablespoon at a time. Stir well after each addition.
Stop adding liquid once the mixture holds together easily when pressed without cracking or feeling overly sticky or wet.
Roll the protein balls
Scoop about 1 tablespoon of dough for each ball. Roll the portion between your palms until smooth and round. Lightly dampen your hands if the dough sticks too much.
Aim for similar sizes so they chill evenly. Continue until you’ve used all the dough, placing each ball on the prepared tray.
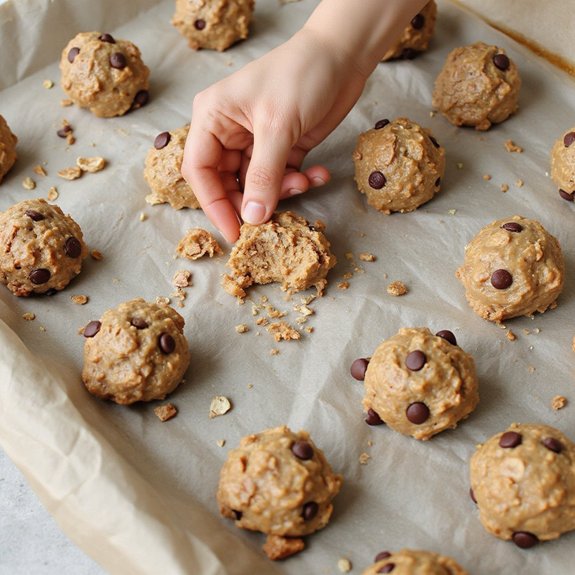
Chill to firm up
Arrange the rolled protein balls on the parchment-lined baking sheet, leaving a little space between each one.
Place the tray in the refrigerator for at least 30 minutes.
Allow the balls to firm up so they hold their shape. Avoid stacking them before chilling, or they may stick together or flatten.
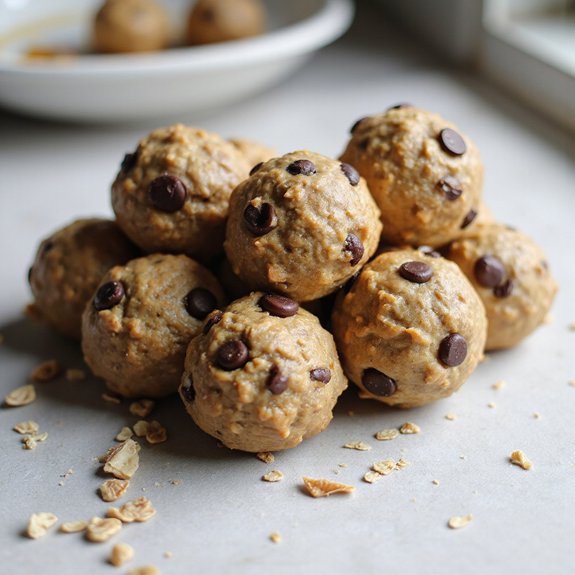
Store and serve
Transfer the chilled protein balls to an airtight container, stacking gently if needed. Keep them refrigerated until ready to eat.
For the best texture, let them sit at room temperature for about 5 minutes before serving.
Enjoy as a quick snack or pre-workout bite, and consume within several days for freshness.
Ingredient Swaps
- Nut butter: Swap almond butter with peanut, cashew, or sunflower seed butter (nut-free option).
- Sweetener: Use maple syrup, agave, or date syrup instead of honey for a vegan version.
- Protein powder: Any flavor (chocolate, unflavored) or plant-based protein works; adjust almond milk as needed for texture.
- Mix-ins: Replace chocolate chips with cacao nibs, dried fruit, or chopped nuts; swap chia/flax with hemp seeds if that’s what you have.
- Flour base: Use finely ground oat flour or cashew flour if almond flour is unavailable, adding a splash more liquid if the dough feels dry.
You Must Know
– Make-Ahead – For longer storage, keep the balls in an airtight container in the fridge for up to 7 days, or freeze for up to 2 months and thaw 15–20 minutes at room temp; the brief thaw returns them to a pleasantly chewy, not rock-hard, texture.
Serving Tips
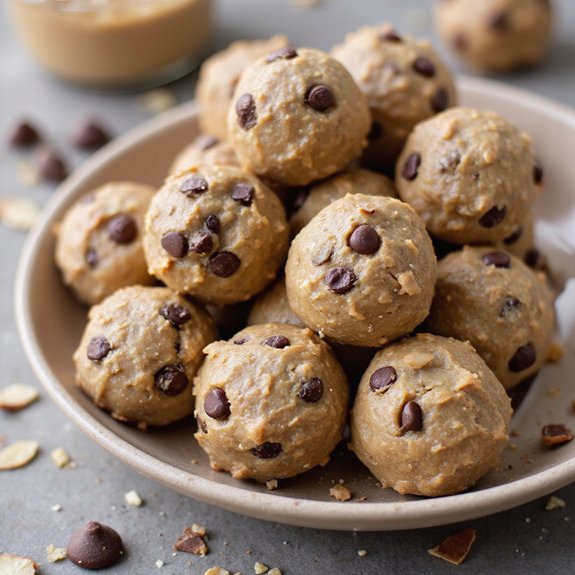
- Serve chilled on a small snack plate with fresh berries or apple slices.
- Pack 2–3 balls in a reusable container for an easy gym or office snack.
- Arrange on a platter with nuts, dried fruit, and dark chocolate squares for a snack board.
- Crumble over Greek yogurt with a drizzle of honey for a quick breakfast.
- Skewer balls on toothpicks and dust lightly with cocoa for party-ready bites.
Storage & Make-Ahead
These protein balls keep well in an airtight container in the refrigerator for up to 1 week.
They’re perfect for making ahead on Sunday for grab-and-go snacks.
For longer storage, freeze in a single layer, then transfer to a container; enjoy within 2–3 months.
Thaw briefly before eating.
Reheating
These are best chilled, not hot.
If desired slightly warm, use a brief 5–10 second microwave burst, or warm on a low oven/stovetop just until lightly softened, never hot.
Protein Balls in Meal Prep
When I’m mapping out snacks for the week, I treat a batch of almond flour protein balls like little “grab-and-go anchors” in my meal prep routine.
I love seeing them lined up on a parchment‑covered tray, like tiny speckled moons, waiting for the fridge to work its magic.
Once they’re chilled, I tuck four or five into small containers so I’ve got built‑in portions.
Some ride along with prepped salads for an easy “dessert,” others live in a dedicated snack bin so I can grab one between calls instead of raiding the pantry.
If you’re packing lunches, slip a few into a reusable bag. By midday, they’re just soft enough—dense, nutty, a quick lift without feeling heavy.
Final Thoughts
Give these almond flour protein balls a try and see how easy (and tasty) homemade snacks can be.
Feel free to tweak the mix-ins and nut butter to make them your own—then stash a batch in the fridge so you’ve always got a quick, nourishing bite ready to go.
Frequently Asked Questions
Can I Make These Protein Balls Without Any Added Sweeteners Like Honey?
Yes, you can. I’d replace honey with a splash more almond milk and maybe mashed banana. When I do this, the balls taste subtly sweet, softer, and perfect for late-night snacking straight from the fridge.
How Can I Increase the Protein Content Without Changing the Texture Too Much?
You can tuck in extra protein powder and a spoon of powdered peanut butter, then splash in tiny drips of almond milk. I do this on busy mornings and the texture still rolls smooth as seaside sand.
Can I Freeze the Unrolled Dough Instead of Rolling Into Balls First?
Yes, you can freeze the unrolled dough. I like pressing it flat in a parchment-lined pan, freezing, then cutting off chunks later—the dough thaws quickly on the counter like sweet, nutty cookie fudge.

Protein Balls With Almond Flour
Equipment
- 1 Mixing bowl
- 1 Mixing spoon
- 1 set measuring cups
- 1 set measuring spoons
- 1 rimmed baking sheet
- 1 sheet parchment paper
- 1 airtight container
Ingredients
- 1 1/2 cup almond flour
- 1/2 cup vanilla protein powder
- 1/4 cup almond butter creamy
- 1/4 cup honey
- 2 tablespoon chia seeds
- 2 tablespoon ground flaxseed
- 2 tablespoon mini dark chocolate chips
- 1 teaspoon vanilla extract
- 1/4 teaspoon fine sea salt
- 1 2–4 tablespoons unsweetened almond milk
Instructions
- Line the rimmed baking sheet with parchment paper and set aside.
- Add the almond flour, protein powder, chia seeds, ground flaxseed, mini dark chocolate chips, and sea salt to the mixing bowl and stir to combine.
- Add the almond butter, honey, vanilla extract, and 2 tablespoons almond milk to the dry mixture and stir until a thick dough starts to form.
- If the mixture is too dry or crumbly, add almond milk 1 tablespoon at a time, stirring after each addition, until the dough holds together when pressed.
- Scoop out about 1 tablespoon of dough at a time and roll it between your palms to form a smooth ball.
- Place each ball onto the prepared parchment-lined baking sheet, spacing them slightly apart.
- Once all the dough is rolled, refrigerate the tray for at least 30 minutes to firm up the protein balls.
- Transfer the chilled protein balls to an airtight container and store in the refrigerator until ready to serve.
Notes

Cynthia Weatherford is a seasoned chef and culinary enthusiast who serves as the Recipe creator of Somonday. With decades of experience in the kitchen and a passion for exploring diverse cuisines, Cynthia brings a blend of creativity and technique to every dish. Known for transforming simple ingredients into show-stopping meals, Cynthia believes that cooking is an art form anyone can master. Dedicated to inspiring home cooks, Cynthia shares approachable recipes, pro tips, and culinary wisdom to make every meal memorable.