There’s something about rolling soft, glossy date dough between your palms that feels instantly calming.
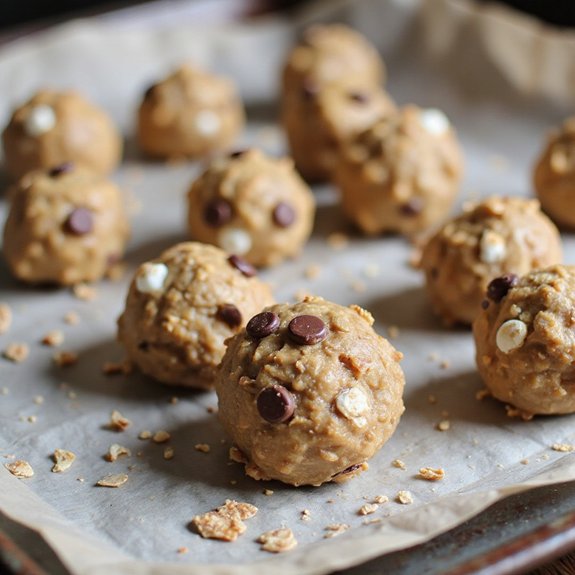
Picture a plate of bite-sized protein balls, studded with chopped nuts and flecks of oats, shining slightly from natural date caramel.
They’re a no-bake, mix-and-roll kind of snack—ready in about 15 minutes—and they taste like a cozy dessert while secretly acting like a power-packed mini meal.
These protein balls are perfect for busy professionals, students, gym-goers, and anyone trying to tame afternoon sugar crashes without turning to candy.
I started making them during a hectic workweek when I kept skipping breakfast.
A couple of these, grabbed on my way out the door, meant I could finally stop relying on vending-machine snacks.
They shine for meal prep Sundays, pre-workout bites, kids’ lunchboxes, and late-night cravings when you want something sweet but still smart.
Ready to bring this dish to life?
Why You’ll Love It
- Delivers rich, nutty sweetness from dates, peanut butter, and honey
- Packs lasting energy with oats, protein powder, and chia seeds
- Uses simple pantry staples and comes together in minutes, no baking
- Customizes easily with different nut butters, mix-ins, and coatings
- Stores and freezes well for convenient grab-and-go snacking
Ingredients
- 1 cup pitted dates, soft — make sure they’re moist so the mixture binds well
- 1 cup rolled oats — old-fashioned oats give the best chewy texture
- 1 cup creamy peanut butter — choose natural peanut butter without added sugar
- 1⁄4 cup honey — adds sweetness and helps hold the balls together
- 1⁄4 cup vanilla protein powder — use a brand you like the taste of
- 2 tablespoons chia seeds — for extra fiber and a slight crunch
- 1⁄4 teaspoon fine sea salt — balances the sweetness and enhances flavor
- 1 teaspoon vanilla extract — rounds out the flavor with warm aroma
Step-by-Step Method
Prepare the Tray
Line a baking sheet with parchment paper. Smooth it flat so it fully covers the surface and the corners.
Set the tray aside while you make the mixture. This prevents the protein balls from sticking and makes it easier to transfer them later.
Make certain the tray fits in your refrigerator before you begin.
Pulse the Dates
Add the pitted, soft dates to the food processor. Pulse in short bursts until they form a sticky, cohesive paste.
Scrape down the sides as needed to catch any larger pieces.
Aim for an even, spreadable texture so the dates blend smoothly with the remaining ingredients.
Add Remaining Ingredients
Add rolled oats, peanut butter, honey, protein powder, chia seeds, salt, and vanilla extract to the food processor.
Arrange them around the date paste to distribute evenly. Use creamy peanut butter for easier mixing.
Make sure the measurements are level for consistent texture and flavor in the final protein balls.
Process into Dough
Process the mixture until it comes together into a thick, slightly sticky dough.
Stop occasionally to scrape down the sides and under the blade to incorporate all ingredients.
Continue pulsing until no large oat or date chunks remain.
The dough should hold together when pressed between your fingers without crumbling apart.
Compact the Mixture
Transfer the dough to a mixing bowl using a spatula. Press and fold the mixture firmly with the spatula to compact it into a uniform mass.
Work any dry pockets into the center until everything feels consistent.
This step makes certain even flavor and helps the balls hold their shape when rolled.
Portion the Dough
Scoop about 1 tablespoon of dough for each ball, using a measuring spoon for consistency.
Level off the spoon before releasing the portion into your hand. Repeat this scooping process, creating small mounds of dough.
Consistent portions make certain even chilling and similar serving sizes for each protein ball.
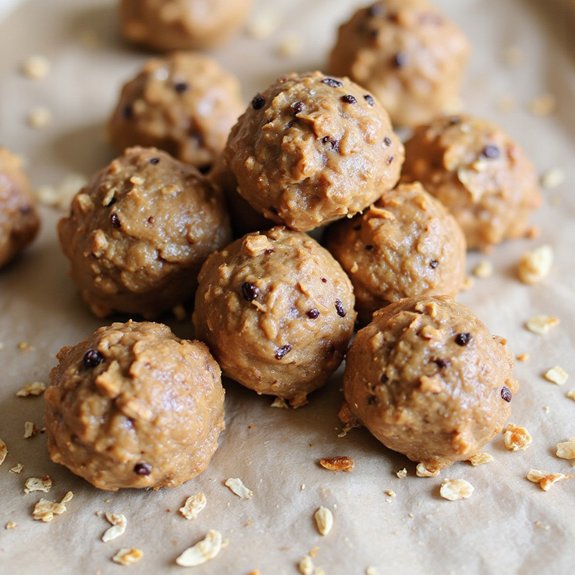
Roll into Balls
Roll each portion between your palms to form a smooth, firm ball. Apply gentle, even pressure so the dough compacts without cracking.
If a ball crumbles, press it together again before rolling.
Continue shaping until the surface is mostly smooth and the ball feels sturdy enough to hold its form.
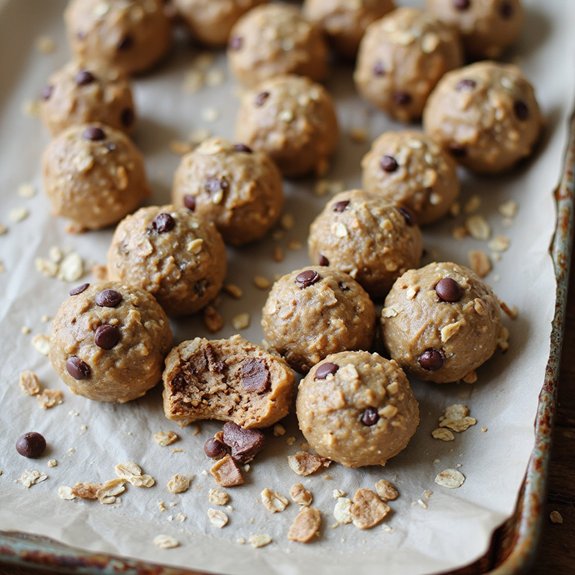
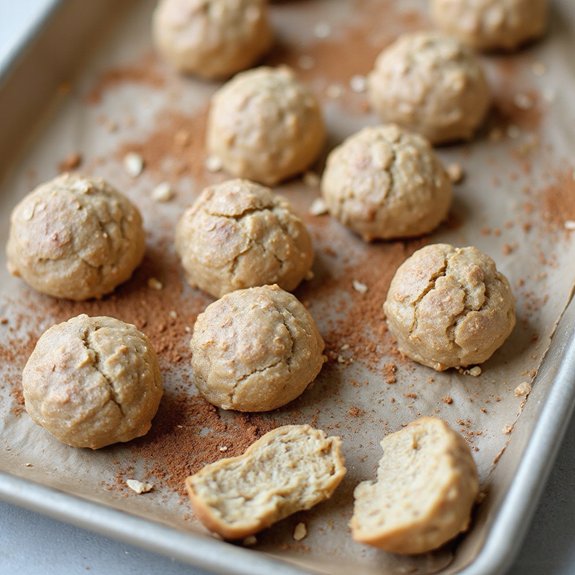
Arrange on the Tray
Place each rolled ball on the prepared baking sheet, spacing them slightly apart.
Avoid crowding so they chill evenly and don’t stick together. Organize them in neat rows if desired.
Check that all balls are similar size and shape, adjusting any that look notably larger or smaller.
Chill to Firm
Refrigerate the baking sheet of protein balls for at least 30 minutes. Allow them to firm up until they feel set and less sticky to the touch.
This chilling step improves texture and helps them hold their round shape.
Leave them longer if your mixture felt very soft or warm.
Store the Protein Balls
Transfer the chilled protein balls to an airtight container.
Arrange them in layers, placing parchment between layers if needed to prevent sticking. Seal the container tightly and store in the refrigerator.
Keep them chilled until ready to serve, and enjoy within about a week for best taste and texture.
Ingredient Swaps
- Nut-free: Swap peanut butter with sunflower seed butter or tahini; use nut-free protein powder.
- Vegan: Replace honey with maple syrup or agave; guarantee protein powder is plant-based.
- Gluten-free: Use certified gluten-free oats and check protein powder labels.
- Budget-friendly: Skip chia seeds and use extra oats instead; use store-brand peanut butter and plain protein powder.
- Regional/availability: If dates are scarce or pricey, use raisins or soft dried figs, adjusting sweetness by reducing honey slightly.
You Must Know
- Troubleshoot • If the mixture looks sandy or cracks when you squeeze it, work in 1–2 teaspoons of honey or water at a time until a pinch of dough holds together cleanly with no dry crumbs.
- Troubleshoot • If the dough sticks heavily to your hands and won’t keep a round shape, knead in 1–2 tablespoons of oats or protein powder until the surface of rolled balls feels tacky but not wet.
- Flavor Boost • For deeper flavor, lightly toast the oats in a dry pan for 3–5 minutes until they smell nutty and turn slightly golden, then cool completely so they don’t melt the peanut butter.
- Make-Ahead • To keep them from drying out over days, press parchment directly on top inside the airtight container and eat within 7 days chilled or within 2 months frozen (thaw 5–10 minutes at room temp).
- Scale • For a double batch (about 32 balls), watch your processor: if it strains or the bowl is over 2⁄3 full, process in two rounds so everything turns into a uniform, sticky dough instead of leaving dry pockets.
Serving Tips
- Serve chilled with Greek yogurt and berries for a balanced snack plate.
- Pack a few in a small reusable container for gym or office snacks.
- Arrange on a platter with fresh fruit and nuts for a simple dessert board.
- Crumble over smoothie bowls or oatmeal for extra texture and protein.
- Drizzle with melted dark chocolate and chill for a more indulgent treat.
Storage & Make-Ahead
These protein balls keep well in an airtight container in the fridge for up to 1 week, making them perfect for meal prep.
You can also freeze them in a single layer, then store in a freezer bag or container for up to 2 months.
Thaw briefly before eating.
Reheating
Gently rewarm chilled protein balls briefly in the microwave on low power or in a low oven.
Avoid the stovetop, which can overheat and dry them.
Do not actually cook.
Post-Workout Snack Trends
Lately, post-workout snacks have shifted from chalky shakes to bite-sized, real-food rewards you actually look forward to eating.
Instead of chugging something that tastes like gym air, I’d rather reach for a cool container of protein balls with dates, waiting in the fridge like tiny promises of energy.
You and I both want that quick recovery, but we also want it to feel good—comforting, clean, and simple.
Here’s what I see rising fast:
- Portable protein: Neat, one-handed bites that won’t crumble in your gym bag.
- Real sweetness: Dates, honey, and fruit instead of syrupy, artificial aftertastes.
- Balanced bites: A cozy mix of carbs, protein, and healthy fats that refuels without leaving you heavy or wired.
Final Thoughts
Give these protein balls with dates a try and see how easy (and satisfying) homemade snacks can be.
Feel free to tweak the nut butter, mix-ins, or sweetness to make them perfectly your own.
Frequently Asked Questions
Can I Make These Protein Balls Without a Food Processor?
Yes, you can. I’d finely chop the dates, then mash them with peanut butter and honey until glossy, like soft caramel. Stir in oats and extras by hand, then roll small, rustic, perfectly chewy bites.
How Many Protein Balls Equal a Typical Snack Serving Nutritionally?
I’d treat two of these as one cozy, satisfying snack for you. Imagine them as small, nutty lanterns of energy—enough protein, fiber, and sweetness to tide you over without becoming a full meal.
Can I Package These Protein Balls as Gifts or for Bake Sales?
Yes, you can. I’d nestle them in mini paper cups, then tuck them into tins or clear bags. I’d label ingredients, add a rustic tag, and keep them chilled until your cozy sale or gifting.
Are These Protein Balls Appropriate for Children’s Lunch Boxes at School?
Yes, I’d happily tuck these into a school lunchbox, as long as nuts are allowed. I’d wrap each ball snugly, pack with an ice pack, and trust their hearty sweetness to keep your child satisfied.

Protein Balls With Dates
Equipment
- 1 food processor
- 1 Mixing bowl
- 1 Spatula
- 1 tablespoon measure
- 1 teaspoon measure
- 1 Baking sheet
- 1 parchment paper sheet
- 1 airtight container
Ingredients
- 1 cup pitted dates soft
- 1 cup rolled oats
- 1 cup peanut butter creamy
- 1/4 cup honey
- 1/4 cup protein powder vanilla
- 2 tablespoon chia seeds
- 1/4 teaspoon fine sea salt
- 1 teaspoon vanilla extract
Instructions
- Line a baking sheet with parchment paper and set aside.
- Add pitted dates to the food processor and pulse until they form a sticky paste.
- Add rolled oats, peanut butter, honey, protein powder, chia seeds, salt, and vanilla extract to the food processor with the dates.
- Process the mixture until it comes together in a thick, slightly sticky dough, scraping down the sides as needed.
- Transfer the mixture to a mixing bowl and use a spatula to press and compact it into a uniform mass.
- Scoop out about 1 tablespoon of dough and roll it between your palms to form a smooth ball.
- Place each ball on the prepared baking sheet, spacing them slightly apart.
- Continue rolling until all of the mixture is shaped into balls.
- Refrigerate the baking sheet for at least 30 minutes to let the protein balls firm up.
- Transfer the chilled protein balls to an airtight container and store in the refrigerator.
Notes

Cynthia Weatherford is a seasoned chef and culinary enthusiast who serves as the Recipe creator of Somonday. With decades of experience in the kitchen and a passion for exploring diverse cuisines, Cynthia brings a blend of creativity and technique to every dish. Known for transforming simple ingredients into show-stopping meals, Cynthia believes that cooking is an art form anyone can master. Dedicated to inspiring home cooks, Cynthia shares approachable recipes, pro tips, and culinary wisdom to make every meal memorable.