Imagine opening your fridge and spotting a container filled with bite-sized protein balls—no peanuts in sight, just jewel-toned dried fruits, specks of oats, and glossy chocolate chips tucked into every nook.
They’re soft and chewy with a light crunch from seeds, a touch of natural sweetness, and that satisfying, “I’ll-have-just-one-more” texture.
These no-bake treats come together in about 15 minutes, making them ideal for busy mornings, after-school snacks, or pre-workout fuel.
They’re especially great for anyone avoiding peanuts, families juggling allergies, beginners who don’t love baking, and meal-preppers who like grab-and-go options.
I first relied on them during a hectic week of late meetings, when dinner kept getting pushed back; a couple of protein balls held me over and stopped the nightly takeout spiral.
They shine during Sunday prep, late-night cravings, road trips, and quick desk lunches. Ready to bring this dish to life?
Why You’ll Love It
- Packs 6–8 grams of protein into every single bite
- Skips peanut butter while still tasting rich, nutty, and satisfying
- Comes together in one bowl with simple pantry ingredients
- Stores well for grab-and-go snacks all week long
- Easily customizable with different nut butters, seeds, or mix-ins
Ingredients
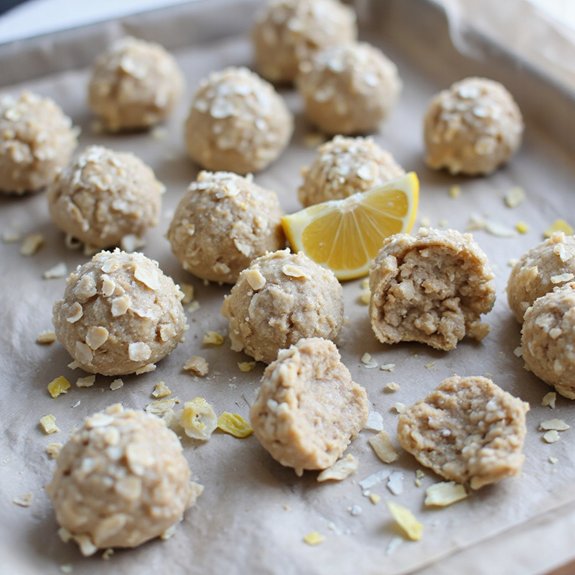
- 1 ½ cups rolled oats — use old-fashioned oats for best texture
- 1 cup vanilla protein powder — pick a brand you enjoy the taste of
- ¼ cup almond butter — creamy, unsweetened works best
- ¼ cup honey — adjust to taste based on sweetness of protein powder
- ¼ cup unsweetened shredded coconut — finely shredded blends more evenly
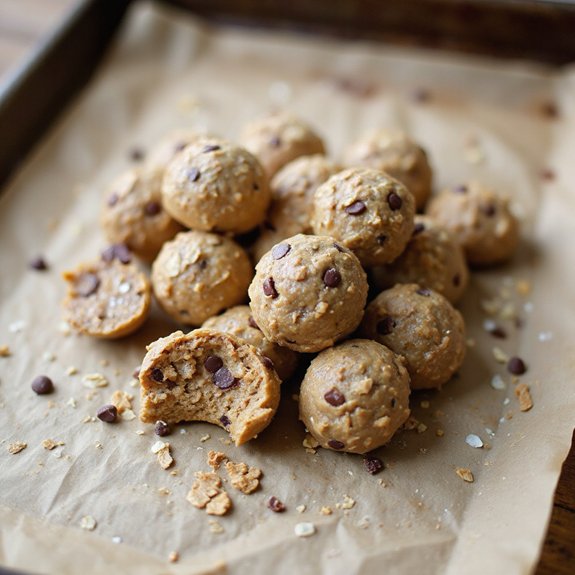
- ¼ cup mini dark chocolate chips — choose at least 60% cocoa for richer flavor
- 2 tablespoons ground flaxseed — store in the fridge to keep fresh
- 2 tablespoons chia seeds — add binding power and crunch
- 1 teaspoon vanilla extract — pure vanilla gives better flavor than imitation
- ¼ teaspoon fine sea salt — balances sweetness and boosts flavor
- ¼–½ cup unsweetened almond milk — add gradually until mixture just holds together
Step-by-Step Method
Prep the Tray
Line a baking sheet with parchment paper. Make sure it lies flat so the balls keep their shape.
Clear space in your fridge for the tray. Set out all ingredients and equipment before starting.
This simple prep keeps the process smooth and avoids sticky messes on your counter.
Combine the Dry Ingredients
Add rolled oats, vanilla protein powder, shredded coconut, ground flaxseed, chia seeds, and sea salt to a mixing bowl.
Stir until everything is evenly mixed. Distribute the seeds and coconut throughout the oats.
This helps prevent clumps later and guarantees each protein ball has the same texture and flavor.
Mix in the Wet Ingredients
Add almond butter, honey, vanilla extract, and ¼ cup almond milk to the bowl. Stir firmly with a wooden spoon, scraping the sides and bottom.
Aim for a thick, sticky dough. If it feels dry or crumbly, add more almond milk one tablespoon at a time until it holds together easily.
Adjust the Consistency
Test the mixture by squeezing some in your hand. If it crumbles, stir in another spoonful of almond milk.
If it feels too wet or loose, add a little extra oats or protein powder. Adjust gradually.
You want a dough that sticks together well without feeling soggy or overly sticky.
Fold in the Chocolate Chips
Sprinkle the mini dark chocolate chips over the mixture. Gently fold them in with the spoon until evenly distributed.
Avoid overmixing so the dough doesn’t get too soft. Check that every scoop of dough will contain some chocolate, giving each protein ball a balanced flavor and texture.
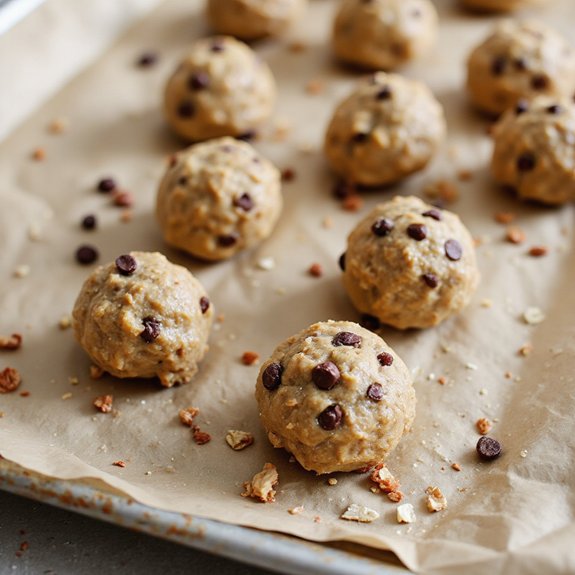
Roll the Protein Balls
Scoop about 1 tablespoon of mixture for each ball. Lightly dampen your hands to reduce sticking.
Roll the mixture between your palms, pressing firmly as you go.
Shape into compact, smooth balls. If a ball cracks, press it together again until the surface feels cohesive and holds its shape.
Chill on the Tray
Arrange the rolled balls on the parchment-lined baking sheet. Space them slightly apart so they don’t stick together.
Place the tray in the refrigerator. Chill for at least 30 minutes.
This rest time helps the balls firm up, improves their texture, and makes them easier to store and handle.
Store for Later
Transfer the chilled protein balls to an airtight container. Arrange them in a single layer, or separate layers with parchment to prevent sticking.
Store the container in the refrigerator for up to one week.
For longer storage, freeze them and let each ball sit at room temperature briefly before eating.
Ingredient Swaps
- Use cashew, almond, or walnut butter instead of peanut butter; for nut-free, try sunflower seed or tahini.
- Swap honey with maple syrup, agave, or brown rice syrup to make the recipe vegan.
- Replace almond milk with oat, soy, or regular dairy milk, and use any plain or flavored protein powder you have on hand (whey, pea, soy, or rice).
You Must Know
- Troubleshoot • If the mixture feels crumbly and won’t hold shape: Squeeze a small portion in your palm—if it cracks instead of forming a smooth ball, stir in 1–2 teaspoons almond milk at a time. This gradually increases stickiness so the balls stay intact after chilling for 30 minutes.
- Troubleshoot • If the balls feel sticky or flatten on the tray: Gently roll one ball—if it leaves a paste on your fingers or looks glossy-wet, sprinkle in 1 tablespoon extra oats or protein powder, then test again. A matte surface that keeps a round shape means the dry-to-wet balance is right.
- Flavor Boost • For more dessert-like flavor without extra sugar: Swap 1–2 tablespoons of the oats for additional shredded coconut or a spoonful of cocoa powder. You’ll get deeper flavor and a richer aroma without changing the 30-minute chill time or overall texture much.
- Make-Ahead • To keep them from drying out in the fridge: Pack the chilled balls into an airtight container in a single layer or with parchment between layers; use within 7 days.
If they seem firmer after day 3–4, roll briefly between your palms to warm and soften before eating.
– Scale • When doubling or halving the recipe: Keep the almond milk flexible—start with about ¾ of the scaled amount, then adjust 1 tablespoon at a time.
Different protein powders absorb liquid differently, so go by feel: they should be soft but able to hold a round shape before chilling.
Serving Tips
- Serve chilled with Greek yogurt and berries for a more filling snack plate.
- Pack a few in a small container alongside apple slices for an on-the-go mini meal.
- Arrange on a platter with mixed nuts, fresh fruit, and dark chocolate squares.
- Crumble over smoothie bowls or oatmeal for extra protein and texture.
- Skewer protein balls with strawberry and banana slices for easy grab-and-go bites.
Storage & Make-Ahead
These protein balls are perfect for make-ahead snacks.
Store in an airtight container in the refrigerator for up to 1 week.
For longer storage, freeze them for up to 2 months.
Freeze on a tray first, then transfer to a container.
Thaw a few minutes before eating.
Reheating
Gently reheat chilled or frozen protein balls briefly.
Use a microwave at low power, a warm (not hot) oven, or a covered skillet on low, just until slightly softened, never hot.
Protein Balls in Pop Culture
When I scroll, I notice how often they replace cookies in cozy night-in scenes or stand in for candy on movie sets, tucked into little compostable cups.
They’re props now—bite-sized shorthand for balance, hustle, and just enough indulgence.
When you mix a bowl at home, you’re not just making a snack; you’re stepping into that larger, rolling story.
Final Thoughts
Give these protein balls a try and see how they fit into your snack routine—then have fun tweaking the mix-ins, nut butters, and sweetness to make them truly your own.
Don’t forget to stash a batch in the fridge or freezer so you’ve always got a quick, satisfying bite ready to go.
Frequently Asked Questions
Can I Make These Protein Balls Completely Sugar-Free, Including No Honey or Chocolate?
Yes, you can. I’d swap honey and chocolate for a few extra tablespoons of almond butter, a splash of vanilla, and cinnamon. As you stir, taste; let the warm, nutty aroma guide your sweetness.
How Can I Calculate the Exact Macros per Protein Ball for My Diet Plan?
You’ll divide each ingredient’s calories, protein, carbs, and fat by 16, then total per ball; I picture you scribbling numbers, kitchen warm and sweet, turning math into bites that fit your plan.
Can I Dehydrate or Bake These for a Crunchy, Shelf-Stable Snack?
You can, but I wouldn’t rely on true shelf‑stable crunch. I’d bake them low and slow, around 250°F, until dry and golden, then store in an airtight jar, enjoying that toasty, nutty snap.
What’s the Best Way to Package These Protein Balls for Gifting or Mail Delivery?
I’d chill them firm, then tuck each into mini parchment candy cups, nestle in a snug tin with tissue, and mail insulated with bubble wrap; I’d label, “Keep cool—little bites of homemade comfort.”

Protein Balls Without Peanut Butter
Equipment
- 1 Mixing bowl
- 1 Wooden spoon
- 1 Measuring cups set
- 1 Measuring spoons set
- 1 Baking sheet
- 1 sheet parchment paper
- 1 airtight container
Ingredients
- 1 1/2 cup rolled oats
- 1 cup vanilla protein powder
- 1/4 cup almond butter
- 1/4 cup honey
- 1/4 cup unsweetened shredded coconut
- 1/4 cup mini dark chocolate chips
- 2 tablespoon ground flaxseed
- 2 tablespoon chia seeds
- 1 teaspoon vanilla extract
- 1/4 teaspoon fine sea salt
- 1 1/4–1/2 cup unsweetened almond milk
Instructions
- Line a baking sheet with parchment paper and set it aside.
- In a mixing bowl, combine rolled oats, protein powder, shredded coconut, ground flaxseed, chia seeds, and sea salt.
- Add almond butter, honey, vanilla extract, and 1/4 cup almond milk to the dry ingredients.
- Stir the mixture with a wooden spoon until it starts to come together, adding more almond milk 1 tablespoon at a time if the mixture is too dry.
- Fold in the mini dark chocolate chips until evenly distributed.
- Scoop out about 1 tablespoon of the mixture and roll it between your palms to form a firm ball.
- Place each ball onto the parchment-lined baking sheet, spacing them slightly apart.
- Continue rolling until all of the mixture has been used.
- Refrigerate the tray of protein balls for at least 30 minutes to firm up.
- Transfer the chilled protein balls to an airtight container and store in the refrigerator.
Notes

Cynthia Weatherford is a seasoned chef and culinary enthusiast who serves as the Recipe creator of Somonday. With decades of experience in the kitchen and a passion for exploring diverse cuisines, Cynthia brings a blend of creativity and technique to every dish. Known for transforming simple ingredients into show-stopping meals, Cynthia believes that cooking is an art form anyone can master. Dedicated to inspiring home cooks, Cynthia shares approachable recipes, pro tips, and culinary wisdom to make every meal memorable.