
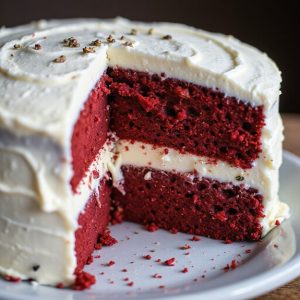
Picture the first slice: a velvety scarlet crumb that’s tender to the touch, cloaked in swirls of snowy frosting freckled with vanilla bean.
Imagine the gentle cocoa aroma meeting the perfume of real vanilla, a comfort that feels like a hug on a plate. This cake matters to me because it’s celebratory yet soothing—fancy enough for milestones, familiar enough to calm a hectic day.
It’s the kind of dessert that turns busy weeknights into little parties, anchors Sunday suppers, and makes birthdays feel properly crowned.
When my daughter’s school play ran late and dinner was a blur, a make-ahead red velvet tucked in the fridge saved the night—quiet slices at the table became our encore and decompression.
This recipe is practical, forgiving, and stunning, with pantry staples and a frosting that spreads like silk. Whether you’re baking ahead or frosting last-minute, you’ll get bakery polish without fuss. Ready? Let’s cook!
Why You’ll Love It
- Delivers classic tangy cocoa flavor with vanilla bean richness
- Bakes into ultra-moist, tender, velvety crumb layers
- Frosts smoothly with luscious, speckled cream cheese frosting
- Assembles easily with simple, reliable steps
- Perfect for celebrations and make-ahead planning
Ingredients
- 2 1/2 cups all-purpose flour, sifted — guarantees light crumb (use unbleached if possible)
- 1 1/2 cups granulated sugar — fine crystals dissolve evenly
- 1 teaspoon baking soda — fresh for proper lift
- 1 teaspoon fine salt — balances sweetness
- 2 tablespoons unsweetened natural cocoa powder — natural, not Dutch-process
- 1 1/2 cups neutral vegetable oil — yields a tender, moist crumb
- 1 cup buttermilk, room temperature — for tang and soft texture
- 2 large eggs, room temperature — emulsifies batter
- 2 tablespoons red liquid food coloring — adjust for vibrancy
- 2 teaspoons vanilla extract — pure extract for best flavor
- 1 teaspoon white vinegar — reacts with soda for rise
- 1/2 cup hot water — loosens batter for even bake
- 8 ounces cream cheese, softened — full-fat for stability
- 1/2 cup unsalted butter, softened — high-fat, good-quality
- 3 cups powdered sugar, sifted — lump-free, smooth frosting
- 1 vanilla bean, seeds scraped — real bean for speckled look
- 1/4 teaspoon fine salt — sharpens frosting flavor
- 1 teaspoon lemon juice, optional — brightens and balances richness
Step-by-Step Method
Preheat, Prepare Pans
Preheat oven to 350°F. Grease two 9-inch round pans and line bottoms with parchment. Lightly flour sides if desired. Make sure racks are centered for even baking.
Gather all equipment. This minimizes delays once the batter is mixed. Set out a cooling rack for later. Have a toothpick ready for doneness checks. Keep ingredients at room temperature.
Sift Dry Ingredients
Sift flour, granulated sugar, baking soda, fine salt, and natural cocoa powder into a large bowl. Break up lumps for an even crumb.
Whisk to combine thoroughly. Sifting aerates the mixture, promoting lift and tenderness. Keep the bowl nearby. Proper blending prevents pockets of cocoa. Set aside while mixing wet ingredients.
Whisk Wet Base
In a medium bowl, whisk vegetable oil, buttermilk, eggs, red food coloring, vanilla extract, and white vinegar until smooth. Emulsify fully for consistent texture.
The vinegar reacts with baking soda for lift. Adjust food coloring for desired hue. Avoid over-whisking. Aim for a uniform, silky mixture with no streaks. Set aside.
Combine, Then Add Hot Water
Pour wet ingredients into dry. Whisk gently until just combined. Don’t overmix to avoid toughness.
Stream in hot water and whisk until the batter is smooth and fluid. The hot water blooms cocoa and improves texture. Scrape the bowl. Batter should be pourable. Let large bubbles rise briefly before dividing.
Portion and Tap Pans
Divide batter evenly between prepared pans. Use a scale for precision if available. Smooth tops with a spatula.
Tap pans firmly on the counter to release air bubbles. This guarantees even layers without tunnels. Wipe spills from rims to prevent sticking. Transfer promptly to the oven to maintain leavening power.
Bake Until Just Set
Bake 28 to 32 minutes, rotating pans once if needed. Check with a toothpick near center; a few moist crumbs are ideal.
Avoid overbaking to keep layers tender. Edges should pull slightly from sides. If ovens run hot, start checking at 26 minutes. Remove to a rack immediately when done.
Cool and Release Layers
Cool cakes in pans on a rack for 10 minutes. Run a thin knife around edges.
Invert onto the rack, peel off parchment, and cool completely. Don’t frost warm cakes. Warmth melts frosting. Allow at least 45 to 60 minutes to fully cool. If domed, plan to level once cooled for stable stacking.
Beat Cream Cheese and Butter
In a mixer, beat softened cream cheese and unsalted butter on medium speed about 2 minutes until creamy and fluffy. Scrape bowl and beater.
Aim for no lumps. Proper aeration yields a light, spreadable frosting. Keep mixture cool to avoid looseness. If too soft, chill briefly and rebeat.
Add Sugar, Then Flavor
Gradually beat in sifted powdered sugar on low until incorporated. Increase to medium and whip until light.
Add vanilla bean seeds, fine salt, and lemon juice if using. Beat 30 seconds to combine. Adjust consistency with a spoonful of sugar to thicken or a teaspoon of cream to loosen. Keep smooth and glossy.
Level, Fill, and Stack
Level cooled cake layers if needed. Place one layer on a serving plate. Spread about 1 cup frosting evenly to edges.
Set second layer on top, centered. Press gently to adhere. Check for evenness from all angles. Prepare remaining frosting for exterior. Have an offset spatula ready for control and smoothness.
Crumb Coat and Chill
Apply a thin crumb coat over top and sides, sealing loose crumbs. Smooth lightly without pulling.
Chill the cake for 15 minutes to set the coat. This creates a clean base for the final layer. If kitchen is warm, extend chilling slightly. Keep leftover frosting covered to prevent crusting.
Finish Frosting and Serve
Spread remaining frosting generously over top and sides. Use long strokes for a smooth finish or create swirls.
Clean the spatula frequently. Chill 20 minutes for neater slices if warm. Slice with a hot, dry knife. Store covered in the refrigerator. Bring to room temperature before serving for best texture.
Ingredient Swaps
- No buttermilk: use 1 cup milk + 1 tablespoon white vinegar or lemon juice (rest 5 minutes), or plain kefir/yogurt thinned with milk.
- Dairy-free: swap buttermilk with unsweetened almond/soy milk + 1 tbsp vinegar; use vegan cream cheese and plant-based butter for frosting.
- Eggs-free: replace 2 eggs with 1/2 cup unsweetened applesauce or 2 flax eggs (2 tbsp ground flax + 6 tbsp water, rested).
- Gluten-free: use a 1:1 gluten-free baking flour blend; sift well and don’t overmix.
- Oil swap: use neutral oil (canola, grapeseed) or 1:1 melted refined coconut oil; for lighter crumb, 1 cup oil + 1/2 cup applesauce.
- Cocoa/color: if using Dutch-process cocoa, add 1/4 tsp extra vinegar; for gel color, start with 1 tsp and adjust.
- Sugar: sub 1:1 with superfine sugar; for less refined, use organic cane sugar (expect slightly denser crumb).
- Vanilla bean: replace with 2–3 tsp vanilla extract or 1 tsp vanilla paste.
- Cream cheese frosting on a budget: use half cream cheese + half butter, or stabilize with 2–3 tbsp cornstarch if too soft.
You Must Know
Doneness • If centers dome or edges pull away early, rotate pans and tent loosely with foil; this evens heat so the crumb sets without over-browning—look for tops springing back lightly and 205–210°F in the center at 28–32 minutes.
Troubleshoot • When batter looks curdled or too thick after combining, stream in 1–3 tablespoons hot water until glossy and ribboning; proper fluidity prevents tunneling—batter should flow in a thick ribbon within 3–4 seconds.
Scale • For a taller 3-layer cake, multiply ingredients by 1.5 and divide among three 8-inch pans; reduce bake time to about 22–26 minutes—layers are done when a toothpick shows a few moist crumbs and edges are 1/8 inch from the pan.
Flavor Boost • For deeper cocoa notes without dulling the red, bloom the cocoa in 1/2 cup of the hot water with 1 teaspoon espresso powder; enhances chocolate aroma—color should remain vibrant, adjust red coloring +1/2 to 1 teaspoon if needed.
Make-Ahead • To keep slices ultra-moist, wrap cooled layers tightly and chill 4–24 hours; frost cold for cleaner edges—finished cake holds 2–3 days refrigerated, bring to 65–70°F for 45–60 minutes before serving for best texture.
Serving Tips
- Slice with a warm, clean knife for neat layers and defined crumbs.
- Garnish with white chocolate curls and a few fresh raspberries for contrast.
- Serve chilled slightly; let stand 10 minutes for the creamiest frosting texture.
- Pair with hot coffee, black tea, or a lightly sweetened vanilla latte.
- Add a dollop of lightly sweetened whipped cream and a mint sprig.
Storage & Make-Ahead
Refrigerate frosted cake, covered, for up to 4 days.
Let slices sit 20–30 minutes before serving for best texture.
Unfrosted layers keep wrapped at room temperature 1 day or refrigerated 3 days.
Both layers and fully frosted cake freeze well, tightly wrapped, up to 2 months.
Thaw overnight in the fridge.
Reheating
Reheat slices gently: microwave 50% power 15–25 seconds.
Whole cake: 300°F oven, loosely tented, 8–12 minutes.
For sauce or frosting softening, use stovetop double boiler or warm water bath.
Avoid overheating.
Juneteenth Picnic Tradition
When June’s sun hangs high and a breeze stirs the oak leaves, I carry this red velvet cake to the picnic table like a bright ribbon in the heart of our Juneteenth spread.
I set it beside smoky ribs, collards, and cold watermelon, its crimson crumb a nod to resilience and joy.
You’ll taste buttermilk tenderness and cocoa’s whisper under vanilla bean speckles—comfort in every slice.
I cut generous wedges, wiping the knife for clean lines, and pass plates to elders first.
Keep the cake shaded; a light chill holds the frosting’s poise.
If the day runs warm, a quick rest in the cooler firms the layers.
Bring extra napkins, share seconds, and let conversation rise like a hymn over the clink of ice.
Final Thoughts
Ready to bake? Give this red velvet cake a whirl, then make it your own—try a touch of orange zest in the frosting or swap in gel coloring to dial in your perfect shade.
Can’t wait to hear how you personalize it!
Frequently Asked Questions
Can I Convert This Recipe for Cupcakes or a Sheet Cake?
Yes—easily. For cupcakes, fill liners two-thirds, bake 18–22 minutes. For a 9×13 sheet, bake 30–35 minutes. I’d keep temperature at 350°F, watch for moist crumbs, and frost generously—pillowy swirls or sweeping waves.
How Do I Bake This at High Altitude Without Sinking?
Reduce leavening slightly, add 2–3 tablespoons extra flour, increase oven to 365°F, and bake a bit shorter. I also add 1–2 tablespoons extra buttermilk, mix gently, and fill pans two-thirds—your crumb stays lofty, not sunken.
What’s the Best Natural Alternative to Red Food Coloring?
Beet powder’s my favorite: it tints batter a deep, rosy hue without off-flavors. I whisk 1–2 tablespoons into dry ingredients. For extra warmth, I blend a pinch of natural cocoa. You’ll get cozy color, no stains.
How Can I Make It Gluten-Free Without Compromising Texture?
Use a 1:1 gluten-free blend with xanthan gum, sift well, and add 2 tablespoons cornstarch. I whisk longer for aeration, rest batter 10 minutes, and bake slightly longer. You’ll keep tender crumbs and velvety, plush slices.
Can I Freeze Frosted Slices Individually for Later?
Yes—you can. I wrap each frosted slice snugly in parchment, then foil, and freeze. Later, I thaw in the fridge, unwrap, and let it warm slightly. The frosting stays lush, the crumb tender, indulgence preserved.
Red Velvet Cake with Vanilla Bean Frosting
Equipment
- 2 9-inch round cake pan
- 1 Mixing bowl large
- 1 Mixing bowl medium
- 1 stand mixer or hand mixer
- 1 Whisk
- 1 Spatula rubber
- 1 Measuring cups set
- 1 Measuring spoons set
- 1 sifter or fine-mesh sieve
- 1 Cooling rack
- 1 offset spatula
- 1 parchment paper sheet
Ingredients
- 2 1/2 cup all-purpose flour sifted
- 1 1/2 cup granulated sugar
- 1 teaspoon baking soda
- 1 teaspoon fine salt
- 2 tablespoon unsweetened natural cocoa powder
- 1 1/2 cup vegetable oil neutral
- 1 cup buttermilk room temperature
- 2 large eggs room temperature
- 2 tablespoon red liquid food coloring
- 2 teaspoon vanilla extract
- 1 teaspoon white vinegar
- 1/2 cup hot water
- 8 ounce cream cheese softened
- 1/2 cup unsalted butter softened
- 3 cup powdered sugar sifted
- 1 vanilla bean seeds scraped
- 1/4 teaspoon fine salt
- 1 teaspoon lemon juice optional
Instructions
- Preheat the oven to 350°F (175°C), grease two 9-inch round cake pans, and line the bottoms with parchment.
- In a large bowl sift together flour, sugar, baking soda, salt, and cocoa powder.
- In a medium bowl whisk together oil, buttermilk, eggs, food coloring, vanilla extract, and vinegar until smooth.
- Pour the wet ingredients into the dry ingredients and whisk until just combined, then whisk in the hot water until the batter is smooth and fluid.
- Divide the batter evenly between the prepared pans and tap pans gently to release air bubbles.
- Bake for 28 to 32 minutes until a toothpick inserted in the center comes out with a few moist crumbs.
- Cool cakes in pans on a rack for 10 minutes, then invert onto the rack, remove parchment, and cool completely.
- For the frosting beat cream cheese and butter on medium speed until creamy and fluffy, about 2 minutes.
- Add powdered sugar gradually on low speed until incorporated, then increase speed to medium and beat until light.
- Add vanilla bean seeds, salt, and lemon juice (if using), and beat 30 seconds to combine.
- Level cooled cake layers if needed, place one layer on a serving plate, and spread about 1 cup of frosting over the top.
- Set the second layer on top, apply a thin crumb coat over the entire cake, chill 15 minutes, then finish with the remaining frosting using an offset spatula.
Notes

Cynthia Weatherford is a seasoned chef and culinary enthusiast who serves as the Recipe creator of Somonday. With decades of experience in the kitchen and a passion for exploring diverse cuisines, Cynthia brings a blend of creativity and technique to every dish. Known for transforming simple ingredients into show-stopping meals, Cynthia believes that cooking is an art form anyone can master. Dedicated to inspiring home cooks, Cynthia shares approachable recipes, pro tips, and culinary wisdom to make every meal memorable.


