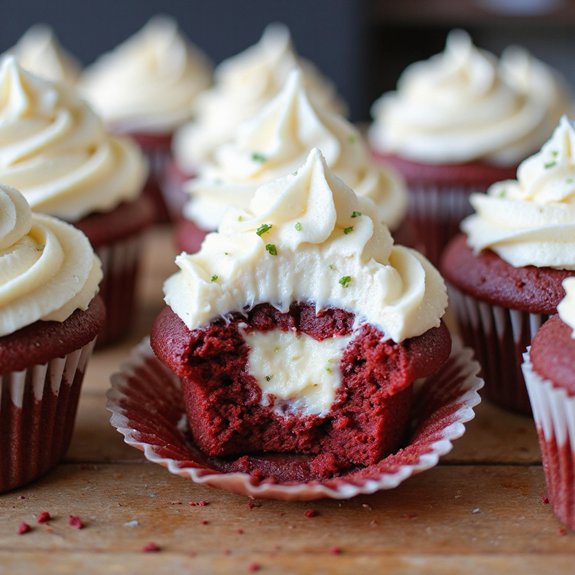
There’s something about peeling back a crimson cupcake wrapper to reveal a swirled, creamy cheesecake center that stops conversation mid-sentence.
Picture velvety red crumb, tender and moist, hugging a cool, tangy pocket of vanilla-scented cheesecake, all topped with a snowy crown of smooth cream cheese frosting.
These red velvet cheesecake cupcakes are a cozy, bakery-style dessert that feels special yet comes together surprisingly fast—perfect for sweet-tooth fans, beginners, and busy hosts alike.
I still remember a rainy Sunday when unexpected guests dropped by; a craving for “something special” turned into a quick batch of these cupcakes.
The kitchen filled with the warm aroma of cocoa and vanilla, and within an hour, everyone was gathered around the table, smiling, plates empty.
They’re ideal for last-minute cravings, easy entertaining, birthdays, potlucks, or a simple treat-yourself evening.
Ready to bring this dessert to life in your own kitchen?
Why You’ll Love It
- Delivers bold flavor: tangy cheesecake meets classic cocoa-kissed red velvet
- Impresses easily: bakery-style look with simple, home-baker-friendly steps
- Stays moist: oil-based batter and creamy centers prevent dryness
- Makes ahead beautifully: refrigerates 3–4 days with flavor improving over time
- Feels special-occasion worthy yet uses basic, easy-to-find ingredients
Ingredients
- 1 cup all-purpose flour — spoon and level for accuracy
- 2 tablespoons unsweetened cocoa powder — natural, not Dutch-processed
- 1/2 teaspoon baking soda — secures a tender crumb
- 1/4 teaspoon salt — fine sea or table salt
- 1/2 cup granulated sugar — standard white sugar for the batter
- 1/2 cup vegetable oil — neutral-flavored (like canola)
- 1 large egg, room temperature — helps batter mix evenly
- 1/2 cup buttermilk, room temperature — full-fat if available
- 1 tablespoon red liquid food coloring — classic bright red hue
- 1 teaspoon vanilla extract — pure vanilla for best flavor
- 1 teaspoon white vinegar — reacts with baking soda for lift
- 8 ounces cream cheese, softened — full-fat block style for filling
- 1/4 cup granulated sugar — sweetens cheesecake center
- 1 teaspoon vanilla extract — for cheesecake filling flavor
- 1 large egg yolk — enriches cheesecake filling
- 4 ounces cream cheese, softened — for frosting base
- 4 tablespoons unsalted butter, softened — room temp for smooth frosting
- 1 1/2 cups powdered sugar, sifted — prevents lumpy frosting
- 1 teaspoon vanilla extract — flavors the frosting
- 1–2 teaspoons milk, as needed — adjust for pipeable consistency
Step-by-Step Method
Preheat & Prep Pan
Preheat the oven to 350°F (175°C). Line a 12-cup muffin tin with paper liners so the cupcakes release cleanly. Clear your workspace and gather all ingredients and equipment. This makes mixing efficient and prevents overmixing later.
Set cream cheese, butter, eggs, and buttermilk out to reach room temperature.
Whisk Dry Ingredients
Whisk together the flour, cocoa powder, baking soda, and salt in a medium bowl. Break up any lumps for a smooth batter later.
Keep the mixture light and airy; don’t pack it down. Set the bowl aside.
Having the dry ingredients fully combined guarantees even flavor and consistent texture in every cupcake.
Mix Wet Ingredients
In another medium bowl, whisk the granulated sugar, vegetable oil, egg, buttermilk, red food coloring, vanilla extract, and white vinegar.
Whisk until the mixture is smooth and uniform in color. Make sure the egg and buttermilk are fully incorporated.
This base gives the cupcakes moisture, tenderness, and that classic red velvet tang.
Combine Wet & Dry Gently
Add the dry ingredients to the wet ingredients. Gently whisk or fold together just until no streaks of flour remain.
Avoid vigorous stirring, which can develop gluten and create dense cupcakes. Stop mixing as soon as the batter looks evenly combined.
Scrape the bowl’s sides and bottom with a spatula to incorporate everything.
Beat Cheesecake Filling
In a small bowl, beat the softened cream cheese with 1/4 cup granulated sugar, 1 teaspoon vanilla, and the egg yolk. Use an electric mixer or whisk until completely smooth and creamy.
Make sure no lumps remain for the best cheesecake texture. Set the filling aside; it should be thick yet spoonable to sit nicely in the batter.
Fill Liners with Batter
Divide the red velvet batter evenly among the 12 cupcake liners, filling each about two-thirds full. Use a scoop or spoon for even portions.
Avoid overfilling to prevent overflow while baking. Gently tap the pan once on the counter to release any large air bubbles and level the batter slightly before adding the filling.
Add Cheesecake Centers
Spoon about 1 tablespoon of cheesecake filling into the center of each cupcake. Gently press the filling so it sinks slightly into the batter but doesn’t reach the bottom.
The batter will rise around it during baking. Try to keep the filling centered. This step creates the creamy cheesecake surprise in each cupcake.
Bake & Test Doneness
Bake the cupcakes for 18–20 minutes. Check them near the earlier time.
Insert a toothpick into the cake portion, not the cheesecake center. It should come out with a few moist crumbs, not wet batter. The edges should look set and slightly springy.
Avoid overbaking to keep both cake and cheesecake moist.
Cool in Pan Briefly
Place the muffin pan on a wire rack. Let the cupcakes cool in the tin for about 10 minutes.
This brief rest helps them firm up, making removal easier. Don’t leave them too long, or condensation can make liners soggy.
Use this time to rinse and dry mixing tools for making the frosting.
Transfer & Cool Completely
Carefully remove the cupcakes from the pan and place them directly on the wire rack. Let them cool completely, about 1 hour.
Make certain they’re no longer warm before frosting, or the frosting will melt. Cooling fully also helps the cheesecake centers set to a creamy, sliceable texture without becoming runny.
Beat Frosting Base
Beat together 4 ounces softened cream cheese and 4 tablespoons softened butter in a bowl. Use an electric mixer for the fluffiest texture.
Mix until the mixture is smooth, light, and well combined with no visible lumps. Scrape down the sides of the bowl as needed. This creamy base is essential for a silky frosting.
Add Sugar & Adjust Consistency
Gradually add the sifted powdered sugar, mixing on low at first to avoid a sugar cloud. Once incorporated, beat in the vanilla extract.
Add 1–2 teaspoons milk, a little at a time, until the frosting is smooth and pipeable. It should hold its shape without being stiff.
Adjust with more sugar or milk as needed.
Frost & Chill Cupcakes
Frost the completely cooled cupcakes using an offset spatula or piping bag for a decorative swirl. Cover the tops generously to complement the cheesecake centers.
Arrange the frosted cupcakes on a tray and refrigerate for at least 20 minutes. This chilling time helps the cheesecake centers firm and the frosting set for cleaner serving.
Ingredient Swaps
- Buttermilk: Use 1/2 cup milk plus 1 1/2 teaspoons lemon juice or white vinegar; let sit 5 minutes.
- Vegetable oil: Swap with canola, light olive, or melted (cooled) coconut oil.
- Cream cheese: Neufchâtel (1/3 less fat) works fine; for lactose-sensitive, use a high‑quality lactose‑free cream cheese.
- Eggs: For the cupcake batter only, you can try 1/4 cup unsweetened applesauce or a flax “egg” (1 tbsp ground flax + 3 tbsp water); the cheesecake layer needs real egg for proper set.
- Food coloring: Use gel color (start with 1/4 teaspoon) or skip entirely for a natural, cocoa‑tinted cupcake.
You Must Know
– Doneness • If the cheesecake centers seem too jiggly
Gently nudge a cupcake: the cheesecake pool should wobble slightly only in the middle, while the red velvet edges look dry and spring back when tapped; a tester in the cake portion should come out with a few moist crumbs, not wet batter. This keeps the centers creamy instead of runny or overbaked.
– Avoid • If your batter looks brown instead of red
Add a few extra drops of liquid or gel coloring until the raw batter is a shade darker than you want the baked color to be. The hue lightens and dulls in the 18–20 minutes in the oven, so starting slightly more intense keeps that classic red velvet look.
– Troubleshoot • If the cheesecake filling sinks to the bottom or leaks out
Keep each liner only about two-thirds full of red velvet, then place the cheesecake spoonful right in the center without touching the edges. This gives the filling a “nest” so it stays suspended in the middle as it sets during the 18–20 minute cook time.
– Make-Ahead • For easier party timing
Chill the unfrosted cupcakes on a rack, then cover and refrigerate up to 2 days; add the cream cheese frosting within 4 hours of serving and chill for at least 20 minutes. This schedule lets the cheesecake layer fully firm while the frosting stays fresh and soft.
– Scale • To double or halve the recipe
Multiply or divide all ingredients by 2 (for 24 cupcakes) or by ½ (for 6 cupcakes), but keep the oven at 350°F (175°C) and start checking doneness at 15 minutes. Pan position and bake time stay nearly the same; the visual cues (set edges, slight center jiggle) are your main guide.
Serving Tips
- Top with red velvet crumbs and a fresh raspberry for elegant contrast.
- Serve on a white platter with chocolate drizzle and scattered mini chocolate chips.
- Pair with hot coffee, black tea, or a small glass of cold milk.
- Add a dollop of whipped cream and a light dusting of cocoa powder.
- Present in decorative cupcake wrappers for parties, grouped on a tiered stand.
Storage & Make-Ahead
Store frosted red velvet cheesecake cupcakes covered in the refrigerator for 3–4 days.
They’re great for making a day ahead; chilling firms the cheesecake centers.
For longer storage, freeze well-wrapped, unfrosted cupcakes up to 2 months.
Then thaw in the fridge and frost before serving.
Reheating
Reheat cupcakes gently to preserve moisture.
Microwave 5–10 seconds on low power.
Or warm in a 300°F (150°C) oven for 5–8 minutes.
Avoid stovetop reheating to prevent uneven heating.
Red Velvet’s Pop-Culture Glow
Everywhere I look, red velvet feels like a tiny spotlight on dessert menus, movie nights, and Instagram feeds—its deep crimson crumb and snowy cream cheese swirls practically made for close‑ups.
I see it glowing under café glass, framed like edible velvet theater curtains, with that hint of cocoa promising something richer than a plain vanilla cupcake.
When I make these red velvet cheesecake cupcakes, I feel like I’m recreating that pop‑culture magic at home.
The batter stains the bowl a movie‑poster red, the cheesecake centers bake into hidden, creamy cameos, and the frosted tops look ready for a slow‑motion unwrapping shot. You’re not just baking dessert—you’re staging a little scene that begs to be shared, then devoured.
Final Thoughts
Give these Red Velvet Cheesecake Cupcakes a try and enjoy the rich, creamy surprise in every bite.
Feel free to tweak the frosting, coloring, or filling to make them perfectly your own.
Frequently Asked Questions
Can I Make These Cupcakes Gluten-Free Without Affecting the Cheesecake Texture?
Yes, you can; swap the flour for a good 1:1 gluten‑free blend and keep the cheesecake layer unchanged. I imagine you biting into tender crumbs, creamy tang, and warmth wafting like vanilla‑scented kitchen light.
How Can I Prevent Red Food Coloring From Staining My Hands and Equipment?
I slip on gloves, oil my measuring spoons, and cover my counter with parchment so the scarlet can’t cling. If it splashes, I wipe it fast with hot, soapy water before it settles.
Are These Cupcakes Safe to Freeze With the Cream Cheese Frosting Already Piped?
Yes, you can freeze them frosted. I chill them first until the cream cheese sets, then wrap each cupcake snugly. When you thaw them, the frosting softens into a velvety crown over tender, fragrant cake.
What’s the Best Way to Ship These Cupcakes Without Ruining the Cheesecake Centers?
I’d chill them overnight, freeze briefly, then nestle each in a snug cupcake pod. I’d pack with ice packs in an insulated box, ship overnight, so the creamy centers arrive cool, lush, and dreamy.
Can I Scale This Recipe for a Mini Cupcake or Jumbo Cupcake Pan?
Yes, you can. For mini pans, I’d bake tiny, two-bite domes, checking doneness around 10 minutes; for jumbo, I’d fill generously, bake closer to 25 minutes, watching fragrant, gently domed tops for cues.

Red Velvet Cheesecake Cupcakes
Equipment
- 1 12-cup muffin tin
- 12 paper cupcake liners
- 2 medium mixing bowls
- 2 small mixing bowls
- 1 electric hand mixer or stand mixer
- 1 Whisk
- 1 Rubber spatula
- 1 Measuring cups set
- 1 Measuring spoons set
- 1 wire cooling rack
- 1 toothpick or cake tester
Ingredients
- 1 cup all-purpose flour
- 2 tablespoon unsweetened cocoa powder
- 1/2 teaspoon baking soda
- 1/4 teaspoon salt
- 1/2 cup granulated sugar
- 1/2 cup vegetable oil
- 1 large egg room temperature
- 1/2 cup buttermilk room temperature
- 1 tablespoon red liquid food coloring
- 1 teaspoon vanilla extract
- 1 teaspoon white vinegar
- 8 ounce cream cheese softened
- 1/4 cup granulated sugar for cheesecake filling
- 1 teaspoon vanilla extract for cheesecake filling
- 1 large egg yolk for cheesecake filling
- 4 ounce cream cheese softened for frosting
- 4 tablespoon unsalted butter softened for frosting
- 1 1/2 cup powdered sugar sifted for frosting
- 1 teaspoon vanilla extract for frosting
- 1 1–2 teaspoons milk as needed for frosting
Instructions
- Preheat the oven to 350°F (175°C) and line a 12-cup muffin tin with paper cupcake liners.
- In a medium bowl whisk together the flour, cocoa powder, baking soda, and salt until well combined.
- In another medium bowl whisk together the granulated sugar, vegetable oil, egg, buttermilk, red food coloring, vanilla extract, and white vinegar until smooth.
- Add the dry ingredients to the wet ingredients and gently whisk or fold until just combined and no streaks of flour remain.
- In a small bowl beat the softened cream cheese with 1/4 cup granulated sugar, 1 teaspoon vanilla, and the egg yolk until smooth and creamy.
- Divide the red velvet batter evenly among the 12 liners, filling each about two-thirds full.
- Spoon about 1 tablespoon of the cheesecake filling into the center of each cupcake, gently pressing so it sinks slightly.
- Bake the cupcakes for 18–20 minutes, or until the edges are set and a toothpick inserted into the cake portion comes out with a few moist crumbs.
- Place the pan on a wire rack and let the cupcakes cool in the tin for 10 minutes.
- Carefully transfer the cupcakes from the pan to the wire rack and let cool completely, about 1 hour.
- For the frosting beat together 4 ounces cream cheese and 4 tablespoons butter until light and fluffy.
- Gradually add the powdered sugar, then beat in the vanilla extract and enough milk to reach a smooth, pipeable consistency.
- Once the cupcakes are completely cool, frost the tops with the cream cheese frosting using a spatula or piping bag.
- Refrigerate the frosted cupcakes for at least 20 minutes before serving to help the cheesecake centers firm up.
Notes

Cynthia Weatherford is a seasoned chef and culinary enthusiast who serves as the Recipe creator of Somonday. With decades of experience in the kitchen and a passion for exploring diverse cuisines, Cynthia brings a blend of creativity and technique to every dish. Known for transforming simple ingredients into show-stopping meals, Cynthia believes that cooking is an art form anyone can master. Dedicated to inspiring home cooks, Cynthia shares approachable recipes, pro tips, and culinary wisdom to make every meal memorable.


