There’s something about a tray of red velvet cupcakes that instantly brightens a room.
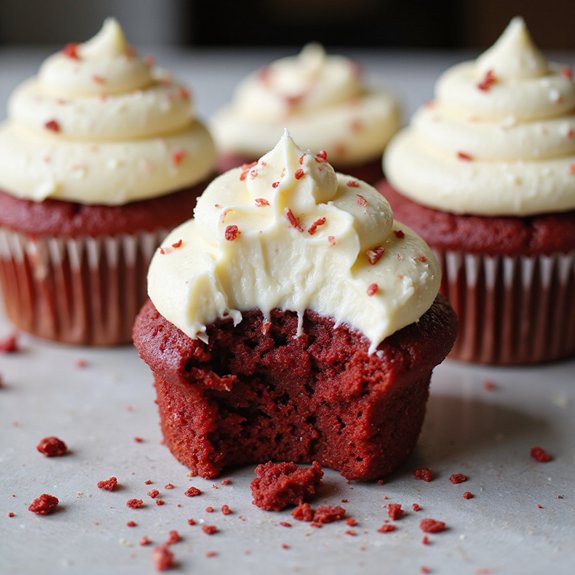
Picture plush, ruby-red cakes crowned with swirls of velvety cream cheese frosting, the sweet aroma of vanilla and cocoa drifting from your oven.
This is a cozy, bakery-style dessert that feels special yet comes together quickly—perfect when you need something impressive without spending all day in the kitchen.
These cupcakes are ideal for sweet-tooth fans, beginners, and busy hosts who want a foolproof treat.
I still remember a rainy Sunday when unexpected guests dropped by; I whipped up a batch of these, and by the time we’d finished catching up, the cupcakes were cooling on the counter, their soft crumb still warm.
They turned a dull, gray afternoon into a small celebration.
Whether it’s birthday parties, last-minute cravings, or easy entertaining, these cupcakes always deliver. Ready to bring this dish to life?
Why You’ll Love It
- Delivers classic red velvet flavor with rich cocoa and vanilla notes
- Bakes into ultra-soft, tender crumbs thanks to buttermilk and gentle mixing
- Crowds love the tangy cream cheese frosting on top
- Uses simple ingredients and basic equipment most home kitchens have
- Perfectly portioned for parties, holidays, or everyday dessert cravings
Ingredients
- 1 1/4 cups all-purpose flour, sifted — spoon and level for accuracy
- 2 tablespoons unsweetened cocoa powder, sifted — natural, not Dutch-processed
- 1/2 teaspoon baking soda — check it’s fresh for proper rise
- 1/2 teaspoon fine salt — fine grains disperse more evenly
- 3/4 cup granulated sugar — regular white sugar works best
- 1/2 cup unsalted butter, softened — should dent easily when pressed
- 2 large eggs, room temperature — leave out 30 minutes before mixing
- 1 teaspoon vanilla extract — pure extract for best flavor
- 1/2 cup buttermilk, room temperature — full-fat if available
- 1 tablespoon red liquid food coloring — adjust for desired color intensity
- 1 teaspoon white vinegar — reacts with baking soda for tenderness
- 8 ounces cream cheese, softened — use block style, not whipped
- 1/4 cup unsalted butter, softened — for a smooth frosting texture
- 1 3/4 cups powdered sugar, sifted — prevents lumpy frosting
- 1 teaspoon vanilla extract — adds classic cream cheese frosting flavor
- 1 pinch fine salt — balances the sweetness of the frosting
Step-by-Step Method
Preheat the Oven & Prep the Pan
Preheat the oven to 350°F (175°C). Line a standard 12-cup muffin tin with paper cupcake liners. Make sure the rack is in the center of the oven for even baking. Set out all ingredients and let cold items come to room temperature. This helps the batter mix smoothly and the cupcakes bake evenly.
Combine the Dry Ingredients
Whisk together the sifted flour, cocoa powder, baking soda, and salt in a medium bowl. Break up any lumps so the mixture is light and uniform. Keep this bowl nearby.
Properly combining dry ingredients guarantees the leavening and cocoa are evenly distributed, which helps the cupcakes rise and bake consistently.
Cream the Butter & Sugar
Beat the softened butter and granulated sugar in another medium bowl using an electric mixer. Mix on medium speed for 2–3 minutes. Aim for a light, fluffy texture and a pale color.
Scrape down the bowl once or twice. This step incorporates air, which gives the cupcakes a tender crumb.
Add the Eggs & Vanilla
Add the eggs one at a time to the butter mixture. Beat well after each addition until fully incorporated. Mix in the vanilla extract until evenly blended.
Scrape the sides and bottom of the bowl to catch any unmixed bits. Don’t overbeat at this stage; just mix until smooth and uniform.
Mix the Buttermilk, Color & Vinegar
Stir together the buttermilk, red liquid food coloring, and white vinegar in a small bowl. Mix until the color is evenly distributed and the liquid is bright red.
Adjust the coloring slightly if needed. This mixture gives the cupcakes their signature hue and tangy flavor while helping with tenderness and rise.
Alternate Dry & Wet Additions
Add one-third of the dry ingredients to the butter mixture. Mix on low just until combined. Pour in half of the buttermilk mixture and mix gently.
Repeat with another third of the dry ingredients, the remaining buttermilk, then the last dry portion. Mix only until a smooth batter forms to avoid overworking the flour.
Fill the Liners & Bake
Divide the batter evenly among the 12 cupcake liners, filling each about two-thirds full. Smooth the tops lightly if needed.
Place the pan in the preheated oven. Bake for 16–18 minutes, or until a toothpick inserted in the center comes out clean or with a few moist crumbs attached.
Cool the Cupcakes Completely
Transfer the muffin tin to a wire cooling rack. Let the cupcakes cool in the pan for 5 minutes to set their structure.
Carefully remove each cupcake from the tin and place them directly on the rack. Allow them to cool completely, about 25 minutes, before adding any frosting so it doesn’t melt.
Beat the Cream Cheese & Butter
While the cupcakes cool, beat the softened cream cheese and 1/4 cup softened butter together in a clean bowl. Mix until smooth, creamy, and lump-free.
Use medium speed and scrape the bowl once or twice. This creates a silky base for the frosting that spreads easily and holds its shape on the cupcakes.
Add Sugar, Vanilla & Salt
Gradually add the sifted powdered sugar to the cream cheese mixture. Beat on low at first to avoid clouds of sugar, then increase speed.
Mix in the vanilla extract and a pinch of salt. Continue beating until the frosting is thick, smooth, and spreadable. Adjust consistency with a little more sugar if needed.
Frost & Finish the Cupcakes
Make sure the cupcakes are fully cool. Use a spatula or piping bag to frost each cupcake generously with the cream cheese frosting.
Swirl or decorate as desired. For a neater look, wipe the edges of the liners if needed. Serve immediately, or briefly chill to help the frosting set before serving.
Store & Serve for Best Texture
Cover any leftover cupcakes and refrigerate for up to three days. Bring them to room temperature before serving so the cake softens and flavors bloom.
In very warm climates, chill freshly frosted cupcakes 15–20 minutes so the frosting firms slightly. Enjoy the cupcakes when they feel soft, moist, and lightly cool.
Ingredient Swaps
- No buttermilk? Use ½ cup milk + 1½ teaspoons white vinegar or lemon juice; stir and rest 5 minutes before using.
- No cake flour? You can keep the all-purpose as written, or for extra softness replace 2 tablespoons of the flour with cornstarch.
- Food coloring alternatives: Use red gel color (more vivid, less liquid) or 1–2 tablespoons beetroot powder for a more natural tint (color will be duller).
- Dairy-free: Swap butter in batter and frosting for a good vegan baking butter, and use vegan cream cheese for the frosting.
- Gluten-free: Use a 1:1 gluten-free all-purpose baking blend in place of the flour; avoid overmixing to keep cupcakes tender.
You Must Know
– Make-Ahead – To spread out the work, chill the unfrosted, fully cooled cupcakes in an airtight container for up to 2 days or freeze up to 1 month; thaw at room temp for about 45–60 minutes, then frost just before serving for best texture.
Serving Tips
- Top with fresh berries or chocolate shavings for color and texture contrast.
- Serve on a white platter to highlight the vibrant red crumb.
- Pair with hot coffee, black tea, or a glass of cold milk.
- Garnish each plate with a drizzle of chocolate or raspberry sauce.
- For parties, arrange on a tiered stand with extra frosting rosettes on top.
Storage & Make-Ahead
Red velvet cupcakes keep in the fridge, covered, for up to 3 days.
Bring to room temperature before serving for best flavor and texture.
You can bake them a day ahead and frost later.
Unfrosted cupcakes also freeze well for about 2 months.
Thaw in the fridge, then frost.
Reheating
Reheat cupcakes gently: in microwave at 50% power for 8–12 seconds.
In a 300°F (150°C) oven for 5–8 minutes, loosely covered.
Avoid stovetop direct heat to prevent drying.
Red Velvet in Pop Culture
On café counters, bakery windows, and even in glossy movie close-ups, red velvet cupcakes keep stealing the spotlight like little edible valentines.
I see them everywhere: perched beside hipster lattes, stacked in YouTube baking hauls, clutched in slow-motion rom-com scenes where the camera lingers on that scarlet crumb and swirl of frosting.
When a show wants shorthand for “treat yourself,” it’s often red velvet. That deep crimson feels a little daring, a little glamorous—more statement accessory than dessert.
Music videos tuck them into party spreads; Instagram turns them into props, filters catching every shine of cream cheese frosting. When I bake them at home, I feel like I’m recreating a tiny piece of that cozy, cinematic magic just for you.
Final Thoughts
Now you’ve got everything you need to bake a batch of soft, tangy red velvet cupcakes with creamy frosting—give them a try and see how they turn out in your kitchen.
Feel free to tweak the recipe with different decorations or extra vanilla to make them truly your own.
Frequently Asked Questions
Can I Make These Red Velvet Cupcakes Gluten-Free Without Sacrificing Texture?
Yes, you can. I’d swap the flour for a good 1:1 gluten‑free blend, add an extra tablespoon buttermilk, and let the batter rest; you’ll still bite into tender, velvety crumbs and lush cream cheese frosting.
How Can I Adapt This Recipe for High-Altitude Baking Conditions?
You can, and I’d gently adjust for you: I’d reduce sugar by 1–2 tablespoons, flour by 2 tablespoons, increase oven to 365°F, add 1 extra tablespoon buttermilk, and shorten baking time slightly.
What Natural Alternatives Can I Use Instead of Red Food Coloring?
You can swap in beet powder or beet puree; I love how it blushes the batter a soft rose. Pomegranate or raspberry juice concentrate also works, tinting everything gently while adding a whisper of tart, jeweled sweetness.
How Do I Scale This Recipe for a Large Party or Wedding?
I’d multiply every ingredient by your servings ÷ 12, then bake in small batches so each tray rises evenly. I’d cool, frost, and refrigerate them, filling long rustic stands with soft, creamy, ruby-topped treats.
What’s the Best Way to Ship These Cupcakes Without Ruining the Frosting?
I’d chill them first, nestle each in a snug cupcake insert, then box and cushion with bubble wrap. Ship overnight with ice packs, so the frosting arrives cool, swirled, and temptingly intact.

Red Velvet Cupcakes
Equipment
- 1 standard 12-cup muffin tin
- 12 paper cupcake liners
- 2 medium mixing bowls
- 1 Small bowl
- 1 Electric mixer or whisk
- 1 Rubber spatula
- 1 measuring cup set
- 1 measuring spoon set
- 1 wire cooling rack
- 1 toothpick
Ingredients
- 1 1/4 cup all-purpose flour sifted
- 2 tablespoon unsweetened cocoa powder sifted
- 1/2 teaspoon baking soda
- 1/2 teaspoon fine salt
- 3/4 cup granulated sugar
- 1/2 cup unsalted butter softened
- 2 large eggs room temperature
- 1 teaspoon vanilla extract
- 1/2 cup buttermilk room temperature
- 1 tablespoon red liquid food coloring
- 1 teaspoon white vinegar
- 8 ounce cream cheese softened for frosting
- 1/4 cup unsalted butter softened for frosting
- 1 3/4 cup powdered sugar sifted for frosting
- 1 teaspoon vanilla extract for frosting
- 1 pinch fine salt for frosting
Instructions
- Preheat the oven to 350°F (175°C) and line the muffin tin with paper cupcake liners.
- In a medium bowl, whisk together the flour, cocoa powder, baking soda, and salt.
- In another bowl, beat the softened butter and granulated sugar with an electric mixer until light and fluffy, about 2–3 minutes.
- Add the eggs to the butter mixture one at a time, beating well after each addition, then mix in the vanilla extract.
- In a small bowl, stir together the buttermilk, red food coloring, and vinegar until evenly combined.
- Add one-third of the dry ingredients to the butter mixture and mix on low just until combined.
- Pour in half of the buttermilk mixture and mix gently, then repeat alternating dry and wet ingredients, ending with the dry, mixing just until a smooth batter forms.
- Divide the batter evenly among the 12 liners, filling each about two-thirds full.
- Bake the cupcakes for 16–18 minutes, or until a toothpick inserted in the center comes out clean or with a few moist crumbs.
- Transfer the pan to a wire rack and let the cupcakes cool in the pan for 5 minutes.
- Remove the cupcakes from the pan and let them cool completely on the wire rack, about 25 minutes.
- While the cupcakes cool, beat the cream cheese and 1/4 cup softened butter together until smooth and creamy.
- Gradually add the powdered sugar, vanilla extract, and pinch of salt, beating until the frosting is thick, smooth, and spreadable.
- Once the cupcakes are completely cool, frost them with the cream cheese frosting using a spatula or piping bag.
Notes

Cynthia Weatherford is a seasoned chef and culinary enthusiast who serves as the Recipe creator of Somonday. With decades of experience in the kitchen and a passion for exploring diverse cuisines, Cynthia brings a blend of creativity and technique to every dish. Known for transforming simple ingredients into show-stopping meals, Cynthia believes that cooking is an art form anyone can master. Dedicated to inspiring home cooks, Cynthia shares approachable recipes, pro tips, and culinary wisdom to make every meal memorable.


