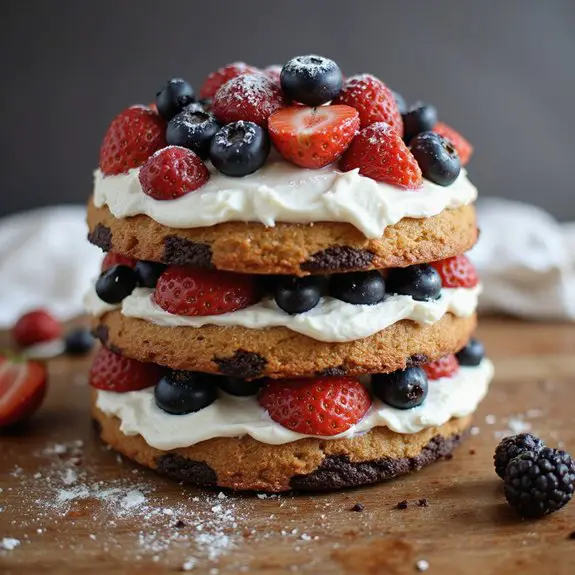
Imagine a cake that combines the rich aroma of dark chocolate with the vibrant colors of fresh berries, creating a comforting masterpiece that feels like a warm hug on a chilly day.
As you slice into this Rustic Forest Cake, the layers reveal a delightful contrast: the soft, moist texture of chocolate cake paired with the dense, chewy brownie cookie layer, all topped with a cloud-like whipped cream.
This cake holds a special place in my heart; it was the perfect solution when I needed a show-stopping dessert for a family celebration. Its rustic charm and indulgent flavors made it a hit, leaving everyone asking for seconds.
Whether you’re planning a cozy Sunday supper or looking for a sweet escape during a busy weeknight, this cake is your new go-to dessert.
Ready? Let’s cook!
Why You’ll Love It
- Delivers bold flavor with rich cocoa and fresh berries.
- Uses pantry staples like flour, sugar, and cocoa powder.
- Impresses guests with its elegant presentation and layered design.
- Offers versatility with customizable fruit toppings.
- Freezes beautifully for make-ahead convenience.
Ingredients
- 1 cup unsalted butter — softened, for easier creaming
- 2 cups granulated sugar — enhances sweetness
- 4 large eggs — provides structure
- 1 teaspoon vanilla extract — adds flavor depth
- 1 cup all-purpose flour — the cake’s base
- 3/4 cup cocoa powder — choose high-quality for best taste
- 1/2 teaspoon baking powder — aids in rising
- 1/4 teaspoon salt — balances flavors
- 1 cup heavy cream — chilled, for better whipping
- 1/2 cup powdered sugar — sweetens whipped cream
- 1/2 cup dark chocolate chips — melts for a brownie layer
- 1/2 cup fresh berries, assorted — for garnish
- 1 tablespoon confectioners’ sugar — for dusting, adds elegance
Step-by-Step Method
Preheat your oven to 350°F (175°C). Grease a 9-inch round cake pan with butter to prevent sticking. This step guarantees the cake bakes evenly and is easy to remove from the pan later.
Cream Ingredients
Cream together the softened butter and granulated sugar in a mixing bowl until light and fluffy. Use an electric mixer or hand whisk. This creates a smooth base for your cake by incorporating air into the mixture.
Beat & Mix Eggs
Beat in the eggs one at a time. Add the vanilla extract. Continue mixing until fully incorporated. This step guarantees a smooth batter and prevents any egg from curdling in the mixture.
Combine Dry Ingredients
Whisk together the all-purpose flour, cocoa powder, baking powder, and salt in a separate bowl. This combines the dry ingredients evenly and breaks up any clumps in the cocoa powder.
Fold & Blend
Gradually add the dry ingredients to the wet mixture. Use a spatula to fold them in gently. Mix until just combined, avoiding overmixing to maintain the cake’s light texture.
Pour & Bake
Pour the batter into the prepared cake pan. Smooth the top with a spatula. Bake for 25-30 minutes or until a toothpick inserted in the center comes out clean. Cool in the pan for 10 minutes before transferring to a cooling rack.
Prepare Brownie Cookie
Spread chocolate chips evenly on a baking sheet. Bake for 15 minutes. Allow the brownie cookie layer to cool completely. This forms a delicious layer that adds texture and flavor to the cake.
Whip Cream
Whip the heavy cream and powdered sugar in a mixing bowl until stiff peaks form. Chill the whipped cream to help it hold its shape when serving.
Slice & Assemble
Slice the cooled cake horizontally to create two layers. Place the brownie cookie layer on top of one cake layer. Spread half of the whipped cream over it.
Layer & Decorate
Add the second cake layer on top. Spread the remaining whipped cream over it. Decorate with fresh berries and dust with confectioners’ sugar. This final touch adds a sweet and elegant finish to your Rustic Forest Cake.
Ingredient Swaps
- For a dairy-free version, replace the unsalted butter with a plant-based margarine and the heavy cream with coconut cream.
- Use gluten-free all-purpose flour as a substitute for regular flour to make the cake gluten-free.
- If cocoa powder is unavailable, you can use carob powder as an alternative.
- Substitute fresh berries with seasonal fruits available in your region.
You Must Know
- Preheat: Always preheat your oven to 350°F (175°C) to guarantee even baking and the best cake texture.
- Cream Butter Properly: Ascertain your butter is softened to room temperature for smoother creaming with sugar, resulting in a lighter cake texture.
- Gentle Mixing: Carefully fold the dry ingredients into the wet mixture to avoid over-mixing, which helps maintain the cake’s light and fluffy texture.
- Cool Completely: Allow both the cake and brownie cookie layer to cool completely before assembling to prevent the whipped cream from melting.
- Whip Cream to Stiff Peaks: Whip the heavy cream and powdered sugar until stiff peaks form to guarantee stability and structure in the cake layers.
Serving Tips
- Serve with a side of vanilla ice cream to complement the rich chocolate flavors.
- Pair with a glass of chilled dessert wine or a hot cup of coffee.
- Garnish with extra fresh berries for added color and freshness.
- Use a cake stand for an elegant presentation during gatherings.
Storage & Make-Ahead
The Rustic Forest Cake can be stored in the refrigerator for up to 3 days.
This guarantees it remains fresh and flavorful.
For make-ahead convenience, you can freeze the assembled cake.
Wrap it tightly in plastic wrap and foil, and it will keep for up to 1 month.
Thaw in the fridge before serving.
Reheating
To gently reheat Rustic Forest Cake, use a microwave on low power for short intervals.
Alternatively, use an oven at 300°F for 10 minutes.
You can also use a stovetop with a double boiler.
Culinary Traditions
After savoring the Rustic Forest Cake, I often find myself pondering the rich culinary traditions that influence such delightful creations.
Each bite transports me to my grandmother’s cozy kitchen, where she’d weave stories of old-world desserts, infusing each tale with laughter and love. Her hands would dance over the ingredients, effortlessly blending flavors just as generations before her had done.
This cake, with its luscious layers of brownie and cookie, echoes those cherished memories. The juxtaposition of textures reminds me of her tales of European pastries and American innovation.
As I dust confectioners’ sugar over the berries, I feel a profound connection to those who cooked before me, each recipe a tribute to time and tradition, binding us through taste.
Final Thoughts
Why not give the Rustic Forest Cake a try and enjoy a delightful treat?
Feel free to tweak the recipe to suit your taste, whether it’s adding more berries or experimenting with different flavors!
Frequently Asked Questions
Can I Use Frozen Berries Instead of Fresh Ones?
I’ve used frozen berries before, and they work wonderfully! Just thaw and drain them well to avoid excess moisture. Their burst of color and flavor reminded me of picking fresh berries on a crisp morning. Enjoy!
How Can I Make This Cake Gluten-Free?
I’d swap all-purpose flour with a gluten-free blend. I once baked for a celiac friend, and the cake turned out dreamy! The rich chocolate aroma filled the kitchen, and nobody noticed the gluten was missing.
What Can I Substitute for Heavy Cream?
When I ran out of heavy cream, I used coconut cream instead. Its rich texture and subtle sweetness elevated the dessert. It reminded me of tropical vacations, adding a unique twist that had everyone asking for seconds!
Is There a Dairy-Free Alternative for Butter?
I’ve swapped butter for coconut oil before, and it worked wonders! The aroma reminded me of a tropical breeze, adding a delightful twist to my dessert. It’s a simple switch that’ll make your dish dairy-free and delicious!
Can I Add Nuts to the Brownie Cookie Layer?
Absolutely, I love adding a handful of chopped nuts to my brownie cookie layer! It adds a delightful crunch and nutty aroma. Pecans or walnuts work best, reminding me of cozy autumn days baking with family.

Rustic Forest Cake with Brownie Cookie Layers
Equipment
- 2 Mixing bowl
- 1 electric mixer or hand whisk
- 1 Baking sheet
- 1 9-inch round cake pan
- 1 Cooling rack
- 1 Spatula
- 1 Knife
Ingredients
- 1 cup unsalted butter softened
- 2 cup granulated sugar
- 4 large eggs
- 1 teaspoon vanilla extract
- 1 cup all-purpose flour
- 3/4 cup cocoa powder
- 1/2 teaspoon baking powder
- 1/4 teaspoon salt
- 1 cup heavy cream
- 1/2 cup powdered sugar
- 1/2 cup dark chocolate chips
- 1/2 cup fresh berries assorted
- 1 tablespoon confectioners’ sugar for dusting
Instructions
- Preheat your oven to 350°F (175°C) and grease the cake pan with butter.
- In a mixing bowl, cream together the butter and granulated sugar until light and fluffy.
- Beat in the eggs one at a time, then add the vanilla extract.
- In another bowl, whisk together flour, cocoa powder, baking powder, and salt.
- Gradually add the dry ingredients to the wet ingredients, mixing until combined.
- Pour the batter into the prepared cake pan and smooth the top with a spatula.
- Bake in the preheated oven for 25-30 minutes or until a toothpick inserted in the center comes out clean.
- Allow the cake to cool in the pan for 10 minutes, then transfer to a cooling rack.
- For the brownie cookie layer, spread chocolate chips evenly on a baking sheet and bake for 15 minutes.
- Allow the brownie cookie layer to cool completely before assembling the cake.
- Whip the heavy cream and powdered sugar in a mixing bowl until stiff peaks form.
- Once the cake is fully cooled, slice it horizontally to create two layers.
- Place the brownie cookie layer on top of one cake layer.
- Spread half of the whipped cream over the brownie cookie layer.
- Add the second cake layer on top and spread the remaining whipped cream over it.
- Decorate with fresh berries and dust with confectioners’ sugar.
Notes

Cynthia Weatherford is a seasoned chef and culinary enthusiast who serves as the Recipe creator of Somonday. With decades of experience in the kitchen and a passion for exploring diverse cuisines, Cynthia brings a blend of creativity and technique to every dish. Known for transforming simple ingredients into show-stopping meals, Cynthia believes that cooking is an art form anyone can master. Dedicated to inspiring home cooks, Cynthia shares approachable recipes, pro tips, and culinary wisdom to make every meal memorable.


