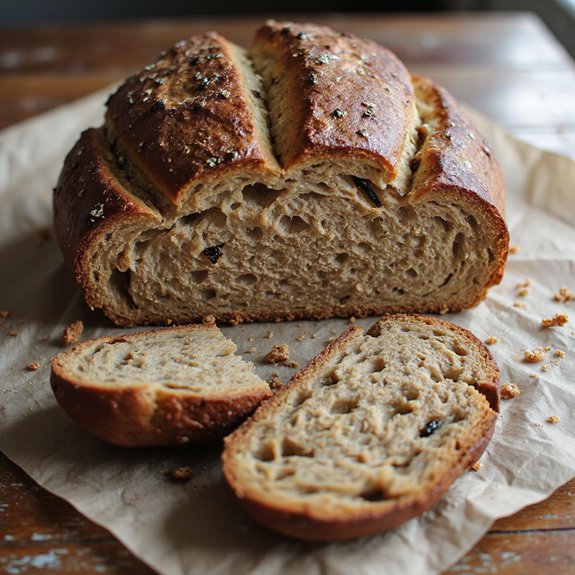
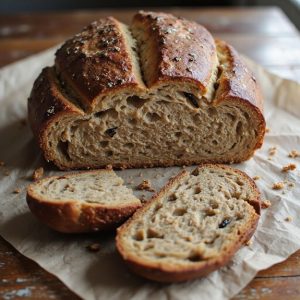
There’s something about the deep, earthy aroma of rye sourdough drifting from the oven, its crust a rich mahogany and its crumb speckled with soft, dusky grains, that makes a kitchen feel like home.
This isn’t a rush-job loaf; it’s a slow, cozy bread meant for lingering meals—thick slices beside hearty stews, toasted under butter, or layered with cheese and pickles.
While it takes time, it’s wonderfully hands-off, ideal for patient beginners, bread enthusiasts, and anyone who loves real, nourishing food.
I still remember a snowed-in Sunday when a loaf of rye sourdough turned a simple pot of soup into a comforting feast, stretching our pantry staples into something special.
This bread shines on quiet weekend afternoons, relaxed Sunday suppers, and any time you want a make-ahead loaf that stays flavorful all week for sandwiches and snacks.
Ready to bring this rye sourdough to life?
Why You’ll Love It
- Delivers bold, tangy rye flavor with a chewy, caramelized crust
- Keeps well for days; flavor actually improves after resting overnight
- Relies on natural sourdough fermentation for better digestion and shelf life
- Uses simple pantry ingredients with optional caraway for classic deli style
- Bakes reliably in a Dutch oven—no specialty bread oven required
Ingredients
- 100 g active rye sourdough starter, 100% hydration — use recently fed and bubbly for best rise
- 300 g water, room temperature — cooler side of warm to avoid over-fermentation
- 200 g rye flour, whole or medium — whole rye gives stronger flavor and denser crumb
- 200 g bread flour — higher protein helps structure this sticky rye dough
- 10 g fine sea salt — weigh for accuracy; salt slows fermentation slightly
- 10 g honey or molasses (optional) — adds mild sweetness and deeper color
- 10 g caraway seeds, lightly crushed (optional) — classic rye aroma and flavor
- Extra bread flour, for dusting — use sparingly to avoid a dense loaf
Step-by-Step Method
Mix Starter and Water
Whisk the active rye starter with room-temperature water in a large mixing bowl. Dissolve the starter as much as possible so it disperses evenly. This guarantees consistent fermentation.
Scrape the sides and bottom of the bowl to incorporate everything. Work quickly so the starter stays active and doesn’t cool or warm dramatically.
Combine Flours and Seasonings
Add rye flour, bread flour, and fine sea salt to the bowl. If you’re using honey or molasses, add it now. Stir with a wooden spoon or spatula until no dry flour remains.
Expect a sticky, shaggy dough. Avoid adding extra flour at this stage, which can make the loaf dense and heavy.
Rest the Dough (Autolyse)
Cover the bowl with a clean kitchen towel and let the dough rest for 30 minutes at room temperature. Allow the flours to fully hydrate.
This rest improves gluten development and makes the dough easier to handle later. Don’t worry if the dough looks rough. Resist the urge to knead during this phase.
Strengthen with Stretch-and-Folds
Wet your hand to prevent sticking, then perform stretch-and-folds in the bowl. Grab one edge of the dough, pull it up, and fold it over the center. Rotate the bowl and repeat 8–10 times.
Feel the dough tighten slightly. These folds build strength without heavy kneading, especially important for sticky rye-based doughs.
Incorporate Caraway Seeds
If using caraway seeds, sprinkle them evenly over the dough. Gently fold the dough over itself several times to distribute the seeds. Avoid aggressive kneading, which can tear the dough.
Make certain seeds aren’t clumped in one area. Continue handling with wet hands to prevent sticking and maintain the dough’s structure.
Bulk Ferment the Dough
Cover the bowl and let the dough ferment at room temperature for 3–4 hours. Perform 2–3 additional sets of stretch-and-folds every 45–60 minutes.
Watch the dough, not the clock. Look for a 50% increase in volume and small bubbles along the sides. Avoid letting it double fully, which risks overproofing.
Shape the Dough Gently
Lightly flour your work surface and use a dough scraper to turn the dough out. Dust your hands lightly. Fold the edges of the dough into the center, then flip it seam side down.
Gently tighten the surface by dragging the dough toward you. Create a round or oval shape, depending on your proofing basket.
Prepare the Proofing Basket
Generously flour your proofing basket or a medium bowl lined with a towel using rye or bread flour. Make sure all surfaces that will contact the dough are coated. This prevents sticking during the final rise.
Place the shaped dough into the basket seam side up. Adjust the dough gently so it fits snugly.
Proof at Room Temperature or Cold
Cover the basket and let the dough proof at room temperature for 1–2 hours, or refrigerate it for 8–14 hours. Choose a cold proof for deeper flavor and easier scoring.
Watch for a modest rise and a slightly springy feel when gently pressed. Avoid letting the dough become overly puffy or fragile.
Preheat the Oven and Dutch Oven
About 45 minutes before baking, place your Dutch oven with its lid into the oven. Preheat to 250°C (480°F). Allow the pot and oven to heat fully.
This high, stable heat creates powerful oven spring and a well-developed crust. Use oven mitts when handling the hot Dutch oven to avoid burns.
Transfer and Score the Loaf
When ready to bake, carefully remove the hot Dutch oven from the oven. Gently invert the dough onto parchment or directly into the pot, seam side down.
Quickly score the top with a sharp knife or lame, making a 1–2 cm deep slash. Create a clean, decisive cut to control expansion during baking.
Bake Covered, Then Uncovered
Cover the Dutch oven with its lid and place it in the oven. Bake for 20 minutes at 250°C (480°F). Then reduce the temperature to 220°C (430°F), remove the lid, and continue baking 20–25 minutes.
Look for a deep brown crust. Remove the loaf when it sounds hollow when tapped on the bottom.
Cool and Store Properly
Transfer the baked bread to a wire cooling rack. Let it cool completely for at least 2 hours before slicing. Allow the crumb to set and moisture to redistribute.
Avoid cutting early, which makes the interior gummy. Once cool, wrap the loaf in a towel or paper. Store at room temperature and toast slices as desired.
Ingredient Swaps
- Use whole wheat flour in place of bread flour for a heartier, denser loaf; add 10–20 g extra water if the dough feels stiff.
- For a sweeter, darker crumb, swap honey/molasses with brown sugar or barley malt syrup in equal weight.
- Skip caraway seeds or replace with fennel, anise, or coriander seeds for a different traditional-style flavor.
You Must Know
– Flavor Boost – For deeper rye character, toast the caraway seeds in a dry pan for 2–3 minutes until fragrant and cool before adding, and extend the cold proof toward 12–14 hours.
Both boost aroma and tang without extra sourness from over-fermenting.
Serving Tips
- Serve with smoked salmon, cream cheese, and dill for a Scandinavian-style open-faced sandwich.
- Pair slices with hearty soups like borscht, lentil, or beef stew.
- Top toasted slices with aged cheddar, mustard, and sliced pickles for a rustic snack.
- Serve thinly sliced with charcuterie, sharp cheeses, pickled vegetables, and mustard.
- Make avocado toast with radishes, lemon, and flaky salt on warm rye sourdough.
Storage & Make-Ahead
Rye sourdough keeps 3–4 days at room temperature wrapped in a towel.
Then up to 1 week in the fridge, well wrapped.
For longer storage, slice and freeze up to 2 months in a freezer bag.
Toast slices straight from frozen to refresh flavor and texture.
Reheating
Reheat slices gently: in a 150°C (300°F) oven for 5–10 minutes.
Briefly reheat in a microwave wrapped in a damp towel.
Or warm on a covered stovetop skillet until warm and soft.
Rye Bread in Jewish Culture
In many Jewish kitchens, a loaf of rye feels as essential as the candlesticks on Friday night, carrying stories in every speckled slice.
When I bake rye, I feel that lineage at my fingertips: Old World fields, crowded bakeries, and Shabbat tables where bread linked generations.
Rye’s tang, especially with caraway, echoes classic Jewish deli loaves that cradle pastrami, corned beef, or a simple smear of mustard.
I picture you slicing into your own loaf, the crust crackling like quiet conversation after the blessings.
As you bake, you’re not just making bread; you’re joining a tradition that prized hearty loaves during hard times and festive ones.
Let your rye stand proudly alongside soup, pickles, and stories.
Final Thoughts
Give this rye sourdough bread a try and enjoy the deep flavor and hearty texture that only rye can bring.
Once you’ve baked it once, have fun tweaking the sweetness, caraway, and proofing time to create your own perfect loaf.
Frequently Asked Questions
Can I Make This Rye Sourdough Completely Gluten-Free?
You can’t make this exact loaf fully gluten‑free, but you can mimic its warmth: I’d start fresh with gluten‑free sourdough starter, blend GF flours, add psyllium husk, and nurture long, gentle fermentation.
How Do High Altitudes Affect Proofing and Baking Times?
High altitude makes your dough rise faster and your loaf bake quicker. I’d watch the dough, not the clock—shorten proofs, lower oven temperature slightly, and let the crust deepen slowly, like an evening sky.
What’s the Best Way to Rescue an Overproofed Rye Dough?
You’ll gently degas, reshape into a tight round, and proof briefly again. I watch for just a soft spring, then bake hot. Expect a denser crumb, but the flavor’s deep, comforting, and beautifully rustic.
Can I Mix Commercial Yeast With the Sourdough Starter Here?
You can, and I’d treat it like a gentle safety net. I’d add 1–2 g instant yeast, mix as usual, then watch the dough like a quiet rising moon—proof by feel, not strict timing.
How Do I Convert This Formula to a Pullman Pan Sandwich Loaf?
You’ll use the same formula, but shape tighter and place in a greased Pullman, filling it half–two‑thirds full. Proof until nearly crowned, then bake covered slightly longer at 220°C, uncovering briefly to deepen color.
Rye Sourdough Bread
Equipment
- 1 large mixing bowl
- 1 medium mixing bowl
- 1 digital kitchen scale
- 1 Dough scraper
- 1 wooden spoon or silicone spatula
- 1 proofing basket or 1 medium bowl lined with towel
- 1 sharp knife or lame
- 1 Dutch oven with lid or 1 baking stone and 1 tray for steam
- 1 wire cooling rack
- 1 clean kitchen towel
Ingredients
- 100 gram active rye sourdough starter 100% hydration
- 300 gram water room temperature
- 200 gram rye flour whole or medium
- 200 gram bread flour
- 10 gram fine sea salt
- 10 gram honey or molasses optional, for sweetness and color
- 10 gram caraway seeds optional, traditional flavor; lightly crushed
- 1 Extra bread flour for dusting
Instructions
- In the large mixing bowl, whisk together the active rye sourdough starter and water until the starter is mostly dissolved.
- Add rye flour, bread flour, salt, and honey or molasses (if using) to the bowl and mix with a spoon or spatula until no dry flour remains and a shaggy dough forms.
- Let the dough rest, covered with a towel, for 30 minutes to hydrate the flours (autolyse).
- After resting, wet your hand and perform several stretch-and-folds in the bowl, pulling the dough up and folding it over itself 8–10 times until it feels tighter.
- If using caraway seeds, gently knead or fold them into the dough until evenly distributed.
- Cover the bowl and let the dough ferment at room temperature for 3–4 hours, performing 2–3 sets of stretch-and-folds every 45–60 minutes.
- When the dough has risen by about 50% and shows bubbles around the edges, lightly flour your work surface and turn the dough out.
- Gently shape the dough into a round or oval by folding the edges into the center, then tightening the surface by dragging it toward you on the counter.
- Generously flour the proofing basket or towel-lined bowl with rye or bread flour and place the dough seam side up inside.
- Cover and let the dough proof at room temperature for 1–2 hours, or refrigerate for 8–14 hours for a slow, cold proof.
- About 45 minutes before baking, place the Dutch oven with its lid in the oven and preheat to 250°C (480°F).
- When ready to bake, carefully remove the hot Dutch oven, gently invert the dough onto a piece of parchment or directly into the pot seam side down.
- Score the top of the loaf with a sharp knife or lame using a 1–2 cm deep slash to control expansion.
- Cover the Dutch oven with the lid and bake for 20 minutes at 250°C (480°F).
- After 20 minutes, reduce the oven temperature to 220°C (430°F), remove the lid, and bake for another 20–25 minutes until the crust is deep brown.
- Remove the bread from the Dutch oven and place it on a wire rack to cool completely for at least 2 hours before slicing.
Notes

Cynthia Weatherford is a seasoned chef and culinary enthusiast who serves as the Recipe creator of Somonday. With decades of experience in the kitchen and a passion for exploring diverse cuisines, Cynthia brings a blend of creativity and technique to every dish. Known for transforming simple ingredients into show-stopping meals, Cynthia believes that cooking is an art form anyone can master. Dedicated to inspiring home cooks, Cynthia shares approachable recipes, pro tips, and culinary wisdom to make every meal memorable.


