There’s something about the crackle of campfire memories—the smell of toasted marshmallows, the glossy sheen of melted chocolate, the crunch of graham crackers—that just feels like pure comfort.
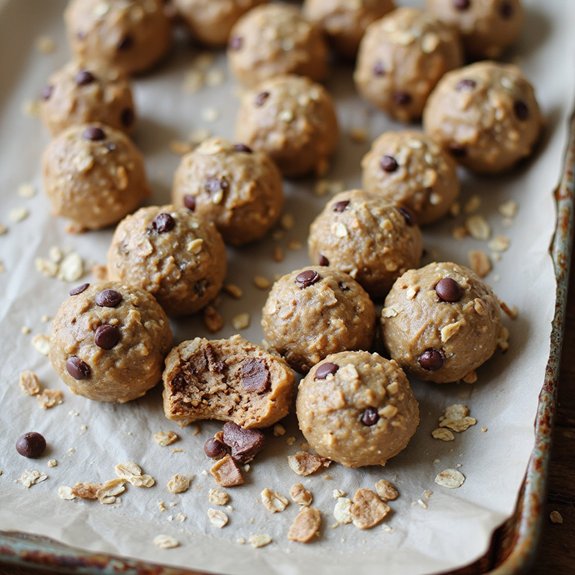
These S’mores Protein Balls capture all that magic in a cozy, bite-sized snack that’s ready in about 15 minutes, no baking required.
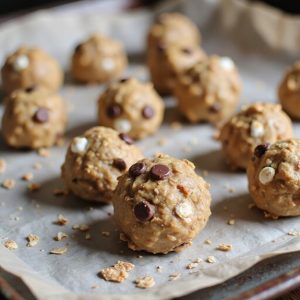
They’re soft, slightly chewy, studded with chocolate chips, and crowned with just enough graham crunch to feel nostalgic, not naughty.
They’re ideal for busy weekdays, lunchboxes, post-workout munchies, and anyone with a sweet tooth who still wants to feel good about what they’re eating.
I first leaned on these during a hectic week of late-night deadlines—one batch on Sunday meant I’d a quick “treat break” that didn’t derail dinner.
They also shine at casual get-togethers, movie nights, or last-minute cravings when you don’t want a full dessert production.
Ready to bring this snack to life?
Why You’ll Love It
- Delivers nostalgic s’mores flavor without a campfire or sticky mess
- Packs in protein for a satisfying, energizing snack anytime
- Uses simple pantry staples and comes together in one bowl
- Requires zero baking and minimal cleanup for busy days
- Stores and freezes well for easy make-ahead meal prep
Ingredients
- 1 ½ cups rolled oats — use old-fashioned oats for best texture
- ½ cup chocolate protein powder — choose a brand you enjoy the taste of
- ½ cup creamy peanut butter — thick, not runny, so the mixture binds
- ¼ cup honey — adjust slightly to taste for sweetness
- ¼ cup mini chocolate chips — semi-sweet or dark work well
- ½ cup mini marshmallows — can lightly toast and cool for more “campfire” flavor
- ¼ cup crushed graham crackers — leave some small chunks for crunch
- 1 teaspoon vanilla extract — pure vanilla for best flavor
- ¼ teaspoon fine salt — balances the sweetness
- 2 tablespoons milk, any type — add more by the tablespoon if mixture is too dry
Step-by-Step Method
Line the Tray
Prepare the baking sheet before you start mixing. Lay a sheet of parchment paper flat on the tray, pressing it into the corners.
Smooth out any wrinkles so the protein balls won’t develop flat spots.
Set the lined tray aside somewhere level and clear, ready to hold the rolled balls later.
Combine Dry Ingredients
Measure the rolled oats into a large mixing bowl.
Add the chocolate protein powder, crushed graham crackers, salt, mini chocolate chips, and mini marshmallows.
Stir with a wooden spoon until everything looks evenly dispersed.
Make certain there are no clumps of protein powder. Set this dry mixture aside while you prepare the wet ingredients.
Blend Wet Mixture
Use a small bowl to combine the peanut butter, honey, vanilla extract, and milk.
Stir vigorously with a spoon until the mixture looks completely smooth and glossy.
Scrape around the edges so no peanut butter remains unmixed. Make sure the texture is pourable but thick, which helps everything bind together later.
Mix Wet into Dry
Pour the smooth peanut butter mixture over the oat mixture in the large bowl.
Use a wooden spoon to fold and press the ingredients together. Work from the outside of the bowl toward the center.
Continue mixing until every bit of oats and crumbs is coated and a sticky, cohesive dough starts to form.
Adjust Consistency
Check the mixture by pressing some between your fingers. If it crumbles or falls apart, add one tablespoon of milk at a time.
Stir well after each addition and test again. Avoid over-wetting the mixture.
Aim for a dough that holds its shape easily when squeezed into a small ball.
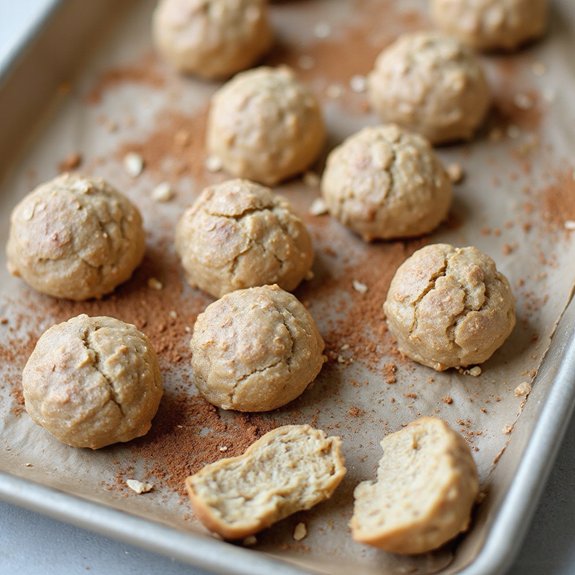
Shape the Balls
Dampen your hands lightly with water to reduce sticking. Scoop out portions of the mixture using your hands or a small cookie scoop.
Roll each portion between your palms into a smooth ball about 1 to 1 ½ inches wide. Place each finished ball directly onto the prepared baking sheet.
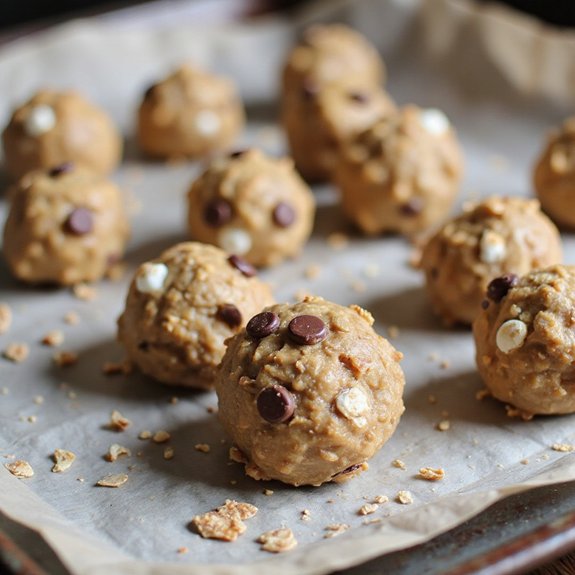
Chill to Firm
Arrange the rolled balls in a single layer on the parchment-lined tray, leaving a little space between them.
Transfer the tray to the refrigerator. Chill the balls for at least 30 minutes so they firm up and hold their shape.
Avoid stacking them during this stage to prevent flattening.
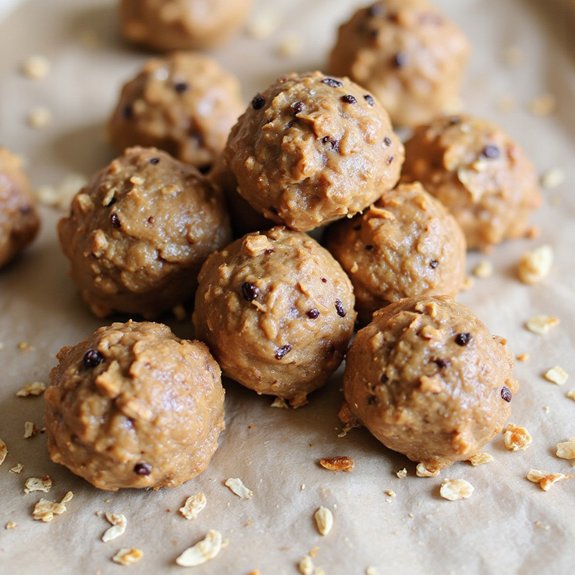
Store and Serve
Once the balls feel firm to the touch, move them gently into an airtight container. Stack them in layers, separating with parchment if needed.
Keep the container in the refrigerator until serving. Enjoy the protein balls chilled or let them sit briefly at room temperature for a softer texture.
Ingredient Swaps
- Make it peanut-free by using almond, cashew, or sunflower seed butter; just choose a thicker variety so the balls hold together.
- For dairy-free or vegan: use plant-based protein powder, dairy-free chocolate chips, maple syrup or agave instead of honey, and vegan marshmallows, plus non-dairy milk.
- Swap rolled oats with quick oats for a softer texture, and use any neutral liquid sweetener (brown rice syrup, date syrup) if honey is expensive or unavailable.
- If graham crackers are hard to find, substitute crushed digestive biscuits, Marie biscuits, or plain tea biscuits for a similar flavor and crunch.
You Must Know
- Troubleshoot – If the mixture crumbles when squeezed, work in 1 teaspoon milk at a time with your hands until a portion pressed firmly holds its shape for 5+ seconds; too much liquid makes them sticky and hard to roll.
- Troubleshoot – If your hands and the dough feel tacky, lightly coat your palms with cold water or a few drops of neutral oil, then roll; the balls should feel just tacky enough to pick up oats without leaving residue on your fingers.
- Scale – For a double batch (about 24 balls), keep the protein powder at a slightly scant 1 cup if using a very absorbent brand; this prevents a dry, chalky texture without needing more than 3–4 tablespoons extra milk total.
- Flavor Boost – For a deeper “campfire” note, toast 2–3 tablespoons of the marshmallows and graham crumbs under a broiler or in a dry pan until golden brown with dark edges, then cool fully (5–10 minutes) before adding so they don’t melt into the dough.
- Make-Ahead – For grab-and-go snacks, chill the rolled balls until firm (30–45 minutes), then freeze on the tray for 1–2 hours and transfer to a bag; they’re ready to eat after thawing at room temp for about 5–10 minutes.
Serving Tips
- Serve chilled on a platter with extra crushed graham crackers sprinkled over top.
- Pair with a cold glass of milk or a vanilla protein shake for extra protein.
- Skewer three balls on a stick for a fun, campfire-style presentation.
- Pack in small parchment-lined tins or jars for grab-and-go snacks.
- Arrange with fresh berries and sliced banana for a balanced snack plate.
Storage & Make-Ahead
S’mores protein balls keep well in the fridge for up to 1 week in an airtight container.
They’re perfect for making ahead as a grab-and-go snack.
For longer storage, freeze on a baking sheet, then transfer to a bag or container and freeze for up to 2 months.
Reheating
Enjoy these chilled, but if desired, gently warm one or two balls briefly in the microwave on low, or place on a low‑heat oven tray.
Avoid stovetop reheating to prevent melting.
Campfire Nostalgia in Culture
Even without a crackling fire or smoky pine air, I can still taste the way campfire nights feel—sticky marshmallow fingers, melted chocolate smears, and that soft crunch of graham that somehow makes the dark feel friendlier.
When I bite into these s’mores protein balls, I tap into that shared language of summer nights and glowing embers that so many of us recognize.
Campfires live in our stories: whispered secrets, ghost tales, off-key songs, and the careful rotation of a marshmallow over orange coals.
Even movies and books lean on that glow to signal closeness and confession.
As you roll the oats, graham, and marshmallows together, you’re not just making a snack—you’re packing up a tiny, portable piece of that cultural ritual.
Final Thoughts
Give these S’mores Protein Balls a try next time you’re craving something sweet, snacky, and a little bit nostalgic.
Feel free to tweak the mix-ins, sweetness, or nut butter to make them your own perfect grab-and-go treat!
Frequently Asked Questions
Can I Make These Protein Balls Without Any Added Sweeteners Like Honey?
Yes, you can. I’d slowly stir in extra peanut butter and milk, letting the chocolate chips and marshmallows carry sweetness, tasting as you go, shaping soft, rustic balls that feel humble, hearty, and just sweet enough.
How Can I Increase the Protein Content Without Changing the Texture Too Much?
You can gently fold in extra chocolate protein powder and finely ground oats, then swap a spoonful of peanut butter for Greek yogurt powder. I imagine the dough staying velvety, dense, and satisfyingly chewy.
Can I Prepare These Using Only a Microwave and No Stovetop or Oven?
Yes, you can; I don’t need a stovetop or oven at all. I just gently microwave the peanut butter, honey, and milk to melt together, then stir everything into a fragrant, sticky dough and chill.
What Are Some Fun Ways to Package These for Gifting or Bake Sales?
You can tuck them into kraft bakery boxes lined with crinkly tissue, nestle three in clear cellophane bags with twine and handwritten tags, or arrange them in mason jars like little campfire treasures, ready to share.
Smores Protein Balls
Equipment
- 1 large mixing bowl
- 1 Wooden spoon
- 1 Rubber spatula
- 1 Baking sheet
- 1 sheet parchment paper
- 1 airtight container
- 1 1/2 cups rolled oats
- 1 1/2 cup chocolate protein powder
- 1 1/2 cup peanut butter, creamy
- 1 1/4 cup honey
- 1 1/4 cup mini chocolate chips
- 1 1/2 cup mini marshmallows
- 1 1/4 cup crushed graham crackers
- 1 teaspoon vanilla extract
- 1 1/4 teaspoon fine salt
- 2 tablespoons milk, any type
Ingredients
- 1 1/2 cup rolled oats
- 1/2 cup chocolate protein powder
- 1/2 cup peanut butter creamy
- 1/4 cup honey
- 1/4 cup mini chocolate chips
- 1/2 cup mini marshmallows
- 1/4 cup crushed graham crackers
- 1 teaspoon vanilla extract
- 1/4 teaspoon fine salt
- 2 tablespoon milk any type
Instructions
- Line a baking sheet with parchment paper and set it aside.
- In a large mixing bowl, combine the rolled oats, chocolate protein powder, crushed graham crackers, salt, mini chocolate chips, and mini marshmallows.
- In a separate small bowl, stir together the peanut butter, honey, vanilla extract, and milk until smooth and well combined.
- Pour the wet mixture over the dry ingredients and mix with a wooden spoon until everything is evenly coated and a sticky dough forms.
- If the mixture feels too dry or crumbly, add an additional tablespoon of milk at a time until it holds together when pressed.
- Use your hands or a small cookie scoop to portion the mixture and roll into balls about 1 to 1 1/2 inches in diameter.
- Place the formed balls onto the prepared baking sheet in a single layer.
- Transfer the baking sheet to the refrigerator and chill the protein balls for at least 30 minutes to firm up.
- Once firm, move the smores protein balls to an airtight container for storage.
- Store in the refrigerator until ready to serve and enjoy chilled or at cool room temperature.
Notes

Cynthia Weatherford is a seasoned chef and culinary enthusiast who serves as the Recipe creator of Somonday. With decades of experience in the kitchen and a passion for exploring diverse cuisines, Cynthia brings a blend of creativity and technique to every dish. Known for transforming simple ingredients into show-stopping meals, Cynthia believes that cooking is an art form anyone can master. Dedicated to inspiring home cooks, Cynthia shares approachable recipes, pro tips, and culinary wisdom to make every meal memorable.