
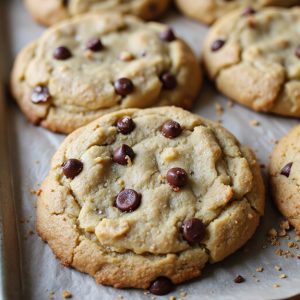
Imagine breaking open a cookie still warm from the oven: golden edges giving way to a plush, soft center, ribbons of melted chocolate pooling against a tender, vanilla-scented crumb.
The buttery aroma fills the kitchen, the kind that makes shoulders drop and voices soften, because a cookie can feel like a hug you can taste.
That’s why this recipe matters to me—it’s a dependable way to bring comfort fast, whether I’m easing a long day or sweetening a small celebration.
These cookies are my go-to for busy weeknights, last-minute playdates, or slow Sunday suppers when everyone lingers at the table.
Once, when a school bake sale announcement landed the night before, this dough saved me—thick, soft cookies that looked bakery-made without the stress.
You’ll get minimal spread, chewy centers, and consistent results every time. Ready? Let’s cook!
Why You’ll Love It
- Delivers plush, bakery-style centers with lightly crisp edges
- Uses simple pantry staples; no fussy ingredients required
- Chills quickly for thicker, no-spread cookies every time
- Offers customizable mix-ins: chips, chunks, or toasted walnuts
- Freezes beautifully; bake from frozen with minimal extra time
Ingredients
- 2 1/2 cups all-purpose flour leveled — measure accurately to prevent spreading
- 2 teaspoons cornstarch — tenderizes for plush centers
- 1 teaspoon baking soda — fresh leavening guarantees lift
- 1/2 teaspoon fine salt — balances sweetness
- 3/4 cup unsalted butter melted and cooled — cool so dough isn’t greasy
- 3/4 cup packed light brown sugar — adds moisture and caramel notes
- 1/2 cup granulated sugar — helps crisp the edges
- 1 large egg room temperature — blends more evenly
- 1 large egg yolk room temperature — extra richness and chew
- 2 teaspoons vanilla extract — use pure for best flavor
- 1 1/2 cups semisweet chocolate chips — choose good-quality chips
- 1/2 cup chocolate chunks optional — varied sizes create melty pockets
- 1/2 cup chopped toasted walnuts optional — toast for deeper nutty flavor
Step-by-Step Method
Whisk the Dry Mix
Whisk flour, cornstarch, baking soda, and salt in a large bowl until evenly combined. Break up any lumps. This guarantees even leavening and tender texture. Set the bowl aside.
Measure accurately, leveling flour for consistency. A quick sift helps if flour is compacted. Keep the dry mix ready to add in one go later.
Beat Butter and Sugars
Beat the melted, cooled butter with brown sugar and granulated sugar until thick, glossy, and smooth. Use a hand or stand mixer on medium speed.
Aim for a cohesive mixture without greasy streaks. This step builds chew from melted butter and moisture from brown sugar, setting the foundation for soft, thick cookies.
Add Egg, Yolk, and Vanilla
Mix in the egg, egg yolk, and vanilla until the batter looks silky and fully emulsified. Scrape the bowl and beaters as needed.
Avoid overmixing once smooth. The extra yolk adds richness and tenderness. Proper emulsification prevents greasy cookies and promotes even baking and a plush center.
Combine Wet and Dry
Add the dry ingredients to the wet mixture. Switch to a rubber spatula and fold just until a soft, cohesive dough forms.
Stop when no dry streaks remain. Don’t overwork or the cookies may toughen. The dough should feel thick and slightly tacky, ready to hold lots of chocolate.
Fold in Mix-Ins
Gently fold in semisweet chips, optional chunks, and walnuts if using. Distribute evenly without crushing the dough. Reserve a small handful of chips to press on after baking for a bakery finish.
Keep folds minimal to avoid warming or overdeveloping gluten. The dough should be studded and sturdy.
Chill to Firm
Cover the bowl and chill the dough for 30 minutes. Let the butter re-solidify and the flour hydrate. This prevents spreading and keeps centers plush. If the kitchen is warm, chill a bit longer.
For maximum thickness, you can scoop first, then chill the portions briefly before baking.
Preheat and Prepare Sheets
Preheat the oven to 350°F (175°C). Line two rimmed baking sheets with silicone mats or parchment. This guarantees even browning and easy release.
Position oven racks in the upper and lower thirds if rotating, or bake one sheet at a time in the center for most consistent results.
Scoop and Shape Tall
Scoop 2-tablespoon portions of dough. Roll into balls, then stack slightly taller mounds to encourage thickness.
Space about 2 inches apart on prepared sheets. For even sizes, use a cookie scoop. If dough feels warm or sticky, chill the scooped mounds for 10 minutes before baking.
Bake Until Just Set
Bake one sheet at a time for 10 to 12 minutes. Look for set edges and pale, slightly underdone centers. Don’t overbake; carryover heat will finish the middles.
Rotate the sheet once if needed for even color. If cookies spread too much, chill longer or add 1 to 2 tablespoons flour next batch.
Cool and Finish
Cool on the baking sheet for 5 minutes to set structure. Press reserved chips onto tops for a bakery look. Transfer cookies to a wire rack to cool completely.
This prevents soggy bottoms and preserves thick, soft centers. Store airtight 3 to 4 days, or freeze dough balls up to 2 months.
Ingredient Swaps
- No eggs: use 1 flax egg (1 tbsp ground flax + 3 tbsp water) or 3 tbsp aquafaba per egg; add 1–2 tbsp extra flour if dough feels loose.
- Dairy-free: swap butter for equal weight vegan butter sticks; choose dairy-free chocolate.
- Gluten-free: use a 1:1 gluten-free all-purpose blend with xanthan gum; chill a bit longer if dough is soft.
- Budget/availability: replace some chips with chopped bar chocolate or mix in raisins; walnuts → peanuts, sunflower seeds, or omit.
- Flavor swaps: brown butter (cooled) for deeper flavor; part or all semisweet → milk, dark, or butterscotch chips; add 1 tsp espresso powder to boost chocolate.
You Must Know
Doneness • If edges look set but centers still appear glossy and pale with slight jiggle, pull the tray now; carryover heat finishes them in 5–7 minutes on the sheet, preventing dry centers.
Troubleshoot • When dough feels greasy or cookies spread into thin puddles by minute 6–7, stash the scooped mounds in the fridge for 10–15 minutes or add 1–2 tablespoons flour; firmer, cooler dough holds a 2-inch spread.
Scale • For half batch, use 1 egg only (omit the extra yolk) and halve all other ingredients; for double, keep baking soda at 2 teaspoons total per 5 cups flour to avoid soapy taste and over-rise.
Flavor Boost • For deeper notes, brown 3/4 cup butter to 170–175 g after moisture loss, cool to room temp, and add 1 tablespoon milk or water to replace evaporated liquid; expect toffee aroma and richer caramel flavor.
Make-Ahead • To stagger fresh bakes, portion 2-tablespoon mounds, freeze solid 2–3 hours, then store airtight up to 2 months; bake from frozen, adding 1–2 minutes, and look for lightly set rims by 11–13 minutes.
Serving Tips
- Serve warm with cold milk or a scoop of vanilla ice cream.
- Sprinkle flaky sea salt on warm cookies for contrast and enhanced chocolate flavor.
- Sandwich two cookies with vanilla or coffee ice cream; roll edges in mini chips.
- Crumble over yogurt or pudding; drizzle with warm chocolate or caramel sauce.
- Plate with fresh berries and a dollop of whipped cream for a café-style dessert.
Storage & Make-Ahead
Cookies keep soft in an airtight container at room temperature 3–4 days.
In the fridge up to 1 week, though chilling can dry them—add a slice of bread to maintain moisture.
Make ahead by scooping and freezing dough balls up to 2 months.
Bake from frozen, adding 1–2 minutes.
Reheating
For gentle reheating, microwave one cookie 8–12 seconds with a damp paper towel.
Or warm in a 300°F oven 3–5 minutes.
Stovetop: covered skillet on low heat 2–3 minutes.
Toll House Origin Mention
Warm lore wafts from every batch: I always tip my spatula to Ruth Wakefield at the Toll House Inn, who in the 1930s stirred chopped chocolate into butter-rich dough and sparked the original Toll House cookie.
Her spark became a beacon, and I honor it while guiding you to softer, thicker bliss. Where Ruth used chopped bars, I lean on a mix of chips and chunks for molten pockets and defined edges.
I echo her generous vanilla and balanced sweetness, then nudge texture with melted butter, a touch of cornstarch, and a brief chill to keep the centers plush.
When you scoop tall mounds and bake just to pale gold, you’ll taste that lineage—nostalgia in the crumb, invention in every warm, melty bite.
Final Thoughts
Give these soft, thick chocolate chip cookies a try and let the warm, gooey centers win you over.
Feel free to tweak with different chips, nuts, or a pinch of sea salt on top to make them your own!
Frequently Asked Questions
How Do I Measure Flour Accurately Without a Scale?
Spoon flour into the cup, let it drift like snow, then level with a straight edge. Don’t scoop and pack. I fluff the bag first, fill gently, sweep flat, and you’ll measure accurately.
Can I Make These Dairy-Free or Vegan?
Yes. I swap melted vegan butter, use plant milk if needed, and replace egg and yolk with 1 flax egg plus 1 tablespoon aquafaba. Choose dairy-free chips. Chill well. You’ll still get plush, cozy, golden-edged bites.
Why Did My Cookies Turn Out Cakey?
They turned cakey from too much flour, overmixing, or excess leavener. I’d spoon-and-level flour, mix just until combined, and verify baking soda freshness. Melted butter cooled, proper chill, and slightly underbaked centers will bring back plush, chewy coziness.
How Do Altitude Adjustments Affect This Recipe?
They’ll spread faster and dry quicker. I’d reduce sugar slightly, increase flour a tablespoon or two, add a splash more liquid, and lower leavening a touch. Bake hotter, shorter. I’ll chill dough longer to keep plush, mountain-cozy centers.
Can I Reduce the Sugar Without Ruining Texture?
Yes. I’d reduce sugar by 15–25%. Increase flour 1–2 tablespoons, add 1–2 teaspoons milk, and keep cornstarch. Chill well. For flavor, boost vanilla and a pinch of salt. Expect slightly less spread, gently underbake for plush centers.
Soft and Thick Chocolate Chip Cookies
Equipment
- 2 large mixing bowl
- 1 hand mixer or stand mixer with paddle attachment
- 1 Whisk
- 1 Rubber spatula
- 2 rimmed baking sheet
- 2 silicone baking mat or parchment paper
- 1 Cookie scoop 2 tablespoons
- 1 wire cooling rack
- 1 measuring cup set
- 1 measuring spoon set
- 1 Kitchen scale optional
Ingredients
- 2 1/2 cup all-purpose flour leveled
- 2 teaspoon cornstarch
- 1 teaspoon baking soda
- 1/2 teaspoon fine salt
- 3/4 cup unsalted butter melted and cooled
- 3/4 cup packed light brown sugar
- 1/2 cup granulated sugar
- 1 large egg room temperature
- 1 large egg yolk room temperature
- 2 teaspoon vanilla extract
- 1 1/2 cup semisweet chocolate chips
- 1/2 cup chocolate chunks optional
- 1/2 cup chopped toasted walnuts optional
Instructions
- Whisk together flour, cornstarch, baking soda, and salt in a large bowl.
- In another bowl beat melted cooled butter, brown sugar, and granulated sugar until thick and glossy.
- Mix in egg, egg yolk, and vanilla until smooth and well combined.
- Add dry ingredients to wet and mix with a spatula just until a soft dough forms.
- Fold in chocolate chips, chocolate chunks, and walnuts if using.
- Cover the bowl and chill the dough for 30 minutes.
- Preheat oven to 350°F (175°C) and line baking sheets with silicone mats or parchment.
- Scoop 2-tablespoon portions, roll into tall mounds, and space 2 inches apart on sheets.
- Bake one sheet at a time for 10 to 12 minutes until edges are set and centers look slightly underdone.
- Cool on the sheet for 5 minutes, then transfer cookies to a wire rack to cool completely.
Notes

Cynthia Weatherford is a seasoned chef and culinary enthusiast who serves as the Recipe creator of Somonday. With decades of experience in the kitchen and a passion for exploring diverse cuisines, Cynthia brings a blend of creativity and technique to every dish. Known for transforming simple ingredients into show-stopping meals, Cynthia believes that cooking is an art form anyone can master. Dedicated to inspiring home cooks, Cynthia shares approachable recipes, pro tips, and culinary wisdom to make every meal memorable.


