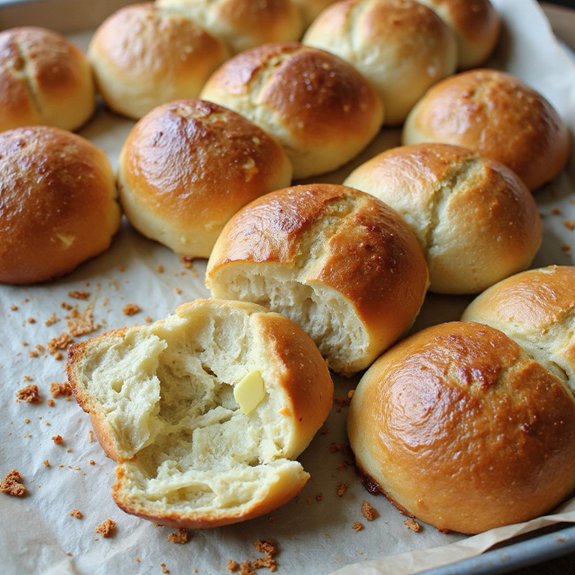
There’s something about pulling a tray of sourdough brioche buns from the oven—the deep golden tops, the delicate blistered crust, and that unmistakable aroma of butter and gentle tang—that makes a kitchen feel like home.
These are soft, cloud-like enriched rolls with a subtle sourdough complexity, perfect for sandwiches, burgers, or simply torn apart and spread with jam. They’re not “instant,” but with an overnight rise and simple steps, they slot easily into a relaxed day of baking.
They’re ideal for comfort seekers, sourdough enthusiasts, and anyone who loves baking projects that feel special but approachable.
I still remember a rainy Sunday when friends came over unexpectedly; these buns, tucked around slow-cooked pulled pork, instantly turned a simple meal into a cozy gathering.
They also shine at holiday brunches, backyard cookouts, and make-ahead freezer stashes for busy weeks.
Ready to bring these sourdough brioche buns to life?
Why You’ll Love It
- Delivers rich, buttery brioche flavor with a subtle sourdough tang
- Creates ultra-soft, fluffy buns that stay tender for days
- Leverages an overnight cold proof for better taste and easy timing
- Adapts perfectly for burgers, breakfast sandwiches, or dinner rolls
- Freezes beautifully, so you can bake once and enjoy for weeks
Ingredients
- 150 g active sourdough starter — 100% hydration, recently fed and bubbly
- 120 g whole milk — lukewarm to gently wake up the starter
- 50 g water — room temperature to keep dough from overheating
- 400 g bread flour — higher protein for strong gluten and structure
- 50 g all-purpose flour — lightens the crumb slightly
- 60 g granulated sugar — adds sweetness and helps browning
- 8 g fine sea salt — balances flavor and strengthens gluten
- 3 large eggs — room temperature for easier emulsification
- 150 g unsalted butter — very soft and cubed for smooth incorporation
- 1 large egg — for egg wash to give a glossy, golden crust
- 15 g whole milk — for egg wash to thin and soften the shine
Step-by-Step Method
Mix the Starter and Liquids
Whisk the active sourdough starter, lukewarm milk, water, eggs, and sugar in the stand mixer bowl.
Blend until mostly smooth and evenly combined. Make certain there are no large streaks of egg or starter.
This step helps dissolve the sugar and evenly distribute the starter, setting up a consistent fermentation and an even crumb later.
Form the Shaggy Dough
Add the bread flour, all-purpose flour, and salt to the liquid mixture.
Attach the dough hook and mix on low speed. Continue mixing for 2–3 minutes until a rough, shaggy dough forms.
Scrape the bowl if needed so no dry patches remain.
The dough should look messy but fully hydrated before intensive kneading.
Knead Until Smooth and Elastic
Increase the mixer speed to medium.
Knead for 5–7 minutes until the dough becomes smoother, more cohesive, and begins pulling away from the sides of the bowl.
It should feel stronger and slightly elastic.
Stop and scrape the bowl if necessary to make certain even gluten development throughout the dough.
Incorporate the Soft Butter Slowly
Reduce the mixer to medium-low.
Add the very soft, cubed butter a few pieces at a time. Let each addition fully incorporate before adding more.
The dough may look greasy or separated at first. Continue mixing patiently.
The butter will eventually emulsify into the dough, creating a rich, supple brioche texture.
Knead to Windowpane Stage
Return the mixer to medium speed and knead 8–12 minutes more.
Check periodically for the windowpane test by stretching a small piece of dough thinly between your fingers.
It should form a translucent membrane without tearing easily.
Once achieved, the dough will be very smooth, elastic, and ready for bulk fermentation.
Begin Bulk Fermentation with Folds
Lightly grease a large mixing bowl and scrape the dough into it.
Cover tightly. Let the dough rest at room temperature for 2–3 hours.
During this time, perform 2–3 sets of stretch-and-folds every 30–45 minutes.
Gently stretch the dough and fold it over itself. This builds strength while preserving a tender, airy crumb.
Cold Proof Overnight
After the initial rise, make sure the dough has slightly puffed.
Cover the bowl very well to prevent drying. Transfer it to the refrigerator for a cold proof of 8–12 hours or overnight.
This slow fermentation deepens flavor, improves texture, and firms the dough.
Chilled dough is much easier to handle when shaping brioche buns.
Turn Out and Prepare the Dough
The next day, lightly flour your work surface.
Gently turn the chilled dough onto the counter, using a dough scraper if needed.
Avoid aggressively deflating it. Pat it into a rough rectangle to make dividing easier.
The dough should feel cool, soft, and slightly tacky but manageable.
Keep extra flour nearby for minimal dusting.
Divide into Equal Portions
Use a kitchen scale for accuracy. Cut the dough into 10 equal portions by weight with a dough scraper.
Aim for uniform pieces so the buns bake evenly. Lightly flour your hands if the dough sticks.
Keep any waiting pieces loosely covered with plastic wrap or a towel to prevent them from drying during shaping.
Shape Smooth, Tight Dough Balls
Working one piece at a time, shape into a tight ball.
Cup your hand around the dough and gently roll it against the work surface.
Use light pressure to create surface tension. The top should become smooth and taut.
Repeat with remaining pieces. Proper shaping helps the buns rise tall and develop a nice domed top.
Arrange on Prepared Baking Sheets
Line two baking sheets with parchment paper.
Place five dough balls on each sheet, spacing them well apart to allow for expansion.
Adjust positions so they’re evenly distributed. Lightly cover the sheets with plastic wrap or a reusable cover.
Make certain the cover doesn’t press onto the dough to avoid sticking or deflation.
Proof Until Puffy and Domed
Let the buns proof at warm room temperature for 3–4 hours, or until puffy, domed, and nearly doubled in size.
Choose a draft-free spot, such as an unheated oven with the light on.
Judge by appearance, not just time.
When gently poked, the dough should slowly spring back, indicating they’re ready to bake.
Preheat the Oven
About 30 minutes before baking, preheat your oven to 375°F (190°C).
Make sure the racks are positioned in the middle for even heat circulation.
Allow the oven to fully reach temperature before placing the buns inside.
Proper preheating helps the brioche spring quickly, setting the structure and producing an even golden color.
Prepare the Egg Wash
In a small bowl, whisk together one egg and the whole milk until completely smooth and homogeneous.
Break up any streaks of egg white. Use a pastry brush for application.
The milk-enriched egg wash gives the buns a deep, glossy sheen and enhances browning.
Keep the mixture nearby, ready to brush just before baking.
Brush the Proofed Buns Gently
Uncover the proofed buns carefully to avoid disturbing their structure.
Using a soft pastry brush, apply a thin, even coat of egg wash over the tops.
Avoid letting it drip heavily down the sides. Work lightly so you don’t deflate them.
This final touch makes certain an attractive, shiny crust after baking.
Bake Until Deep Golden and Done
Bake one tray at a time in the preheated oven for 15–20 minutes.
Rotate the tray if your oven browns unevenly.
The buns are done when deep golden brown and the internal temperature reaches about 200°F (93°C).
Use an instant-read thermometer for accuracy. Remove immediately to prevent overbaking and drying.
Cool on a Rack Before Serving
Transfer the hot buns from the baking sheet to a cooling rack.
Let them cool completely or until just warm before slicing or serving.
Cooling allows the crumb to set and moisture to redistribute. Enjoy them fresh as burger buns, sandwich rolls, or simply with butter.
Once cooled, they can also be wrapped and frozen.
Ingredient Swaps
- Use 2–3 tbsp extra sugar or honey if your starter is more tangy, or reduce sugar by 15–20 g for a less sweet bun.
- Replace whole milk with equal amounts of any rich plant milk (oat, soy, cashew) for dairy-light or dairy-free buns; swap butter for vegan block butter or margarine with at least 80% fat.
- If you don’t have bread flour, use all-purpose and add 10 g essential wheat gluten (or expect slightly less chew and structure).
- Granulated sugar can be swapped 1:1 with light brown sugar or 40–50 g honey/maple syrup (reduce the water by about 10 g to compensate).
- For egg-free buns, use 60 g thick, unsweetened plant yogurt per egg in the dough and brush tops with plant milk instead of egg wash (texture will be a bit less rich and fluffy).
You Must Know
– Flavor Boost • For deeper sourdough flavor without extra tang, keep the cold proof closer to 12–14 hours and use milk straight from the fridge for the dough liquids; the longer, cooler fermentation builds complexity while avoiding sharp acidity.
Serving Tips
- Split and toast lightly; fill with smash burgers, melty cheese, and caramelized onions.
- Use as a base for eggs Benedict with ham, poached eggs, and hollandaise.
- Serve warm with salted butter and fruit jam or lemon curd for breakfast.
- Make mini sliders with pulled pork, crunchy slaw, and tangy barbecue sauce.
- Turn day‑old buns into decadent French toast with berries and maple syrup.
Storage & Make-Ahead
Sourdough brioche buns keep in the fridge, well wrapped, for up to 4 days.
For best texture, slice and lightly toast after chilling.
They’re very make-ahead friendly: cool completely, wrap airtight, and freeze up to 2 months.
Thaw at room temperature, then warm in a low oven before serving.
Reheating
Reheat buns gently: in a 300°F (150°C) oven for 5–8 minutes.
Or briefly in the microwave wrapped in a damp towel.
Or on a covered stovetop skillet over low heat until warmed through.
Brioche Buns in French Cafés
Often, when I think of French cafés, I picture a small wicker chair by an open window, the air rich with espresso and the faint sweetness of butter warming in the oven.
In that glow, brioche buns feel less like bread and more like a quiet invitation. Their sourdough tang is gentle, tucked inside threads of eggy softness and a lacquered, golden crust.
When I bake these at home, I try to recreate that café moment for you:
- Slice a bun, toast lightly, and serve with salted butter and jam.
- Tuck in ham, Gruyère, and Dijon for a warm café-style sandwich.
- Pair with strong coffee or café au lait.
- Serve simply, still warm, letting the aroma do the talking.
Final Thoughts
Give these sourdough brioche buns a try and enjoy how soft, rich, and flavorful they turn out—perfect for everything from burgers to breakfast sandwiches.
Once you’ve made them once, have fun tweaking the sweetness, size, or toppings (like sesame seeds or flaky salt) to make them your own.
Frequently Asked Questions
Can I Make These Brioche Buns Without a Stand Mixer?
Yes, you can. I’d mix with a sturdy spoon, then knead by hand until silky and stretchy, feeling the dough warm beneath my palms, soft as satin, filling your kitchen with slow, tender anticipation.
How Do Altitude Changes Affect Proofing and Baking These Buns?
Altitude makes your dough rise faster and bake quicker, so I’d watch the proof like a sleepy balloon, shorten proof times, and lower oven temperature slightly, keeping the crumb tender, golden, and softly fragrant.
Are These Sourdough Brioche Buns Suitable for Freezing Unbaked?
Yes, you can freeze them unbaked, right after shaping. I’d let you nestle each dough ball on a tray, freeze firm, then bag airtight. Later, thaw, proof until billowy, and bake—warm, buttery clouds.
What’s the Best Way to Scale This Recipe for Large Crowds?
You can safely double or triple the recipe by weight; I’d mix separate batches, then proof and shape together. Picture giant trays of golden buns, buttery steam curling up as you brush on warm egg wash.
Can I Adapt This Dough for Braided Loaves or Babka-Style Breads?
Yes, you can. I’d chill the dough firm, then roll, fill, and braid it; as it bakes, butter and sugar will sigh into glossy swirls, your kitchen smelling like caramel, toasted wheat, and quiet mornings.

Sourdough Brioche Buns
Equipment
- 1 stand mixer with dough hook
- 1 large mixing bowl
- 1 medium mixing bowl
- 1 Kitchen scale
- 1 Measuring spoons set
- 1 Dough scraper
- 1 plastic wrap or 1 reusable cover
- 2 baking sheets
- 2 sheets parchment paper
- 1 pastry brush
- 1 Cooling rack
Ingredients
- 150 gram active sourdough starter 100% hydration
- 120 gram whole milk lukewarm
- 50 gram water room temperature
- 400 gram bread flour
- 50 gram all-purpose flour
- 60 gram granulated sugar
- 8 gram fine sea salt
- 3 large eggs room temperature
- 150 gram unsalted butter very soft and cubed
- 1 large egg for egg wash
- 15 gram whole milk for egg wash
Instructions
- In the bowl of a stand mixer, whisk together the active sourdough starter, lukewarm milk, water, eggs, and sugar until mostly smooth.
- Add the bread flour, all-purpose flour, and salt to the bowl and mix with a dough hook on low speed until a rough, shaggy dough forms, about 2–3 minutes.
- Increase to medium speed and knead until the dough becomes smoother and starts to pull from the sides of the bowl, about 5–7 minutes.
- With the mixer on medium-low, add the soft butter a few cubes at a time, allowing each addition to incorporate before adding more.
- Continue mixing on medium speed until the dough is very smooth, elastic, and passes the windowpane test, about 8–12 minutes.
- Scrape the dough into a lightly greased large mixing bowl, cover tightly, and let rest at room temperature for 2–3 hours, performing 2–3 sets of stretch-and-folds every 30–45 minutes.
- After the initial rise, cover the bowl well and refrigerate the dough for a cold proof of 8–12 hours or overnight.
- The next day, lightly flour your work surface and gently turn out the chilled dough onto it.
- Divide the dough into 10 equal pieces by weight using a dough scraper and scale.
- Shape each piece into a tight ball by cupping your hand around it and rolling against the work surface until smooth and taut.
- Line two baking sheets with parchment paper and arrange 5 dough balls on each sheet, spacing them well apart.
- Lightly cover the trays with plastic wrap or a reusable cover and let the buns proof at warm room temperature until puffy, domed, and nearly doubled, about 3–4 hours.
- About 30 minutes before baking, preheat the oven to 375°F (190°C).
- In a small bowl, whisk together the egg and milk for the egg wash until well combined.
- Gently brush the tops of the proofed buns with a thin, even coat of egg wash, taking care not to deflate them.
- Bake the buns, one tray at a time, for 15–20 minutes or until deep golden brown and the internal temperature reaches about 200°F (93°C).
- Remove the buns from the oven and transfer them to a cooling rack to cool completely or until just warm before serving.
Notes

Cynthia Weatherford is a seasoned chef and culinary enthusiast who serves as the Recipe creator of Somonday. With decades of experience in the kitchen and a passion for exploring diverse cuisines, Cynthia brings a blend of creativity and technique to every dish. Known for transforming simple ingredients into show-stopping meals, Cynthia believes that cooking is an art form anyone can master. Dedicated to inspiring home cooks, Cynthia shares approachable recipes, pro tips, and culinary wisdom to make every meal memorable.


